Easy No Bake Tiramisu Cheesecake
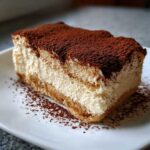
You will love this creamy, decadent Tiramisu Cheesecake that combines classic Italian tiramisu flavors with a rich, no-bake cheesecake base. It is simple to prepare and perfect for making ahead for any special occasion.
- Prep Time: 30 min
- Cook Time: 0 min
- Total Time: 6 hr 30 min
- Yield: 10 servings
- Category: Dessert
- Method: No Bake
- Cuisine: Italian Fusion
- Diet: Vegetarian
Ingredients
Scale
- 1 1/2 cups chocolate wafer crumbs or graham cracker crumbs
- 1/4 cup granulated sugar (for crust)
- 6 tablespoons unsalted butter, melted
- 1 teaspoon instant espresso powder (for crust)
- 16 ounces cream cheese, softened
- 1 cup powdered sugar
- 1 teaspoon vanilla extract
- 1 cup heavy whipping cream, cold
- 8 ounces mascarpone cheese, softened
- 1/2 cup strong brewed coffee, cooled
- 2 tablespoons coffee liqueur like Kahlua (optional)
- Cocoa powder, for dusting
Instructions
- Prepare the crust: In a medium bowl, combine the chocolate wafer crumbs, 1/4 cup granulated sugar, and 1 teaspoon instant espresso powder. Pour in the melted butter and mix until the crumbs are evenly moistened. Press the mixture firmly into the bottom of a 9-inch springform pan. Place the crust in the freezer while you prepare the filling.
- Beat the cream cheese: In a large bowl, use an electric mixer to beat the softened cream cheese, powdered sugar, and vanilla extract until the mixture is completely smooth and fluffy. Scrape down the sides of the bowl as needed.
- Whip the cream: In a separate, clean bowl, beat the cold heavy whipping cream until stiff peaks form. Set aside.
- Combine filling base: Gently fold the softened mascarpone cheese into the cream cheese mixture until just combined. Do not overmix.
- Add coffee flavor: Mix the cooled brewed coffee and optional coffee liqueur into the mascarpone mixture until smooth.
- Fold in whipped cream: Gently fold the whipped cream into the coffee-mascarpone mixture until no white streaks remain. This keeps the filling light and airy.
- Assemble the cheesecake: Remove the crust from the freezer. Spread half of the cheesecake filling evenly over the crust.
- Create the coffee layer: Dip ladyfingers quickly, one by one, into the remaining cooled coffee (or coffee/liqueur mixture). Arrange a single layer of the soaked ladyfingers over the filling.
- Top the cheesecake: Spread the remaining cheesecake filling over the ladyfinger layer, smoothing the top with a spatula.
- Chill: Cover the pan loosely with plastic wrap and refrigerate for at least 6 hours, or preferably overnight, until the cheesecake is firm.
- Serve: Before serving, carefully remove the springform ring. Dust the top generously with cocoa powder. Slice and enjoy this luxurious coffee dessert.
Notes
- For a richer coffee flavor in the soak, use strong espresso instead of brewed coffee.
- If you skip the optional coffee liqueur, add 1/2 teaspoon more instant espresso powder to the filling for depth.
- If you do not have ladyfingers, you can use a layer of crushed chocolate cookies mixed with a little melted butter for the middle layer instead.
Nutrition
- Serving Size: 1 slice
- Calories: 450
- Sugar: 35g
- Sodium: 250mg
- Fat: 30g
- Saturated Fat: 18g
- Unsaturated Fat: 12g
- Trans Fat: 0.5g
- Carbohydrates: 40g
- Fiber: 1g
- Protein: 7g
- Cholesterol: 95mg
Find it online: https://spoonsprout.com/tiramisu-cheesecake-easy-no-bake-recipe/