

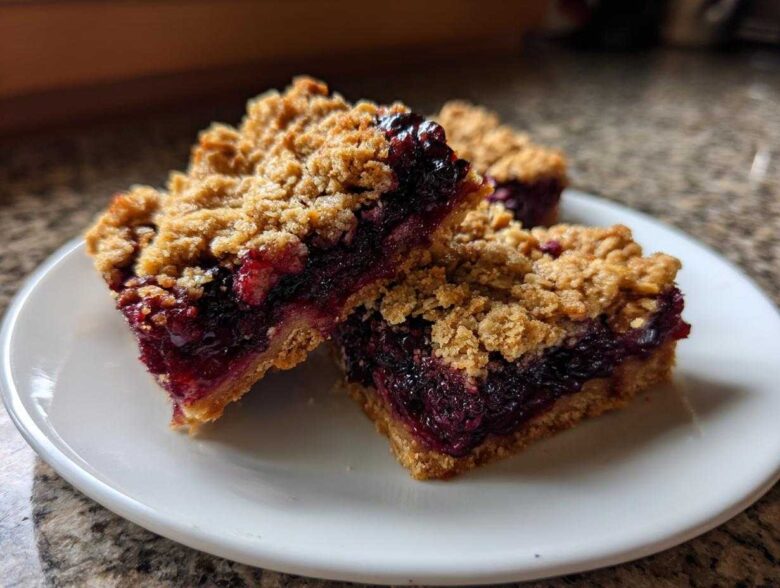
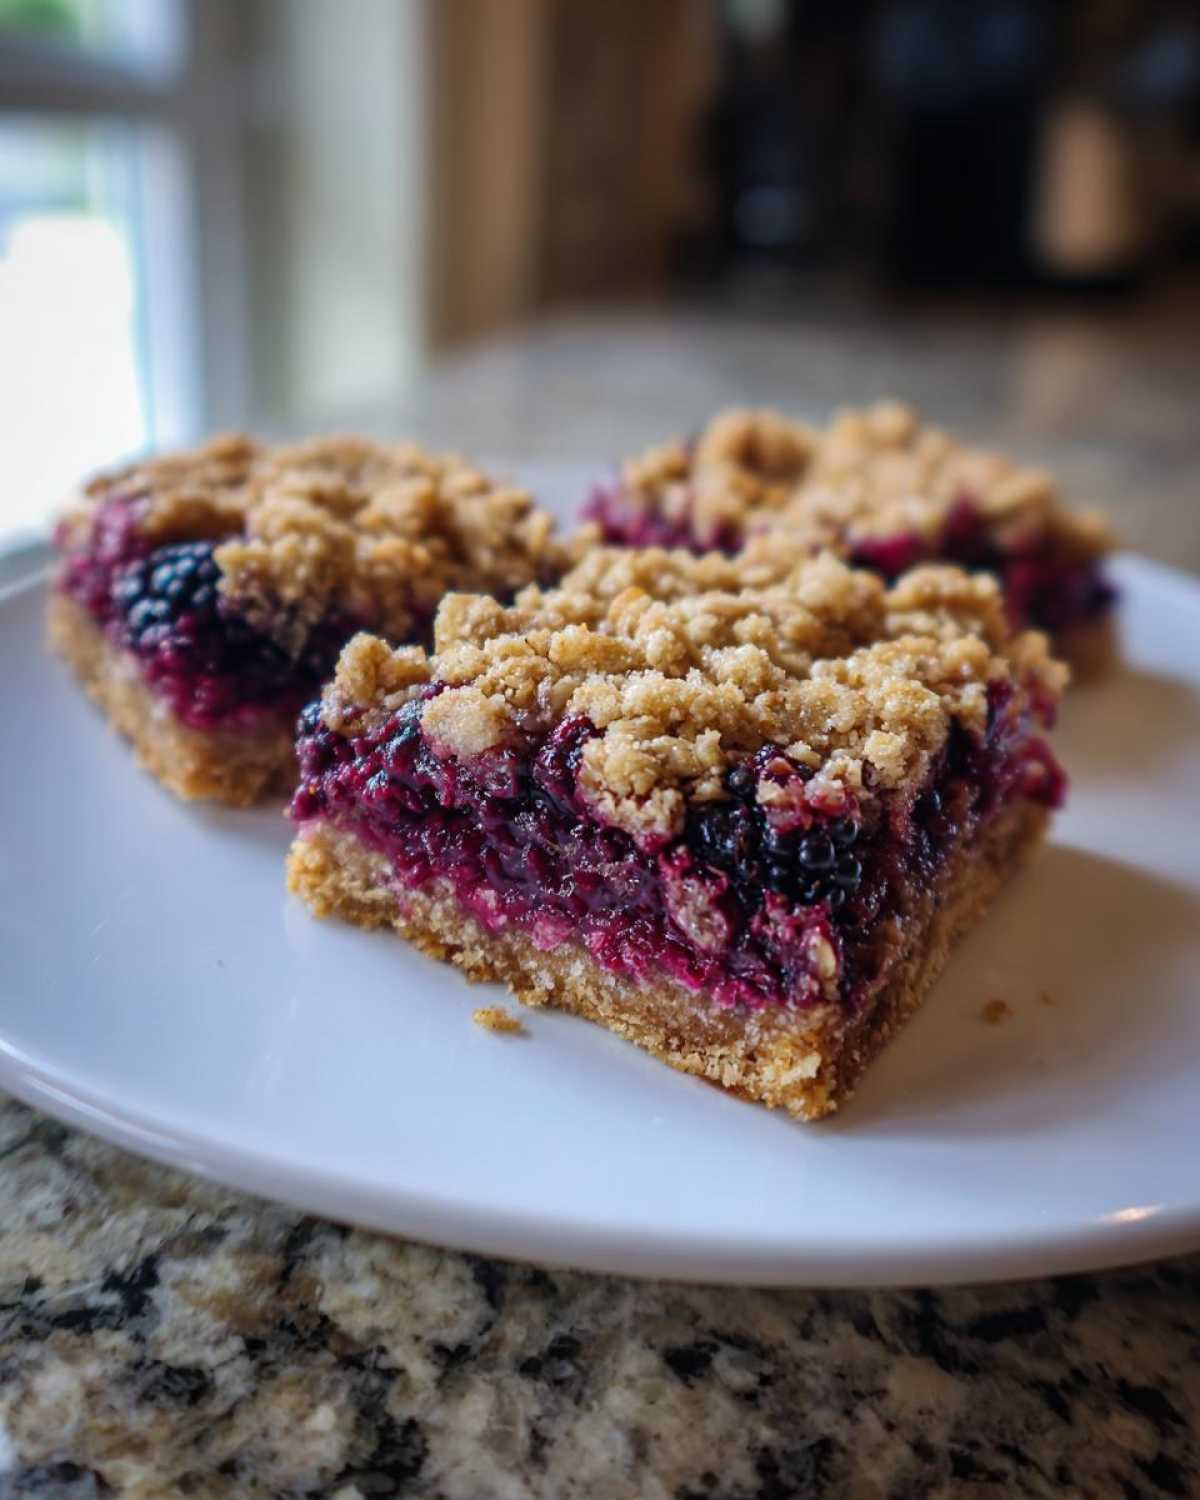
Oh, summer desserts! They just hit different, don’t they? I swear, one of the biggest baking challenges is finding a fruit dessert that travels well and doesn’t turn into a total puddle when you slice it. That’s why I spent ages, honestly years, perfecting the ratio here. Forget messy pies or sloppy cobblers; these are my absolute go-to: the Sweet Blackberry Crumble Bars. Trust me, after years of making every fruit bar imaginable, I finally nailed the structure. We’ve got this sturdy, buttery shortbread base, a thick, jammy filling, and then that gorgeous oat streusel topping that just melts in your mouth. They’re completely scoopable and look fantastic on a platter. I think you’re going to love how easily these come together!
For another way to enjoy seasonal fruit, check out my recipe for a rustic summer blackberry galette while the berries are ripe!
Why You Will Make These Sweet Blackberry Crumble Bars Repeatedly
Okay, now that you have the recipe, you need to know *why* these are going straight into your regular rotation. I’m not kidding, once you see how they turn out, you won’t want to make another type of berry bar again. They check every single box!
- They are genuinely sliceable! Because of that secret cornstarch boost in the filling, you get defined squares, not a gooey mess.
- The topping is the best! It’s a buttery shortbread meets an oatmeal streusel—crisp and perfectly toasted, never soggy.
- They hit that “sweet spot.” I’ve balanced the sugar so the blackberries taste bright and flavorful, not sickly sweet.
- Minimal fuss, maximum impact! You mix the base and topping with the same dough—less cleanup for you!
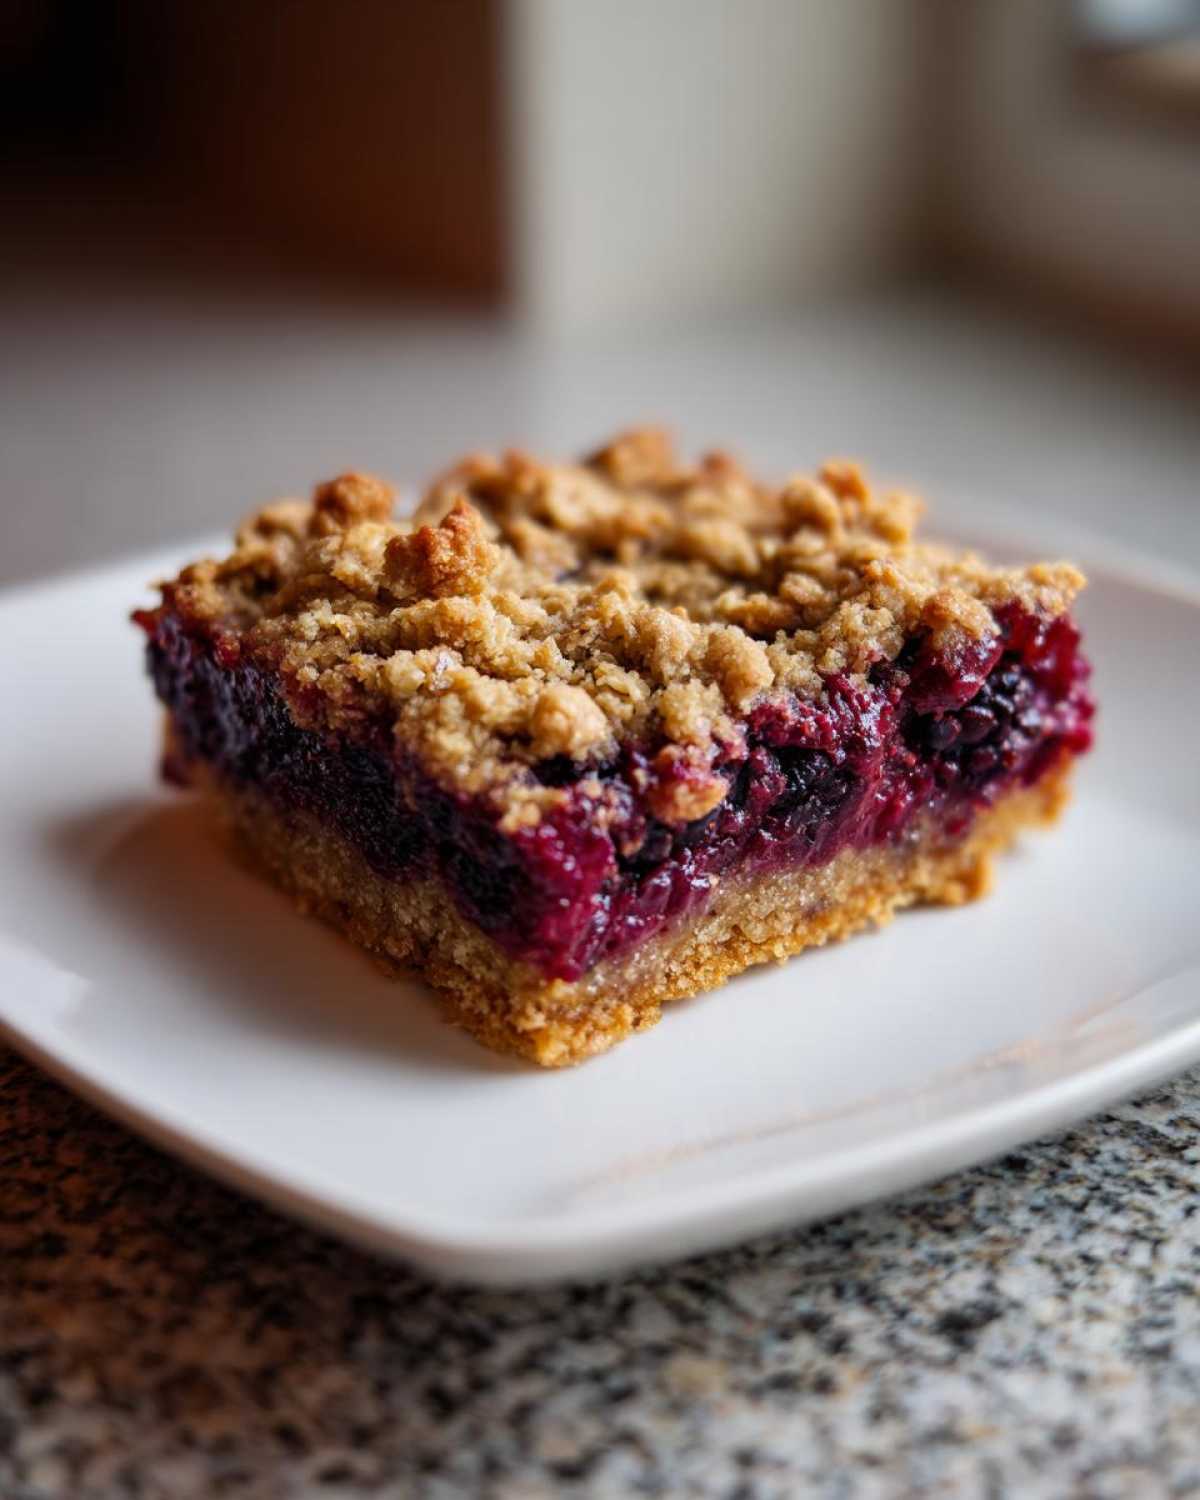
- They look stunning. Seriously, the contrast between the golden topping and the deep purple berry layer is table-worthy.
- They’re fantastic for potlucks because they hold their structure whether warm or completely cooled.
Seriously, the structure on these Sweet Blackberry Crumble Bars is unlike anything else. You just have to try them!
Essential Ingredients for Perfect Sweet Blackberry Crumble Bars
When you are making something truly special like these Sweet Blackberry Crumble Bars, you absolutely cannot skimp on the quality of your ingredients. I have tried making them with lower-quality butter or using canned fruit, and honestly, it just doesn’t work. The magic here lies in the balance between that rich, buttery crumble and the bright burst of the berries. Make sure you have everything measured out before you even preheat the oven!
The most crucial part? You need a hefty amount of blackberries. We are going for thick, jammy layers, not just a hint of fruit flavor. For this recipe, you’ll want about 1 1/2 pounds of berries, whether you pick them fresh from the patch or grab those beautiful frozen ones from the freezer bag.
If you want some phenomenal tips on working with those fresh, gorgeous berries this season, check out my guide on baking with fresh blackberries!
For the Buttery Base and Oat Streusel Topping
Remember, this mixture does double duty—it’s pressed into the bottom for the shortbread base AND reserved for the topping! The oats are what give it that lovely, slightly chewy texture that holds up so well.
- 1 cup (that’s two sticks!) of unsalted butter, and please make sure it’s softened—not melted, soft!
- 1 cup of granulated sugar (we split this between the base and the filling).
- 1/2 teaspoon salt to make all that butter flavor really pop.
- 2 teaspoons of pure vanilla extract—don’t reach for the imitation stuff!
- 2 cups of all-purpose flour.
- 1 full cup of rolled oats. These give our topping that classic, cozy crumble feel.
For the Perfectly Sweet Blackberry Filling
This is where we lock in the sliceable texture you’re looking for! The lemon juice is just a tiny thing, but it brightens everything up so much.
- 1 1/2 pounds of fresh or frozen blackberries.
- 1/2 cup granulated sugar—this is the part that keeps these beautiful Sweet Blackberry Crumble Bars firmly in the ‘sweet’ category!
- 2 tablespoons of cornstarch—measure this precisely! It thickens the juices wonderfully.
- 1 tablespoon of fresh lemon juice.
- 1/4 teaspoon of ground cinnamon. It marries perfectly with the berries, trust me.
Step-by-Step Guide to Making Sweet Blackberry Crumble Bars
Alright, let’s get baking! You’ve got your ingredients lined up, now we put it all together. The trick with these Sweet Blackberry Crumble Bars is remembering that one dough batch does the job for both the bottom and the top. Don’t panic if it looks crumbly when you mix it; that’s exactly what we want for that perfect streusel!
First things first: turn that oven on to 350°F (175°C). Then, grab a 9×13 inch pan and line it with parchment paper. Make sure you leave some overhang on those sides! That parchment is your best friend and acts like built-in handles for lifting these beauties out later. You can read all about my favorite buttery crumble topping recipe secrets, but for this recipe, we stick to the process!
Preparing the Base and Crumble Mixture
Start by creaming your softened butter with half a cup of that sugar until it’s nice and fluffy—you want it light, not just mashed together. Mix in your vanilla and the salt. Now, slowly add in your flour and those rolled oats. Mix it until you see big, moist clumps forming. That mixture is your base and topping dough. Take two-thirds of that crumb mixture and press it down firmly into the bottom of your prepared pan. You want a solid foundation for that lovely blackberry layer.
Assembling the Perfectly Sweet Blackberry Filling Layer
Time for the berries! In a separate bowl, which helps prevent crushing, gently toss your blackberries with the remaining sugar, the cornstarch, the cinnamon, and the lemon juice. You aren’t stirring vigorously; we are just coating them. Once they are all glistening and coated, carefully spread that whole mixture right over your pressed shortbread base. Try to make it even so everything bakes uniformly.
Baking and Cooling for Sliceable Sweet Blackberry Crumble Bars
Now, sprinkle that remaining one-third of the reserved crumble mixture evenly over the top of the berries. Pop it into the preheated oven for about 40 to 45 minutes. They are done when the topping is golden brown and you see the blackberry filling bubbling up around the edges. This next step is non-negotiable if you want those perfect Sliceable Blackberry Squares: you MUST let them cool completely. I mean it! Letting them chill on the rack for at least two hours is the secret to cutting clean squares that don’t fall apart when you pick them up.
Tips for Achieving the Best Sweet Blackberry Crumble Bars Texture
Listen, making a truly great fruit bar isn’t just about following steps; it’s about understanding *why* we do those steps, especially when we are aiming for that perfect combination of sliceable filling and a crisp topping. I’ve experimented way too much to just stick to the basics, so let me share the pro moves that elevate these Sweet Blackberry Crumble Bars from good to absolutely unforgettable.
The biggest concern people have is sogginess, right? We absolutely cannot have a soggy bottom on our bars, and we need that topping to offer some honest crunch. That’s where a few simple tweaks come into play. If you want to seriously boost that buttery flavor in the base and topping, try this one substitution I found while experimenting with other shortbread-like desserts. Instead of using all-purpose flour in the crumble mixture, swap out about a quarter cup of it for almond flour.
It gives this incredible richness to the crust! You can find more ideas for rich bases over in my classic pecan pie bars tutorial, but for these berry bars, the almond flour really complements the fruit acids.
Now let’s talk about berries, because that’s the filling layer you need to manage:
- Frozen Berries? Go For It! If you’re grabbing frozen blackberries (which is often cheaper, let’s be honest), do not, under any circumstances, thaw them first. Toss them straight from the freezer into the bowl with the sugar, cornstarch, and spice. The cornstarch is there specifically to handle that extra moisture the frozen berries release while baking.
- The Chill Factor for Crispness: If you want the absolute crispiest topping possible—the kind that shatters just slightly when you bite it—try sticking the reserved topping mixture in the freezer for about 15 minutes right after you portion it out before sprinkling it over the berries. Chilling that fat mixture ensures it melts slower in the oven, resulting in a crispier crust rather than a softer one.
- Mandatory Cooling Time: I know, I know, you just pulled hot, bubbly bars out of the oven. But you simply *must* let them cool completely—at least two hours, maybe even more if your kitchen is warm. This is key for those beautiful, clean squares. The structure of the cornstarch and the butter needs time to firm up completely. Patience here guarantees you get those perfectly shaped Oatmeal Blackberry Bars when you cut them later!
Variations on Your Sweet Blackberry Crumble Bars
While I absolutely adore these original Sweet Blackberry Crumble Bars exactly as they are—with that classic oat streusel and perfectly sweet filling—I know you folks like to customize your baking! It’s what makes cooking so much fun, right? Tweak them slightly, and you get a whole new dessert experience without starting from scratch. These little changes really highlight how versatile this basic bar structure is.
I’ve played around with the crust and topping mixture montón over the years. If you are looking for a slightly brighter, more summery flavor profile, this is definitely the place to add a little zing. If you check out how I do the crust on my apple pie bars, you’ll see how I integrate citrus, and that works beautifully here too!
If you want to see another great bar recipe involving apple and warm spices, take a peek at my apple pie crumb bars with cinnamon—the process is super similar!
Here are a few easy swaps and additions that give you fantastic results when making these Homemade Fruit Crumble Bars:
- Add Brightness to the Base: For an extra pop of fresh flavor that really complements the blackberries, zest half a small lemon directly into the butter-sugar mixture when you are creaming it together for the base and topping. It cuts through the richness of the butter beautifully.
- Texture Swap for the Topping: If you’re out of rolled oats or just want a different crunch profile, swap them out! You can replace the full cup of oats with an equal amount of finely crushed graham crackers or even vanilla wafer crumbs. This turns your base into a more shortbread-meets-cheesecake crust vibe.
- Spice It Up (Beyond Cinnamon): That 1/4 teaspoon of cinnamon is lovely, but for a deeper, warmer flavor that mimics fall, try using just a tiny pinch (like 1/8 teaspoon) of nutmeg or cardamom in your crumble mix. Cardamom is surprisingly good with dark berries!
- A Little Heat: Want to wake up the filling? Add just a *tiny* pinch of cayenne pepper to the blackberry mixture when you add the cornstarch and sugar. You won’t really taste the heat, but it magically makes the berry flavor much more complex and exciting!
These simple adjustments ensure that even if you make these Quick Blackberry Bar Recipe twice in one week, they taste totally different each time. Happy experimenting!
Storage and Reheating Sweet Blackberry Crumble Bars
The best part about making these fantastic Sweet Blackberry Crumble Bars is that they are almost always better the next day! That slight rest time lets the berry juices settle, making those squares even more firm and sliceable. But how do you keep them perfect?
Since these are packed with so much buttery oat topping and that thickened fruit filling, storage is pretty straightforward. You don’t want them sitting out forever, especially if your kitchen is warm, because we want to maintain that structure we worked so hard for!
Storing Your Crumble Bars
First off, rule number one: make sure they are completely cool before you even think about covering them up. If you wrap them while they have any residual warmth, you’re going to steam that gorgeous, crisp topping, and nobody wants soggy crumble!
Once they are stone-cold, I prefer storing them in an airtight container right on the counter. At room temperature, they generally stay fantastic for about three to four days easily. Just make sure you place a layer of parchment or wax paper between layers if you stack them inside your container. This stops the sugary topping from sticking to the underside of the layer above it. If it’s super hot and humid where you live, or if you made a huge batch and need them to last longer than four days, popping the airtight container in the fridge is your next best bet. They’ll last up to a week in the fridge, but they do lose a little bit of that fresh-from-the-oven tenderness when chilled.
Reheating for the Perfect Snack
Honestly, these are delicious straight out of the fridge or at room temperature, especially with a cup of coffee. But hey, sometimes you just want that gentle warmth back, right? If you want to reheat them, treat each square individually!
Don’t even bother with the microwave unless you enjoy chewy crusts—it warms the butter weirdly and makes the topping soft. Instead, pop your Homemade Fruit Crumble Bars squares onto a baking sheet and place them in a low oven, maybe about 300°F (150°C), for just 5 to 8 minutes. This low, slow heat gently warms the berry filling back up and crisps the buttery edges of the streusel beautifully without drying out the bar. This little reheating trick brings back some of that fresh-baked magic, I promise!
Frequently Asked Questions About Sweet Blackberry Crumble Bars
When you dive into a new recipe, especially one like these Sweet Blackberry Crumble Bars Recipe, I always get a flood of questions from folks who want to make sure they get that perfect, sliceable result. It’s all about getting the ratios right, and I want to save you the trial and error I went through! Here are the things people ask me most often when they attempt these beautiful dessert squares.
We covered a lot of ground on texture and structure, but sometimes you need a quick reminder! For any other tricky fruit bar questions, you can always check out my guide on easy homemade blackberry bars for more troubleshooting!
Can I use frozen blackberries in this Sweet Blackberry Crumble Bars Recipe?
Yes, absolutely! Seriously, don’t hesitate if you only have frozen ones on hand. The beauty of using frozen berries here is that they help keep the structure of the filling firm when you assemble it, which helps prevent the base from getting soggy too fast. The only hard and fast rule is this: do not thaw them first! Toss them straight from the freezer into your bowl with the sugar and cornstarch. That cornstarch is powerful, and it handles the extra moisture release during baking perfectly, ensuring you still get those wonderful, jammy pockets without turning your entire bar into soup!
How do I ensure my Homemade Fruit Crumble Bars hold their shape?
This is probably the number one question I get about any bar recipe that has a filling! To get those clean, sharp squares that look so good in photos, you need two things to work together. First, you need that 2 tablespoons of cornstarch in the filling; that’s your insurance policy against gooeyness. Second, you need patience for the cooling process. I cannot stress this enough: you must let these Homemade Fruit Crumble Bars cool completely, ideally for two full hours on a wire rack, before you even attempt to lift them out of the pan. The butter and the cornstarch need that time to completely solidify their structure. If you cut them warm, they will definitely fall apart!
What makes this a ‘Sweet’ Berry Dessert Bar?
Great question! Sometimes blackberry desserts can lean a little too tart, especially if your berries are naturally acidic. With these Sweet Berry Dessert Bars, I specifically designed the sugar distribution to lean toward the sweeter side. We are using a good amount of sugar in the buttery base AND in the filling, which brings out the natural sweetness of the berries while balancing out any sharp tartness. We are aiming for that satisfying, rich, dessert-quality sweetness, not the sharp, bracing acidity you might find in a pie baked specifically to showcase tartness.
Estimated Nutritional Snapshot for Sweet Blackberry Crumble Bars
Now, listen, I’m a home cook, not a registered dietitian, so take these numbers with a grain of salt (pun intended!). When you’re baking up a batch of truly delicious Sweet Blackberry Crumble Bars, the nutrition changes slightly depending on what brand of butter you use or how generously you portion your oats. I try not to worry too much about the exact calorie count when something tastes this good, but for those of you who like to keep track, here is the general breakdown based on using the exact amounts in my recipe, cut into 24 squares.
These figures are meant to give you a general idea of what you are working with per square. If you cut them smaller, of course, the numbers go down. If you cut them into giant, rustic pieces—which I totally understand doing—they will obviously go up!
- Serving Size: 1 bar
- Calories: 250
- Sugar: 18g
- Sodium: 85mg
- Fat: 14g
- Saturated Fat: 8g
- Unsaturated Fat: 6g
- Trans Fat: 0g
- Carbohydrates: 31g
- Fiber: 2g
- Protein: 3g
- Cholesterol: 30mg
Just a quick note here, because this is important: These values are estimates derived from standard ingredient calculations. Your actual nutritional content for these Homemade Fruit Crumble Bars will vary a bit based on the specific ingredients you choose and how precise your measurements are. For example, using super ripe, naturally sweet berries versus slightly greener ones can change the overall sugar profile slightly!
Share Your Homemade Fruit Crumble Bars Creations
That’s it! You’ve made it through the whole process of creating the most wonderfully structured, delightfully sweet Sweet Blackberry Crumble Bars. I hope your kitchen smells as amazing as mine does right now. There is nothing more satisfying than seeing that golden, bubbling top coming out of the oven.
Now for the fun part—the community! If you followed along and baked these squares, or if you tried one of the variations—maybe you added that lemon zest? I want to see them! Baking is always better when you share the results, and I absolutely love seeing your creations on my social feeds. Don’t forget to snap a picture of those perfect, clean slices!
When you share, please tag me so I don’t miss it! And if you had success with this recipe, it helps the community so much if you come back here and leave a rating. Five stars means I nailed that perfect balance of buttery crumble and jammy filling for you!
If you’re looking for more delicious bakes and cooking inspiration throughout the week, make sure you pop over to my main blog page for new recipes and cooking adventures!
Happy baking, and enjoy every single one of those wonderful Homemade Fruit Crumble Bars!
PrintPerfect Sweet Blackberry Crumble Bars with an Oat Streusel Topping
Make easy, sliceable dessert bars featuring a sweet blackberry filling layered between a buttery shortbread base and a crisp oat crumble topping.
- Prep Time: 20 min
- Cook Time: 45 min
- Total Time: 165 min
- Yield: 24 bars
- Category: Dessert
- Method: Baking
- Cuisine: American
- Diet: Vegetarian
Ingredients
- 1 cup (2 sticks) unsalted butter, softened
- 1 cup granulated sugar, divided
- 1/2 teaspoon salt
- 2 teaspoons vanilla extract
- 2 cups all-purpose flour
- 1 cup rolled oats
- 1 1/2 pounds fresh or frozen blackberries
- 1/2 cup granulated sugar
- 2 tablespoons cornstarch
- 1 tablespoon lemon juice
- 1/4 teaspoon ground cinnamon
Instructions
- Preheat your oven to 350°F (175°C). Line a 9×13 inch baking pan with parchment paper, leaving an overhang on the sides for easy removal.
- Prepare the base and crumble: In a large bowl, cream together the softened butter and 1/2 cup of the sugar until light and fluffy. Mix in the vanilla extract and salt.
- Add the flour and rolled oats to the butter mixture. Mix on low speed or with a fork until large, moist crumbs form. This mixture will serve as both the base and the topping.
- Press two-thirds of the crumb mixture evenly into the bottom of the prepared pan to form the crust. Set the remaining one-third aside for the topping.
- Prepare the filling: In a separate bowl, gently toss the blackberries with the remaining 1/2 cup sugar, cornstarch, lemon juice, and cinnamon until the berries are coated.
- Spread the blackberry filling evenly over the crust layer.
- Sprinkle the reserved one-third crumb mixture evenly over the blackberry filling.
- Bake for 40 to 45 minutes, or until the topping is golden brown and the filling is bubbling.
- Remove the pan from the oven and let the bars cool completely in the pan on a wire rack for at least 2 hours before slicing. This cooling time is crucial for sliceable bars.
- Once cool, use the parchment overhang to lift the bars out and cut them into squares.
Notes
- For a richer flavor in the crumble, substitute 1/4 cup of the all-purpose flour with almond flour.
- If using frozen blackberries, do not thaw them before mixing with the sugar and cornstarch.
- To achieve a crispier topping, chill the reserved crumble mixture for 15 minutes before sprinkling it over the filling.
Nutrition
- Serving Size: 1 bar
- Calories: 250
- Sugar: 18g
- Sodium: 85mg
- Fat: 14g
- Saturated Fat: 8g
- Unsaturated Fat: 6g
- Trans Fat: 0g
- Carbohydrates: 31g
- Fiber: 2g
- Protein: 3g
- Cholesterol: 30mg