

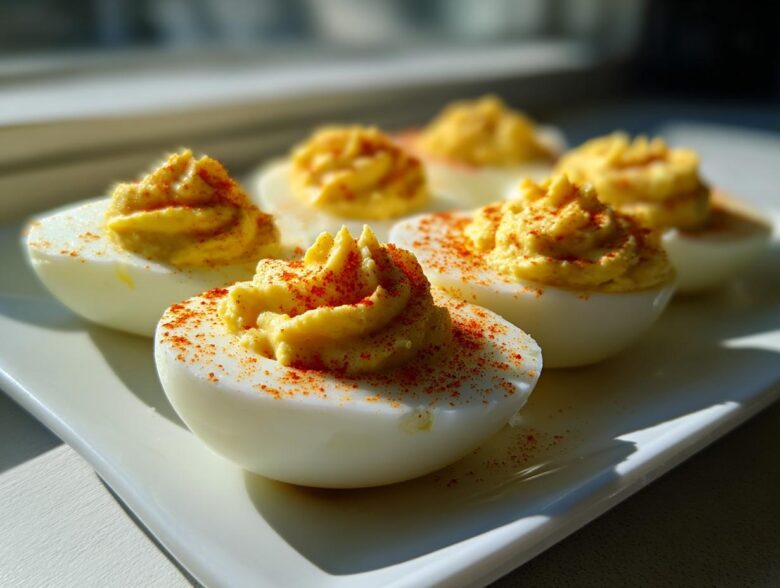
You know those appetizers that just disappear the second you set them down? For me, that’s always been deviled eggs. They’re the classic champion of every good picnic, holiday spread, or Sunday dinner. But oh, have I wrestled with the filling over the years! One batch is sandy, the next one splits and looks watery. Forget that! I finally nailed down the method that makes these Traditional Deviled Eggs (Perfectly Creamy) absolutely legendary. Trust me, once you get that silky smooth, pale yellow filling piped perfectly back into the whites, you’ll never go back to the lumpy stuff again. It all comes down to a couple of small, specific steps that I’m finally sharing!
I’m so excited for you to try the Caprese Skewers with Pesto Appetizer inspiration, but these eggs are the real MVP. This recipe isn’t fancy—it’s just pure, honest, perfect flavor that everyone loves.
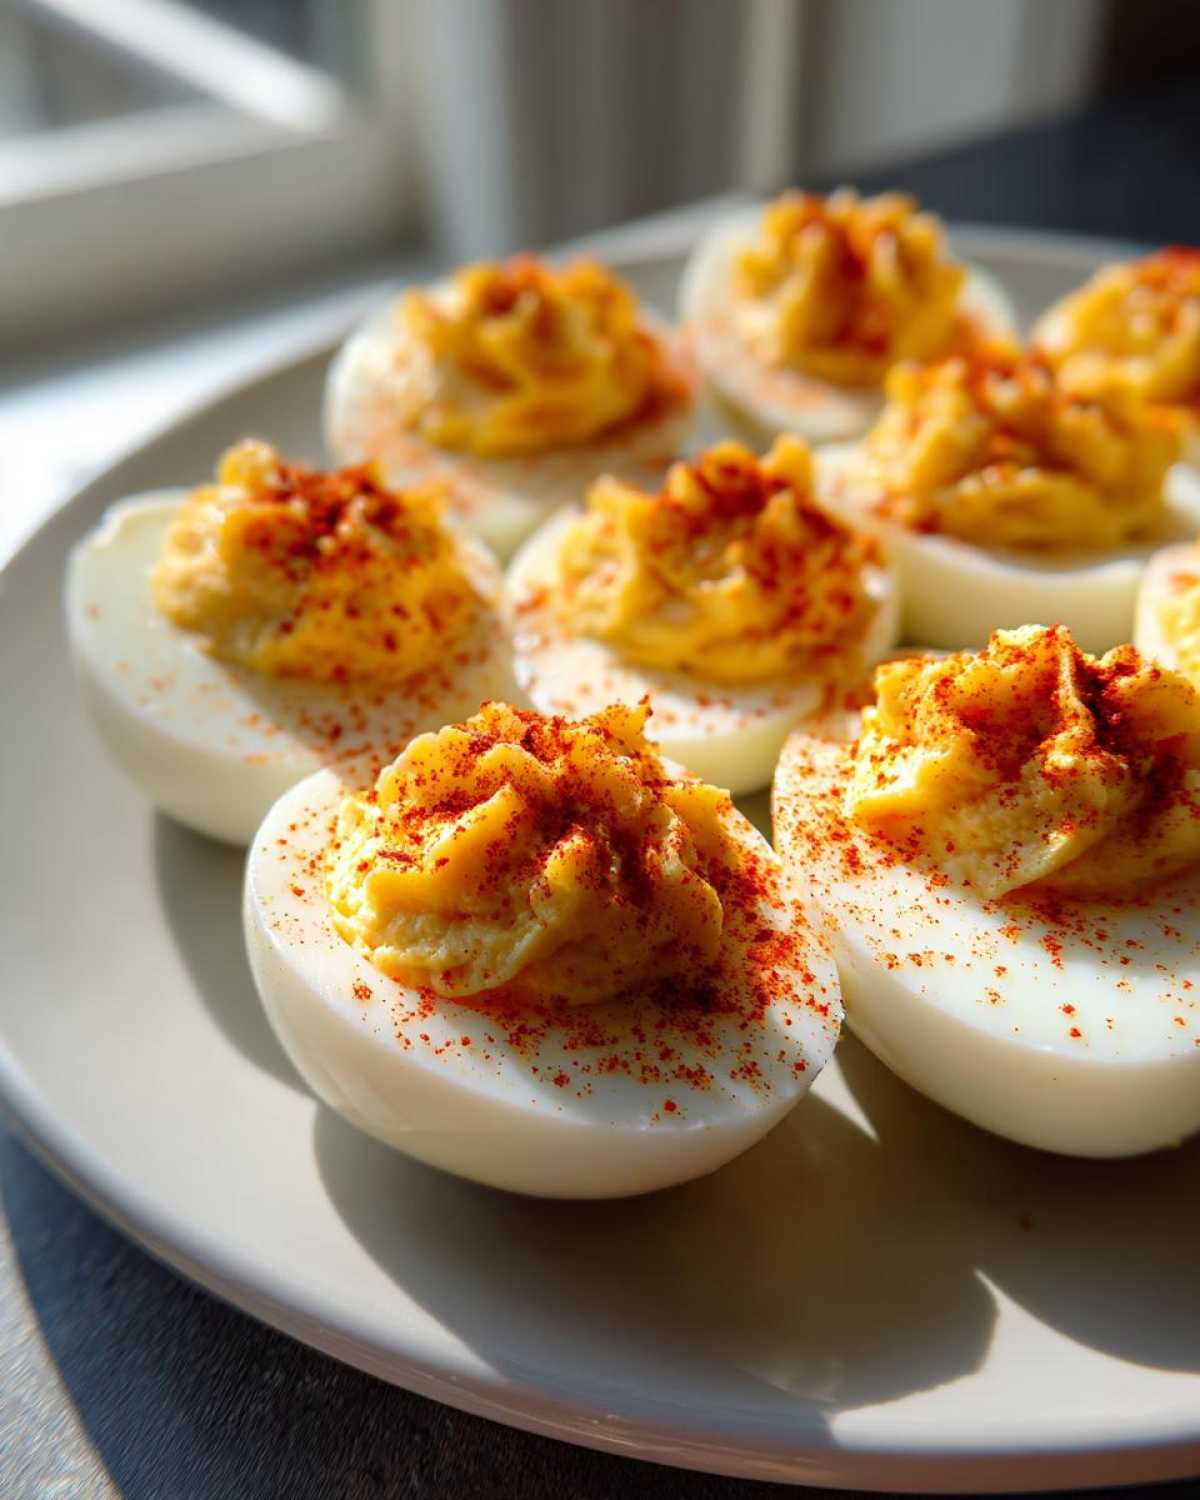
Why This is The Ultimate Traditional Deviled Eggs (Perfectly Creamy) Recipe
What makes this recipe the one you’ll keep forever? It’s all about zero fuss and maximum payoff. We skip the adventurous ingredients like dill relish or avocado and stick to what works: the tang of mustard and vinegar, perfectly balanced by rich mayonnaise. If you want the Best Creamy Deviled Eggs that taste exactly like grandma used to make, this is it. It’s totally reliable, so you never have to sweat over the filling consistency again!
Key Details for Your Traditional Deviled Eggs (Perfectly Creamy)
Here are the timelines so you can plan your baking session. This recipe is pretty fast if you plan your chilling time!
- Prep Time: 20 min
- Cook Time: 12 min
- Total Time: 62 min (factoring in cooling!)
- Yield: 24 halves
Simple Ingredients for Classic Deviled Eggs Recipe
See? I told you this was straightforward! You don’t need a million fancy things hiding in your pantry for this recipe. We are using the absolute staples that make these Classic Deviled Eggs Recipe so timeless. The real stars, in terms of creaminess, are a good quality mayonnaise—don’t skimp here—and that trusty yellow mustard. The mustard is key not just for a slight tang, but for helping emulsify everything so it becomes that beautiful, smooth texture. If you want those perfect little mounds, you need a high-quality binder!
I’ve linked some of my favorite pantry staples here that help create the best simple deviled egg ingredients.
Here’s what you need for a batch of 12 eggs (24 halves):
- 12 large eggs
- 1/2 cup mayonnaise (the full-fat stuff, please!)
- 2 tablespoons yellow mustard (the bright yellow kind, not Dijon)
- 1 tablespoon white vinegar
- 1/4 teaspoon salt
- 1/8 teaspoon black pepper
- Paprika, for garnish
Ingredient Notes and Substitutions for Smooth Yolk Filling Secret
Let’s talk about the eggs first. You absolutely should *not* use eggs that are fresh out of the carton for deviled eggs. Trust me on this one! Fresh eggs are impossible to peel nicely, and peeling determines your final look. You want eggs that are at least a week old; they release from the shell so much easier. It’s one of my favorite tricks for keeping things stress-free!
Also, the vinegar contributes the little bit of necessary acid to brighten up that rich yolk and mayo blend. Don’t skip it! If you add too much, though, it can thin your filling, which brings us right back to our main goal: creaminess. A little dash of mustard handles the tang without making the whole thing taste like a hot dog stand.
Perfect Hard Boiled Eggs for Deviled Eggs: The Foundation
You cannot have Traditional Deviled Eggs (Perfectly Creamy) if your whites are ruined or the yolk is green around the edges, right? The foundation of a perfect egg starts long before you mix the filling—it starts with how you cook the egg itself. Getting the yolk perfectly centered and bright yellow, and ensuring the white peels beautifully, is half the battle. If you struggle with peeling, I promise this method works like magic.
We aren’t going for a gentle simmer here; we are going for the dependable, all-in method that guarantees an easy peel almost every time. This technique ensures your whites are firm but not rubbery, which is perfect for holding that rich filling.
Here is the exact process I swear by to get eggs ready for that Smooth Yolk Filling Secret:
- First up, grab a good saucepan, big enough so the eggs aren’t cramped! Place your 12 large eggs inside and cover them with cold tap water—make sure the water is about an inch above the eggs.
- Turn the heat up to high and bring that water to a full, rolling boil. Once it’s bubbling hard, pull the pan right off the burner immediately. Don’t leave it sitting on the hot element!
- Slap a lid on that pot right away. Now, this is important: set a timer for exactly 12 minutes. Don’t touch them! This standing time does the perfect amount of cooking without overdoing it.
- When that timer goes off, you need to shock them. Scoop every single egg out of the hot water and plunge them straight into an ice bath. I mean ice water—lots of cubes! Let them sit there completely submerged for about 15 minutes. This part is non-negotiable; it stops the cooking so your yolks stay golden, and it makes peeling a breeze.
Once they are totally cool, you can peel them gently. You’ll find the shell just slips right off! Because we stopped the cooking process so well, you guarantee yourself those beautiful, unblemished whites that make Homemade Traditional Deviled Eggs look professional.
How to Make the Easy Deviled Egg Filling for Traditional Deviled Eggs (Perfectly Creamy)
Okay, here’s where the magic that creates that unbelievable, silky texture happens! If you want the filling to live up to the promise of Traditional Deviled Eggs (Perfectly Creamy), you have to treat the yolks right before you introduce the wet stuff. Rushing this step is the number one reason people end up with fillings that taste grainy or look slightly curdled. We are going for pure, velvety goodness here.
Once you’ve got your perfectly peeled, cooled halves sitting neatly on your serving platter—whites looking pristine—poke those beautiful yolks right out into a medium-sized bowl. Don’t mix the mayo or mustard in yet! You want to use a sturdy fork and smash those yolks down until they are absolutely powder smooth. I mean, pretend you’re trying to grind them into fine dust. This intense initial mashing is the very core of the Smooth Yolk Filling Secret.
If you are a total perfectionist, like me when I’m nervous about a big crowd, you can push the mashed yolks through a fine-mesh sieve right into another bowl. It sounds like a ton of extra work, but wow, it guarantees the most incredible texture. It’s just one of those little things that elevates a simple dish to something truly stellar.
Once they are powder smooth, then we add the flavor components listed in the easy deviled egg filling section: the mayonnaise, mustard, vinegar, salt, and pepper. Mix gently now; you’re just incorporating the liquids. Stop mixing the moment everything looks uniform and perfectly pale yellow. That’s it! That smooth texture is your sign to stop working that bowl!
Step-by-Step Instructions for Traditional Deviled Eggs (Perfectly Creamy)
Let’s run through the whole assembly process, making sure every one of those 24 halves gets treated just right. Remember, presentation matters almost as much as taste when it comes to these beauties!
- First thing: Cut all your peeled eggs in half lengthwise.
- Gently lift every single yolk out and put it straight into your mashing bowl. Lay those empty white boats out neatly on whatever platter you plan to serve them on. This keeps things tidy!
- Mash those yolks until they are completely lump-free. Seriously, scrape the bottom of the bowl to check!
- Add in all your wet ingredients—mayonnaise, mustard, vinegar—and your seasonings (salt and pepper). Mix until it’s uniform and looks perfectly creamy and homogenous. Do a quick taste test here!
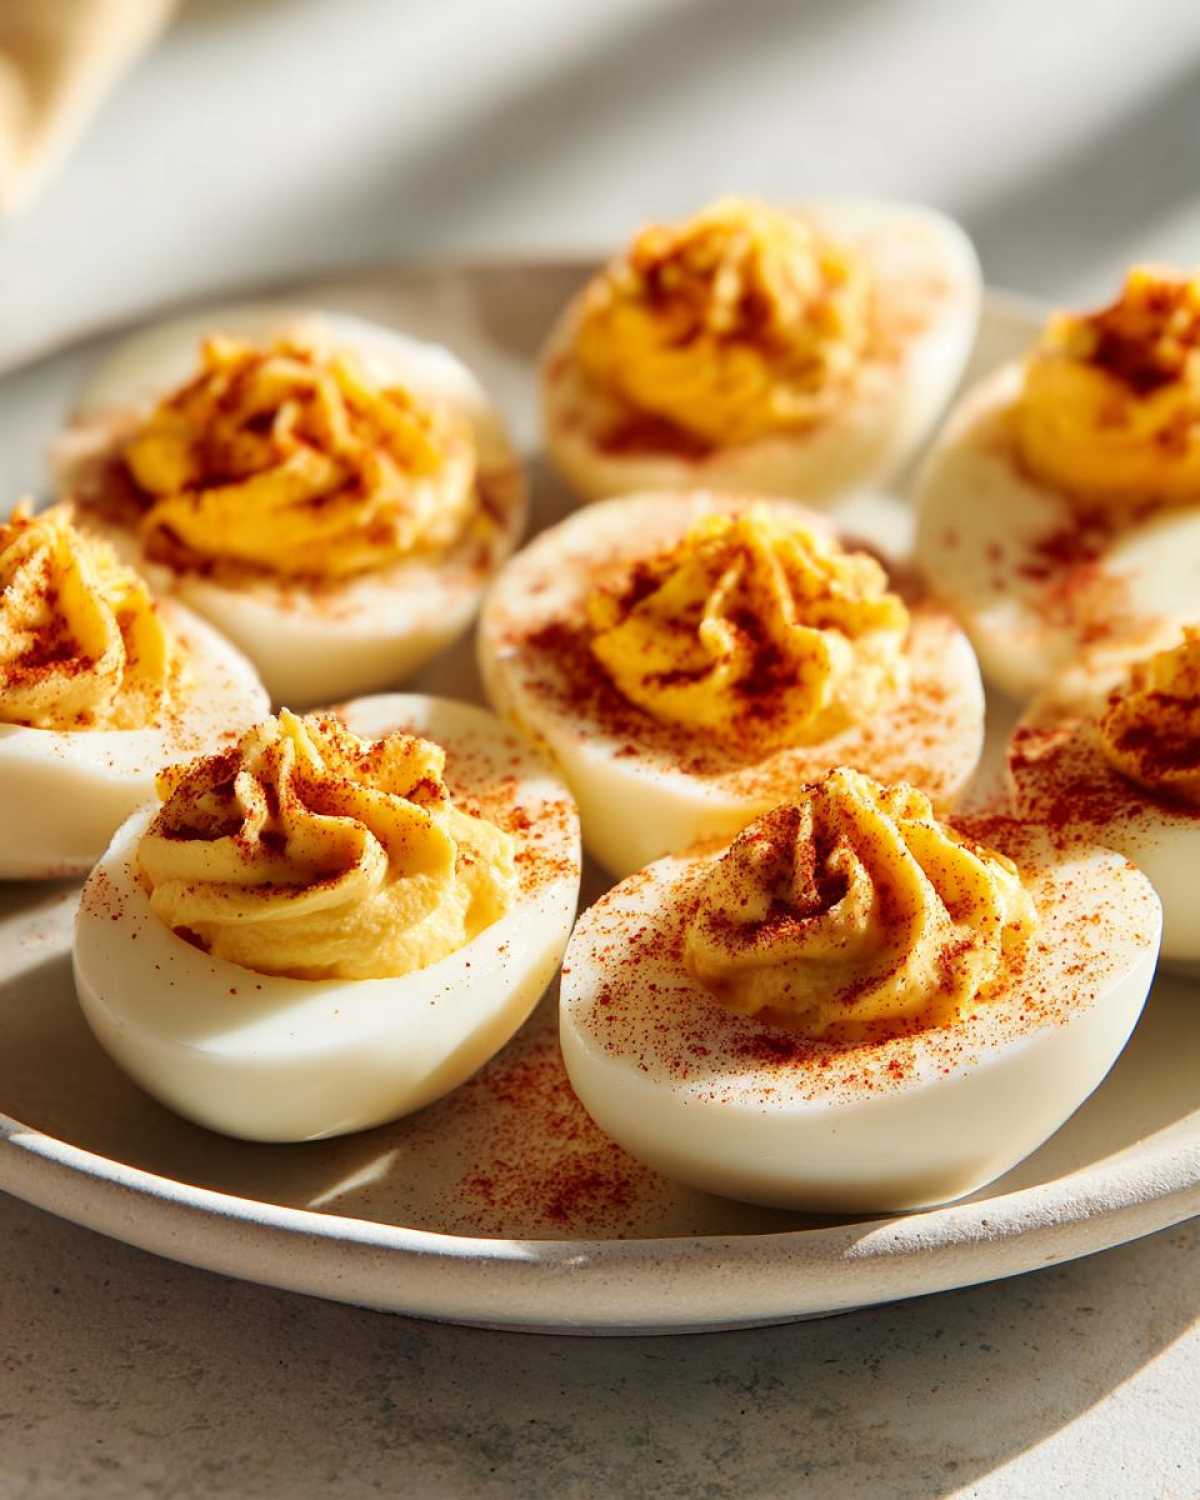
- Now for the fun part: getting the filling back in. You can use a small spoon and carefully mound the filling into the whites, smoothing the top with the back of the spoon for an old-fashioned look. Or, if you have a piping bag fitted with a star tip, use it! Piping makes them look super professional for your Traditional Deviled Eggs (Perfectly Creamy) platter.
- Fill every single white half generously.
- The final touch: grab that paprika! Give a light dusting over the top of every filled egg half. It adds color and that little smoky flavor note we all love.
- Don’t serve them right away! Cover the platter loosely with plastic wrap and put them in the fridge for at least 30 minutes. This chilling time is essential because it lets the filling firm up slightly. This keeps them stable and prevents them from getting too runny, even if the kitchen is warm.
That chilling step is a lifesaver for keeping your beautiful mounds intact!
Tips for Success with Homemade Traditional Deviled Eggs
You’ve cooked the eggs perfectly, you’ve got that ridiculously smooth filling—now we just need to make them look as good as they taste! Presentation is huge for appetizers, especially when you want your spread to look like the ultimate spread of Old Fashioned Deviled Eggs. I always tell people that even if you plan to take them to a potluck, taking the extra thirty seconds to pipe them makes that huge difference.
If you’re feeling artsy, definitely bust out the pastry bag fitted with a star tip. Filling them this way gives you those pretty ridges that hold the paprika perfectly and make the whole platter look intentional. Don’t feel bad if you don’t have one, though! I used to just use two small spoons—one for scooping the filling into a neat ball and another for gently pushing it into the egg white.
Here are a few final touches to ensure your eggs stay perfect until they hit the table:
- Keep It Cool: Always, always chill the eggs for at least 30 minutes after filling. If you’re transporting them, pack them in an insulated carrier with an ice pack underneath the serving tray. Nobody wants warm, melting mayo!
- The Paprika Dusting: Use plain paprika for the traditional look. If you want a little twist without compromising the classic flavor, try smoked paprika—it adds a wonderful depth!
- Go Big with Mayonnaise: If your filling still seems a touch stiff after mixing, don’t be afraid to add an extra teaspoon of mayo until it moves smoothly off a spoon or out of a piping tip. Too little binder spells disaster for that creamy texture we worked so hard for.
These small finishing steps guarantee your Traditional Deviled Eggs (Perfectly Creamy) become the talk of the party. For more ideas on perfecting classic recipes, check out my thoughts on The Ultimate Deviled Egg Recipe over here!
Make Ahead Deviled Eggs Tips for Potluck Perfect Deviled Eggs
Who has time on party day to peel and fill a dozen eggs? Not me! If you’re making these for a big event—and trust me, Potluck Perfect Deviled Eggs should be on every menu—planning ahead is the key to keeping your sanity. The great news is that you can absolutely prep these ahead of time, but you have to be smart about it so the filling stays fresh and doesn’t get a weird film on top.
My recommendation for the absolute best results, especially if you’re prepping them a day ahead, is to treat the whites and the filling like two separate projects until just before serving. This way, the whites don’t absorb moisture weirdly, and the filling stays optimally smooth and creamy.
Here’s my favorite way to manage the timeline for your Traditional Deviled Eggs (Perfectly Creamy):
- One Day Ahead: Hard-boil, peel, and slice all your eggs. Place the egg white halves snuggly in an airtight container and store them in the fridge.
- The Yolk Prep: Mash all your yolks completely smooth with just the seasonings (salt, pepper). Keep them dry for now! Store the mashed yolks in a separate small, airtight container.
- The Day Of: About an hour before you need to leave or serve, take the yolks and whites out. Mix the yolks with the mayo, mustard, and vinegar until you hit that perfect creamy consistency we love.
- Assembly Time: Fill the whites right before you travel or right before the guests arrive! If you’re piping them, they hold their shape so much better when filled fresh. If you have to fill them two hours early, just cover them tightly with plastic wrap and keep them chilled until the very last minute.
If you insist on assembling them all the way ahead of time, make sure they are super cold, then cover the entire platter tightly with plastic wrap, maybe even placing a damp paper towel very lightly over the top layer so they don’t dry out. They are still good for up to 24 hours this way, but I still think the flavor peaks when you fill them just a few hours before serving. For more tips on making them truly potluck-ready, check out my guide on Potluck Perfect Deviled Eggs!
Serving Suggestions for Your Traditional Deviled Eggs (Perfectly Creamy)
So, you’ve got these gorgeous, perfectly creamy eggs staring back at you—what else goes on the platter? Since these are the ultimate classic, they pair well with almost anything, but they really shine next to other tried-and-true favorites. They are the rockstar appetizer of any spread, but they need a good supporting cast, especially if you’re heading out to a picnic or barbecue.
When thinking about what to serve alongside them, I always try to balance the richness of the yolk filling. If you loaded up on heavy dips, maybe balance it out with something fresh and vibrant. They feel right at home next to things like veggie trays, miniature meatballs, or maybe even some classic potato salad. If you’re planning a huge spread, I have a whole strategy for keeping things balanced in my post about Picnic Food Recipes Egg Salad Style—deviled eggs are mandatory there!
Here are a few pairings that always look and taste fantastic next to our Traditional Deviled Eggs (Perfectly Creamy):
- Something Tangy and Crisp: Pickled vegetables or miniature cucumber sandwiches provide a nice textural contrast to the smooth filling.
- Skewers and Sticks: Anything served on a stick travels well! Think simple grilled shrimp or even some little cheese cubes.
- Fresh Herbs: I love sprinkling a tiny bit of finely chopped fresh chives over the paprika right before serving. It instantly brightens up the presentation and adds that fresh oniony note that cuts through the richness of the mayo.
- A Little Crunch: Instead of plain paprika, some people crush up salty potato chips or even some crispy, crumbled bacon bits to sprinkle on top for a little extra *oomph*. But if you’re sticking strictly to the old-fashioned way, just paprika is perfect!
Honestly, you can’t go wrong. People are going to be too busy grabbing seconds of your perfect appetizer to worry about the side dishes!
Storage and Reheating Instructions for Traditional Deviled Eggs (Perfectly Creamy)
This is the part where we talk about leftovers, which, let’s be honest, isn’t usually a huge problem with these!
Since our filling relies heavily on mayonnaise—which is basically an emulsion of oil and egg yolk—these are definitely a dish that tastes best the day they are made. Stability tends to suffer if they sit around too long, especially if the kitchen is warm. When it comes to Traditional Deviled Eggs (Perfectly Creamy), refrigeration is your friend, but reheating is a hard no-go.
I know someone, somewhere, has tried to microwave them. Don’t be that person! Reheating mayonnaise-based fillings ruins the texture entirely; it separates, gets oily, and frankly, it’s just not safe or pleasant. Stick to chilling them thoroughly before serving.
How Long Will They Keep?
For safety and texture reasons, you want to keep these beauties refrigerated the whole time. If you have leftovers, store them in a very airtight container. I mean airtight—you don’t want them soaking up any lingering onion smells from your fridge!
I find that they are still perfectly good—and the texture holds up reasonably well—for up to two days in the cold. After that, the whites start getting a little rubbery, and the filling might get a little weepy at the surface, even if covered tightly. However, if you followed my Make Ahead Deviled Eggs Tips and stored the components separately, that’s when you get the longevity boost!
- Assembled Eggs: Best eaten within 24 hours. Keep tightly covered in the coldest part of the fridge.
- Yolk Filling Only (My preferred method): If you made extra filling that you didn’t pipe, and kept it plain (no paprika), it can last in an airtight container for three days. You can re-mix it with a teaspoon of fresh mayo right before piping onto a fresh batch of hard-boiled whites.
The best policy for Classic Deviled Eggs Recipe? Make just enough for the crowd, and if you have any assembled leftovers, eat them the next day for lunch sprinkled on a salad!
Frequently Asked Questions About Creamy Deviled Eggs
I know everyone has their own little trick for deviled eggs, but these questions pop up constantly in my comments section! Whether you’re aiming for that perfect, fluffy texture or just trying to avoid those sad, greenish yolks, here’s the scoop on keeping your Creamy Deviled Eggs lookin’ sharp.
How do I prevent my deviled egg filling from being runny?
This is the most common issue, honestly! Nothing is worse than filling the whites and watching the mixture slowly slump over the sides. The absolute key here is twofold: Dry yolks and good quality mayo. Make absolutely certain you mash those yolks until they are completely dry powder before you even think about adding *any* wet ingredients. If they’re still slightly crumbly, that’s fine, but they shouldn’t look wet.
Second, check your mayonnaise. If it’s a lower-fat version or a cheap brand, it might have more water content, which shears too easily. Use a good, full-fat mayonnaise. If you accidentally add too much vinegar or mayo, fix it fast! Don’t add more egg yolk (that wastes food!)—instead, stir in a tiny spoonful of extra mashed, dry yolk, or even a quarter teaspoon of dry mustard powder. That will absorb the extra liquid instantly and thicken it right back up for that classic look.
What makes these Traditional Deviled Eggs (Perfectly Creamy) different from others?
It’s all technique, honey, not crazy ingredients! What sets this recipe miles apart from the ones that turn grainy is mashing the yolks until they are totally smooth *before* anything else goes in. A lot of folks just dump everything in the bowl and mix, resulting in little bits of hard yolk still running around. We don’t do that here!
Remember how I mentioned pushing the yolks through a fine-mesh sieve if you are going all out? That step is the ultimate differentiator for achieving that cloud-like texture. It removes those final tiny, stubborn lumps that make a filling seem heavy instead of light. Seriously, if you’re prepping for a big crowd and want to impress them with truly Smooth Yolk Filling, try the sieve trick once. It’s worth the extra dishwashing, I promise!
Why are my egg yolks turning green around the edges?
Ugh, the dreaded green ring! That usually happens when the eggs are cooked too long or cooked at too low a temperature for too long. It’s just a chemical reaction between the sulfur in the egg white and the iron in the yolk. It’s totally safe to eat, but it looks awful on beautiful Traditional Deviled Eggs (Perfectly Creamy)!
The secret to avoiding it is the ‘boil-then-rest’ method we used. Bringing the water to a hard boil and then immediately removing it from the heat ensures the yolk cooks through gently, but quickly, using only the residual heat. Crucially, that immediate transfer to the ice bath stops the residual heat from continuing to cook the yolk past that perfect bright yellow stage. If you skip the ice bath, you invite that green tinge!
Can I use Dijon mustard instead of yellow mustard in this No Fuss Deviled Eggs recipe?
You certainly can swap it out if that’s what you prefer, but remember it changes the flavor profile! Yellow mustard is milder, slightly sweeter, and has that bright, familiar tang that suits the No Fuss Deviled Eggs vibe perfectly. Dijon is robust, usually spicier, and tends to have a browner tint, which will slightly dull the color of your filling.
If using Dijon, cut the amount back by about half a tablespoon to start, taste it, and see if you like it. I stick to the classic yellow mustard because it honors the historical, simpler flavor that my family cherishes in these Classic Deviled Eggs Recipe. For more reliable, straightforward appetizer tips, take a peek at some of my other posts!
If you’ve got more burning questions, you can check out more quick tips over at my guide on No Fuss Deviled Eggs!
Estimated Nutritional Information
Listen, these are Traditional Deviled Eggs (Perfectly Creamy), so they are rich! They are packed with protein and fat, which is why they are so satisfying at a party. I always have to remind myself that these are an appetizer, not a vegetable side dish, ha! But hey, they are so much better than anything store-bought.
Please remember that all these numbers are estimates, just giving you a general ballpark idea since every single egg varies slightly in size, and the brand of mayo you select can change things. This data is calculated based on serving one half of an egg, like the recipe yields.
Here is what you can generally expect from one of these glorious little bites:
- Serving Size: 1 half
- Calories: 70
- Fat: 6g
- Saturated Fat: 1.5g
- Carbohydrates: 0.5g
- Protein: 2.5g
- Sodium: 95mg (This can jump depending on how salty you make your filling!)
You can see why a couple of these make for a great, flavorful snack! They are low in sugar, which is fantastic, and they carry just enough sodium to keep things tasting bright. Knowing the nutritional breakdown helps me manage how many I gobble down before everyone else gets a chance!
Share Your Perfectly Creamy Traditional Deviled Eggs Experience
I’ve spilled all my secrets now—from the ice bath timing to the secret of getting that unbelievably smooth yolk filling. But the best part of sharing these family recipes is hearing how they turn out in *your* kitchens! I absolutely love seeing photos of your platters, especially when you nail that perfect piping swirl on top. It makes my whole day!
Once you’ve tried putting these Traditional Deviled Eggs (Perfectly Creamy) on your table, please come back and tell me what you thought. Did they disappear even faster than mine do? Did your family notice the texture difference this time around? Drop a rating down below—five stars if you think this is the Best Creamy Deviled Eggs recipe out there!
I always read every single comment. If you tweaked something small—maybe you added a splash of pickle juice instead of vinegar, or tried smoked paprika—let us all know! We bakers learn best from each other. Tag me in your photos on social media so I can celebrate your impressive work on these classic appetizers. I’m always looking for new ways to present the classics, too, even though this version is pretty much perfect!
If you’re looking for more deep dives into perfecting the classics, you can always browse my full recipe collection over at the main blog page. Happy cooking, and I can’t wait to hear how your spread turns out!
PrintTraditional Deviled Eggs (Perfectly Creamy)
Follow this straightforward recipe to make classic, creamy deviled eggs with a smooth yolk filling every time.
- Prep Time: 20 min
- Cook Time: 12 min
- Total Time: 62 min
- Yield: 24 halves
- Category: Appetizer
- Method: Boiling and Mixing
- Cuisine: American
- Diet: Vegetarian
Ingredients
- 12 large eggs
- 1/2 cup mayonnaise
- 2 tablespoons yellow mustard
- 1 tablespoon white vinegar
- 1/4 teaspoon salt
- 1/8 teaspoon black pepper
- Paprika, for garnish
Instructions
- Place eggs in a saucepan and cover with cold water by one inch. Bring water to a rolling boil over high heat.
- Once boiling, remove the pan from the heat, cover it, and let the eggs stand for exactly 12 minutes.
- Immediately transfer the eggs to an ice bath (a bowl of ice and water) and let them cool completely, about 15 minutes. This stops the cooking process and aids peeling.
- Peel the cooled eggs carefully. Slice each egg in half lengthwise.
- Gently scoop the yolks into a medium bowl. Place the egg white halves on a serving platter.
- Mash the yolks thoroughly with a fork until no lumps remain. This step is key for a smooth filling.
- Add the mayonnaise, mustard, vinegar, salt, and pepper to the mashed yolks.
- Mix the yolk mixture until it is completely smooth and creamy. Taste and adjust salt or pepper if needed.
- Spoon or pipe the yolk mixture back into the egg white halves.
- Sprinkle the tops of the filled eggs with paprika before serving.
Notes
- For easier peeling, use eggs that are at least one week old, not fresh from the carton.
- If you want an extra smooth texture, press the mashed yolks through a fine-mesh sieve before mixing in the wet ingredients.
- Chill the filled eggs for at least 30 minutes before serving to firm up the filling.
Nutrition
- Serving Size: 1 half
- Calories: 70
- Sugar: 0.5
- Sodium: 95
- Fat: 6
- Saturated Fat: 1.5
- Unsaturated Fat: 4.5
- Trans Fat: 0
- Carbohydrates: 0.5
- Fiber: 0
- Protein: 2.5
- Cholesterol: 75