

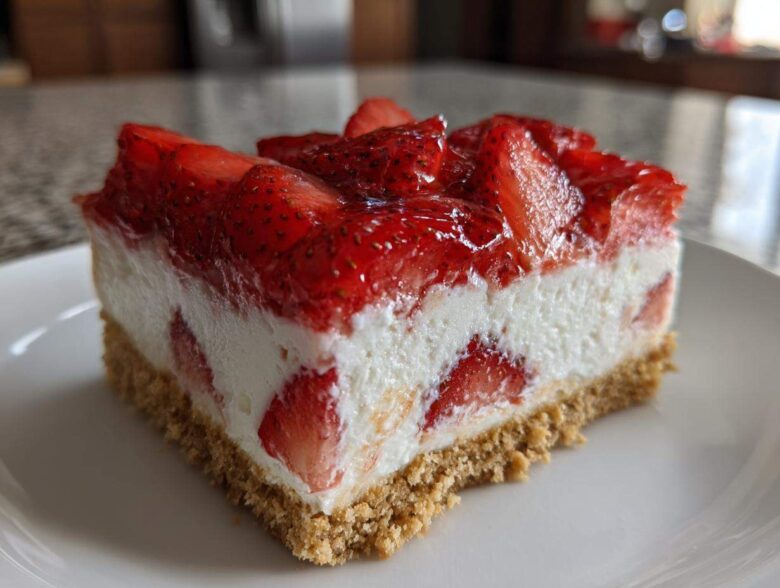
You know those times when you need a showstopper dessert, but the thought of turning on the oven makes you sweat just a little bit? I live for those moments because that’s where the magic of no-bake recipes comes in! Seriously, this **No-Bake Strawberry Heaven Dessert** is the truth. It’s ridiculously easy to pull together, and honestly, it looks like you spent hours fussing over it.
I first whipped this up for a potluck when my AC decided to break down mid-July. Everyone kept asking for the recipe because it was so creamy and cool. It’s my go-to **Easy Strawberry Dessert** because the layers stack up so beautifully. Check out more of my basic baking tips over at my blog! Trust me, once you try this simple, chilled treat, you’ll never look back!
Why This No-Bake Strawberry Heaven Dessert is Your New Favorite (Simple Strawberry Delight)
Why mess with ovens when you can achieve pure bliss in under an hour of hands-on time? This dessert is the definition of an impressive return on investment. It’s the easiest **No Bake Summer Treat** you’ll ever make, truly. If you loved the simplicity here, you absolutely must check out my trick for a no-bake peanut butter cup cheesecake!
- It’s visually stunning. Those layers just scream impressive summer vibes for any party.
- The flavor is pure, bright strawberry mixed with cool, vanilla cream. It’s the ultimate **Chilled Creamy Strawberry Recipe**.
Honestly, after trying this **Simple Strawberry Delight**, I was hooked. You don’t need to stress about burning edges or checking internal temperatures. It just works!
Quick Prep Time for Maximum Enjoyment
We’re talking maybe 25 minutes of actual work before it goes into the fridge. That’s it! Think about it—while your oven preheats for a normal cake, you could have the crust set and the cream layer mixed up for this dessert. It’s perfect for those last-minute gatherings.
Perfect Texture: Creamy and Light
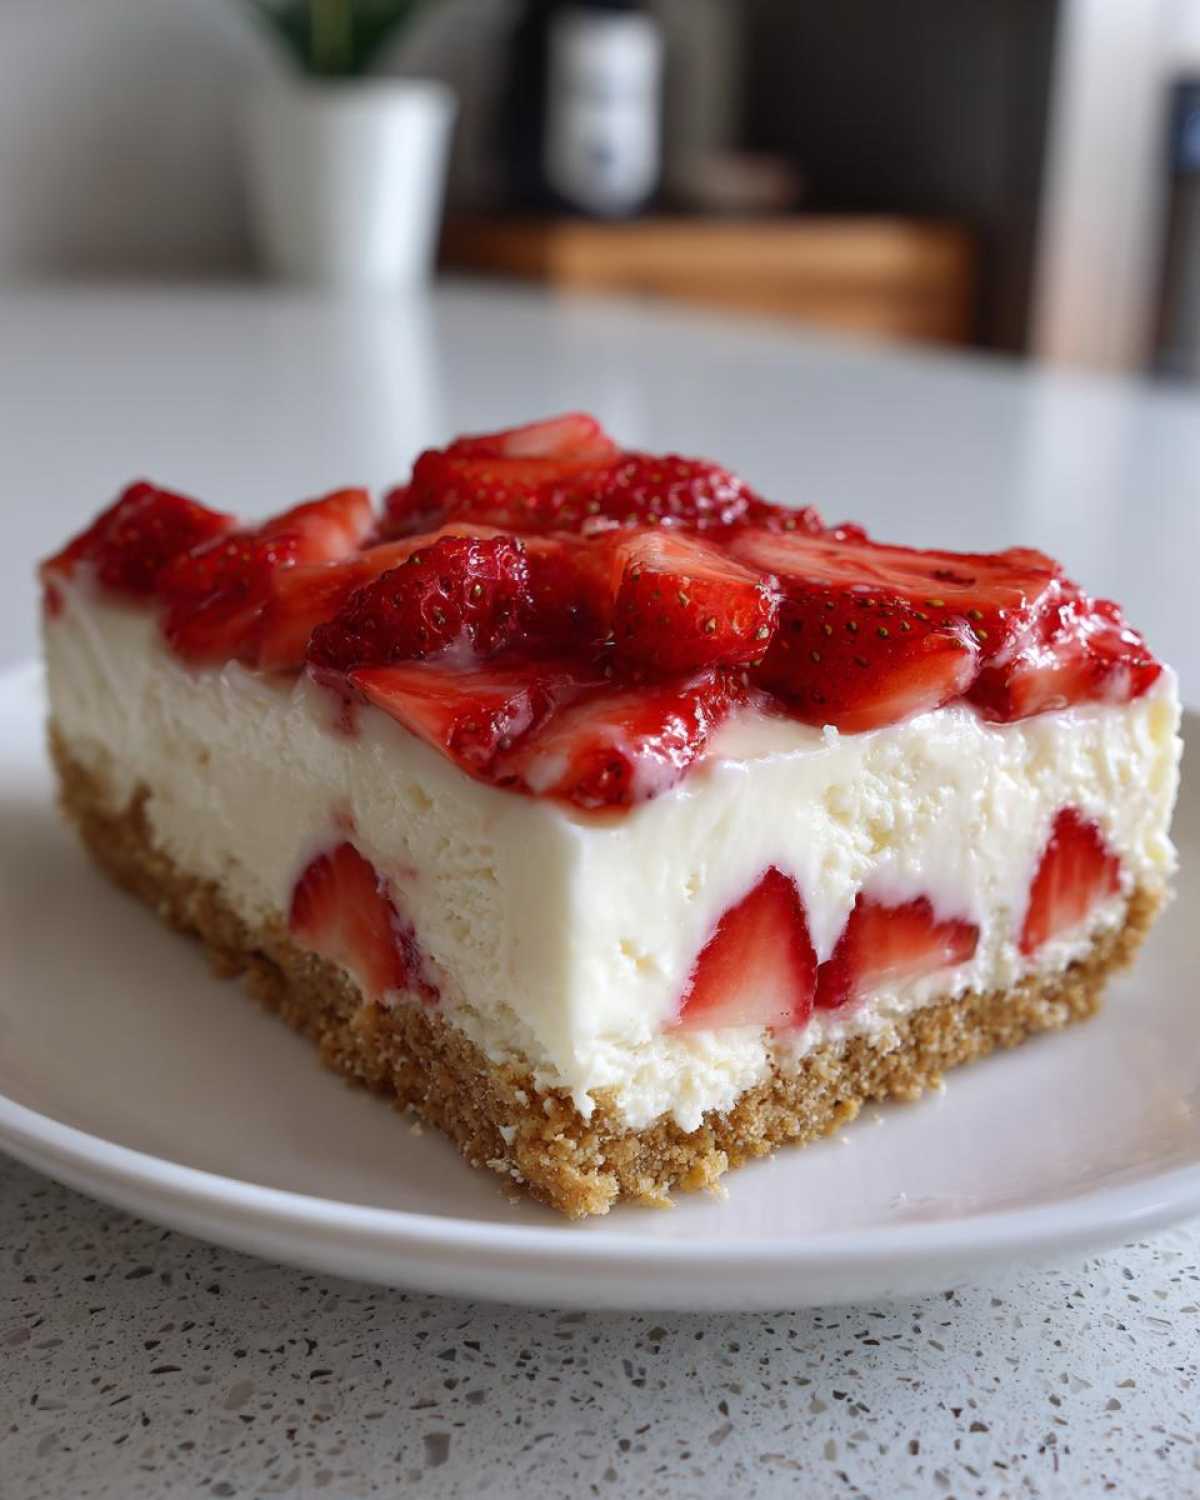
This is where the ‘Heaven’ part comes in. You get that fantastic buttery crunch from the crust—kind of like a graham cracker cloud—followed by the unbelievably smooth, airy cream filling. It melts in your mouth! It’s why I call this a **Quick Strawberry Cream Delight**; it satisfies that craving for something rich without the heaviness of a true baked cheesecake.
Essential Ingredients for No-Bake Strawberry Heaven Dessert
Okay, grab your shopping list because this is where the magic starts! For this **No-Bake Strawberry Heaven Dessert**, we keep the ingredient list short and sweet, but prep details are everything. You want things just right, especially that cream cheese!
Because we aren’t baking, the temperature of your dairy products makes or breaks the cream layer. Remember, softened cream cheese is crucial—if it’s cold, you’ll end up with lumps, and nobody wants a lumpy heaven! If you’re looking for a really luscious layered treat that uses fruit beautifully, you should check out my recipe for a lemon berry trifle too!
- Graham Cracker Crumbs: You need 1 1/2 cups for that perfect base crunch.
- Granulated Sugar (for crust): 1/4 cup provides just enough sweetness to the crumb base.
- Unsalted Butter: 6 tablespoons, and they must be melted, so they bind those crumbs together.
- Cream Cheese: A full 8-ounce package, but please, please make sure it’s fully softened to room temperature.
- Powdered Sugar: 1 cup to sweeten that dreamy cream cheese layer.
- Vanilla Extract: Just 1 teaspoon to give everything a warm background note.
- Frozen Whipped Topping: You need a 12-ounce container, and it must be thawed first. If you make your own stabilized whipped cream, use about 3 cups equivalent!
- Fresh Strawberries: 2 cups, sliced beautifully. Freshness counts here for texture!
- Strawberry Glaze or Preserves (Optional): About 1/4 cup for a beautiful shiny top layer if you feel fancy.
Step-by-Step Instructions for Your Layered Strawberry Dessert No Oven
Alright, this is where we stop talking and start building our tower of deliciousness! Since this is a **Layered Strawberry Dessert No Oven**, technique is all about patient layering and gentle mixing. We want defined layers, not a strawberry-flavored mudslide, right?
Just keep in mind: the final setting time is non-negotiable. Chilling for a minimum of 4 hours is how this dessert earns its ‘Heaven’ status. If you skimped on chilling time, you’ll end up with a soupy mess, and trust me, that’s not heavenly! Don’t forget to check out some of my other quick recipe ideas on my blog while you wait for the magic to happen!
Preparing the Crumb Crust Base
First things first, we build the foundation. In a medium bowl, get your graham cracker crumbs and the 1/4 cup of sugar mixed well. Then, pour in that melted butter and stir it all up until every crumb looks perfectly coated. It should look like wet sand—that’s how you know the butter did its job!
Press this mixture firmly into the bottom of your 9-inch pie dish or 8×8 pan. Here’s my secret tip for a professional-looking base: grab a flat-bottomed measuring cup—like a half-cup measure—and use the bottom of it to press the crumbs down really evenly. That makes for a clean slice later!
Pop that crust into the fridge for at least 15 minutes. That chill time really helps it firm up before we introduce the wet layers.
Creating the Cream Cheese Filling for No-Bake Strawberry Heaven Dessert
This is the most important mixing step, so grab your paddle attachment or just use a good sturdy hand mixer! Beat that softened cream cheese until it is absolutely, completely smooth. I mean velvety smooth—no lumps allowed for this **No-Bake Strawberry Heaven Dessert**!
Once the cream cheese is happy, slowly beat in the powdered sugar and the vanilla extract until it gets light and fluffy. Now, for the crucial part to keep that airy texture: take your thawed whipped topping and gently *fold* about half of it into the cream cheese mixture with a spatula. Don’t stir aggressively! We are incorporating air, not deflating it. Keep folding until just combined. See? Perfectly smooth!
Assembling and Finishing the Quick Strawberry Cream Delight
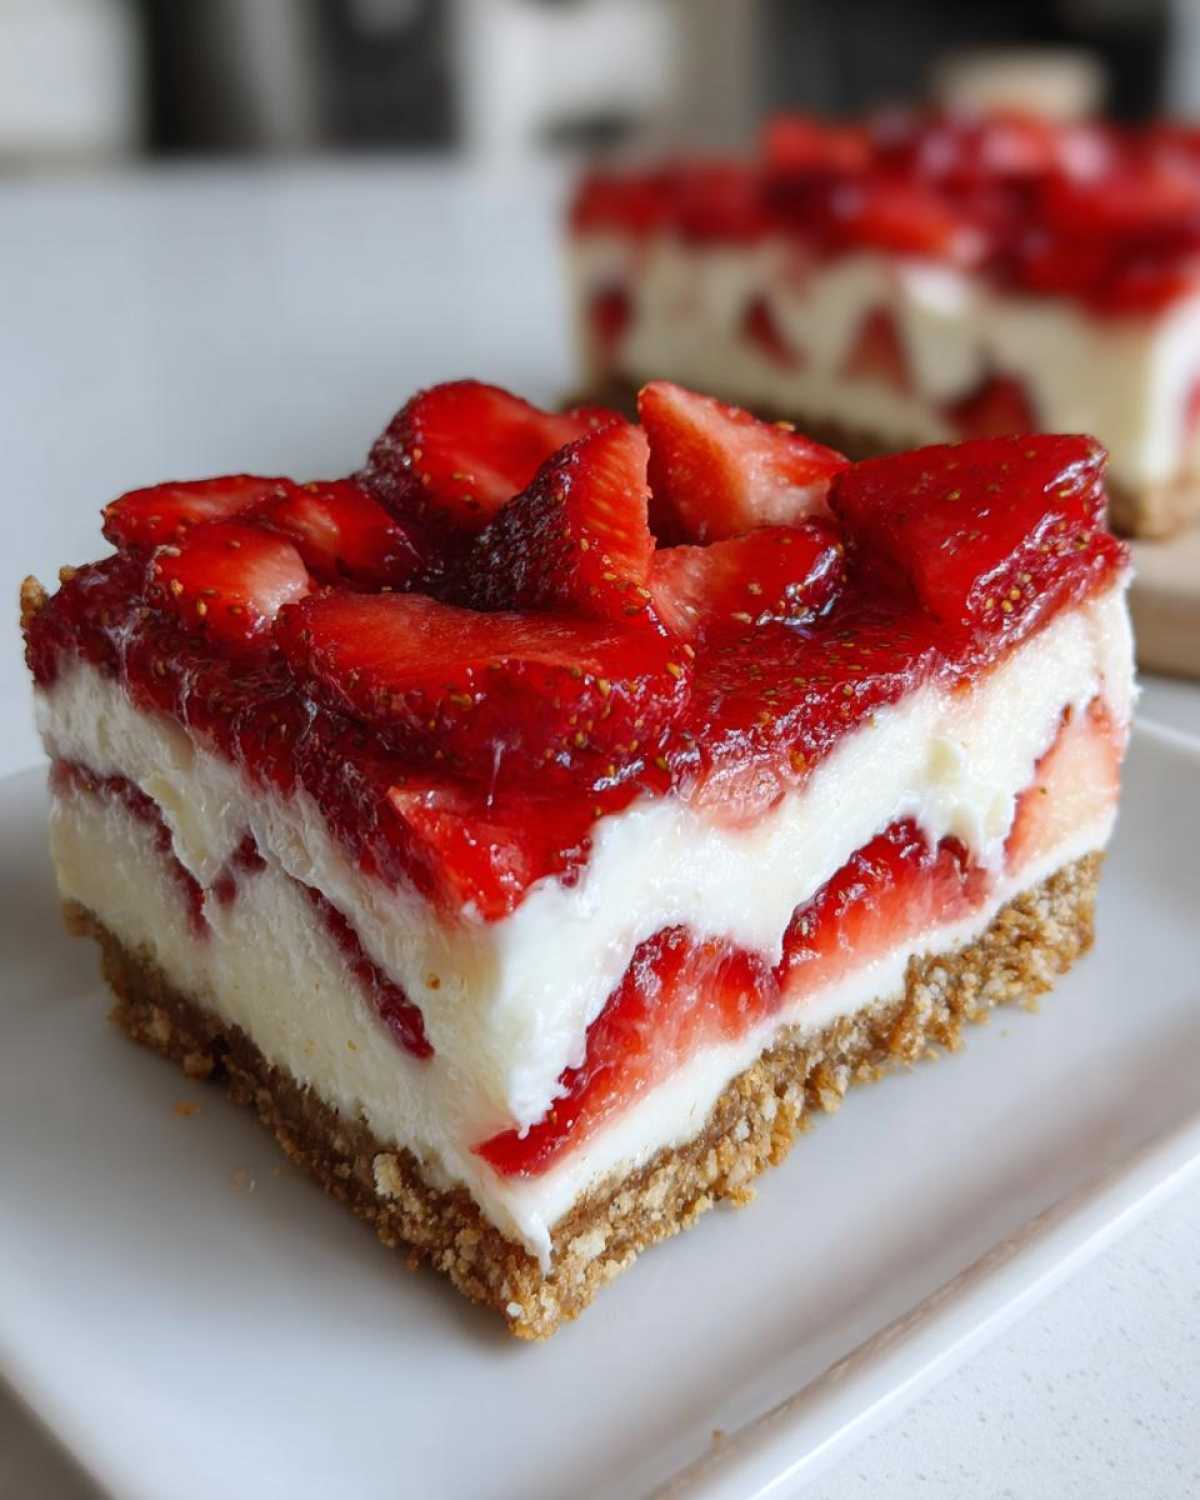
Time to layer! Take your chilled crust out of the fridge. Spread half of that gorgeous cream cheese mixture evenly over the crumbs. Then, arrange half of your beautiful sliced fresh strawberries right on top of that first cream layer.
Next up, carefully spread the remaining cream cheese mixture over all those strawberries. Try not to push down too hard, or the layers will start to mingle! Top that second cream layer with the rest of your fresh strawberries. If you’re going the extra mile, gently spoon or drizzle that optional strawberry glaze or preserves right over the top layer of berries. That little bit of shine really elevates this **Quick Strawberry Cream Delight**!
Once it’s all stacked up, cover the dish loosely and send it straight to the refrigerator. Remember, it needs at least 4 hours to set up properly! Patience is key here for the structure.
Tips for Success Making the Best No Bake Strawberry Dessert
Getting this **Best No Bake Strawberry Dessert** right is all about respecting the cold and the thaw! My biggest piece of advice, which I learned the hard way, is about that cream cheese. I mentioned it before, but seriously, if that block isn’t soft like room temperature butter, you’ll get tiny, frustrating lumps in your filling that baking usually hides. Don’t let that happen!
Also, while this recipe is naturally no-bake, I sometimes cheat, especially if I’m serving it right away. If you want a really sturdy crust—like professional-grade sturdy—you can pop that crust into a 350°F oven for about 8 minutes. Just make sure it’s completely cooled before you start layering. If you want to read about another great crust technique, check out my post on apple pie crumb bars!
Finally, don’t skimp on the chilling time. Four hours is the minimum. If you rush it, your beautiful layers won’t hold their shape when you try to scoop a serving. We need that good, solid chill!
Ingredient Notes and Substitutions for No-Bake Strawberry Heaven Dessert
I want you to feel totally confident making this **No-Bake Strawberry Heaven Dessert**, so let’s talk about those little swaps you can make if your pantry is looking a bit different than mine! If you run out of graham crackers, don’t panic. You can absolutely use vanilla wafers instead. You’ll still get that buttery, sweet crunch that works so well as the base for this creamy dessert.
If you like a little wake-up call in your sweetness—you know, cutting through that richness—I totally endorse adding lemon juice! You can swap out about 1/4 cup of that powdered sugar in the cream cheese layer for fresh lemon juice. It gives the whole dessert a tang that pairs beautifully with the strawberries. It makes it feel even lighter somehow.
Now, let’s talk about that whipped topping. Whether you use store-bought or make your own homemade whipped cream, the temperature matters! It needs to be completely thawed, but it should still feel nice and cold when you fold it in. If it gets too warm, it gets runny, and then your filling loses all that beautiful volume we worked so hard to create. We want fluffy clouds, not thin syrup!
Serving Suggestions for Your Creamy Strawberry Dessert Idea
Once this beauty has set up, serving it is almost as fun as making it! Because this **Creamy Strawberry Dessert Idea** is already so rich and satisfying, you don’t need much fuss on the side. A simple, crisp mint leaf tucked right into the top layer of glaze looks gorgeous and adds a tiny fresh pop.
If you’re prepping this for a big crowd, serving slices directly from the 8×8 dish works great for that rustic look. For something a little fancier, try scooping it into individual parfait glasses before chilling. They look elegant, and everyone gets a perfect crust-to-filling ratio in every glass! If you prefer a fancier chilled dessert recipe, you might love my mint pots de creme next time!
Storage and Reheating Instructions for No Bake Summer Treat
This **No Bake Summer Treat** is truly best enjoyed cold, straight from the fridge. Since we didn’t use any oven magic here, storage is all about keeping things properly chilled to maintain that integrity. You need to cover your dish tightly once it’s set—plastic wrap works great, but make sure it doesn’t actually touch the whipped topping layer, or you’ll get those weird damp spots.
It keeps wonderfully in the refrigerator for up to three or maybe four days if you’ve made it with fresh fruit. The crust might soften up a tiny bit on day three, but the filling stays pretty firm and delicious. I find the flavor actually deepens subtly overnight, which is a nice bonus!
Now, here’s the most important thing because this is a no-bake recipe: You absolutely cannot reheat this. I mean it! There’s no oven, no microwave—if you try to warm this up, you’ll just end up with a sweet, strawberry-flavored puddle of melted cream cheese and topping. Keep it chilled! If you’re looking for a dessert that *is* good warm, you should really master my crumb bar recipe, but this one is strictly for cooling down!
Frequently Asked Questions About No-Bake Strawberry Heaven Dessert
I know sometimes you just have a quick question pop up while you’re gathering ingredients, so let’s clear up a few things about making this perfect **Layered Strawberry Dessert No Oven**!
Can I use fresh strawberries instead of frozen in this No Bake Strawberry Delight?
Oh, absolutely, and frankly, I highly recommend it! Fresh strawberries work so much better for texture and color in this recipe. When I make my standard **No Bake Strawberry Delight**, I always grab fresh ones. If, for some reason, you only have frozen berries on hand, you must thaw them completely and drain off every last bit of excess liquid before you try to layer them. If you don’t drain them, that extra moisture will seep into your cream layer while it chills, and that’s how you get a soggy crust!
How far in advance can I prepare this Simple Strawberry Dessert for Parties?
This is such a fantastic **Simple Strawberry Dessert for Parties** because you can totally bake ahead! I usually find that making it the day before serving is ideal—that gives it a good solid 12 to 24 hours to really set up and for those flavors to marry up nicely in the fridge. It holds its texture really well, unlike some cakes that get dry. As long as it stays covered in the refrigerator, it’s perfect right up until you’re ready to serve it!
If you’re wondering more about the folks behind these trusty recipes, feel free to check out our story!
Estimated Nutritional Snapshot for this No Bake Strawberry Heaven Dessert
Now, I always feel a little awkward talking numbers when we’ve just been talking about pure, delicious joy, but I know some of you track things closely! So, here is the estimated nutritional breakdown for one slice of this spectacular **No Bake Strawberry Heaven Dessert**. Remember, since we aren’t baking anything, these numbers can shift a bit based on the brand of whipped topping or the exact size of your homemade crust compression!
For full transparency regarding my sources and how these numbers are calculated, you can always peek at my full nutrition disclaimer page. We want everyone to bake confidently!
- Serving Size: 1 slice
- Calories: Approximately 310
- Sugar: About 28g (Those lovely strawberries and powdered sugar add up!)
- Fat: Roughly 18g
- Protein: A light 3g
- Carbohydrates: Around 35g
See? It’s a rich treat made simply! That’s the beauty of cutting out the oven time—less chance for evaporation and concentration, which keeps the sugar slightly more balanced than some baked goods. Enjoy every spoonful!
PrintNo-Bake Strawberry Heaven Dessert
Make this simple, layered, chilled dessert featuring a crumb crust, creamy filling, and fresh strawberries. It requires no oven time.
- Prep Time: 25 min
- Cook Time: 0 min
- Total Time: 4 hr 25 min
- Yield: 8 servings
- Category: Dessert
- Method: Chilling
- Cuisine: American
- Diet: Vegetarian
Ingredients
- 1 1/2 cups graham cracker crumbs
- 1/4 cup granulated sugar (for crust)
- 6 tablespoons unsalted butter, melted
- 1 (8 ounce) package cream cheese, softened
- 1 cup powdered sugar
- 1 teaspoon vanilla extract
- 1 (12 ounce) container frozen whipped topping, thawed (or equivalent homemade whipped cream)
- 2 cups fresh strawberries, sliced
- 1/4 cup strawberry preserves or glaze (optional topping)
Instructions
- Prepare the crust: Mix graham cracker crumbs, 1/4 cup granulated sugar, and melted butter in a medium bowl until combined. Press the mixture firmly into the bottom of a 9-inch pie dish or an 8×8 inch baking dish. Chill the crust for at least 15 minutes.
- Make the cream cheese layer: In a separate bowl, beat the softened cream cheese until smooth. Gradually beat in the powdered sugar and vanilla extract until the mixture is light and fluffy.
- Fold in the whipped topping: Gently fold half of the thawed whipped topping into the cream cheese mixture until just combined. Do not overmix.
- Layer the dessert: Spread half of the cream cheese mixture evenly over the chilled crust. Arrange half of the sliced fresh strawberries over the cream cheese layer.
- Add the second layer: Carefully spread the remaining cream cheese mixture over the strawberries. Top with the remaining sliced strawberries.
- Finish and chill: Spread the remaining whipped topping over the top layer of strawberries. If using, gently spoon or drizzle the strawberry preserves or glaze over the whipped topping.
- Refrigerate the dessert for at least 4 hours, or until firm, before slicing and serving.
Notes
- For a firmer crust, bake the crust at 350°F for 8 minutes, then cool completely before proceeding.
- If you prefer a tangier flavor, substitute 1/4 cup of the powdered sugar with lemon juice in the cream cheese mixture.
- Use vanilla wafers instead of graham crackers for a different crust flavor.
Nutrition
- Serving Size: 1 slice
- Calories: 310
- Sugar: 28g
- Sodium: 180mg
- Fat: 18g
- Saturated Fat: 10g
- Unsaturated Fat: 8g
- Trans Fat: 0g
- Carbohydrates: 35g
- Fiber: 1g
- Protein: 3g
- Cholesterol: 45mg