

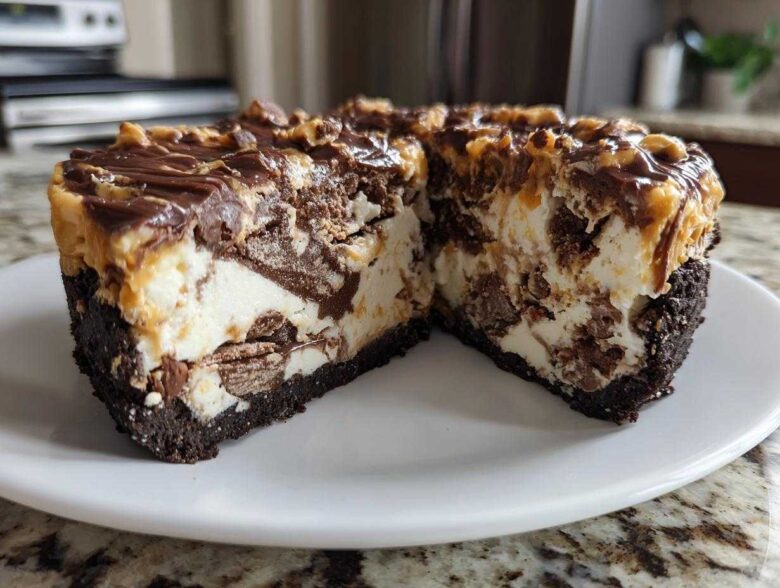
Oh, friend, when the weather gets warm, or sometimes honestly, just when the craving hits—which for me is usually Tuesday afternoon—there is nothing that beats digging into a truly decadent frozen treat. And I mean *truly* decadent. Forget those flimsy store-bought options; we are making the ultimate No-Churn Peanut Butter Fudge Ice Cream Pie with Oreo Crust. Trust me on this one. I have messed up countless frozen desserts, but this specific formula, using just a few key ingredients and zero ice cream maker time, has been my rock solid winner for summer parties. It’s creamy, it’s crunchy, and that fudge swirl? Forget about it! If you love deep peanut butter flavors, you should see the no-bake peanut butter cup cheesecake I made last month, but this pie right here? This is the perfect creamy dream.
Why You Will Love This Peanut Butter Fudge Ice Cream Pie
Seriously, what’s not to adore? This pie is pure indulgence without the fuss. You get that perfect crunch from the Oreo crust that just melts right into the creamy filling. That rich peanut butter flavor plays so nicely with the ribbons of deep chocolate fudge.
- It’s completely no-churn—no special equipment needed! This easy ice cream pie recipe is a lifesaver.
- The texture contrast between the dense crust, fluffy filling, and thick fudge swirl is heaven!
- It’s the ultimate make-ahead dessert, perfect for when you need a showstopper ready to go.
Essential Ingredients for the Perfect Peanut Butter Fudge Ice Cream Pie
Listen, when you are relying on something to freeze properly without an ice cream maker, the quality of your ingredients matters! I can’t stress enough that you need to follow these measurements exactly; this is where the magic happens. If you want a really rich flavor that stands up to the cold, check out my recipe for fudgy peanut butter chocolate chip cookies—it uses similar flavor builders!
For the Oreo Crust
This is the crunchy foundation, so don’t skimp on the butter!
- 1 1/2 cups Oreo cookie crumbs (You know, just crush up a whole sleeve!)
- 6 tablespoons unsalted butter, melted
For the No-Churn Peanut Butter Ice Cream Base
The secret to the ‘no-churn’ texture is having one component super cold and one component soft. I learned this the hard way the first time!
- 2 cups heavy whipping cream, must be cold
- 1 (14 ounce) can sweetened condensed milk, must be cold
- 1 cup creamy peanut butter, must be room temperature
- 1 teaspoon vanilla extract
For the Fudge Swirl Layer
This adds that gorgeous deep color and texture when you cut into it. The slight warming is key so it flows easily, but not so hot that it melts your base!
- 1/2 cup chocolate fudge sauce, warmed slightly
Step-by-Step Instructions for Your Peanut Butter Fudge Ice Cream Pie
Okay, now for the fun part! We are making layers of deliciousness here, so take your time, especially when folding everything together. Don’t rush the freeze time, because that is absolutely crucial for a great frozen peanut butter pie. If you’ve mastered the crust, the rest is just careful assembly!
Assembling and Freezing the Crust
First up, the crust! Mix those Oreo crumbs and the melted butter until everything looks like wet, dark sand. Press that mixture firmly into your 9-inch pie plate. I like to use the bottom of a glass to really compact it on the bottom and push it up the sides. Pop that into the freezer for a quick 15 minutes to set up while you start on the creamy part.
Creating the Creamy Peanut Butter Ice Cream Base
Grab your cold, cold heavy cream and whip it until you get stiff peaks. I mean, when you pull the mixer out, the peaks should stand tall and not droop at all—that’s how you get that fantastic texture. In a separate bowl, whisk your room temperature peanut butter with the cold condensed milk and vanilla until it is super smooth. Now, the secret is folding! Gently fold about a third of that whipped cream into the peanut butter mix just to loosen it up. Then, very carefully fold in the rest of the whipped cream. Stop folding the second you see no white streaks left. We need to keep all that air in there!
Layering and Swirling the Peanut Butter Fudge Ice Cream Pie
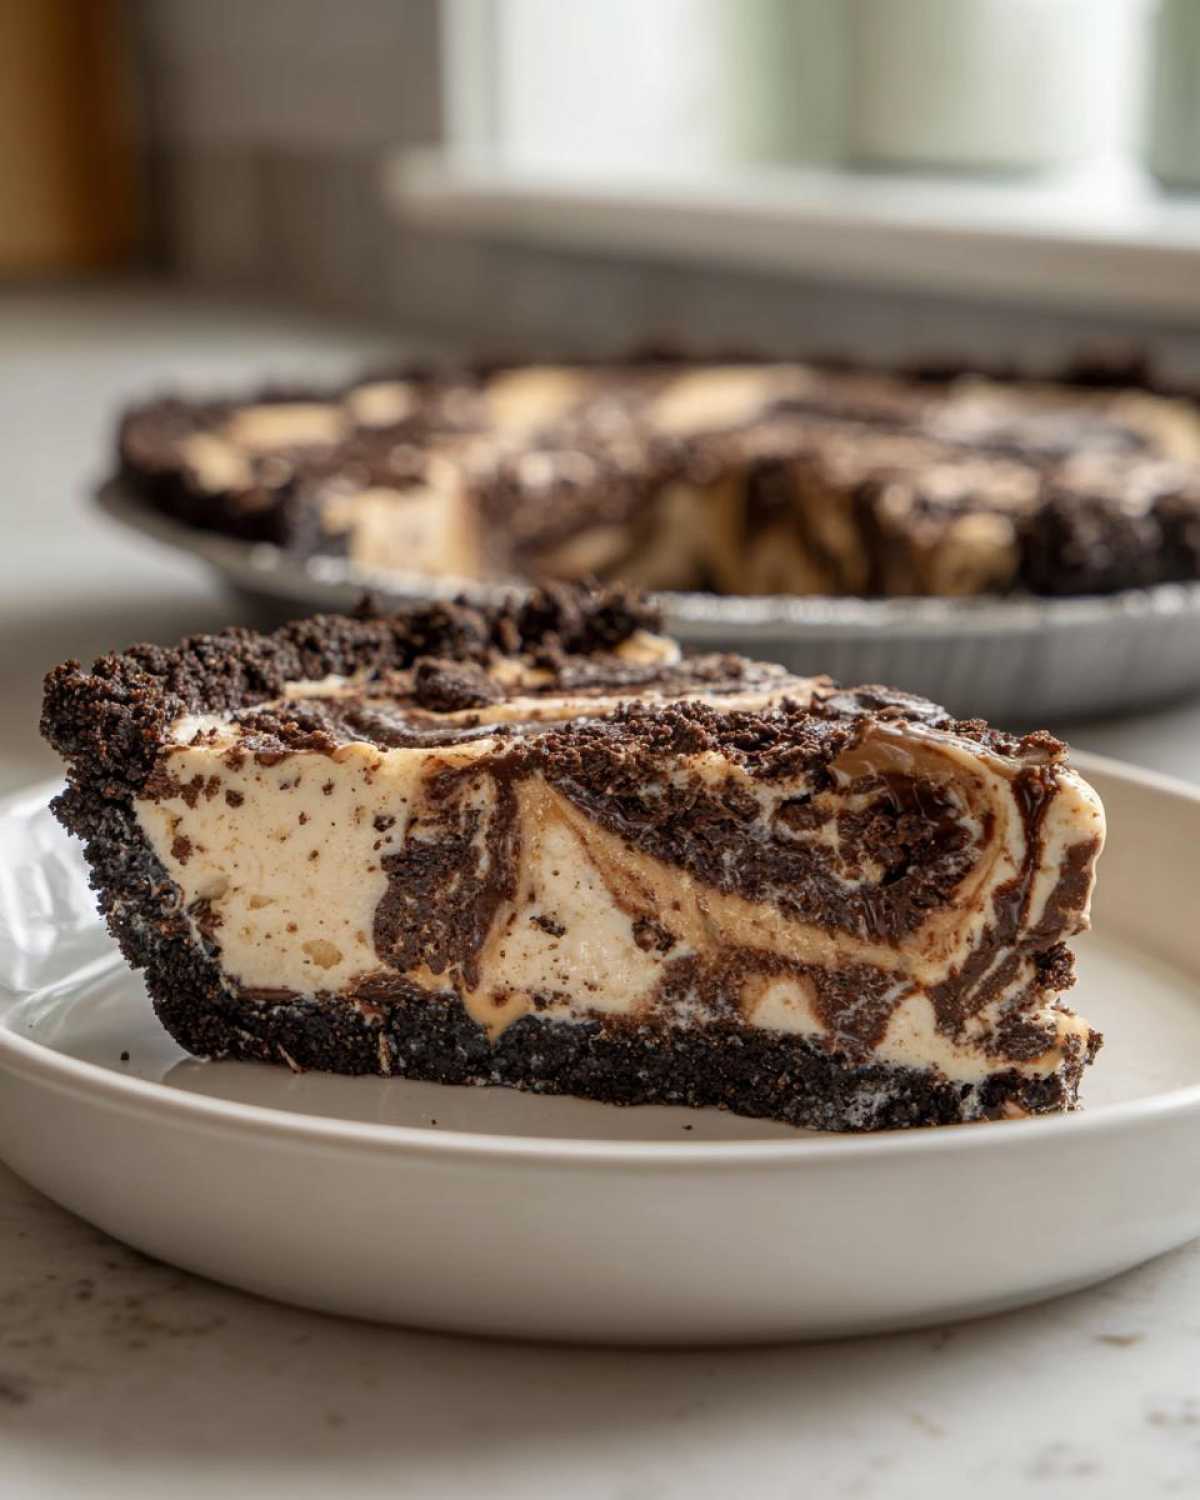
Time to bring it all together! Scoop about half of your peanut butter ice cream mixture into that chilled crust. Now, drizzle half of your slightly warmed fudge sauce over the top. Grab a butter knife and gently go through the filling just once or twice to make a pretty swirl. Don’t mix it all up! Repeat that process: spread the rest of the peanut butter mixture over the top, drizzle the rest of the fudge, and give it one last gentle swirl. Cover it up tightly and freeze this beauty for a minimum of six hours. Honestly, overnight is always best for a truly firm, sliceable result.
Expert Tips for the Best Peanut Butter Fudge Ice Cream Pie Results
Okay, now that you’ve got this glorious, cold monster chilling in the freezer, we need to talk about presentation! Getting this pie out of the pan and cutting those perfect wedges can be tricky, especially when it’s rock solid. I’ve got a couple of secrets from all my attempts that made my best peanut butter desserts look professional every time.
My biggest tip, which I copied from my mother, is to use a springform pan instead of a regular pie dish if you plan on topping it heavily. It just pops right out! But whether you use a springform or a standard plate, the slicing technique is universal.
Achieving a Clean Slice Every Time
For the cleanest slice possible—especially since this is a frozen dessert—the knife has to be sharp and hot. Don’t just grab a regular knife! Run your sharpest chef’s knife under really hot water for about 30 seconds. Dry it quickly with a towel so there’s no dripping water in the pie, and then—*whoosh*—slice right through the pie. Wipe the blade clean and reheat it for every single cut. It makes all the difference in keeping those beautiful fudge swirls visible!
Ingredient Notes and Substitutions for Your Frozen Peanut Butter Pie
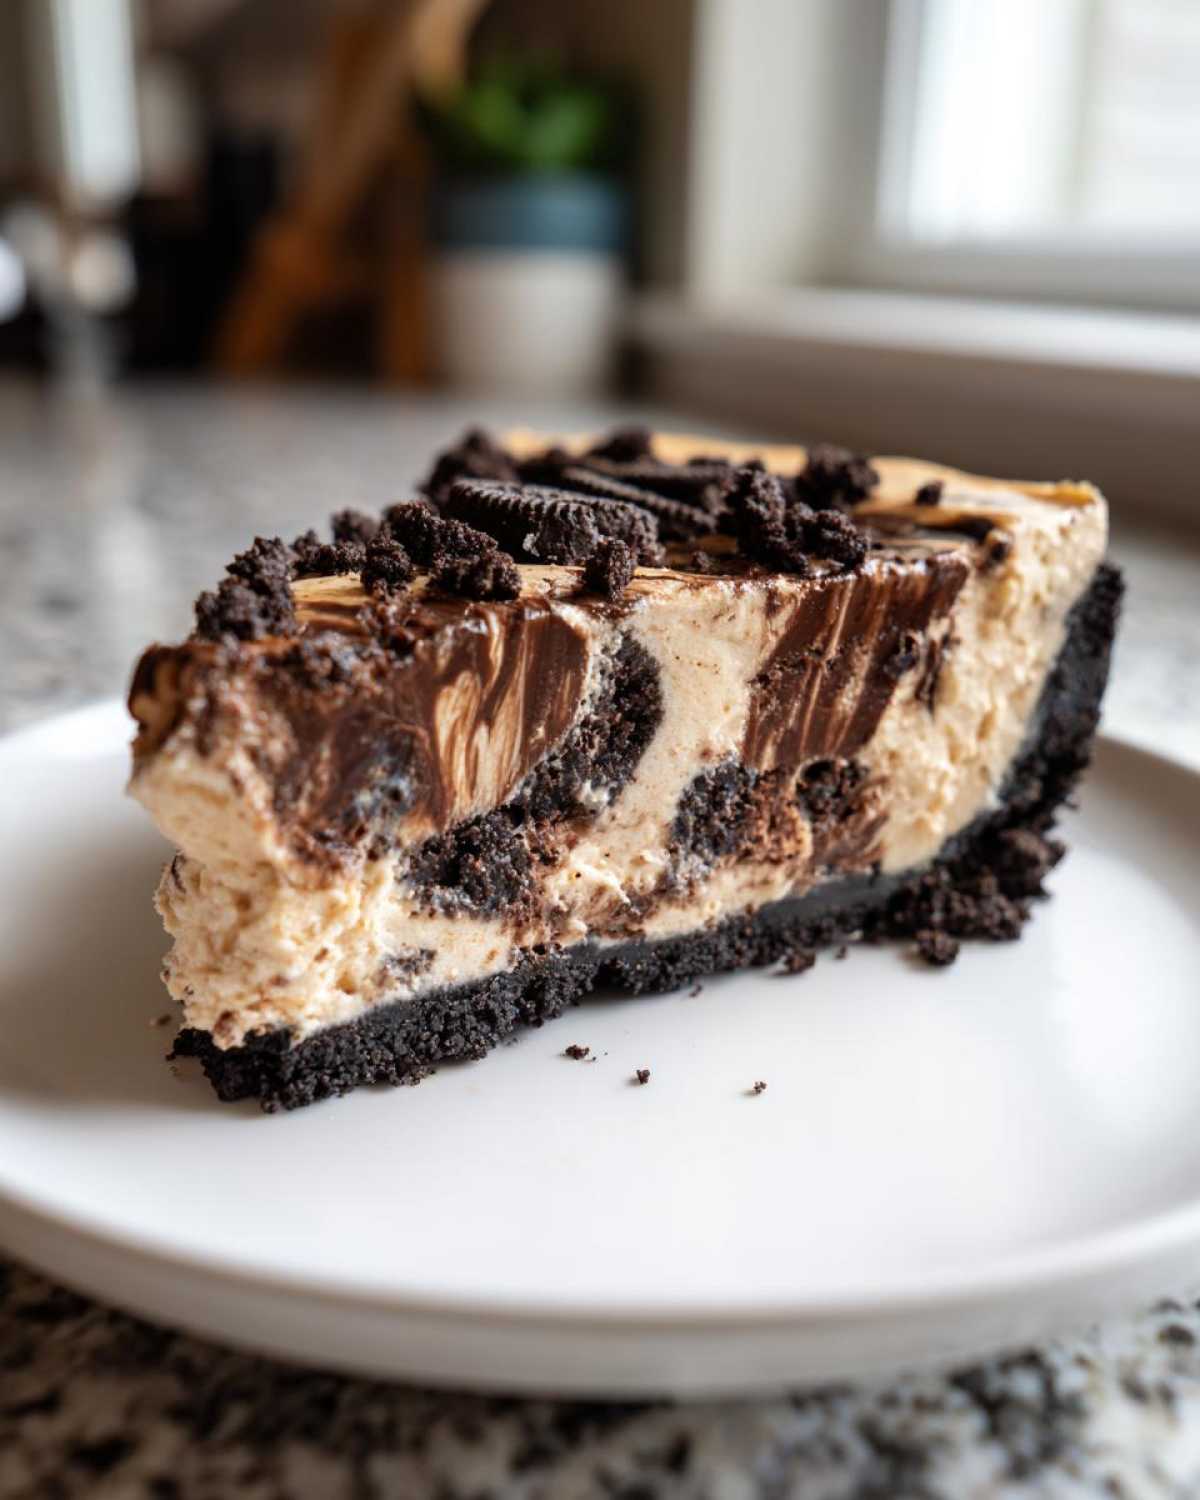
We need to talk about the ingredients for a second because this isn’t a baked good where you can easily hide a mistake. Since we aren’t cooking anything, the texture relies 100% on how we combine these cold and room-temp items. If you want that ribbon of fudge to be smooth and not just chunky bits suspended in the cream, the temperature of your main flavor player is key!
The absolute most important thing here is your peanut butter. If you grab the jar straight from the fridge? Forget about it, you’ll end up with hard lumps in your otherwise fluffy ice cream base. It needs to be cooperative! Warm that peanut butter up gently for about 15-20 seconds in the microwave—just until it’s easily pourable and smooth. When you start mixing it with the cold condensed milk, it will combine into that flawless texture needed for a rich, dreamy homemade fudge pie base.
Now, what if you’re like my brother-in-law and you hate Oreos? Totally fair! While the chocolate cookie crust is my personal favorite because it matches that fudge so well, you absolutely have options. If you need a slightly different flavor profile, just swap out the Oreos for graham cracker crumbs. Use the same amount, mix it with the same melted butter, and press it in the same way. It gives you a slightly sweeter, less intense chocolate flavor that lets the peanut butter shine through even more. Whichever crust you choose, just remember to freeze it first!
Storage and Reheating Instructions for Creamy Ice Cream Pie
Because this amazing No-Churn Peanut Butter Fudge Ice Cream Pie takes a little bit of effort (mostly waiting!), we definitely want to make sure we store it correctly so it tastes just as fantastic next week as it does tonight! Since this is a frozen dessert, the primary enemy is air, which means freezer burn will sneak in if we aren’t careful.
Once your pie is completely frozen solid—I mean hard as a rock—you need to cover it incredibly well. I use plastic wrap pressed directly against the surface of the pie first—think of it as a protective seal right over the fudge swirl. Then, you wrap the whole pie plate tightly in aluminum foil or place it inside a large, airtight container. This double layer keeps any weird freezer smells out and locks in all that creamy texture.
When stored this way, your summer frozen pie is good for about two to three weeks! Honestly, mine usually doesn’t last that long, but it definitely freezes beautifully for make-ahead situations. Make sure you pop it out of the freezer about 5 to 10 minutes before you plan to cut it. If you try slicing it rock-solid, you’ll just end up with crumbs everywhere, and nobody wants that messy situation! That short thaw time just softens the edges enough to let your sharp knife glide right through. Easy peasy!
Serving Suggestions for Your Decadent Peanut Butter Desserts
We’ve done the hard work! We’ve got the crunch, the creaminess, and that perfect fudge ribbon running through the whole thing. But just like Grandma always said, you can’t serve something beautiful without a little flourish on top, right? Since this No-Churn Peanut Butter Fudge Ice Cream Pie is already so rich and packed with flavor, we want toppings that complement it without competing or melting everything into a puddle.
I usually keep things really simple because the pie itself is the star, but here are my favorite ways to dress it up when I’m feeling extra fancy for company. If you love going deep on the peanut butter theme, check out my guide to making decadent peanut butter desserts for more inspiration!
First, you absolutely cannot go wrong with a simple dollop of fresh whipped cream. Don’t buy the canned aerosol stuff unless you are in a real pinch—whipping your own heavy cream is so easy, and the texture is so much lighter and cleaner against the density of the pie. It acts like a cloud on top!
For crunch, the way to go is with some chopped peanuts. I like to dry toast mine lightly in a little skillet for just two minutes until they smell amazing—it really wakes up the oils and makes them pop! Just sprinkle them right over the whipped cream dollop. It adds a beautiful visual contrast, too.
And if you want to go *all in* on the chocolate and peanut butter theme, warm up just a tiny bit more of that chocolate fudge sauce we used inside the pie. Drizzle it right over the top of the finished slices just before serving. It gives it that professional look, and when you use that hot knife trick we talked about, those drizzles look just incredible against the pale peanut butter ice cream.
My kids always vote for tiny mini peanut butter cups sprinkled on top. I mean, why not? It just makes it look even more over-the-top decadent, and for a party, you want people to ooh and aah when it comes out of the freezer!
Frequently Asked Questions About Peanut Butter Fudge Ice Cream Pie
I get so many messages asking about adapting this recipe, and honestly, it’s one of the best parts of sharing these family-friendly formulas! Since this is a no-churn dessert, people often wonder about the best way to handle the texture and timing. If you’re looking for more inspiration after conquering this, you should check out my full collection of peanut butter dessert recipes!
Can I make this Peanut Butter Fudge Ice Cream Pie ahead of time?
Oh, you absolutely can, and you should! That’s the best part about this Frozen Peanut Butter Pie. Because it needs that long freeze time—at least six hours, but overnight is truly ideal—it’s tailor-made for making ahead. You can put this pie together two or three days before you need it. Just make sure you wrap it really well to prevent any ice crystals from forming on top of that precious fudge swirl. It’s the perfect potluck dessert because you just pull it out of the freezer and let it sit for ten minutes while you socialize!
What if I don’t have an electric mixer for the whipped cream?
I totally get it. Not everyone has a fancy stand mixer sitting on their counter! If you’re stuck without one when making this Creamy Ice Cream Pie, you have two options. Option one: Grab a big metal bowl and a sturdy whisk and just put your arm into it! It takes real elbow grease, maybe 8 to 10 minutes of serious whipping, but you can totally get those stiff peaks. It’s a good workout! Option two, if you want to cheat a little, is to substitute your whipped cream with 16 ounces of stabilized whipped topping, like Cool Whip, which you can just gently fold into the peanut butter mixture. It changes the texture slightly—it gets a little less airy—but it still makes a phenomenal No Bake Chocolate Peanut Butter Dessert!
How do I ensure the fudge layer stays swirled and doesn’t sink?
This is all about respecting the temperature differences when you layer! If you pour the fudge sauce when it’s piping hot, it will instantly melt the peanut butter base underneath it, and you’ll end up with a uniform, slightly marbled chocolate-peanut butter mixture instead of distinct swirls. We want that nice definition in our Fudge Layer Pie.
The rule is to let the fudge cool down just enough so that it’s still pourable and runny, but not hot to the touch—think warm bathwater temperature. Also, when you drizzle it, don’t dump it all in one spot! Spread that drizzle out over the surface before you swirl it with a knife. Remember, you only need to swirl once or twice down each line you create. If you keep messing with it, you’ll incorporate too much, and you lose that beautiful ribbon effect!
Estimated Nutritional Data for Peanut Butter Cream Pie
It’s always good practice to know what you’re digging into, especially with rich treats like this Peanut Butter Cream Pie. Please keep in mind that since we used standard measurements and room-temperature peanut butter, these figures are just great estimates for one slice. For the most accurate numbers for your specific brand of Oreos or fudge sauce, you’d have to run it through a nutritional calculator, but this gives you a solid ballpark!
- Serving Size: 1 slice
- Calories: 450
- Sugar: 40g
- Sodium: 250mg
- Fat: 28g
- Saturated Fat: 14g
- Trans Fat: 0g
- Carbohydrates: 45g
- Fiber: 2g
- Protein: 10g
- Cholesterol: 60mg
Yes, it’s a splurge, but that’s what the Best Peanut Butter Desserts are for, right? If you want to lighten it up slightly, you can use graham crackers instead of Oreos for the crust, which knocks the sugar and chocolate down just a tiny bit!
Estimated Nutritional Data for Peanut Butter Cream Pie
It’s always good practice to know what you’re digging into, especially with rich treats like this Peanut Butter Cream Pie. Please keep in mind that since we used standard measurements and room-temperature peanut butter, these figures are just great estimates for one slice. For the most accurate numbers for your specific brand of Oreos or fudge sauce, you’d have to run it through a nutritional calculator, but this gives you a solid ballpark! Don’t fret too much over these numbers; remember this pie is still much better for you than store-bought since we know exactly what we put in it!
- Serving Size: 1 slice
- Calories: 450
- Sugar: 40g
- Sodium: 250mg
- Fat: 28g
- Saturated Fat: 14g
- Trans Fat: 0g
- Carbohydrates: 45g
- Fiber: 2g
- Protein: 10g
- Cholesterol: 60mg
Yes, it’s a splurge, but that’s what the Best Peanut Butter Desserts are for, right? If you want to lighten it up slightly, you can use graham crackers instead of Oreos for the crust, which knocks the sugar and chocolate down just a tiny bit! You can also check out how I make a lighter version over at my peanut butter cream pie post if you’re trying to watch those numbers!
PrintNo-Churn Peanut Butter Fudge Ice Cream Pie with Oreo Crust
Make a rich, frozen pie featuring a crunchy chocolate cookie crust, creamy peanut butter ice cream, and a thick fudge swirl.
- Prep Time: 20 min
- Cook Time: 0 min
- Total Time: 6 hr 20 min
- Yield: 8 servings
- Category: Dessert
- Method: Freezing
- Cuisine: American
- Diet: Vegetarian
Ingredients
- 1 1/2 cups Oreo cookie crumbs
- 6 tablespoons unsalted butter, melted
- 2 cups heavy whipping cream, cold
- 1 (14 ounce) can sweetened condensed milk, cold
- 1 cup creamy peanut butter, room temperature
- 1 teaspoon vanilla extract
- 1/2 cup chocolate fudge sauce, warmed slightly
Instructions
- Prepare the crust: Mix the Oreo crumbs and melted butter until fully combined. Press the mixture firmly into the bottom and up the sides of a 9-inch pie plate. Freeze the crust for 15 minutes.
- Make the ice cream base: In a large bowl, whip the cold heavy cream with an electric mixer until stiff peaks form. Set aside.
- In a separate bowl, whisk together the cold sweetened condensed milk, peanut butter, and vanilla extract until smooth.
- Gently fold about one-third of the whipped cream into the peanut butter mixture to lighten it. Then, fold in the remaining whipped cream until just combined. Do not overmix.
- Pour half of the peanut butter ice cream mixture into the prepared crust. Drizzle half of the warmed fudge sauce over the top. Use a knife to gently swirl the fudge into the ice cream layer.
- Spread the remaining peanut butter mixture over the first layer. Drizzle with the remaining fudge sauce and create a final swirl pattern.
- Cover the pie plate tightly with plastic wrap. Freeze for at least 6 hours, or until completely firm.
- Before serving, let the pie sit at room temperature for 5 to 10 minutes for easier slicing. Slice and serve cold.
Notes
- For a cleaner slice, run a sharp knife under hot water and dry it before cutting each piece.
- You can substitute graham cracker crumbs for the Oreo crumbs if you prefer a less chocolatey crust.
- If your peanut butter is cold, warm it slightly in the microwave for 15 seconds to make it easier to mix into the condensed milk.
Nutrition
- Serving Size: 1 slice
- Calories: 450
- Sugar: 40
- Sodium: 250
- Fat: 28
- Saturated Fat: 14
- Unsaturated Fat: 14
- Trans Fat: 0
- Carbohydrates: 45
- Fiber: 2
- Protein: 10
- Cholesterol: 60