

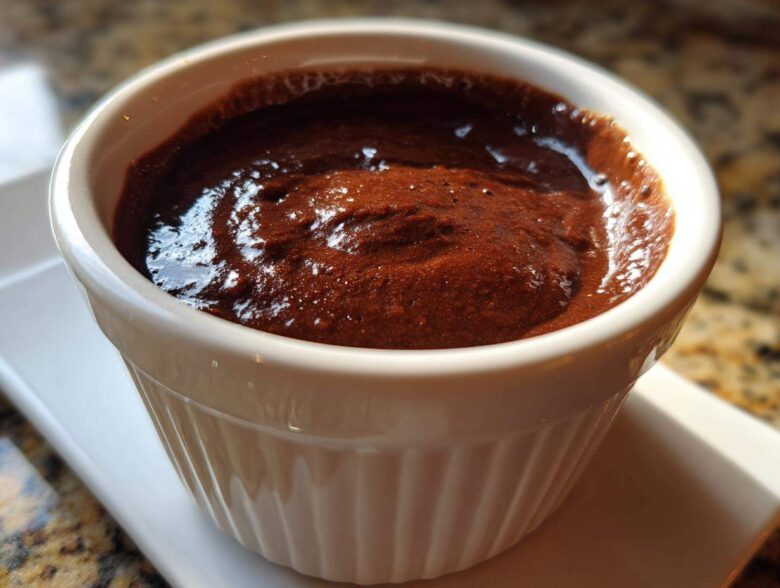
Okay, look, I’m going to be honest with you. That little plastic tub of chocolate pudding in the grocery aisle? It’s fine in a pinch, I guess. But the second you have this homemade chocolate pudding recipe from scratch cooling on the counter, you realize what you’ve been missing! Forget the weird stabilizers and that slightly manufactured taste. We are making the real deal here—a creamy chocolate pudding recipe so rich and velvety, it tastes like it took all day to make. But guess what? It’s actually a super handy, quick homemade dessert that comes together on the stovetop in less than 15 minutes of active cooking. Trust me when I say this is the best homemade chocolate pudding you will ever try. It’s my go-to comfort food dessert, and once you master this silky smooth pudding, you’ll never look back!
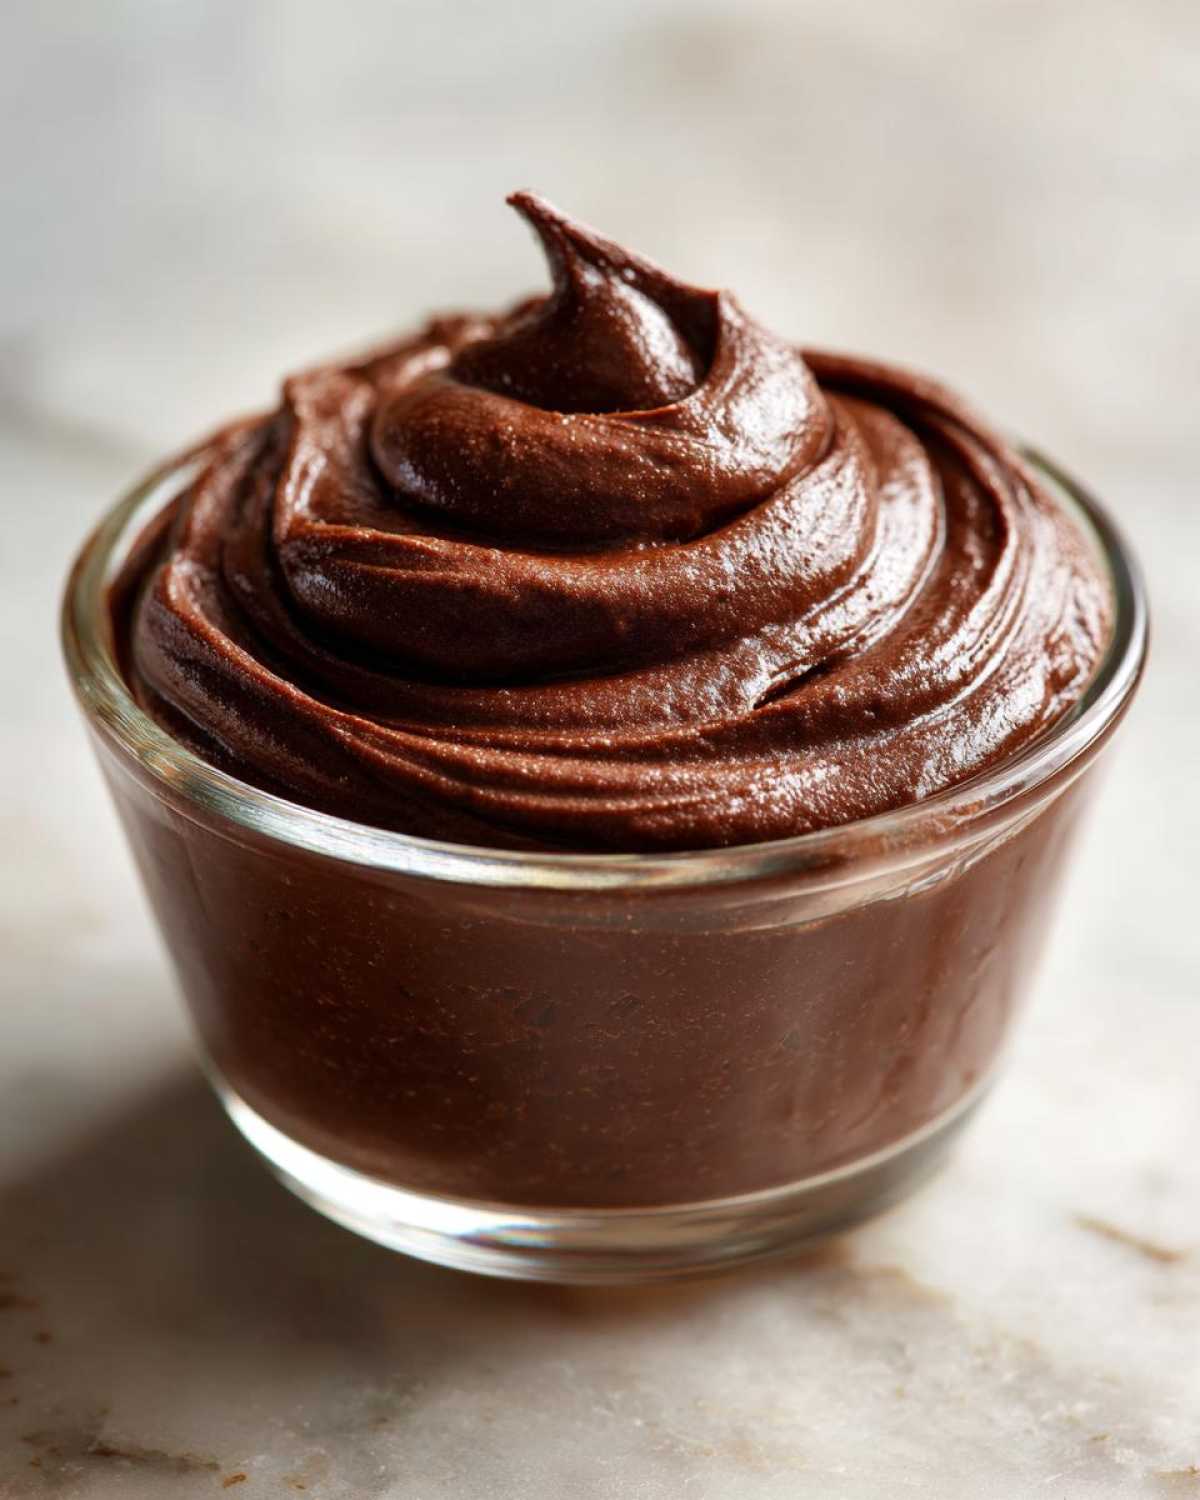
Why This Homemade Chocolate Pudding Recipe is the Best
When you’re making a decadent chocolate treat at home, texture is everything. Forget that gummy stuff! This recipe gives you:
- That incredibly velvety chocolate pudding mouthfeel that melts instantly.
- A deep, non-wimpy rich chocolate dessert flavor, thanks to the good cocoa.
- It’s a true easy stovetop pudding—just whisk and watch the magic happen.
It’s pure nostalgia, made better. If you want the foolproof method for making the best chocolate dessert ever, you’ve landed in the right spot. You can see more of my kitchen philosophy over at my main blog page!
Ingredients Needed for the Ultimate Homemade Chocolate Pudding
You won’t believe how many of these components are likely already sitting in your pantry! This chocolate pudding recipe from scratch relies on simple dairy and baking standards to achieve that perfect, rich consistency. It’s proof that you don’t need fancy equipment to make chocolate pudding at home. We’re using just a handful of ingredients for this classic chocolate pudding.
- 2/3 cup granulated sugar
- 1/4 cup unsweetened cocoa powder (Dutch process recommended!)
- 1/4 cup cornstarch (This is our secret thickener!)
- 1/4 teaspoon salt
- 2 cups whole milk
- 2 large egg yolks
- 2 tablespoons unsalted butter
- 1 teaspoon vanilla extract
Ingredient Notes and Substitutions for Homemade Chocolate Pudding
Listen up, because the quality of your cocoa matters for this rich chocolate dessert. I strongly recommend Dutch process cocoa if you can find it. It gives you that beautiful, dark color and a smoother, less acidic chocolate punch compared to natural cocoa. If you absolutely must substitute the whole milk, any kind of dairy milk will work, but stick to 2% or higher to guarantee that fantastic body. Using skim milk results in a much thinner pudding, and nobody wants that!
Step-by-Step Instructions for Easy Homemade Chocolate Pudding
I’m going to walk you through this, and I promise you, once you get the hang of the stovetop action, this becomes a go-to simple dessert recipe. Grab a medium saucepan; this is where all the magic for this dessert from scratch happens. First things first, mix all your dry buddies—the sugar, your glorious dark cocoa powder, cornstarch, and salt—right in that dry pan. Whisk them until they look like dusty sandpaper. This pre-mix is critical!
Next, *slowly* whisk in the 2 cups of whole milk until you have no lumps lurking anywhere. Put that pan over medium heat. Start whisking, and I mean constantly! You need to keep that mixture moving so it doesn’t scorch the bottom. After about 6 to 8 minutes, it’s going to start getting thick and might just start showing a little bubble—that means it’s close!
While it’s heating, take your 2 egg yolks into a small bowl and give them a little whip. Now comes the tricky bit: tempering. You have to coax those yolks into liking the hot stuff! Take about half a cup of that hot milk mixture and pour it in a super thin stream into the yolks while you are whisking the yolks like crazy. If you dump it fast, you get scrambled eggs, and that ruins our silky smooth pudding dream! Once that’s done, pour the yolk mixture right back into the saucepan with the rest of the pudding. Cook for just one or two more minutes until it hits a full boil and is seriously thick. Then, off the heat! Stir in your butter and vanilla. Pour it into little cups and press plastic wrap right onto the surface before chilling. You can check out some more super easy stovetop favorites here.
Achieving Silky Smooth Pudding Texture
The secret to avoiding any graininess or clumps in your homemade chocolate pudding is all in the whisking rhythm. When you mix the dry ingredients first, you coat the cornstarch particles in sugar, which stops them from clumping when the liquid hits! That initial whisking prevents 90% of texture disasters. Then, when you bring it to the heat, keep that whisk in motion, using wide sweeps to scrape the bottom and corners of the pan.
But the absolute most important moment for that creamy chocolate pudding recipe texture is the tempering step we talked about. Tempering introduces the yolks gradually to the heat so they thicken the pudding gently rather than setting up instantly into little pockets of cooked egg. If you temper it right, you’ll be rewarded with a velvety chocolate pudding appearance, which is what we want when making this classic chocolate pudding at home.
Tips for Perfect Homemade Chocolate Pudding Every Time
Honestly, once you nail the stovetop cooking part, keeping this homemade chocolate pudding perfect while it chills is easy. I’ve made enough batches of this easy chocolate pudding to know all the little secrets that separate “good” from “absolute perfection.” Don’t let the chilling process ruin your hard work!
First up: the skin. Oh, that dreaded film that forms on top when pudding tries to hang out uncovered in the fridge! It’s the enemy of a perfect, smooth top layer. The solution is so simple it feels like cheating: plastic wrap. You must press a piece of plastic wrap directly onto the surface of the pudding as soon as you pour it into your serving dishes. I’m talking zero air gap between the plastic and the pudding. This traps the steam so it condenses on the wrap instead of raining back down onto your pudding, ensuring that flawless, silky smooth pudding finish.
Second, and this is key for structural integrity: patience before chilling! You need to make sure it hits that full boil after adding the yolks back in. If you pull it off the heat too soon because you are worried about overcooking, your pudding won’t set up right. It needs those final moments of vigorous boiling to fully activate the cornstarch and egg—that’s what gives you that creamy chocolate pudding recipe density when cold. Resist the urge to stop stirring too early!
Finally, when you serve it, give it a good, gentle whisk just before digging in, especially if it’s been a day or two. Sometimes the fats separate just a tiny bit, and stirring it back together brings that beautiful, velvety texture right back to life. It’s my favorite little secret for making a refrigerated pudding taste freshly made. You can always find my more in-depth tips and tricks for classic chocolate pudding baking over here!
Storage and Reheating for Your Homemade Chocolate Pudding
Since this is a rich, dairy-based dessert made with egg yolks and no harsh chemicals, storage is pretty straightforward, but you have to respect the chill time! Once your homemade chocolate pudding has completely cooled—that means at least two hours in the fridge—it needs to stay covered. Remember that crucial step where we pressed the plastic wrap directly onto the surface? Keep that wrap on! It’s the only way to guarantee that perfect, unblemished surface for when you serve it.
Generally, this chocolate pudding recipe from scratch is fantastic for up to four days in the refrigerator. Seriously, it holds up beautifully! The depth of chocolate flavor actually deepens slightly overnight, making day two sometimes even better than day one. It remains wonderfully cold and firm.
Now, about reheating this easy chocolate pudding—and this is important—we usually don’t reheat it! This isn’t a sauce; it’s meant to be served cold or at least thoroughly chilled for that true, luxurious pudding texture. If you try to microwave it, you’ll break the setting structure we worked so hard to achieve with the cornstarch and yolks, and it will turn soupy fast. Cold or room temperature is the way to go for this particular comfort food dessert.
If you take it out of the fridge and it seems a little *too* firm the next day, don’t panic! Just cover it again and let it sit on the counter for maybe 10 or 15 minutes before serving. It softens up perfectly and tastes amazing without needing heat. Enjoying this classic chocolate pudding straight from the cold is half the fun!
Creative Variations for Your Rich Chocolate Dessert
This creamy chocolate pudding recipe is perfect on its own, but when you want to mix things up and elevate it into something truly special—maybe a little unexpected twist on a familiar comfort food dessert—I have a couple of simple tricks up my sleeve. These modifications are so easy that they barely add any time to the process, making it perfect for a last-minute decadent chocolate treat.
My absolute favorite way to boost the chocolate experience is by adding coffee. You don’t even have to love coffee to enjoy this! Next time you’re making this, dissolve about one teaspoon of instant espresso powder right into the dry ingredients along with the cocoa. It doesn’t make the pudding taste like coffee; it just deepens and darkens the chocolate flavor, making it taste almost like a fine, adult dessert. It really cranks up the richness without adding any extra fat or sugar, transforming it into a lovely mocha vibe.
Another fun swap that changes the whole profile is playing with extracts. Vanilla is classic, but swapping that out for a half teaspoon of good quality peppermint extract makes for a festive winter treat. Or, and this is bold, if you want to make your homemade chocolate pudding extra special, try almond extract! It gives it this slightly marzipan, old-world flavor. Just please, taste as you go with extracts; they are strong!
If you just can’t resist texture, you can absolutely fold in other things right at the end, after you stir in the butter and vanilla, just before you pour it into the dishes. Think about adding a handful of miniature chocolate chips—they melt slightly but leave little pockets of gooey chocolate. Or, if you like a little crunch, try adding finely crushed peppermint candies or a few tablespoons of toasted pecans. It’s still a totally easy stovetop pudding, but it feels way fancier! For something totally over-the-top and different, you can check out my recipe for dark chocolate mousse with chili—super spicy and rich!
Serving Suggestions for Classic Chocolate Pudding
Now that you have this beautifully rich, thick, and supremely satisfying homemade chocolate pudding chilling perfectly, it’s time for the grand finale: the topping! Honestly, the best homemade chocolate pudding can stand proudly on its own, but presentation is half the fun, right? These simple additions take your classic chocolate pudding from a simple bowl to something you’d pay good money for at a fancy restaurant. And trust me, after all that whisking, you deserve the fancy treatment!
The number one classic topping, and I’m not arguing, is homemade whipped cream. Skip the aerosol can! Really good whipped cream—just heavy cream, a dash of powdered sugar, and a drop of vanilla, whipped until it just holds soft peaks—is fluffy perfection against the cold, dense pudding. That slight lightness contrasts beautifully with this rich chocolate dessert.
If you’re feeling a bit fruity, that dark, deep flavor of the pudding pairs shockingly well with tartness. A few fresh raspberries or thinly sliced strawberries sprinkled on top are amazing. They cut through the richness so nicely. If you don’t have fresh fruit, a smear of raspberry jam on the bottom of the cup *before* you pour in the pudding also works like a charm!
For texture lovers—and you know who you are—we need crunch! I love topping mine with some chocolate shavings. Just take a vegetable peeler to a nice bar of semi-sweet chocolate. Instant, elegant curls! If you want something bolder, grab some crushed shortbread cookies or those crunchy chocolate wafer cookies. They never get totally mushy right away, giving you that perfect snap against the smooth pudding.
And for those who like a little extra drama, especially if you followed my little coffee boost variation, try topping it with a dusting of unsweetened cocoa powder mixed with a tiny pinch of sea salt right before serving. It really brings the chocolate flavor forward. If you want to see how I make some truly decadent topping variations, check out my post on mint pots de creme—the techniques can totally be borrowed for this pudding!
Frequently Asked Questions About Making Homemade Chocolate Pudding
Can I skip the egg yolks in this chocolate pudding recipe from scratch?
This is the big one, isn’t it? The short answer is that you shouldn’t if you want that classic, rich, velvety texture! Those two egg yolks are crucial; they add incredible richness and help the cornstarch do its job in creating that dense, satisfying pudding consistency. If you leave them out, you’ll end up with something closer to a thin custard. If you absolutely must skip them—maybe due to an allergy—you’ll need to substitute with a few extra tablespoons of cornstarch (maybe up to 1/2 cup total) and perhaps add a splash of heavy cream to try and bring back some of that lost fat and richness. It won’t be the best homemade chocolate pudding result, but it will work!
Help! My homemade chocolate pudding is grainy or lumpy. What went wrong?
Oh, I hate when that happens! Graininess almost always happens for one of two reasons for this kind of easy stovetop pudding. First, you didn’t fully dissolve the cornstarch and cocoa powder into the cold milk before putting it on the heat. If dry clumps sit on the bottom, they cook unevenly and clump up. Second, and more common, is when you didn’t temper the egg yolks correctly. If you pour the hot milk into the yolks too fast, you essentially scramble them, and those tiny bits of cooked egg create a grainy texture throughout the pudding. Always whisk those yolks constantly while adding the hot liquid slowly!
How long does this velvety chocolate pudding need to chill before it sets up?
You absolutely cannot rush the chilling phase if you want that firm, scoopable texture. While the pudding feels thick on the stove, it’s going to tighten up significantly in the cold. I always recommend a minimum of two hours in the refrigerator, but honestly? If you can wait four hours, or even better, make it the day before, the pudding will be perfectly set. Remember, this is a dessert from scratch, not instant! Chilling allows the cornstarch structure to fully crystallize and firm up. If you check my instructions, I stress pressing plastic wrap right onto the surface to keep it looking pristine during this long chill.
Can I use natural cocoa powder instead of Dutch process in this easy chocolate pudding?
Yes, you can, but be prepared for a slightly different outcome! This is why I call the recipe out specifically. Dutch process cocoa has been neutralized, which means it has a darker color and a smoother, less acidic chocolate taste—perfect for a luxurious, rich chocolate dessert. Natural cocoa powder tends to be a bit brighter and more acidic in flavor. If you use natural cocoa, your pudding won’t be quite as dark, and the flavor will lean a little sharper, but it will still taste fantastic! It’s just a matter of preference when making homemade chocolate pudding.
Estimated Nutritional Data for This Simple Dessert Recipe
I always like to give you a general idea of what you’re enjoying when you whip up a batch of this truly decadent treat. These numbers are estimates for one serving based on the ingredients listed in the recipe above. Of course, if you load it up with extra marshmallows or heavy cream toppings, those numbers change!
For one serving of this simple dessert recipe, you can expect:
- Calories: 310
- Sugar: 35g
- Fat: 12g (Saturated Fat: 7g)
- Carbohydrates: 45g
- Protein: 7g
We aim for a rich experience, so a little sugar is necessary for that perfect sweetness against the dark cocoa! If you want the full breakdown on how the nutrition looks compared to other desserts, check out my full disclaimer page here.
Estimated Nutritional Data for This Simple Dessert Recipe
I always like to give you a general idea of what you’re enjoying when you whip up a batch of this truly decadent treat. These numbers are estimates for one serving based on the ingredients listed in the recipe above. Of course, if you load it up with extra marshmallows or heavy cream toppings, those numbers change!
For one serving of this simple dessert recipe, you can expect:
- Calories: 310
- Sugar: 35g
- Fat: 12g (Saturated Fat: 7g)
- Carbohydrates: 45g
- Protein: 7g
We aim for a rich experience, so a little sugar is necessary for that perfect sweetness against the dark cocoa! If you want the full breakdown on how the nutrition looks compared to other desserts, check out my full disclaimer page here.
PrintThe Ultimate Creamy Homemade Chocolate Pudding from Scratch: Rich, Quick, and Better Than Boxed
Make rich, velvety chocolate pudding from scratch on the stovetop. This easy recipe yields a silky smooth, decadent dessert that surpasses any boxed mix.
- Prep Time: 10 min
- Cook Time: 15 min
- Total Time: 2 hours 25 min
- Yield: 4 servings
- Category: Dessert
- Method: Stovetop
- Cuisine: American
- Diet: Vegetarian
Ingredients
- 2/3 cup granulated sugar
- 1/4 cup unsweetened cocoa powder (Dutch process recommended)
- 1/4 cup cornstarch
- 1/4 teaspoon salt
- 2 cups whole milk
- 2 large egg yolks
- 2 tablespoons unsalted butter
- 1 teaspoon vanilla extract
Instructions
- In a medium saucepan, whisk together the sugar, cocoa powder, cornstarch, and salt until combined.
- Gradually whisk in the whole milk until the mixture is smooth.
- Place the saucepan over medium heat. Cook, stirring constantly with a whisk, until the mixture thickens significantly and just begins to bubble. This takes about 6 to 8 minutes.
- In a small bowl, lightly whisk the egg yolks.
- Temper the yolks: Slowly pour about 1/2 cup of the hot milk mixture into the egg yolks while whisking the yolks constantly.
- Pour the tempered yolk mixture back into the saucepan with the remaining milk mixture.
- Continue to cook over medium heat, stirring constantly, for 1 to 2 minutes more until the pudding comes to a full boil and is very thick. Do not overcook after boiling.
- Remove the saucepan from the heat. Stir in the butter and vanilla extract until smooth.
- Pour the pudding into individual serving dishes or a single bowl. Press plastic wrap directly onto the surface of the pudding to prevent a skin from forming.
- Chill in the refrigerator for at least 2 hours, or until completely cold and set.
Notes
- For an extra rich flavor, substitute 1/2 cup of the milk with heavy cream.
- If you prefer a less intense chocolate flavor, use natural unsweetened cocoa powder instead of Dutch process.
- To serve, top with fresh whipped cream or shaved chocolate.
Nutrition
- Serving Size: 1 serving
- Calories: 310
- Sugar: 35
- Sodium: 150
- Fat: 12
- Saturated Fat: 7
- Unsaturated Fat: 5
- Trans Fat: 0
- Carbohydrates: 45
- Fiber: 2
- Protein: 7
- Cholesterol: 85