

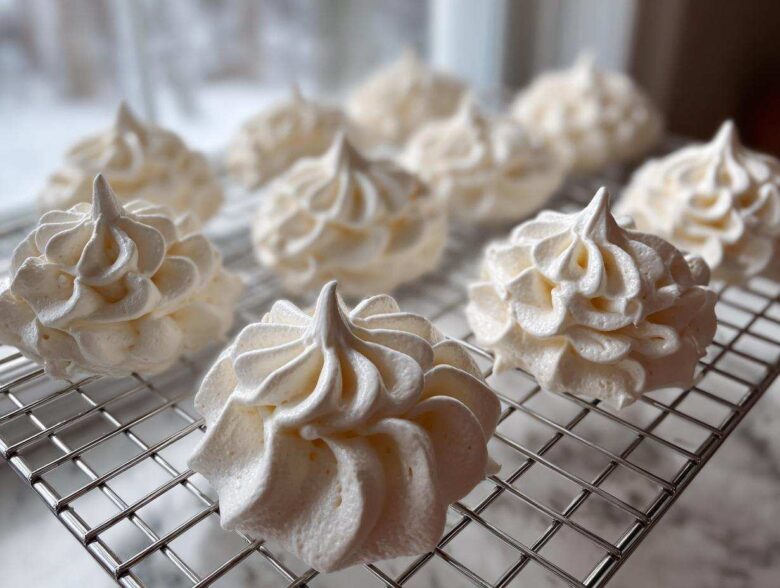
There is something absolutely magical about a dessert that feels like it’s barely there, right? Those little clouds of sweetness that just melt away the second they hit your tongue? I used to be terrified of making meringue cookies, honestly. Every time I tried, I ended up with sticky, weeping messes instead of the light, airy treats I dreamed of. But don’t you worry about that anymore!
I finally cracked the code using the classic French meringue method. This guide has the ultimate easy meringue cookies recipe that promises results that are crisp on the outside and completely light every single time. After trying dozens of batches—and only a few failures thanks to too much humidity—I’ve got the foolproof steps for you. Seriously, if you can turn on a mixer, you can nail these simple egg white desserts.
If you want to know more about where this site is coming from, you can check out our story here, but for now, let’s get whipping!
Why This Easy Meringue Cookies Recipe Works for Beginners
I know why you quit trying to make these before! Most meringue recipes sound complicated, but this French method is truly your friend when you’re just starting out. It relies on incorporating the sugar while the egg whites are still forming soft peaks, which builds a super stable structure right away. It’s really the best starting point for making light and airy cookies.
This recipe just removes all the guesswork. Trust me, once you see that glossy mixture, you’ll be hooked!
- It uses simple pantry staples—mostly just egg whites and sugar!
- The low-and-slow drying time in the oven leads to almost zero cracking.
- It’s naturally gluten free, so everyone can enjoy these delicate sweet treats.
Achieving Perfect Meringue Texture: Crisp and Airy
When I talk about perfect texture, I mean these should sound hollow when you tap them gently. They need a solid, paper-thin crust that shatters when you bite it. But the inside? That’s the secret reward! It should be slightly chewy and just dissolve on your tongue like sweet air. That’s the melt in your mouth cookies experience we are after. It’s all about getting those egg whites fully whipped before the sugar takes over, which is exactly what this technique ensures.
Essential Ingredients for Fluffy Meringue Cookies
Okay, you only need five things for this recipe, but the *quality* and *temperature* really matter here! I learned the hard way that even a tiny bit of grease in the bowl stops everything dead in its tracks. Make sure everything is spotlessly clean before you start mixing those egg whites.
For the best structure and texture, you absolutely have to use room temperature egg whites. They whip up so much higher and faster than cold ones! Also, grab yourself some superfine sugar—sometimes called caster sugar. If you don’t have it, pulse regular sugar in your food processor for just a quick 30 seconds until it’s finer. Don’t forget to check out our ingredient guidelines if you have questions about substitutes!
- 4 large egg whites, room temperature
- 1 cup superfine granulated sugar (caster sugar)
- 1 teaspoon pure vanilla extract
- 1/4 teaspoon cream of tartar
- Pinch of salt
Step-by-Step Instructions for Making Meringue Cookies
Now it’s time for the fun part—turning those beautiful ingredients into actual meringue cookies! This process requires patience, but seriously, the mixer is doing 90% of the hard work. Just follow these steps exactly, and you’ll have those perfect kisses ready for the oven in no time. We’re sticking to the reliable French meringue technique here, which is perfect for baking with egg whites.
If you want them light and airy, you have to commit to the slow build of the sugar. Trust me, once you see that glossy mixture, you’ll be hooked!
- First things first: Get that oven temperature figured out. You want it super low, usually between 200°F and 225°F—honestly, sometimes I just set mine to the lowest it will go! Line two big baking sheets with parchment paper.
- In a pristine, grease-free bowl, start beating your egg whites along with that pinch of salt and the cream of tartar on medium speed until they look foamy and start holding soft peaks.
- This is critical: Start adding the room-temperature sugar *very slowly*. I mean one tablespoon at a time, waiting about 30 seconds in between each addition. If you dump it all in, it’ll deflate everything!
- Once all the sugar is incorporated, crank the mixer up to high speed. You need to whip this meringue until it becomes stiff, ultra-glossy, and holds those firm peaks that don’t flop over.
- Do the finger test! Rub a tiny bit between your fingers. If you feel even one solitary grain of sugar, keep whipping! Once it feels perfectly smooth, mix in your vanilla extract.
- Time to pipe! Put that glorious, stiff meringue into a piping bag fitted with your favorite star tip—I always use a big star, like the Wilton 1M, for those beautiful meringue kisses. Pipe kisses or little dollops onto your pans.
- Bake them gently for 60 to 90 minutes. The goal here isn’t browning; it’s drying them all the way through.
- The final, non-negotiable trick: Turn the oven off, but leave the cookies inside! Pop a wooden spoon in the door crack to prop it open just a smidge, and leave them in there for at least an hour, or even overnight if you can manage it. This slow cooling prevents those awful sudden cracks!
Whipping Technique: The Secret to Light and Airy Cookies
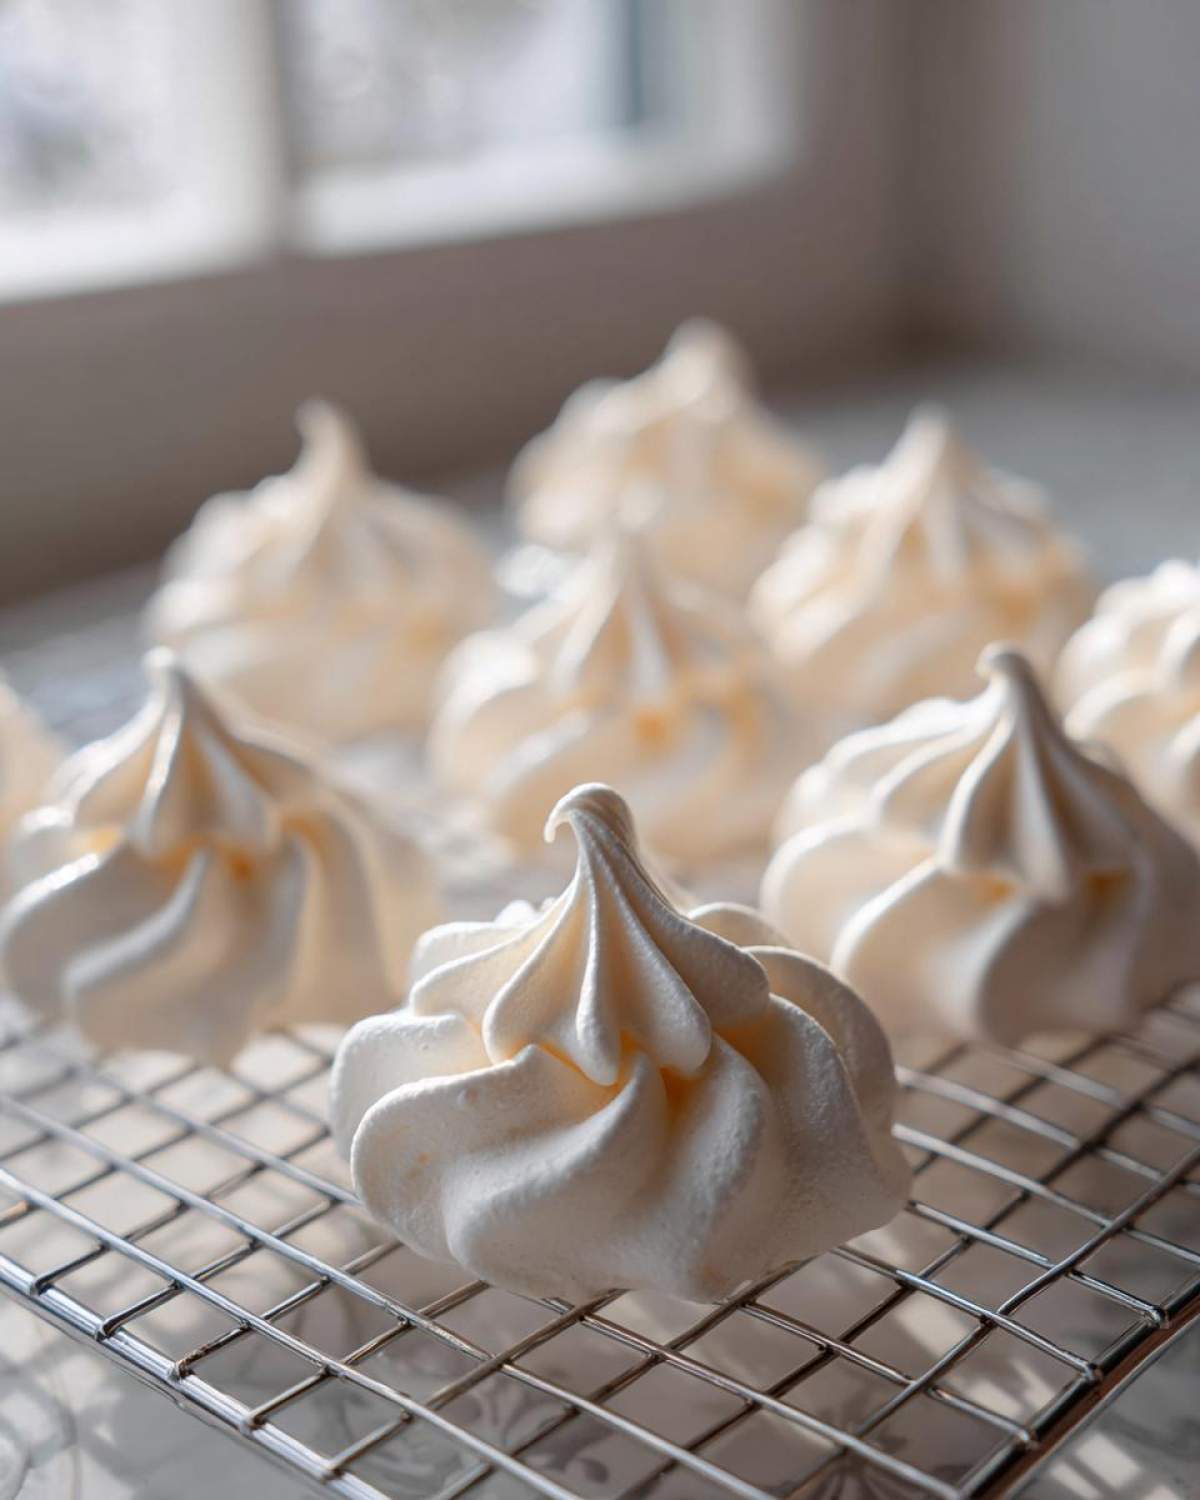
The whole battle is won or lost in the whipping stage. You have to let those egg whites get to the soft peak stage—when they look like shaving cream—before you even think about adding sugar. If you add sugar when the whites are too runny, the sugar water won’t incorporate properly, and you’ll never get that required volume. Keep beating, and then when you slowly stream in that superfine sugar, you’re essentially strengthening the protein walls, which traps all the air you worked so hard to create. It’s almost structural magic!
Piping and Shaping Your Meringue Kisses Recipe
Once your meringue is that perfect stiff, glossy cloud, you need to get it onto the sheets quickly so it doesn’t start to deflate. If you’re going for the classic pretty look, use a piping bag with a large, open star tip—it gives you those amazing ridges that look so professional when finished. If piping stresses you out, don’t sweat it! Take two spoons dipped in hot water, wipe them, and just drop little mounds, using the spoons to gently swirl the top. People love these adorable little mounds too, and they’re perfect for a simple meringue cookies batch!
Tips for Perfect Meringue Texture and Preventing Cracks
If you’ve ever pulled your cute little puffs out of the oven only to find them weeping sticky puddles onto your counter or cracking wide open like tiny baked geodes, you know the heartbreak! Getting that stable, dry texture takes mastering just a few non-negotiable points, and it’s really where this recipe proves its worth.
The absolute number one enemy of perfect meringue is fat. If you have any residual grease—from a single speck of egg yolk or oil left on your bowl—your egg whites will never reach their maximum volume. I’ve made that mistake before, trying to rush things, and the result was a sad, soupy mess that just wouldn’t whip up. Now, I always wipe my stainless steel bowl down with a paper towel dipped in a little vinegar before I even start cracking eggs. It’s my insurance policy!
The other massive factor you can’t control, but you have to respect, is humidity. On a rainy day, meringue is practically impossible because the moisture in the air fights against your low-heat drying process. If it’s a swamp outside, you absolutely must extend that final drying time in the turned-off oven. I needed almost an extra hour and a half last time it stormed, but they came out perfectly dry!
Remember that final step? Leaving them in the cooling oven with the door propped open? That’s my favorite trick to avoid cracking. Sudden temperature changes cause the trapped air inside to expand too fast, making them burst. By letting them cool down slowly along with the oven, you give the structure time to settle gently. If you follow that tip, coupled with knowing your oven runs cool, you’ll have beautiful meringue every time. For more general advice on what I’ve learned over the years, you can check out my general baking tips page!
Flavor Variations for Your Vanilla Meringue Recipe
Once you master the base recipe, you have to start playing around, right? That’s the joy of baking! While the simple vanilla is fantastic, these little puffs are the perfect canvas for adding pops of flavor or color. This is where those meringue cookies go from being simple treats to something truly festive or unique for gifting. Why stick to plain white when you can have rainbow swirls or spicy winter flavors?
In the recipe notes, I mentioned one of my favorite swaps: using dry Jello powder instead of some of the sugar. It adds awesome color and a slight tangy fruit flavor that pairs surprisingly well with the sweetness. Just make sure you substitute 1 tablespoon of sugar for 1 tablespoon of finely ground Jello powder. You can see how I use similar flavor techniques in my marshmallow recipe!
Creating Festive Peppermint Meringue Cookies
If you’re looking for something specifically for the holidays, you can’t beat peppermint! It’s so easy to turn this into beautiful Holiday Meringue Cookie Ideas. Once your meringue is fully mixed, before you pipe it, gently fold in about a half teaspoon of high-quality peppermint extract. For a real visual treat, you can even divide the meringue in half, add a tiny drop of red food coloring to one half, and then layer both into your piping bag using a large star tip. Swirling them together creates stunning candy-cane striped kisses!
Storage and Keeping Your Crispy Meringue Treats Fresh
You did it! You baked them low and slow, they dried perfectly in the oven, and now they look like little works of art. The last thing you want is for all that effort to turn into a sticky mess overnight, right? Humidity is the absolute arch-nemesis of any meringue, so storage is just as important as the baking!
Here is the simple rule I follow: Keep them out of the fridge! Seriously, don’t even think about it. Refrigerators are little moisture factories, and that moisture will be absorbed by your beautiful, crisp shells almost instantly. That means they’ll start weeping and getting tacky before you can even serve them.
You need an airtight container. A cookie tin, a large plastic container with a tight-sealing lid—anything that keeps the air out. I always line the bottom of my containers with a layer of paper towels before I gently stack the meringue kisses inside. The paper towels are surprisingly good at catching any little bit of condensation before it touches the bottom layer of cookies.
If you’ve stored them correctly, they should easily last a week, maybe even longer, sitting on your counter at room temperature. I try to eat mine within three or four days just because they are so addictive, but they truly hold up well once they are completely dry. If they do start to feel a little soft after a week, just pop them back into your very low oven (like 200°F) for about 15 minutes to re-crisp them up. You can’t go wrong!
Frequently Asked Questions About Meringue Cookies
Okay, I know you might still have a couple of head-scratchers about whipping these delicate treats, and that’s totally normal! I certainly did when I was learning to make these meringue cookies. These are the questions I get asked most often when people try this recipe for the first time. Don’t hesitate to reach out if you need more help—you can always send me a note via my contact page!
Here are the need-to-knows to ensure you get those fantastic, crisp meringue treats instead of sad, sticky puddles.
Why are my meringue cookies weeping or sticky?
Oh, the dreaded weep! This almost always means one of two things, and usually, it happens after they’re baked. First, you might not have whipped enough sugar in—if there’s un-dissolved sugar floating around, it pulls moisture out later. Second, humidity is your enemy! If they feel sticky on the outside after cooling, you probably didn’t dry them out long enough in the oven, or you took them out while the kitchen was too humid. Remember my trick: leave them in the turned-off oven until completely cool!
Can I skip cream of tartar in this recipe?
Technically, you *can*, but I strongly advise against it, especially if you are baking meringue for beginners. Cream of tartar is an acid, and it acts like a stabilizer for your egg whites. It helps them whip up higher and keeps them firm so they don’t deflate easily. If you absolutely don’t have any, you can substitute it with about a teaspoon of lemon juice or white vinegar, but cream of tartar is usually the most reliable ingredient for achieving those light and airy cookies.
Are French Meringue Cookies Gluten Free?
Yes! This is one of the best parts about these delicate sweet treats. The base recipe, using only egg whites, sugar, and vanilla, contains absolutely no gluten whatsoever. So you can confidently serve these amazing gluten free meringues to anyone with dietary restrictions. Just be mindful if you add flavorings, like crushed cookies or certain extracts, that they aren’t contaminated!
Can I make these meringue kisses ahead of time?
Absolutely! That’s why they are such a fantastic dessert for holidays or parties. As long as you store them in that airtight container I mentioned, they actually taste better a day or two later once they’ve fully settled and dried out. Don’t bake them more than a week in advance, though, because even in a tight container, they can start to lose that fresh snap.
Serving Suggestions for Delicate Sweet Treats
Now that you have perfected these beautiful, delicate sweet treats, the next challenge is resisting eating them all yourself before anyone else sees them! Because these meringue cookies are so light and basically just pure sugar and air, they are wonderful on their own, but they also make incredible garnishes or accompaniments to richer desserts. They melt away so nicely alongside something heavier, providing that perfect sweet, crunchy contrast.
For me, the absolute best time to enjoy one of these is right after dinner with a strong cup of coffee. They balance the bitterness perfectly. I love serving them alongside a rich, fudgy brownie—you know, the kind that sticks to your teeth? The meringue just melts right into the fudginess. Speaking of fudgy, if you’ve got any leftover brewed coffee from your morning pot, you have to try my espresso-infused brownies; the meringues are divine crumbled over the top!
You can also use them as decoration! They look gorgeous nestled into a bowl of fresh raspberries and whipped cream, or balanced delicately on top of a scoop of ice cream. They look fancy, but since they are so easy to make, they feel like cheating! They’re also fantastic broken up and sprinkled over pudding or mousse if you want that crisp texture without piping them all perfectly.
Nutritional Snapshot for Simple Egg White Desserts
Since these treats are mostly air and egg white, they are surprisingly light when it comes to calories, which is great news if you’re keeping track! Remember, these values are just estimates based on using the four large egg whites and the exact amount of sugar listed in the recipe, and they are calculated based on a yield of about 3 dozen cookies.
Because we aren’t adding any butter, milk, or flour substitutes to the base recipe, these are incredibly low in fat, which is fantastic for simple egg white desserts. But, since they are mostly sugar, of course, that needs to be factored in!
If you are using any of the Jello flavor swaps mentioned earlier, the sugar content might change slightly depending on the brand of powder you use, so keep that in mind if you are counting strictly!
- Serving Size: 2 cookies
- Calories: 50
- Sugar: 12g
- Protein: 1g
- Fat: 0g
- Cholesterol: 0mg
Just a quick reminder though—this nutritional information is estimated based on my baking math, so if you’re super strict about totals, maybe take it with a pinch of salt! For all official health recommendations, always see a registered dietician, of course.
PrintThe Ultimate Easy Meringue Cookies Recipe: Light, Crisp, and Perfect Every Time

Make light, airy meringue cookies that are crisp on the outside and melt in your mouth. This recipe uses the simple French meringue method for perfect results.
- Prep Time: 15 min
- Cook Time: 90 min
- Total Time: 105 min
- Yield: About 3 dozen
- Category: Dessert
- Method: Baking
- Cuisine: American
- Diet: Gluten Free
Ingredients
- 4 large egg whites, room temperature
- 1 cup superfine granulated sugar (caster sugar)
- 1 teaspoon pure vanilla extract
- 1/4 teaspoon cream of tartar
- Pinch of salt
Instructions
- Preheat your oven to the lowest setting, usually between 200°F and 225°F (95°C to 107°C). Line two baking sheets with parchment paper.
- Place the egg whites and cream of tartar in a clean, grease-free mixing bowl. Beat on medium speed until soft peaks form.
- Slowly add the superfine sugar, one tablespoon at a time, while continuing to beat on medium-high speed. Wait about 30 seconds between each addition.
- Once all the sugar is added, increase the speed to high and beat until the meringue is stiff, glossy, and holds firm peaks. When you rub a small amount between your fingers, you should not feel any sugar granules.
- Beat in the vanilla extract.
- Transfer the meringue to a piping bag fitted with a large star tip (like Wilton 1M) or use two spoons to drop mounds onto the prepared baking sheets.
- Bake for 60 to 90 minutes, depending on the size of your cookies and your oven temperature. The goal is to dry them out, not brown them.
- Turn off the oven, prop the door open slightly with a wooden spoon, and let the cookies cool completely inside the oven for at least 1 hour, or preferably overnight. This helps them dry fully and prevents cracking.
- Store cooled meringue cookies in an airtight container at room temperature.
Notes
- Ensure your bowl and whisk attachments are completely free of any grease or yolk; fat prevents the egg whites from whipping properly.
- If you do not have superfine sugar, pulse regular granulated sugar in a food processor for 30 seconds until finer.
- For flavored meringues, substitute 1 tablespoon of the sugar with 1 tablespoon of finely ground, dry Jello powder or add 1/2 teaspoon of peppermint extract with the vanilla.
- If your kitchen is humid, baking time may need to be extended.
Nutrition
- Serving Size: 2 cookies
- Calories: 50
- Sugar: 12
- Sodium: 5
- Fat: 0
- Saturated Fat: 0
- Unsaturated Fat: 0
- Trans Fat: 0
- Carbohydrates: 12
- Fiber: 0
- Protein: 1
- Cholesterol: 0