

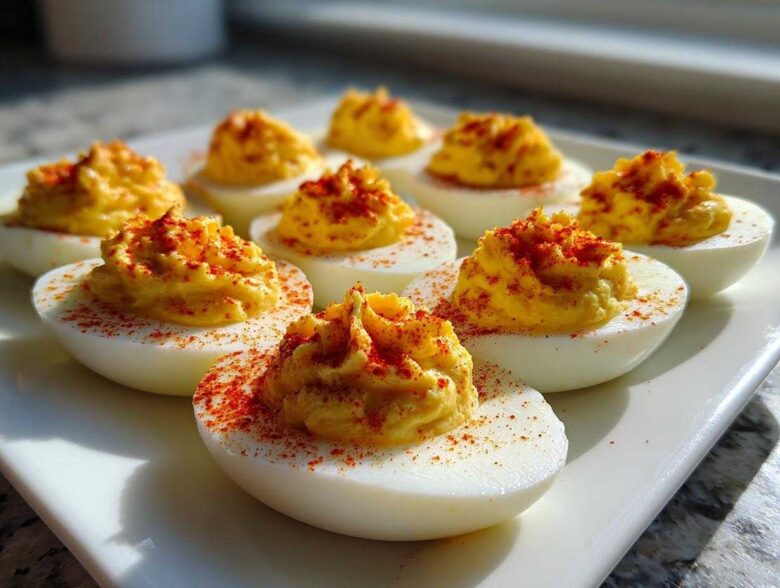
Oh, can we talk about potlucks for a minute? Nothing says ‘gathering’ quite like a platter of perfect deviled eggs disappearing faster than anything else on the table. I swear, people fight over the last one! For years, I struggled with those pale, crumbly yolks or eggs that just wouldn’t peel. It was messy and frustrating, but trust me, I cracked the code. This isn’t just any recipe; this is my foolproof, tried-and-true deviled eggs recipe that guarantees a creamy, tangy filling every single time. Getting the hard-boiling part right is half the battle won, and I’m going to show you how I finally stopped wrestling with eggshells.
Why This Is the Best Deviled Eggs Recipe (Easy Deviled Eggs)
I know everyone thinks their appetizer is the best, but honestly, this method for deviled eggs is magic—it’s why they are always the first things gone at a summer BBQ or holiday party. We aren’t cutting corners here, we are perfecting the classics! My goal was always to find the best deviled eggs that were super easy but tasted completely indulgent.
What makes this recipe stand out? Well, you get guaranteed results, which is everything when you’re cooking for a crowd. Forget disappointment; these beauties deliver.
- The filling comes out impossibly smooth and creamy—no grit allowed!
- My boiling technique means those darn shells slide right off, saving you tons of frustration.
- We stick to the tangy, salty, classic flavor profile your family expects.
If you follow the boiling guide I laid out, you’ll have bright yellow yolks ready for mixing. When you’re looking for easy deviled eggs that impress everyone, this simple process is the only way to go. For more great tips on feeding a hungry crowd, check out what I’ve been cooking lately over at my general cooking adventures!
Ingredients Needed for Perfect Deviled Eggs
You don’t need a huge shopping list for these beauties, which is another reason they are my go-to party food! The fewer ingredients, the less chance of something going wrong, right? Everything here focuses on delivering that intense, tangy, savory flavor we all love. Make sure you have everything ready before you start boiling, because once those eggs are done, you gotta move fast!
Here is exactly what you need for making 24 perfect halves:
- 12 large eggs (I’ll tell you later why ‘large’ matters!)
- 1/2 cup mayonnaise (Use the good stuff, it makes a difference!)
- 2 tablespoons yellow mustard (Don’t substitute Dijon here; we need that classic zing!)
- 1 tablespoon white vinegar
- 1/4 teaspoon salt
- 1/4 teaspoon black pepper
- Paprika, for garnish (I swear by the sweet stuff for color!)
That’s it! See? Simple ingredients lead to the most satisfying deviled eggs you’ll ever serve. Just measure everything out, and we’re ready for the action!
How to Make Deviled Eggs: Step-by-Step Instructions
Okay, deep breath! Knowing how to make deviled eggs perfectly means mastering the egg itself. I know that gray ring around a yolk can feel like a personal failure, but trust me, it’s just chemistry! We are going to avoid that green horror show entirely by using a very specific resting time followed by a serious ice bath. This method ensures brilliant yellow centers, perfect for our deviled eggs recipe.
Perfecting the Hard-Boiled Eggs for Deviled Eggs
First things first: water source! Place all 12 eggs right into a big pot. Pour cold tap water over them until they are about an inch submerged. Now, put the pot on high heat until you get a full, rolling boil. The second it hits that boil—stop everything! Immediately kill the heat, slap that lid on tight, and set your timer for exactly 12 minutes. Don’t peek!
When the timer rings, that’s your cue to shock those poor things. Drain the hot water quickly and plunge those eggs straight into an ice bath—that’s a huge bowl filled with ice cubes and cold water. Let them hang out for a good 15 minutes until they are completely chilled to the touch. Pro Tip Alert: If you can, use eggs that are already a week or so old from the carton instead of farm-fresh ones. Older eggs just peel so much easier!
Creating the Smooth Yolk Filling for Your Deviled Eggs
Now for the best part! Carefully peel those cooled eggs. Slice them right down the center, lengthwise, and gently scoop all those beautiful yellow yolks into a bowl. Lay your clean white halves out on your serving platter now so you’re ready to fill them up later. Mash those yolks thoroughly with a fork until they look like fine, totally dry sand.
This is where we add the tang: mix in that mayonnaise, yellow mustard, vinegar, salt, and pepper. You need to beat this mixture until it is completely smooth. I mean *smooth*! If you had any lumps before, now is the time to conquer them. If you really want show-stopping texture, try pushing the mashed yolks through a fine-mesh sieve right before you add the wet ingredients. It takes an extra minute, but wow, the creaminess is worth the effort!
Assembling and Garnishing Classic Appetizer Deviled Eggs
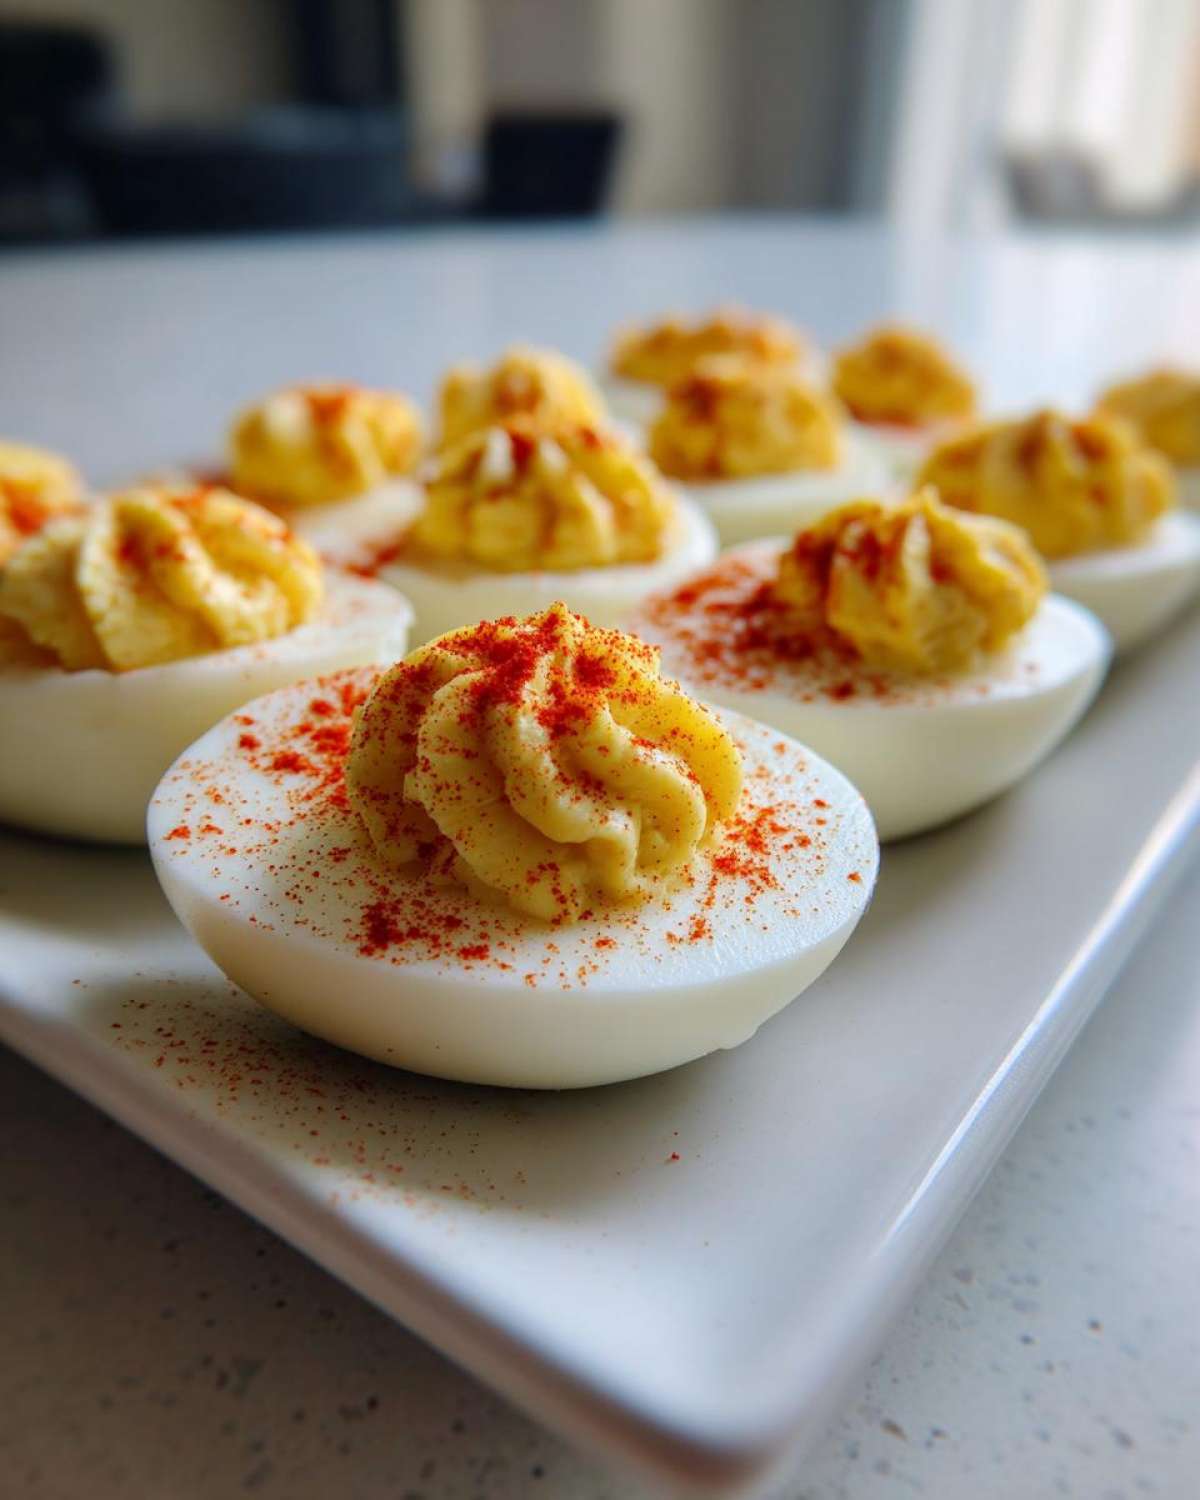
Once your filling is perfect, it’s time to get decorative! You can spoon the filling back in, but I highly recommend using a Ziploc bag (cut a corner off) or a piping bag with a star tip. They just look so much more professional that way! Pipe the filling back into the hollowed-out whites until you have a lovely little swirl rising up.
Finally, the signature touch that makes them a classic appetizer: a generous dusting of paprika right on top. That pop of red against the yellow filling makes them look appetizer-ready! Don’t forget to check out the soup recipe I love when I need something comforting after all this party food preparation—it’s my favorite chicken noodle soup.
Tips for Success with Your Deviled Eggs Recipe
Even with a tried-and-true recipe like this, a few little tricks can take your deviled eggs from great to show-stopping. Since these are such a classic centerpiece for any event, presentation really matters! I’ve learned these hard-won lessons over countless holiday spreads, and you should take advantage of my mistakes!
First, let’s talk about consistency for the filling. If you find your yolk mixture is just a tad too loose—maybe you accidentally added a little too much vinegar or mayo—don’t panic! Just whip in an extra teaspoon of mustard powder, or, even better, stir in a tiny pinch of cornstarch before you mix the rest of everything in. It firms things up beautifully.
Presentation is key for these little bites. If you’re aiming for that restaurant-quality look, you absolutely have to pipe the filling in. The simplest way to do this, if you don’t own a fancy piping bag, is honestly just using a sturdy Ziploc bag. Spoon the mixture in, seal it tight, and snip a small corner off with scissors. Make sure the hole is big enough for the filling to come out easily, but small enough to hold some shape.
Also, remember that paprika garnish we talked about? Don’t skip it, but consider what you’re using! Smoked paprika vs. sweet paprika changes the flavor slightly, but presentation-wise, sweet paprika gives us that gorgeous, velvety red finish. It’s the visual cue that screams, “I made these with love!”
And hey, if your whites look a little sad after peeling, a quick wipe with a damp paper towel cleans up any stray yolk bits before you fill them. For more ways to elevate classic comfort food, you should really look at my favorite apple crumb bars—they work the same magic!
Ingredient Notes and Substitutions for Deviled Eggs
Even though this is a classic recipe, sometimes you have to work with what’s in the fridge! I always tell folks that the quality of your main players—the mayo and the mustard—really shines through in a simple dish like this. Since there are so few components, there isn’t much to hide behind!
Let’s talk about the mayonnaise first. I stick firmly to full-fat mayo because it creates that signature rich texture. If you’re looking to cut some fat, you can swap out half of the mayo for plain Greek yogurt. Now, here’s the catch: Greek yogurt is much tangier than mayo, so you might need to add a tiny extra pinch of salt or a half teaspoon of sugar to balance it out. Taste as you go!
Mustard is another fun spot for customization. We use standard yellow mustard because it brings that bright, slightly vinegary punch that cuts through the richness of the yolk. If you swap it for Dijon, you’ll get a deeper, earthier note. And hey, if you want to get a little wild, use a smoky whole-grain mustard; that can give your finished eggs an unexpected savory depth.
That teaspoon of white vinegar? Don’t skip it! That acid is crucial for balancing the savory egg fat. If you are out of vinegar, a couple of drops of fresh lemon juice works in a pinch, but it will definitely brighten the flavor profile compared to the subtle tang of vinegar.
Basically, keep the ratio of filling items the same, but feel free to swap out the flavor agents based on what you have on hand. It’s your platter, after all!
Make-Ahead and Storage for Crowd-Pleasing Deviled Eggs
This is one of those appetizers where timing is everything—especially if you’re serving them outdoors or need to prep a day ahead! The biggest enemy of a beautiful plate of deviled eggs is moisture weeping out of the filling, making them look sad and watery.
If you want to get ahead, I strongly suggest you do not mix the filling until the day you plan to serve them, or at the very latest, the night before. Once that creamy yolk mixture sits for too long, especially with the vinegar in it, you risk separating the emulsion, and nobody wants greasy eggs.
Here is my fail-safe method for managing this party finger food:
- Boil and peel your eggs a day in advance. Store the peeled whites in an airtight container in the fridge. Seriously, peel them perfectly ahead of time—peeling is the messy part!
- Mix the yolk filling completely, making sure it’s wonderfully smooth. Store this filling tightly covered in the fridge.
- The assembly needs to happen just a few hours before serving. If you’re heading to a potluck, fill the eggs right before you walk out the door. This keeps them looking fresh, prevents discoloration, and stops the filling from drying out on the edges.
Food safety matters, especially for egg dishes left out on a buffet table. Because these are creamy and rich, they shouldn’t sit out at room temperature for more than two hours total. If you’re taking them somewhere, keep them chilled in a cooler until it’s time to eat! If you realize you have too much prepping to do, you can check out my easy cranberry brie bites—they are almost zero effort!
Variations on Traditional Deviled Eggs
Now, this secret weapon of an appetizer is brilliant in its simplicity, and I’m dedicated to keeping the base recipe—the creamy, tangy yolk swirl—front and center. But hey, variety is the spice of life, right? Once you master the foolproof technique above, you can absolutely get creative with your garnishes and little mix-ins without messing up the essential flavor of these deviled eggs.
You don’t need a whole new recipe to jazz things up! You just need to sneak in a few extra touches right before you pipe or spoon them. Here are the three simplest twists I use when I’m feeling a little extra flair:
The Tangy Twist: If you want something that screams ‘picnic classic,’ stir in about one tablespoon of sweet pickle relish right into the yolk mixture. Make sure you drain that relish really, really well before it hits the bowl, or your filling will get too runny! This adds a lovely little textural pop and extra zing. Mix that right in with the mayo!
The Smoky Sophistication: This is my favorite for fall gatherings. Instead of just sprinkling sweet paprika on top, switch to a light dusting of smoked paprika. Wow! It gives the eggs a subtle, deep barbecue flavor that pairs beautifully with the vinegar. It looks exactly the same, but the taste is miles away—in a good way, of course.
The Heat Seeker: For those folks who like a little fire, a dash of heat works wonders. I add about 1/4 teaspoon of your favorite hot sauce directly into the yolk mixture when I add the salt and pepper. You can use classic cayenne pepper, but I love using Cholula because it adds a little vinegary kick that marries perfectly with the mustard we already have in there. Start small with the hot sauce; you can always add more, but you can’t take it out once it’s mixed in!
See? You’re still using the exact same base recipe components—no weird ingredients required. You’re just deciding which flavor story you want to tell with those last few sprinkles!
Frequently Asked Questions About Making Deviled Eggs
I totally get it; sometimes you need a quick answer before you dive back into the recipe. These little bites are simple, but those few tricky spots—like peeling or runny filling—trip everyone up the first few times. Hopefully, these quick answers cover what you need to nail your easy deviled eggs for the next event!
Why are my deviled egg yolks green?
Oh, that infamous gray or greenish ring! That’s just a sulfur reaction happening between the iron in the yolk and the sulfur in the egg white. It’s totally harmless, but it looks awful, right? The good news is we planned ahead for this! The key is the ice bath—plunging those hot eggs straight into ice water immediately stops the cooking process. If you skip the ice bath or let them cool slowly on the counter, that chemical reaction has way too much time to occur. Always use that ice bath to keep your yolks bright yellow!
How long do deviled eggs last in the refrigerator?
Because they are egg-based, you have to be a little safe with leftovers. If you made the whole batch and they were properly chilled, they are generally fine for about three to four days in an airtight container in the fridge. However, they taste a million times better the day you make them—the filling gets a little watery the next day. If you have leftovers, I always suggest taking them out of the fridge for about 30 minutes before eating just to let the flavors come back to life a bit.
Can I use fresh eggs for the best deviled eggs?
This is a common question about how to make the best deviled eggs! Counterintuitively, no, you actually shouldn’t use super farm-fresh eggs for boiling. When eggs are extremely fresh, the inner membrane really sticks to the shell. As an egg ages (even just a week or so), the pH level changes and that membrane pulls away just enough to make peeling a dream. So, if you want those perfectly smooth fillings tucked into intact whites, grab slightly older eggs from the carton!
If you want to dive into some truly decadent treats after your savory appetizers, you’ve got to try my amazing baklava recipe. But these questions should keep you on track for perfect eggs!
Estimated Nutritional Data for Deviled Eggs
Okay, I know that deviled eggs are pure comfort food, and we usually don’t worry too much about the numbers when we are making a perfect classic appetizer like this. But since you asked, here is the quick breakdown of what you can generally expect from two halves of these delicious bites based on the standard recipe above.
Remember, this information is just an estimate! If you swap out the mayonnaise for low-fat yogurt or use less rich mustard, your numbers are going to change. This table is based on using the full-fat mayonnaise and yellow mustard noted in the ingredient list, so consider it a guideline for the traditional flavor experience.
For a serving size of 2 halves:
- Calories: Around 100
- Fat: About 9 grams (most of this is that rich yolk and mayo flavor!)
- Protein: Roughly 5 grams
- Carbohydrates: Very low, about 1 gram
- Sugar: About 1 gram
- Sodium: Around 150mg
They are wonderfully low in carbs and fiber, making them a satisfying, savory bite that won’t weigh you down before the main course hits the table. Enjoy them guilt-free; they are worth every delicious speck of paprika!
PrintClassic Deviled Eggs Recipe
A simple recipe for making traditional, creamy, and tangy deviled eggs, perfect for any gathering.
- Prep Time: 20 min
- Cook Time: 12 min
- Total Time: 32 min
- Yield: 24 halves
- Category: Appetizer
- Method: Boiling and Mixing
- Cuisine: American
- Diet: Low Fat
Ingredients
- 12 large eggs
- 1/2 cup mayonnaise
- 2 tablespoons yellow mustard
- 1 tablespoon white vinegar
- 1/4 teaspoon salt
- 1/4 teaspoon black pepper
- Paprika, for garnish
Instructions
- Place eggs in a large saucepan and cover with cold water by about one inch.
- Bring the water to a rolling boil over high heat.
- Once boiling, immediately remove the pan from the heat, cover it, and let the eggs stand for 12 minutes.
- Transfer the eggs to an ice bath (a bowl of ice water) and let them cool completely, about 15 minutes.
- Peel the cooled eggs. Slice each egg in half lengthwise.
- Carefully scoop the yolks into a medium bowl. Place the egg white halves on a serving platter.
- Mash the yolks with a fork until they are fine crumbs.
- Add the mayonnaise, mustard, vinegar, salt, and pepper to the mashed yolks. Mix until the filling is completely smooth.
- Spoon or pipe the yolk mixture back into the hollowed-out egg white halves.
- Sprinkle paprika over the top of each filled egg half before serving.
Notes
- To make peeling easier, use eggs that are about one week old, not fresh.
- For a smoother filling, press the mashed yolks through a fine-mesh sieve before mixing in the other ingredients.
- You can use a piping bag with a star tip for a decorative look when filling the egg whites.
Nutrition
- Serving Size: 2 halves
- Calories: 100
- Sugar: 1
- Sodium: 150
- Fat: 9
- Saturated Fat: 2
- Unsaturated Fat: 7
- Trans Fat: 0
- Carbohydrates: 1
- Fiber: 0
- Protein: 5
- Cholesterol: 180