

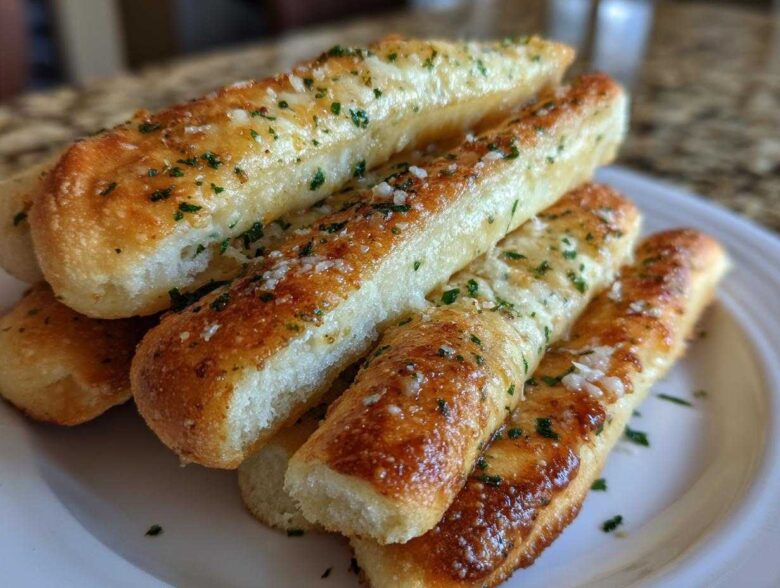
Okay, let’s be real. Is there anything better than those warm, buttery breadsticks you get at your favorite Italian spot? I swear, I used to go to Olive Garden *just* for the breadsticks and call it a night! But that floppy, greasy pile you get sometimes? Not quite right. So, I spent what felt like months—tossing dough, burning garlic, swearing at my oven—to finally nail the absolute best soft and chewy Olive Garden Copycat Breadsticks. Trust me, the dough is the secret weapon here. It needs that perfect chewiness, not just fluffiness, and getting that required 1-hour rise just right is how we stop them from turning into crackers.
Why You Will Make These Soft Breadsticks Again and Again
There’s a reason everyone pines for these things! Once you master this recipe, you’ll never go back to the freezer aisle. They just hit different, you know? Here’s why I think you’ll be making batch after batch of these beauties:
- They nail that perfect soft breadsticks texture—tender on the inside but with that slight, satisfying chewiness that makes you reach for three more.
- The Garlic Parmesan Butter topping is transformative! It’s rich, packed with real garlic flavor, and soaks right into the hot dough.
- Forget an all-day bake! This is a fantastic quick bread recipe; the active time is minimal, and you can have these ready in just over an hour.
- You get true restaurant style breadsticks without waiting in line or paying restaurant prices. Seriously satisfying!
- The dough freezes beautifully, meaning you can always have chewy breadsticks ready for unexpected movie night cravings.
Honestly, the smell alone is worth the effort. It’s going to fill your kitchen with the best Italian-American smells, and they pair perfectly with everything.
Ingredients for the Ultimate Copycat Breadsticks Recipe
Listen, if you want that perfect texture, you can’t mess around with the foundation—the dough! I’m listing everything out super clearly because when you’re trying to replicate something so specific, precision matters. We’re breaking this down into two parts: what makes the miracle dough, and what makes that killer topping. Don’t touch that whisk until you’ve got all your pieces ready, okay?
For the Homemade Dough Recipe
This is where the magic starts. The water temperature is non-negotiable, so please grab that thermometer! If it’s too cold, your yeast sulks. Too hot, and you kill it instantly. We want happy, bubbly yeast, which equals soft breadsticks!
- 1 cup warm water (It absolutely must be between 105-115 degrees F—this is key for waking up that yeast!)
- 2 1/4 teaspoons active dry yeast
- 1 teaspoon granulated sugar (This feeds the yeast, so don’t skip it!)
- 2 3/4 cups all-purpose flour, plus more for dusting
- 1 teaspoon salt
- 2 tablespoons olive oil, plus more for greasing the bowl
For the Garlic Parmesan Breadsticks Topping
This is the part that screams, “We are not eating plain rolls tonight!” The fresh ingredients shine here, especially that garlic. It has to be freshly minced; garlic powder just doesn’t give you that sharp punch we’re aiming for in this garlic butter sauce.
- 1/2 cup (1 stick) unsalted butter, melted
- 4 cloves garlic, minced (Freshly minced, please!)
- 1/2 cup grated Parmesan cheese
- 2 tablespoons fresh parsley, chopped
If you’re interested in making a homemade garlic herb butter that doubles as a fantastic dipping sauce for other things, you should definitely check out my recipe for garlic mashed potatoes with butter—the topping technique is very similar!
How to Prepare Easy Breadsticks: Step-by-Step Instructions
Okay, this is the fun part! Even though the dough needs time to do its thing, the actual hands-on work for these easy breadsticks is super fast. When you see that yeast start foaming up? That’s your signal that everything is alive and happy in there. Follow these steps exactly, and you’ll be dipping these in marinara before you know it!
Making and Proofing the Homemade Dough Recipe
First things first, we wake up the yeast. Mix that warm water, yeast, and sugar together in a big bowl and just leave it alone for about 5 to 10 minutes. If it gets foamy and bubbly on top, congratulations, you’re ready to go! Then, stir in your flour and salt until it looks like a rough, messy ball. Don’t worry about it looking pretty yet.
Now, turn that messy dough out onto a lightly floured counter. This is where you work it out! Knead it by hand for a full 5 to 7 minutes. You should feel it transform from shaggy and stiff to smooth and elastic. It’s satisfying! Pop it into an oiled bowl, cover it up tight, and let it rest for a whole hour in a warm spot. This long rest is what guarantees those incredibly soft breadsticks we are dreaming of.
Shaping and Baking Your Breadsticks
While that dough is resting, go ahead and preheat your oven to 400 degrees F (200 degrees C) and line a baking sheet with parchment—that makes cleanup almost nonexistent! Once the hour is up, punch that beautiful dough down gently. Roll or stretch it out into a big rectangle, aiming for about half an inch thick. Use a pizza cutter or a sharp knife to slice it into strips, roughly one inch wide and eight inches long.
Lay those strips on your prepared sheet, giving them a tiny bit of space between each one. Here’s a little trick: let them hang out for just 10 minutes before they go into the heat. This little breather helps them puff up just right. Bake them for 10 to 12 minutes. You want them lightly golden; don’t overbake them, or they’ll get crunchy!
Applying the Buttery Breadsticks Finish
While the breadsticks are getting golden in the oven, whip up that glorious topping! Just throw that melted butter, minced garlic, Parmesan, and parsley into a little bowl and mix everything until it smells incredible. Seriously, cover your nose or you’ll eat the topping with a spoon!
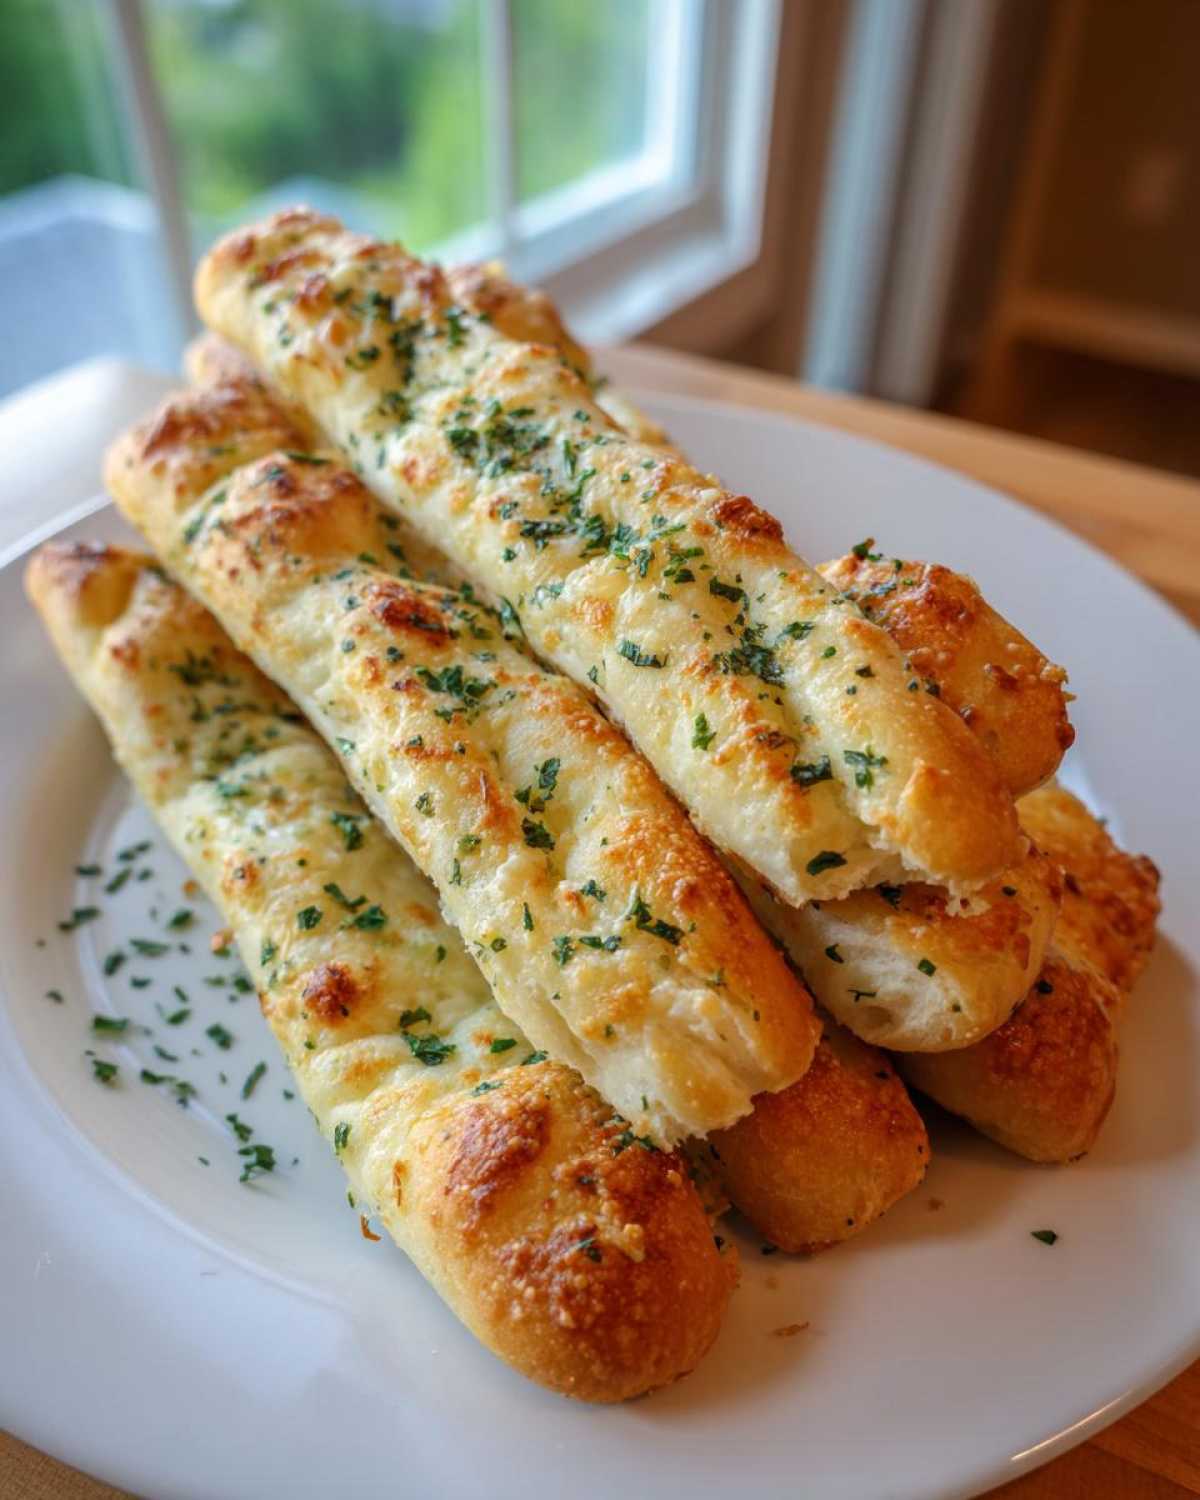
The second those breadsticks come out of the oven—I mean *immediately*—grab a brush and paint every single surface liberally with that garlic butter. The heat of the breadsticks melts the butter perfectly so it sinks right in, locking in that moisture and flavor. This step is absolutely crucial for achieving the true Olive Garden Breadsticks Copycat experience.
Tips for Perfect Chewy Breadsticks Every Time
Making bread is fun, but troubleshooting why breadsticks turn out brittle instead of delightfully chewy can be frustrating. I’ve been there! After making enough batches of these garlic breadsticks recipe variations to wallpaper my kitchen, I figured out the three biggest levers for success when aiming for that signature chew.
First up: Don’t skimp on the oil in the dough! The 2 tablespoons of olive oil aren’t just for flavor in this homemade breadsticks recipe; it adds necessary fat that coats the gluten strands, keeping them supple and soft. If you drop that down, you’ll lose that crucial pillow-like quality, and they won’t be nearly as chewy breadsticks.
Second, the oven temperature has to be right. Because these strips are thin, they bake fast. If your oven runs cool, they will dry out before they ever get a chance to puff up properly. Make sure you’re really preheating to 400°F—maybe even let it sit another five minutes after it dings its ready signal, just to be sure the heat is consistent across the board.
Finally, and this is my most important tip for texture: Brush the topping on while they are still screaming hot! If you wait even three minutes after they come out of the oven, the exterior will cool slightly, and the buttery topping will just sit on top instead of absorbing inward. That absorption is what keeps the interior of these strips moist and soft for hours. Don’t delay that buttery shower!
Variations: From Cheesy Breadsticks to Italian Breadsticks
The base dough for these babies is so fantastic, you can truly take them wherever you want! While the classic garlic parmesan is my go-to, I love experimenting, especially when I’m serving a crowd that needs a little something extra. It’s all about using that wonderful, warm Garlic Butter Topping as a canvas.
If you have some mozzarella hiding in the fridge, you absolutely must try making Cheesy Breadsticks! Right after you brush the hot breadsticks with the garlic butter mixture—and I mean immediately—sprinkle half a cup of shredded, low-moisture mozzarella over the top. Pop the whole tray back into the very hot oven for just 2 to 3 minutes, just until the cheese is melted and bubbly. Be quick, though; you don’t want to melt your breadsticks into one giant sheet!
For a more rustic, savory vibe, try dipping into the herb cabinet for an authentic Italian Breadsticks flavor. Before you add the Parmesan to your melted butter mixture, toss in a teaspoon of dried oregano and maybe half a teaspoon of dried rosemary. The heat from the butter wakes up those potent herbs perfectly. This savory twist pairs unbelievably well with a big bowl of soup, just like what I use when I make my creamy tomato soup!
If you are feeling really wild, you can even take a small handful of pepperoni, dice it super tiny, and mix that into the dough right before the first rise. You’ll get these savory little bites that remind me of a pepperoni roll, but in stick form! The possibilities are endless once you have that perfect homemade dough recipe down pat.
Storage & Make Ahead Breadsticks Instructions
You are never going to want to eat just one batch, I know! But leftovers are a thing, and thankfully, these make ahead breadsticks freeze and store really well if you treat them right. The worst thing you can do is put them in the fridge uncovered; they turn into sad, hard little logs overnight. Yuck!
For leftovers, store any extra breadsticks in a truly airtight container at room temperature. They will stay nice and soft for about two days this way. If you need to keep them longer than that, pop them into a freezer-safe bag, squeeze all the air out, and freeze them. They hold up beautifully for about a month!
Now, reheating is where most people mess up the texture. Please, please, please do not microwave them! Microwaving is the enemy of soft dinner rolls and breadsticks alike because it dries them out in about 30 seconds. The best method is to pop them back onto a baking sheet and warm them at 300 degrees F for about 5 to 7 minutes. That little bit of dry heat crisps the outside just a tiny bit while steaming the inside back to its original soft, chewy state.
But my favorite trick, which saves time on a busy weeknight, is using the dough ahead of time! You can mix this entire homemade dough recipe the day before you plan to bake. Once the dough is fully kneaded, grease your bowl like normal, but then cover it and stick it right into the refrigerator. The cold temperature significantly slows down the yeast activity. Leave it there for up to 24 hours.
When you are ready to bake, just pull the dough out of the fridge and let it sit on the counter for about 30 minutes to warm up a bit before you punch it down and shape it. You might need to let it rise for that full hour again after the second resting period, but prepping the dough the day before means you only have 15 minutes of active work before a quick bake. It’s a lifesaver when you want great appetizer bread sticks without starting from scratch!
Serving Suggestions for These Appetizer Bread Sticks
Now that you’ve got a pan full of the most glorious, buttery, garlicky sticks known to mankind, the question is: what are we dipping them in? These aren’t just good for snacking, though they totally are when they come straight out of the oven! These appetizer bread sticks need a proper partner to reach their full potential. I always think of them as the essential dinner side dish bread upgrade.
You simply cannot go wrong keeping it in the Italian-American family. Think big bowls of pasta! They are perfect for sopping up the last bit of meaty Bolognese sauce or scooping up every drop of creamy Alfredo sauce. They turn a simple weeknight spaghetti into a fancy restaurant meal. Don’t bother with bread baskets at the restaurant anymore!
But my absolute favorite pairing, especially when the weather gets chilly, is soup. These breadsticks are phenomenal for dunking. Forget crackers—bring on the hot, velvety soup! My creamy tomato basil soup, which has a little bit of zing from good Parmesan, is literally built for these things. Dipping a hot, soft breadstick into that warm soup? It’s pure comfort food heaven. You must try that combo next time you make a batch!
And hey, don’t forget the dipping sauces! Even though our garlic parmesan breadsticks are already slathered in buttery goodness, a side of warm marinara sauce for scooping is always a winner. For some variety, I occasionally mix a bit of pesto into some sour cream for a brighter green dipping flavor. Honestly, though, if you serve them warm, they don’t even need a dip—they’re perfect just as they are!
Frequently Asked Questions About Homemade Breadsticks
Can I use bread flour instead of all-purpose flour for these breadsticks?
Yes, you absolutely can, but you need to be careful! Bread flour has more protein, which is what gives you that extra structure and chew, making them closer to true Italian breadsticks. However, because bread flour absorbs more liquid, your dough might feel really stiff. If you swap it, I’d start with 1/4 cup less flour than the recipe calls for, and only add more if your dough is genuinely too sticky after kneading. Too much flour, and you’re back to having tough breadsticks, which is the last thing we want!
I want these to be Cheesy Breadsticks! When do I add the cheese?
That’s the easiest upgrade ever! If you want gooey, melty cheese, you’ll follow the basic baking instructions, but skip brushing with the butter immediately when they come out. Instead, brush them lightly with melted, plain butter first. Then, sprinkle generously with shredded mozzarella or provolone. Pop them back into the hot oven (or just place them under the broiler for 60 seconds—watch it like a hawk!) until that cheese is perfectly melted and bubbly. Finally, *then* you brush them with the garlic Parmesan mixture as directed.
Why are my breadsticks tough and dry instead of soft and chewy?
Oh, honey, I’ve been there! Most often, tough breadsticks mean one of two things happened. Either you used too much flour during the kneading or shaping stage, or you overbaked them. Since these strips are thin, they cook fast, so if you miss that 10 to 12-minute window, they dry out instantly. Also, make sure you let the dough have that full 1-hour rest time! That rise is crucial for the airy, light interior that keeps these from becoming dense sticks of disappointment.
Can I use instant yeast instead of active dry yeast?
You sure can! Instant yeast is usually more forgiving. The beauty of instant yeast is that you don’t technically need to “proof” it by waiting for it to foam up in the warm water. If you use instant yeast, just mix the water, yeast, and sugar together, let it sit for just a minute, and then immediately start adding your dry ingredients. You can skip the whole 5-to-10-minute waiting period. Just remember the water still needs to be warm, or the yeast won’t activate at all, yielding flat, sad homemade breadsticks!
Estimated Nutritional Data for Garlic Parmesan Breadsticks
If you’re tracking macros or just curious about what you are dipping into that marinara sauce, here is the general nutritional information for one of these glorious garlic parmesan breadsticks. Remember, these numbers are estimates based on the standard recipe ingredients. If you go wild with the extra cheese variation we talked about, those numbers are going to jump up in the fat and sodium department, so be mindful!
I always tell people that since this is homemade, you know exactly what’s going into it—like using real unsalted butter instead of lower-quality stuff. That counts for something, right? But still, take these with a grain of salt (pun intended, since there’s salt in the dough!).
- Serving Size: 1 breadstick
- Calories: 185
- Fat: 9g (That’s the butter working its magic!)
- Carbohydrates: 23g
- Protein: 4g
- Sugar: 1g
Just a quick disclaimer: Since we are making these from scratch and using specific brands of flour or cheese can change things slightly, please treat these figures as a good guideline rather than a scientific fact. If you swap out the olive oil for butter in the dough, for example, the fat content will shift! But for a batch of restaurant-style buttery breadsticks this good, honestly, 185 calories is a steal!
PrintThe Ultimate Soft & Chewy Olive Garden Copycat Breadsticks with Garlic Parmesan Butter
Make soft, chewy breadsticks at home that taste just like the restaurant favorite, topped with a rich garlic parmesan butter sauce.
- Prep Time: 20 min
- Cook Time: 12 min
- Total Time: 1 hour 32 min
- Yield: 16 breadsticks
- Category: Appetizer
- Method: Baking
- Cuisine: Italian-American
- Diet: Vegetarian
Ingredients
- 1 cup warm water (105-115 degrees F)
- 2 1/4 teaspoons active dry yeast
- 1 teaspoon granulated sugar
- 2 3/4 cups all-purpose flour, plus more for dusting
- 1 teaspoon salt
- 2 tablespoons olive oil, plus more for greasing
- 1/2 cup (1 stick) unsalted butter, melted
- 4 cloves garlic, minced
- 1/2 cup grated Parmesan cheese
- 2 tablespoons fresh parsley, chopped
Instructions
- Combine the warm water, yeast, and sugar in a large bowl. Let it sit for 5 to 10 minutes until foamy.
- Stir in the flour and salt into the yeast mixture. Mix until a shaggy dough forms.
- Turn the dough onto a lightly floured surface and knead for 5 to 7 minutes until smooth and elastic.
- Lightly oil a clean bowl. Place the dough in the bowl, turning to coat. Cover the bowl with plastic wrap and let it rise in a warm place for 1 hour, or until doubled in size.
- Preheat your oven to 400 degrees F (200 degrees C). Line a baking sheet with parchment paper.
- Punch down the risen dough. Roll or stretch the dough into a large rectangle, about 1/2 inch thick.
- Use a pizza cutter or knife to cut the dough into strips, about 1 inch wide and 8 inches long.
- Place the strips on the prepared baking sheet, leaving a small space between them. Let them rest for 10 minutes.
- Bake for 10 to 12 minutes, or until lightly golden brown.
- While the breadsticks bake, prepare the topping: In a small bowl, combine the melted butter, minced garlic, Parmesan cheese, and parsley. Mix well.
- As soon as the breadsticks come out of the oven, brush them generously with the garlic butter mixture.
- Serve warm immediately.
Notes
- For extra cheesy breadsticks, sprinkle an additional tablespoon of Parmesan cheese over the buttered sticks right after they exit the oven.
- If you want a quicker rise time, place the dough in an oven that has been turned off but still holds residual warmth.
- You can make the dough ahead of time and refrigerate it for up to 24 hours before rolling and baking.
Nutrition
- Serving Size: 1 breadstick
- Calories: 185
- Sugar: 1
- Sodium: 250
- Fat: 9
- Saturated Fat: 5
- Unsaturated Fat: 4
- Trans Fat: 0
- Carbohydrates: 23
- Fiber: 1
- Protein: 4
- Cholesterol: 20