

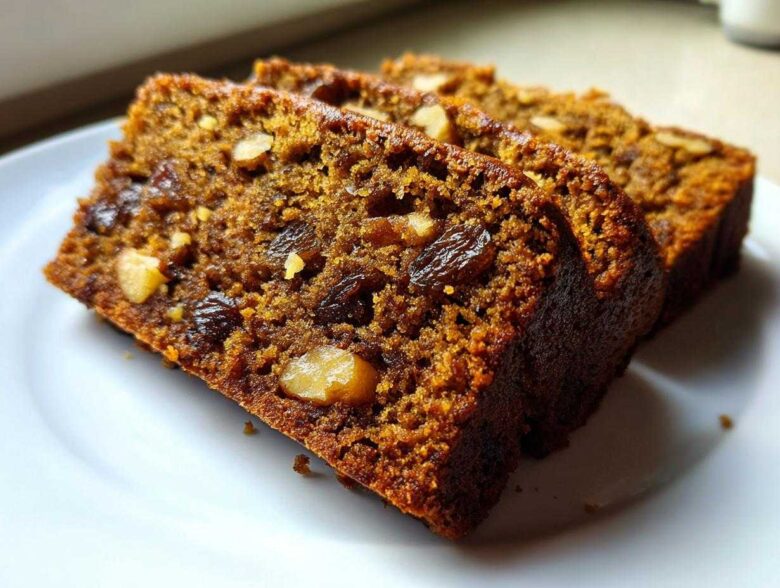
Oh, you know how I feel about those classic, cozy baked goods that smell like a hug? Nothing quite beats the nostalgia of a perfect quick bread coming fresh out of the oven. I’ve baked a million loaves over the years, and the one that always brings me back to my grandmother’s table is this Old-Fashioned, Ultra-Moist Date Nut Bread. Seriously, ditch any memory you have of dry, crumbly loaves—that is NOT what we are making here. I tried every trick in the book because I refuse to serve anything less than heavenly, and I finally cracked the code on keeping this date nut bread perfectly tender every single time. Trust me, once you try this method, you’ll never look back!
We have so many great recipes over on the blog that people love for quick snacking, like many of my favorite brunch items, but this one stands alone. It uses simple pantry ingredients, but the technique? That’s where the magic happens. You’re going to want to bookmark this one right away because this recipe is foolproof.
Why This Old-Fashioned date nut bread Recipe is Your New Favorite (Moist Date Nut Bread Recipe)
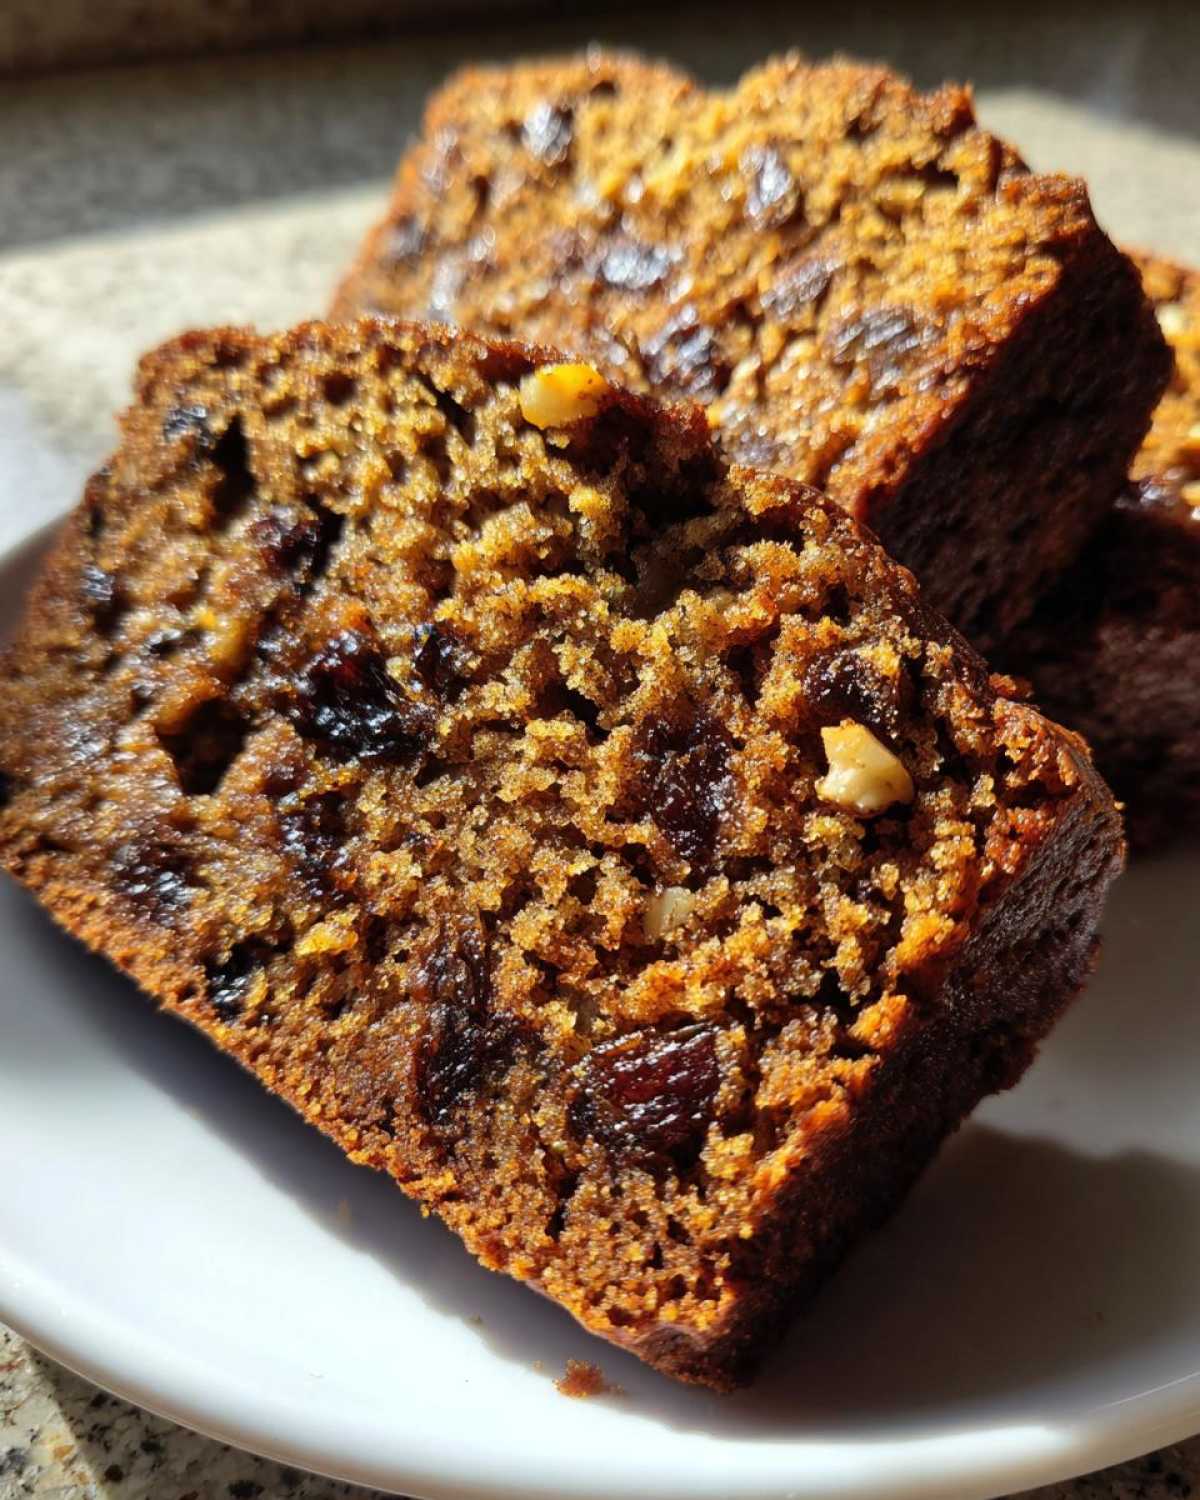
When I tell you this is the Moist Date Nut Bread Recipe you’ve been dreaming about, I mean every word. Quick breads can be tricky; sometimes they come out dense, sometimes they’re dry as dust. But this one? It’s consistently perfect. It’s got that deep, comforting sweetness you expect from a holiday fruit bread, but it’s so simple you can whip it up for a Tuesday morning snack.
Why is everyone raving about this loaf? Here’s the quick run-down on why you should trust this simple baking recipe:
- It has an unbelievably tender crumb that stays fresh for days.
- It uses everyday ingredients—no weird specialty flours needed!
- It taps right into that wonderful, comforting flavor profile we all crave.
Guaranteed Moisture Content
The secret sauce, honestly, is how we treat those dates. We aren’t just tossing them in dry; we soak them! This method essentially pre-hydrates the dates and unlocks a little bit of magic with the baking soda. That reaction ensures every bite is swimming in moisture, not shrinking away from your fork.
Simple Steps for Easy Quick Bread Baking
I made sure this whole process fits right into a busy schedule. If you can cream butter and sugar, you can make this! It truly is one of the most forgiving recipes for Easy Quick Bread Baking. You mix, pour, and wait for that incredible aroma to fill your house. It’s comfort baking at its absolute simplest.
Gathering Ingredients for Your date nut bread Loaf
Okay, now that you’re sold on the moist factor, let’s talk ingredients. You don’t need a complicated shopping trip for this recipe; it’s about using the *right* things in the right way. For the absolute Best Date Nut Loaf, the quality of your dates really matters, but everything else is pretty straightforward pantry stuff. When I first started baking this, I used whatever dates I had—but now? I’m loyal to the soft Medjools because they stand up better to the soaking step.
The magic ingredients that make this a step above any other Nut and Date Cake Recipe are the pitted dates and the boiling water, which we’ll dive into next. Get your butter soft but not melty; that’s critical for the creaming step coming up!
Here’s what you’ll need:
- 1 cup boiling water
- 1 cup packed pitted Medjool dates, chopped
- 1 teaspoon baking soda
- 1/2 cup (1 stick) unsalted butter, softened
- 1 cup packed light brown sugar
- 2 large eggs
- 1 teaspoon vanilla extract
- 1 3/4 cups all-purpose flour
- 1 teaspoon baking powder
- 1/2 teaspoon salt
- 1 cup chopped walnuts or pecans
Ingredient Notes and Substitutions for date nut bread
Let’s talk dates and nuts, because these are your flavor heavy hitters. For the dates, don’t skip pouring that boiling water over them with the baking soda! That step is non-negotiable for keeping the bread incredibly tender and it helps soften them up beautifully before they even hit the oven.
For the nuts, I usually stick with walnuts because I love that slightly bitter contrast against the sweet dates, but if you prefer pecans, go for it! Either way, make sure they are roughly chopped. If you’re making this for someone with a nut allergy, you can totally skip them, though you might want to add a handful of toasted sunflower seeds or replace them with an extra splash of vanilla for flavor depth. If you ever want to try roasting your nuts first to boost that flavor, check out my spiced nut recipe—though for this loaf, we usually just toss them in raw for ease!
Step-by-Step Instructions for the date nut bread
Alright, buckle up! This is where we turn those ingredients into the most incredible loaf you’ve ever seen. Don’t rush this part, even though it’s quick bread! Following these steps exactly makes the difference between a merely good loaf and that legendary, melt-in-your-mouth, Classic Loaf Cake texture we are aiming for. I always preheat my oven first—350 degrees F (175 degrees C)—and spend that time greasing and flouring my 9×5 inch pan until it’s perfectly shiny and ready to go. That little bit of prep ensures a beautiful release later on.
Preparing the Dates for Maximum Moisture
This first step is the key to the whole operation! Grab those chopped dates and toss them into a bowl. Now, you need to pour the boiling water right over them. Don’t think about it too much; just pour! Then, stir in that teaspoon of baking soda. You will see it start to foam up a bit, which is exactly what we want. You need to let this mixture sit there and chill out for a solid 15 minutes. This soaking process is non-negotiable for achieving that signature moistness. It’s working its magic so your final date nut bread isn’t dry!
Mixing Wet and Dry Ingredients for Your date nut bread
While the dates are soaking, we handle the wet stuff. Cream your softened butter and brown sugar together until they look light and fluffy—you want air in there! Then, beat in your eggs one by one, followed by the vanilla. In a separate bowl, whisk your flour, baking powder, and salt. Keep your dry mix ready!
Now, here’s the rule for quick breads: add your dry stuff to the wet stuff gradually. We’re alternating things, but honestly, the main thing is to mix *just* until they disappear. Seriously, stop stirring the second you don’t see streaks of flour anymore. Overmixing develops gluten, and gluten gives you tough bread, not tender bread. Once combined, fold in those soaked dates (don’t drain that liquid!) and your chopped nuts. You’re basically done with the hard part!
Baking and Cooling the Homemade Date Bread
Pour all that gorgeous batter into your prepared loaf pan. It should look thick, which is perfect! Pop it into the preheated oven and set a timer for 55 minutes. Ovens vary wildly, so you might need up to 65 minutes. You test it the old-fashioned way: stick a wooden skewer or toothpick right into the very center.
If it comes out clean or with just a few moist crumbs clinging to it—you’re done! If it’s batter, give it another five minutes. Once it passes the test, pull it out and let it hang out in the pan for about 10 minutes. This lets it firm up just enough so it doesn’t break when you try to turn it out. After that short rest, flip it onto a wire rack to cool completely. If you’re looking for even more guidance on simple baking recipes, I have a whole section dedicated to beginner tips right here on the site!
Tips for the Best date nut bread Success
Even with a great recipe, sometimes little things throw off your quick bread! For this date nut bread, I have two non-negotiable checks I always do before I even start mixing. First, fresh baking soda is your friend. If your soda or powder is old, your dates won’t foam properly, and you’ll lose that crucial lift. A quick way to check your baking soda is to drop a tiny bit into a splash of vinegar—if it fizzes like crazy, you’re good to go!
Second, make sure your butter and eggs are truly at room temperature. If the butter is too cold, you’ll never get that fluffy creamed mixture we talked about, and the whole structure suffers. If you’re having a day where you forget to pull things out, I know a trick for softening butter fast, though for this bread, just setting it near a warm oven for ten minutes usually does the trick. These small steps separate a good loaf from the truly amazing, don’t-you-dare-touch-it, bake-it-for-brunch Comfort Food Baking masterpiece!
If you enjoy this kind of spiced, cozy flavor, you also have to try the crumb topping magic I use on my apple pie crumb bars—it works beautifully sprinkled on top of this loaf too!
Variations: Customizing Your date nut bread
We love tradition, but sometimes you just need to switch things up a little bit, right? This date nut bread is so foundational that it begs to be customized. You can take this recipe and easily turn it into a deeper, more complex flavor profile, maybe even something perfect for a holiday setting. For example, if you’re looking for something exceptionally autumnal, try adding half a teaspoon of ground cloves and a quarter teaspoon of cardamom along with the existing spices—that really elevates it into a wonderful Spiced Date Bread!
Another great way to switch things up is with the flour. If you want something a little heartier, swap out half of your all-purpose flour for whole wheat. It will come out slightly denser, but honestly, still moist because of all that date goodness we added in earlier.
Trying the Banana date nut bread Variation
Okay, this one is a game-changer, especially if you find yourself with some overripe bananas staring at you from the fruit bowl. You absolutely can make a Banana Date Nut Bread Variation! If you do this, cut back on the initial boiling water slightly—maybe just use a cup of hot (not boiling) water instead—and then add about three-quarters of a cup of very soft, mashed banana into the wet ingredients when you add your eggs and vanilla.
The banana adds another layer of sweetness and moisture. If you try it, you’ll probably want to slightly reduce the brown sugar by about a quarter cup because the bananas bring their own sweetness to the party. It turns into a true hybrid loaf, perfect for a hearty slice before heading out. If you’ve ever loved my other banana recipes, like my banana bread pudding, you’ll appreciate how beautifully that tropical sweetness meshes with the dates here!
Serving Suggestions for date nut bread
When should you eat this glorious date nut bread? Honestly, any time works, but I have my favorites! The absolute best way to enjoy a slice—especially if it’s still a tiny bit warm—is slathered with soft, good-quality butter. It just melts right into the crumb, and that little bit of saltiness against the sweet dates is heaven. It’s truly fantastic as a robust morning treat, perfect with a hot cup of coffee or tea.
If you’re serving it up for brunch, maybe on a weekend morning, pair it with something bright. It’s hearty enough to stand alone as a Quick Bread for Breakfast, but sometimes I serve it alongside something like my maple cinnamon cocktail if it’s a holiday brunch!
Storage and Make Ahead Bread Options for date nut bread
One of the biggest wins for any quick bread, and especially this one, is how ridiculously well it keeps. This is truly the perfect Make Ahead Bread for busy weeks or holiday prep. Because we made sure this loaf is soaked in moisture, it handles storage like a champion!
If you’re planning on eating it within three or four days, just leave it covered loosely on the counter at room temperature. You can use foil or just put it into a bread box. Honestly, even uncovered for a day, it barely loses any moisture because of that date soak we worked so hard on.
But real talk? When I bake this, I always make two loaves because I know I won’t eat them fast enough, or I want one ready for unexpected guests. For freezing, you need to let the loaf cool off completely—and I mean rock solid cold, otherwise, moisture gets trapped and freezes weirdly. Once it’s totally cool, wrap it tightly first in plastic wrap, and then wrap that bundle again in aluminum foil. This double-wrap method is my secret defense against freezer burn.
You can freeze a whole loaf or even individual slices! If you freeze slices, just wrap each one separately. Then, when you want a slice weeks later, just peel off the plastic and pop it in the toaster or microwave for about 20 seconds. It comes back to life just like it was baked yesterday. How easy is that for having a wholesome snack on demand?
Frequently Asked Questions about date nut bread
I know when you’re trying a new recipe, even a classic one, questions pop up! I’ve spent years perfecting this loaf, so let me save you some time and answer the most common things folks ask me after they’ve looked over the steps for this date nut bread. We want every loaf you bake to be a success, whether it’s for a busy morning or a holiday centerpiece!
If you try this and still have questions, you know you can always reach out to me via the contact page—I love hearing from my kitchen crew! Check out these quick answers first, though:
Can I substitute the nuts in this date nut bread?
Oh, absolutely! I totally get it; sometimes we just don’t have walnuts on hand, or maybe you want to avoid them entirely. If you’re skipping them, you should absolutely feel free to do so. This is a lovely Sweet Loaf Recipe even without the nuts! If you want to replace them to keep that textural contrast, toasted sunflower seeds or pumpkin seeds (pepitas) are fantastic in here. If you want to go the extra step for flavor, check out some of my toasted nut seasoning ideas here for inspiration on what to add!
What makes this ‘Old Fashioned Quick Bread’ so moist?
The real trick—the thing that separates a dry loaf from this incredibly moist version—is Step 2 of the instructions. We soak the chopped dates in boiling water along with a teaspoon of baking soda for 15 minutes before mixing. That process does two things: first, it forces moisture into the dates themselves, and second, the baking soda slightly softens the dates structurally. When that date-and-water mixture goes into the batter, it guarantees a wonderfully tender crumb that lasts for days. That’s the secret to this Best Date Nut Loaf!
What if I want to use whole wheat flour?
That’s a great idea if you want a slightly more wholesome snack! For an Old Fashioned Quick Bread, I usually stick to all-purpose flour because it gives the best rise, but if you swap in whole wheat, try doing it halfway. Replace 3/4 cup of the all-purpose flour with 3/4 cup of whole wheat flour. Since whole wheat is heavier, you don’t want to go 100% unless you’re deliberately aiming for a very dense result. You might also notice it bakes up just a tiny bit quicker, so keep an eye on that skewer!
Nutritional Snapshot of Your date nut bread
Now, I’m not a nutritionist by any means—my expertise stops firmly at delivering the best possible flavor and texture! But I know many of you are curious about what you’re enjoying when you slice into this delicious date nut bread. Since this is loaded with natural sugars from the dates and brown sugar, it definitely lands on the sweeter side of the spectrum, which is perfect for a treat!
Below are the approximate nutritional estimations based on the recipe details provided. Please remember, these numbers are just a general guide. If you swap out walnuts for pecans, or use a touch less butter, these calculations will shift slightly. Think of this as a helpful guide rather than strict dietary requirements!
Here is a quick look at what you can expect per slice (based on 10 servings):
- Calories: Around 310
- Total Fat: About 14g
- Carbohydrates: Approx. 45g
- Sugar: Heavily weighted here at 28g (mostly from the fruit and brown sugar!)
- Protein: About 5g
- Fiber: Just 2g
This is why I love serving it warm with just a little smear of butter—it helps balance out that intense sweetness and gives you a little extra healthy fat!
PrintOld-Fashioned, Ultra-Moist Date Nut Bread
This recipe yields a classic, moist date nut bread loaf that is simple to prepare and perfect for snacking or breakfast.
- Prep Time: 15 min
- Cook Time: 65 min
- Total Time: 80 min
- Yield: 1 loaf (about 10 slices)
- Category: Baking
- Method: Baking
- Cuisine: American
- Diet: Vegetarian
Ingredients
- 1 cup boiling water
- 1 cup packed pitted Medjool dates, chopped
- 1 teaspoon baking soda
- 1/2 cup (1 stick) unsalted butter, softened
- 1 cup packed light brown sugar
- 2 large eggs
- 1 teaspoon vanilla extract
- 1 3/4 cups all-purpose flour
- 1 teaspoon baking powder
- 1/2 teaspoon salt
- 1 cup chopped walnuts or pecans
Instructions
- Preheat your oven to 350 degrees F (175 degrees C). Grease and flour a standard 9×5 inch loaf pan.
- Place the chopped dates in a bowl and pour the boiling water over them. Stir in the baking soda and let stand for 15 minutes. The mixture will foam slightly.
- In a large bowl, cream together the softened butter and brown sugar until light and fluffy. Beat in the eggs one at a time, then stir in the vanilla extract.
- In a separate medium bowl, whisk together the flour, baking powder, and salt.
- Gradually add the dry ingredients to the wet ingredients, mixing just until combined. Do not overmix.
- Stir in the soaked dates (with their liquid) and the chopped nuts until evenly distributed throughout the batter.
- Pour the batter into the prepared loaf pan.
- Bake for 55 to 65 minutes, or until a wooden skewer inserted into the center comes out clean.
- Let the bread cool in the pan for 10 minutes before turning it out onto a wire rack to cool completely.
Notes
- For extra moisture, you can substitute half of the water with strong brewed coffee.
- This bread freezes well once completely cooled; wrap tightly in plastic wrap and foil.
- Serve slices warm with softened butter.
Nutrition
- Serving Size: 1 slice
- Calories: 310
- Sugar: 28
- Sodium: 210
- Fat: 14
- Saturated Fat: 5
- Unsaturated Fat: 9
- Trans Fat: 0
- Carbohydrates: 45
- Fiber: 2
- Protein: 5
- Cholesterol: 55