


Oh, if there is one thing that always pulls me back to the warm, comforting roots of our kitchen heritage, it’s a small, perfectly baked bite of cheese bread. I’m Mei (Sprout!), and while Spoon loves food that simmers for hours, I adore these quick bursts of joy. Today, we’re making the real deal: the Authentic Pão de Queijo Recipe: Naturally Gluten-Free with a Perfectly Chewy and Crispy Texture. Forget those dry, crumbly imitations; this brazilian cheese bread uses tapioca flour exactly how it should be used, grounding tradition with a fresh, light structure that melts in your mouth. Trust me, once you nail this, you won’t look back!
Why This Authentic Brazilian Cheese Bread Recipe Works (Pão de Queijo Tips)
When I first tried making this years ago, I realized immediately why the authentic recipes are so revered. It’s all about the texture, isn’t it? You want that little crackle when you bite in, followed by that gorgeous, slightly stretchy, cheesy center. Why this brazilian cheese bread recipe just sings is because it hits all the right notes:
- It’s naturally gluten free cheese bread, which is just a wonderful bonus!
- The preparation is shockingly fast—we’re done mixing before the oven is even fully hot.
- The texture is the absolute dream: crispy on the outside, wonderfully chewy inside.
The Secret to Chewy Cheese Puffs: Tapioca Flour
The absolute core of Pão de Queijo is the tapioca flour, often called tapioca starch. You cannot switch this out for regular all-purpose flour, or you’ll end up with a completely different, sad little biscuit. Tapioca flour comes from the cassava root, and when it hits that hot liquid mixture we scald it in, it hydrates in a way that creates that signature starchy, elastic, almost magical pull inside the dough. It’s what gives you those incredible chewy cheese puffs that truly define this South American Bread.
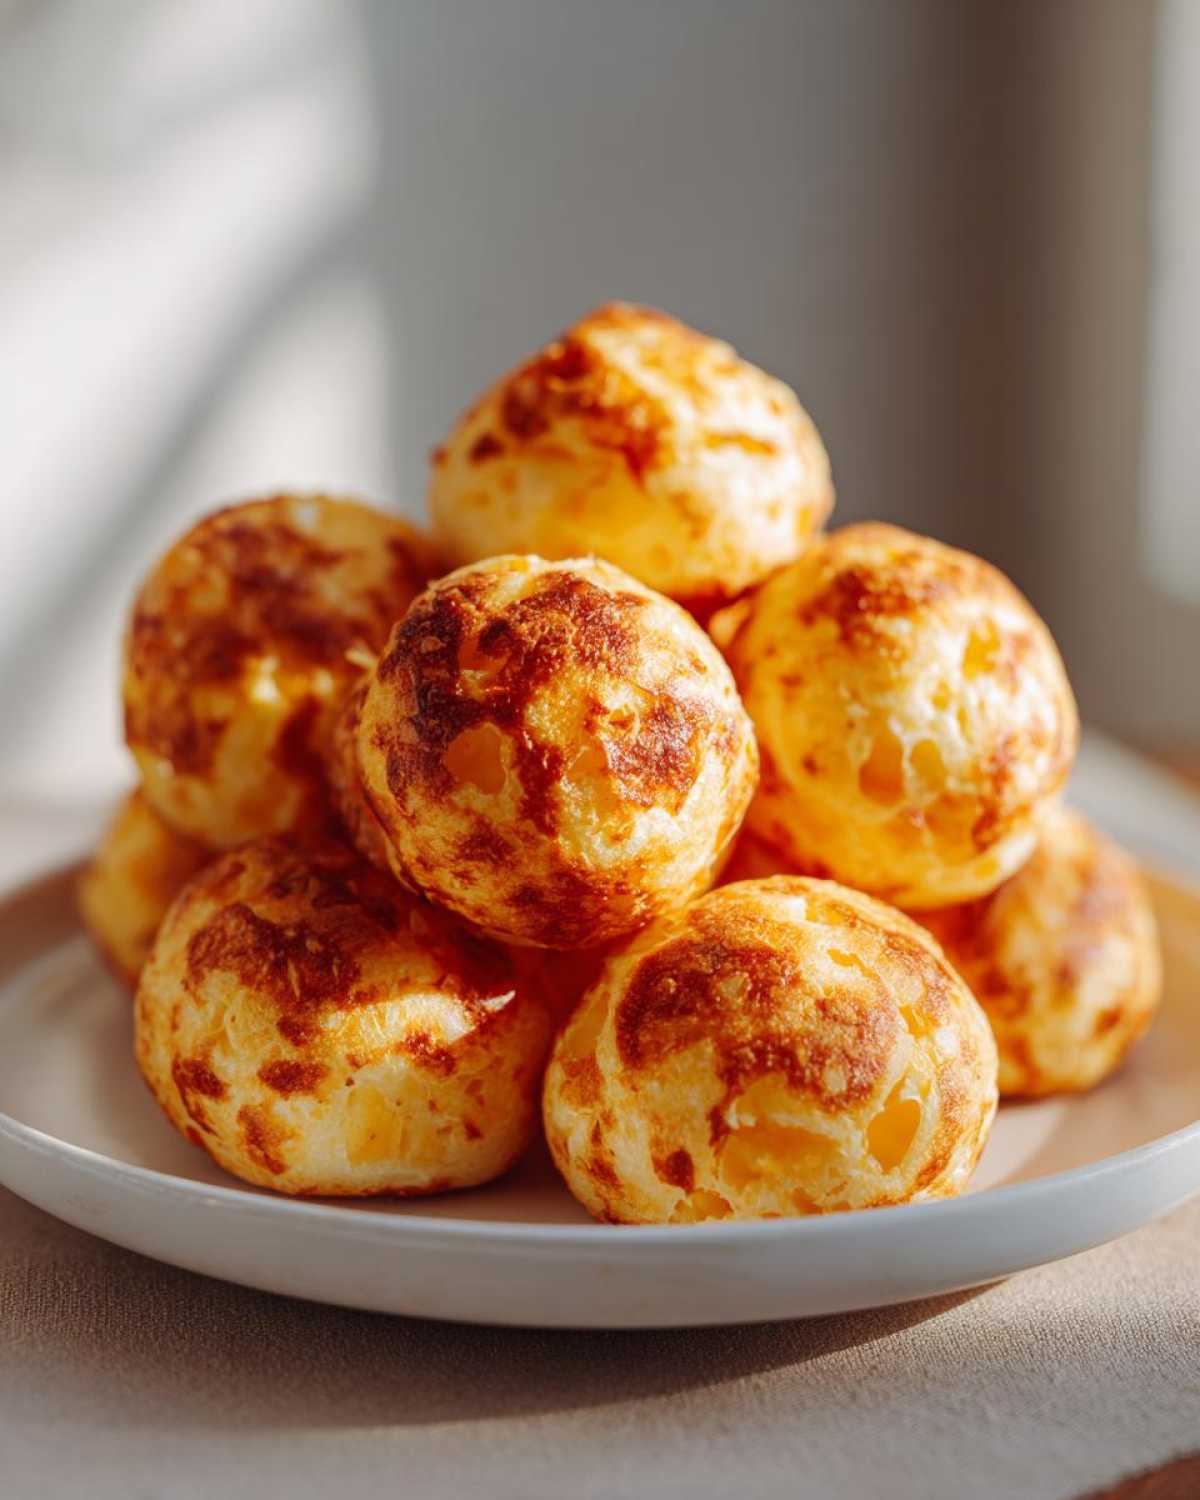
Gathering Ingredients for Your Brazilian Cheese Bread
I always tell Spoon that having everything ready before you start the liquid phase is half the battle won for any good homemade Pao de Queijo. When we gather the ingredients for this brazilian cheese bread, it’s deceptively simple—no fancy yeast or proving time needed! Just gather these essentials, and we can get started on making those perfect, warm cheesy bites.
- 1 cup whole milk
- 1/2 cup vegetable oil
- 1 teaspoon salt
- 2 cups tapioca flour (that’s tapioca starch, my dear!)
- 2 large eggs, just lightly beaten
- 1 cup shredded Parmesan cheese (for bite!)
- 1/2 cup shredded mozzarella cheese (for melt!)
How to Prepare Homemade Pao de Queijo: Step-by-Step Instructions
Now that we have our ingredients ready, let’s get into the fun part: figuring out exactly how to make brazilian cheese bread! This method, which involves scalding the flour, is what truly sets the *pão de queijo* apart from any other quick bread. It’s all about the technique and the timing here, not waiting on yeast. Follow these steps carefully, and you’ll have those perfect crispy outside soft inside bread bites in no time!
Preheating and Preparing the Pan for Brazilian Cheese Bread
First things first, let’s get that oven ready for action! We need it heated to 375°F (190°C). While it’s warming up, take your baking sheet and give it a light greasing, or if you want zero sticking drama, line it with parchment paper. This little step saves you headache later, trust me.
The Scalding Process: Combining Liquid and Tapioca Flour
This is where the magic starts! Grab a small saucepan and bring your milk, oil, and salt right up to a boil over medium heat. The second it hits that rolling boil, pull it off the stove! Immediately pour that hot liquid right over your tapioca flour in a big bowl. Stir it vigorously—it’ll look shaggy and weird, that’s perfect! Now, this is crucial: you must let that mixture cool down for a solid 10 minutes before we touch the eggs. If it’s too hot, you’ll scramble them!
Forming and Baking Your Crispy Outside Soft Inside Bread
Once the shaggy dough is cool enough, start adding those beaten eggs one at a time, mixing well after each addition until everything starts coming together into this sticky mass. Then, fold in both your Parmesan and mozzarella cheeses until they are evenly distributed throughout the dough. Now, scoop out just a rounded tablespoon of dough for each little ball—aim for about 1 to 1.5 inches across. Space them about an inch apart on your prepared pan. Bake them for about 20 to 25 minutes until they puff up and turn nicely golden brown. You can check out this great guide on authentic preparation if you want to see another good visual!

Pao de Queijo Tips and Tricks for Perfect Brazilian Cheese Bread
Okay, you’ve got the basic recipe down, but mastering this brazilian cheese bread takes just a little bit of that Spoon & Sprout magic. I love sharing these little secrets because they elevate these simple cheesy bites recipe from good to absolutely unforgettable! These Pao de Queijo Tips and Tricks are all about maximizing that texture everyone raves about.
First, remember, since we are using tapioca flour, these are naturally gluten free! We never have to worry about substituting; this is the real deal. Also, if you are aiming for that classic restaurant taste—you know, the one that tastes like the famous steakhouse rolls? Spoon insists on using a mix of sharp, salty Parmesan with the milder mozzarella for that perfect flavor depth. You can check out a great breakdown of that savory cheese rolls blend here.
My little trick—the Sprout idea—is to never skip the cooling time after scalding the flour. If the dough is too hot when the eggs go in, you deflate the little air pockets we are trying to build! A slightly cooler dough means a better final rise, giving you that beautiful hollow center. It’s worth the extra ten minutes, I promise. If you need other ideas on how to handle starchy doughs, take a peek at our gnocchi post!
Make-Ahead & Freezer Tips for Brazilian Cheese Bread Dough
One of the absolute best things about this brazilian cheese bread recipe is how incredibly freezer-friendly it is! Life gets busy, right? Spoon and I learned a long time ago that having a stash of ready-to-bake dough balls meant we always had a perfect Brazilian appetizer on hand for unexpected guests or just a cozy weekend morning.
You don’t bake them first! You freeze the raw dough balls. After you’ve rolled them into those lovely little 1 to 1.5-inch spheres, lay them out on a baking sheet lined with parchment paper—make sure they aren’t touching much. Then, slide that entire tray into your freezer until they are totally solid. I usually wait about an hour or two for them to firm up completely.
Once they are frozen solid, scoop those hard little nuggets right into a zip-top freezer bag. They’ll keep beautifully for a few weeks! They are so convenient!
When that craving hits and you need those warm cheesy bites right now, you bake them straight from frozen. Don’t bother thawing them! Just toss them onto your preheated baking sheet, but you do have to adjust the time slightly. Give them about 5 to 10 extra minutes in the oven. They might look a little less perfectly browned at first, but they’ll catch up and puff up beautifully!

Serving Suggestions for Your Brazilian Appetizer
The best part about having these addictive little brazilian cheese bread balls ready is figuring out when to unleash them upon the world! They are meant to be eaten warm—that’s non-negotiable if you want the full melted cheese effect. They are certainly versatile enough to fit any part of your day.
Traditionally, Pão de Queijo is the absolute superstar of any Brazilian breakfast recipe. Imagine having one (or three!) warm alongside a strong cup of coffee in the morning. It’s pure comfort, waking up the kitchen with that wonderful savory aroma.
But let’s be real, they are also the perfect little grab-and-go snack or the easiest Brazilian appetizer you could ever put out for company. They require zero assembly on your end, which I love when I’m busy hosting. Since they are naturally gluten free, they are a guaranteed crowd-pleaser for everyone at the party!
Spoon likes to serve ours alongside hearty soups, where they are perfect for dipping and soaking up flavor. If you are looking for another easy-to-make, no-fuss party starter, you should absolutely check out my recipe for Caprese Skewers with Pesto—they are the colorful cousins to these savory rolls!
Storing Leftover Brazilian Cheese Bread
If you actually manage to have any brazilian cheese bread left over once they come out of the oven, I have some quick advice for you! These cheesy bites recipe are absolutely best right out of the oven, but we all know that life happens. Don’t worry at all if you have a few stragglers the next day; we just need to remember they are delicate because of the tapioca flour.
The best way to store any leftovers is in an airtight container at room temperature. Don’t leave them on the counter exposed for too long, as they can get a little firm overnight. They should stay good for about two days this way. I wouldn’t push it past that; they just taste so much better fresh!
Now, reheating them is key to getting back that wonderful texture. If you try the microwave, they will probably turn kind of rubbery and sad very quickly—we want to avoid that at all costs! Instead, you need to pop them back into a preheated oven. I set mine at about 350°F (175°C) for just five to seven minutes. That short blast in the dry heat really helps crisp up the outside skin again while warming the inside just enough so you get that glorious, gooey cheese melt back inside. It brings them right back to life!

Frequently Asked Questions About Pao de Queijo
It’s okay if you still have a few questions buzzing around after baking your first batch of these wonderful brazilian cheese bread! When Spoon and I first started making these—when they were just called *tapioca flour bread* instead of the fun name Pão de Queijo—we had tons of confusion. Here are the answers to the things I get asked most often about getting these savory cheese rolls just right.
Is Brazilian Cheese Bread truly gluten free?
Yes, absolutely! This is one of the best things about them. Because authentic brazilian cheese bread uses only tapioca flour (which comes from the cassava root) and not wheat or any other grain, this recipe is naturally gluten free cheese bread. You don’t have to worry about adding any fancy substitutes or expensive flour blends. That clean, simple ingredient list is what gives you the perfect texture!
What cheese is best for the most authentic Brazilian Cheese Bread?
While you can certainly get away with just using one cheese, Spoon and I find that balance is everything. For the *most* authentic flavor that really pops when you bite in, you want to use about a 2-to-1 ratio of Parmesan to Mozzarella. The Parmesan brings that salty, sharp depth that cuts through the richness of the oil and milk, while the mozzarella keeps that inside wonderfully stretchy and gooey. Don’t skimp on the cheese quantity either; you want those bits throughout the dough!
Why did my Pão de Queijo not puff up?
Oh, that’s the most disappointing moment! If your chewy cheese puffs came out flat and dense instead of light and airy, it usually boils down to one of two issues regarding temperature. First, did you make sure your oven was fully preheated to 375°F (190°C)? Baking them at too low a temperature means the starch doesn’t set fast enough to hold the steam bubble. The second major culprit: if the milk/oil mixture was too hot when you added the eggs, you may have deflated the essential air pockets we worked so hard to create when we scalded the flour. Always let that starchy base cool until you can touch it before adding the eggs!
If you have any other burning questions about this recipe or anything else in our kitchen, please don’t hesitate to reach out to us through our contact page!
Nutritional Estimate for This Cheesy Bites Recipe
Okay, Spoon always insists on knowing the numbers, even though my focus is always on making sure it tastes like pure happiness! Since these are savory little pastries made with cheese and oil, they are certainly rich, but they are also naturally gluten free, which helps things feel a little lighter. Please keep in mind that this is just an estimate based on the recipe ingredients as written.
For one delightful piece of this brazilian cheese bread (that’s about one golf-ball-sized piece), here is what you can generally expect:
- Calories: 100
- Fat: 6g
- Saturated Fat: 3g
- Carbohydrates: 8g
- Protein: 4g
- Sugar: 0.5g (Isn’t that great? Almost zero sugar!)
- Sodium: 150mg
See? Low sugar makes these perfect for snacking any time of the day! This breakdown is just a guideline, of course, depending on exactly how much cheese we manage to squeeze into the batter!
PrintAuthentic Pão de Queijo: Naturally Gluten-Free Brazilian Cheese Bread

Make this authentic Pão de Queijo, or Brazilian Cheese Bread, at home. This recipe yields cheesy bites that are crispy outside and deliciously chewy inside. It is naturally gluten-free, perfect for a quick snack or appetizer.
- Prep Time: 15 min
- Cook Time: 25 min
- Total Time: 40 min
- Yield: About 20 bites
- Category: Snack
- Method: Baking
- Cuisine: Brazilian
- Diet: Gluten Free
Ingredients
- 1 cup whole milk
- 1/2 cup vegetable oil
- 1 teaspoon salt
- 2 cups tapioca flour (tapioca starch)
- 2 large eggs, lightly beaten
- 1 cup shredded Parmesan cheese
- 1/2 cup shredded mozzarella cheese
Instructions
- Preheat your oven to 375°F (190°C). Lightly grease a baking sheet or line it with parchment paper.
- In a medium saucepan, combine the milk, oil, and salt. Bring this mixture to a boil over medium heat.
- Remove the saucepan from the heat immediately. Pour the hot liquid mixture over the tapioca flour in a large bowl. Stir well with a wooden spoon until the mixture is combined and forms a shaggy dough. Let this cool for about 10 minutes.
- Add the eggs to the dough mixture, one at a time, mixing well after each addition until incorporated. The dough will become sticky.
- Stir in the Parmesan cheese and mozzarella cheese until they are evenly distributed throughout the dough.
- Scoop rounded tablespoons of dough and roll them into small balls, about 1 to 1.5 inches in diameter. Place the balls about 1 inch apart on the prepared baking sheet.
- Bake for 20 to 25 minutes, or until the cheese bread puffs up and the exterior is golden brown.
- Serve warm immediately for the best crispy and chewy texture.
Notes
- This recipe uses tapioca flour, making it naturally gluten-free, which is a key feature of true Pão de Queijo.
- For a copycat Texas de Brazil Cheese Bread experience, use a mix of sharp Parmesan and mild mozzarella for the best flavor balance.
- You can freeze the dough balls unbaked. Place them on a tray in the freezer until solid, then transfer them to a freezer bag. Bake directly from frozen, adding about 5 to 10 minutes to the baking time.
Nutrition
- Serving Size: 1 piece
- Calories: 100
- Sugar: 0.5
- Sodium: 150
- Fat: 6
- Saturated Fat: 3
- Unsaturated Fat: 3
- Trans Fat: 0
- Carbohydrates: 8
- Fiber: 0.1
- Protein: 4
- Cholesterol: 25