

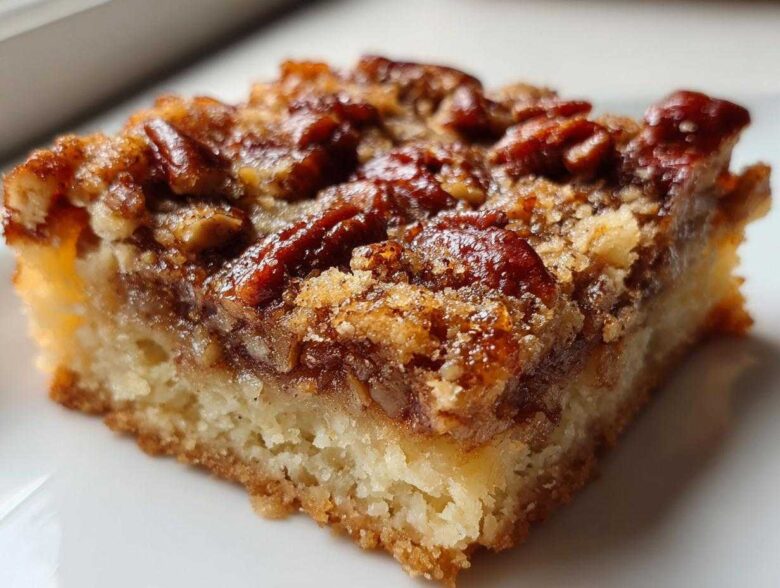
Sometimes, the heart just aches for that gooey, deep caramel-nut flavor but my hands are shouting, “No thanks, I don’t have time for pie pastry!” That’s when I lean on the clever solutions that let the Spoon’s tradition shine through without all the fuss. These pecan pie bars are my answer to that craving. We call them the Best Ever Easy Pecan Pie Bars with Buttery Shortbread Crust because they genuinely deliver that intense, rich flavor profile you expect, but the process is utterly straightforward. I love taking a deep-rooted classic, like Spoon’s obsession with proper pie flavor, and making it bright and accessible. Trust me, this reliable method guarantees gorgeous, sliceable squares every time.
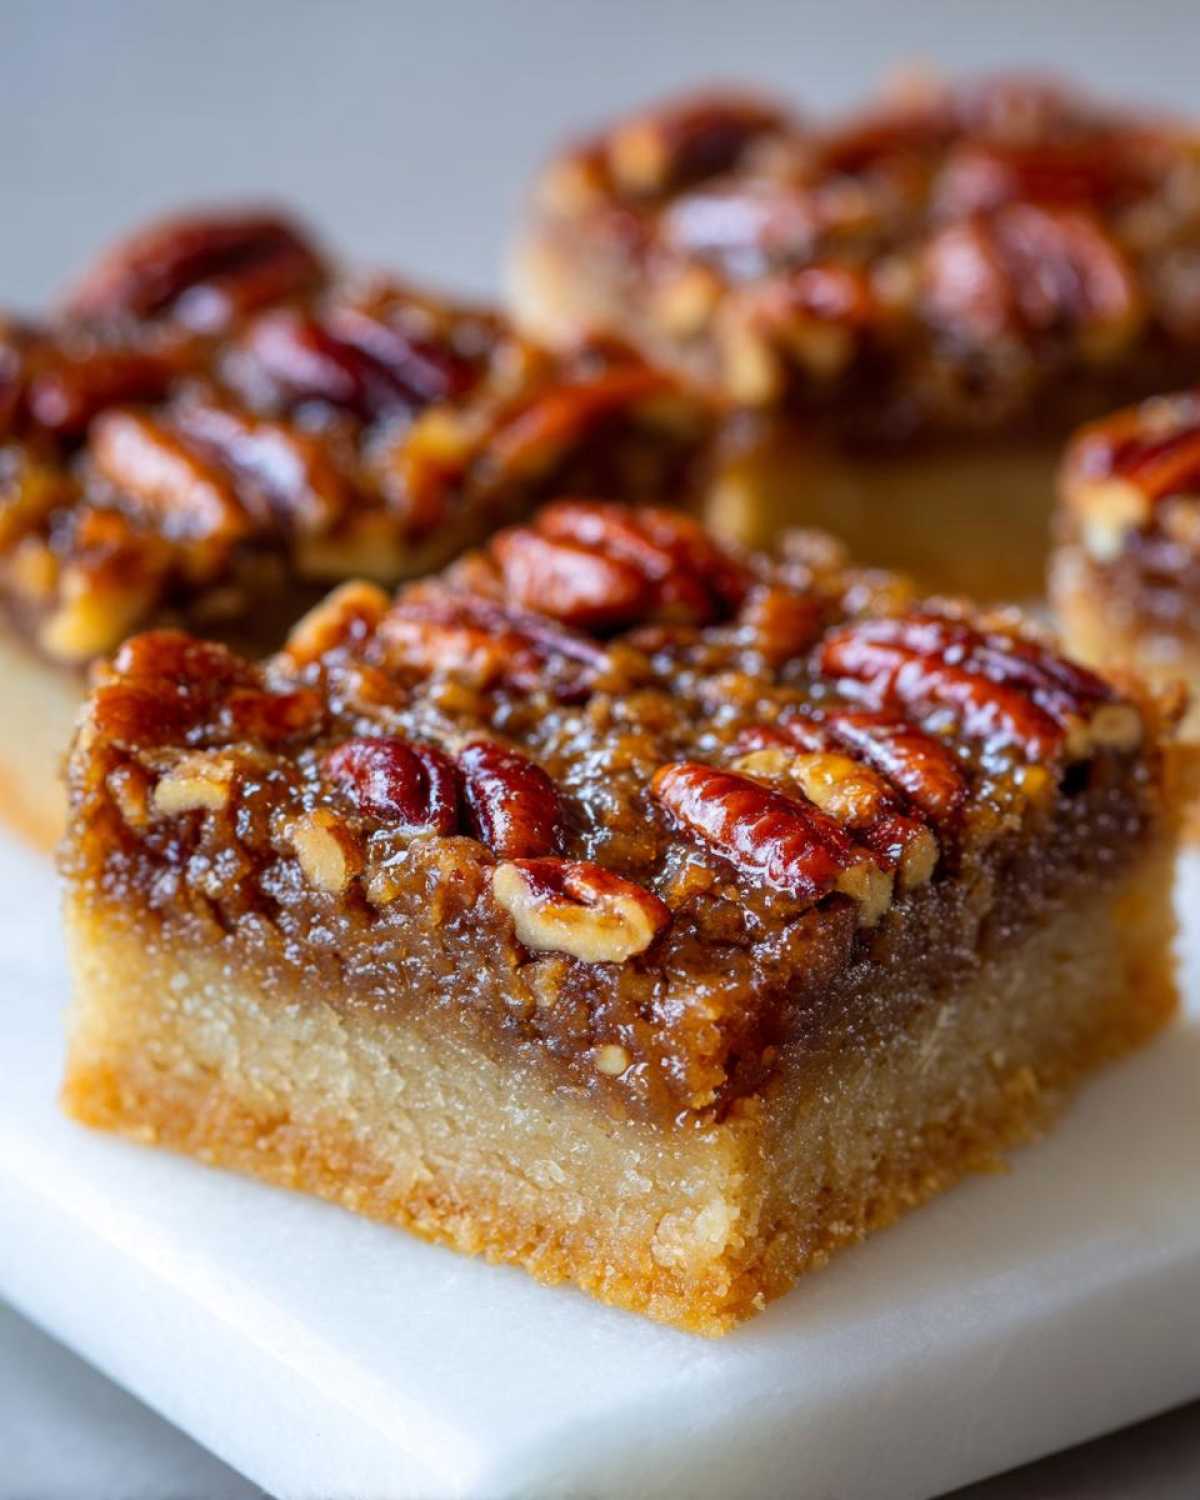
Why These are the Best Ever Easy Pecan Pie Bars
Honestly, when I see how many people save recipes that are meant to be simple, it just confirms what Spoon and I always say: we want great flavor without the headache! These pecan pie bars are utterly dependable. They taste like they took hours, but they really don’t. We’ve tested this so many times to make sure the shortbread crust is perfect without needing any fancy rolling pins.
The Simple Buttery Pecan Bars Experience
The best part? The crust comes together right in the pan. You just mix it, press it, and bake it—no chilling, no rolling, no fuss! This ease is what guarantees you end up with those perfect, gooey pecan squares that don’t fall apart when you pick them up. It’s quick-fix happiness that tastes incredibly rich.
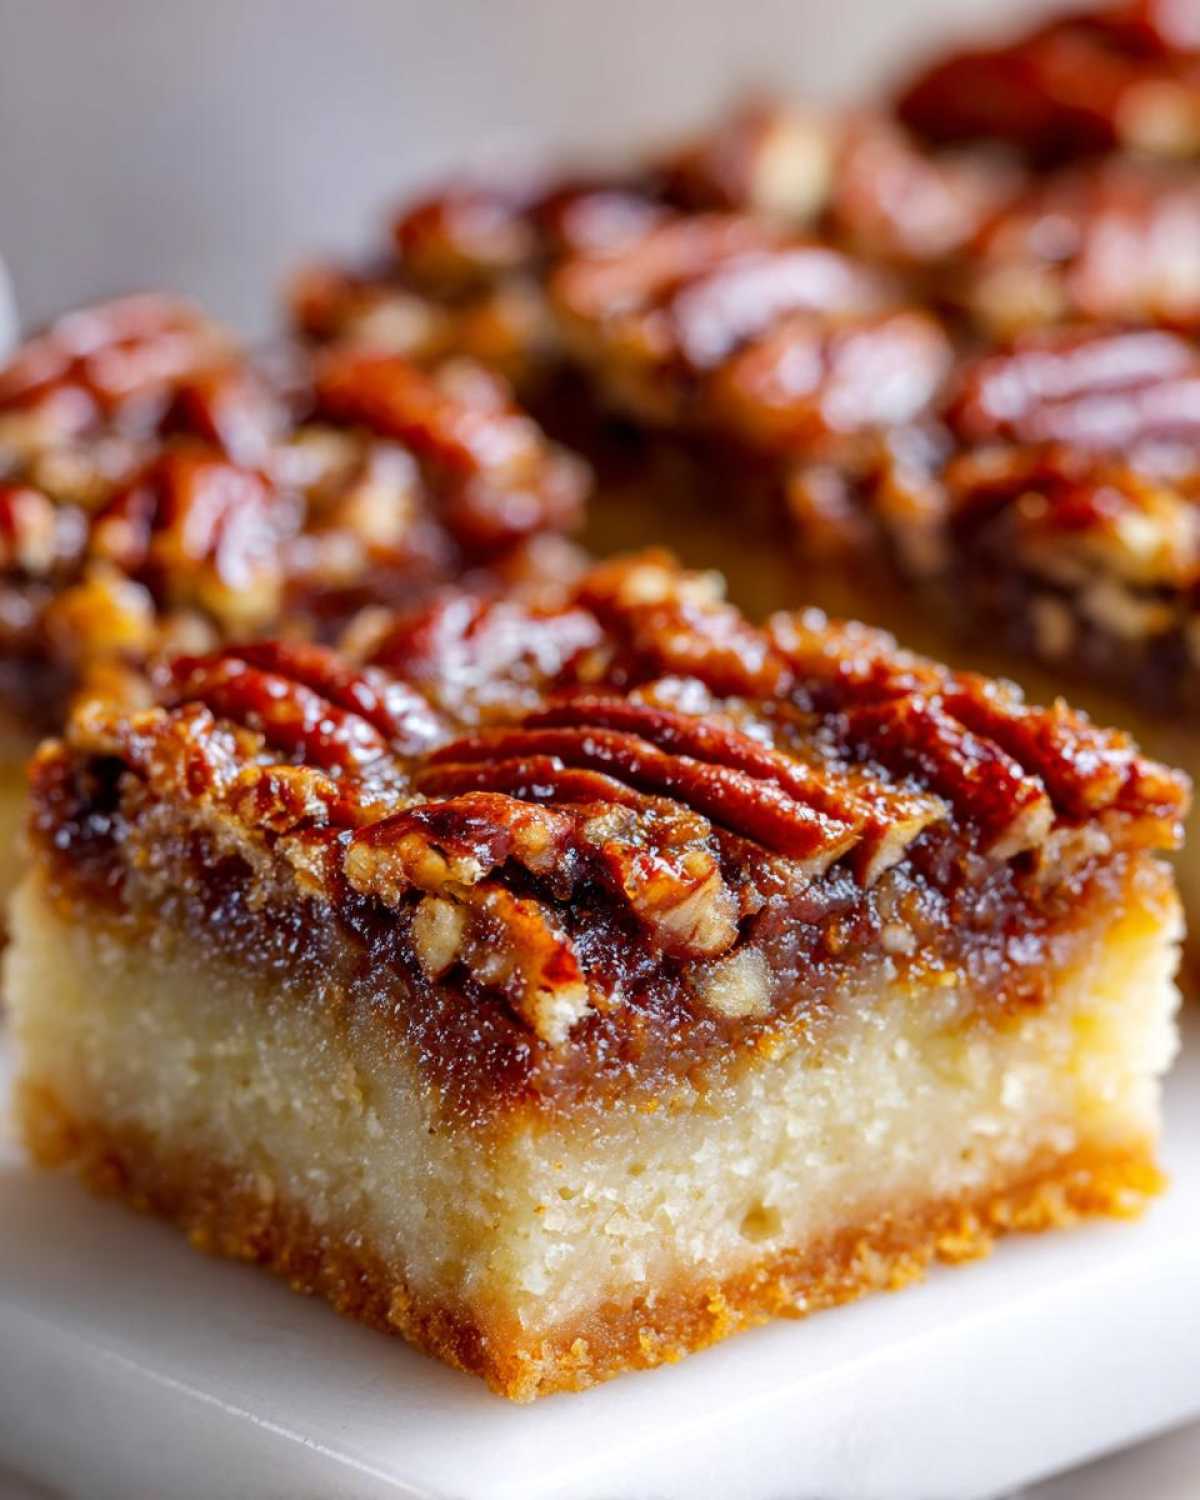
Perfect for Holidays and Family Gatherings
Since they bake up in a sheet pan, they are the definition of portability! They slice beautifully, which makes them fantastic for sharing. If you are looking for that wonderful, deep flavor of a classic pecan pie alternative but need something easy to transport to a party, these are IT. They are huge bake sale favorites because they last well and everyone grabs one (or three!). You can find our dedicated classic pecan pie bars recipe if you ever want to see the full journey, but this version keeps things super breezy.
Gathering Ingredients for Your Pecan Pie Bars
Okay, let’s talk about what you need to make these fantastic pecan pie bars. When I work on recipes like these, which lean a little more on the sweeter, richer side, I try to make sure the basics are top-notch. Spoon always reminds me that while we are making it easy, we shouldn’t skimp on the essentials that give the dessert its deep flavor. For instance, using good quality pecans really pays off here!
I’ve broken this down into the crust, which is our buttery foundation, and the filling that gets all gooey and lovely in the oven. You’ll notice we use both softened and melted butter—that’s a little trick to keep the crust tender while ensuring the topping sets up nicely.
For the Buttery Shortbread Crust Recipes Base
- 1 cup unsalted butter, softened to the perfect touchable stage.
- 1 cup powdered sugar, because it melts beautifully into the butter.
- 2 cups all-purpose flour—our main structure builder!
- 1/2 teaspoon salt, just a little pinch for balance.
For the Rich Dessert Bars Pecan Filling
This is where the magic happens, folks! That caramel cloud layered over the shortbread is what makes these rich dessert bars legendary. Don’t skip the corn syrup; it’s essential for that perfect gooey texture that will make people beg for the recipe. You can see how we use pecans alongside other ingredients in our sweet potato dish, but here they are the absolute star!
- 1 cup packed light brown sugar—packed tight!
- 1/2 cup light corn syrup—this is your secret weapon for that classic pie filling consistency.
- 1/4 cup granulated sugar.
- 1/4 cup (4 tablespoons) unsalted butter, melted and ready to go.
- 2 large eggs, room temperature is always best for emulsifying.
- 1 teaspoon vanilla extract.
- 1 1/2 cups pecan halves or pieces—feel free to toast them slightly first for extra depth!
How to Prepare Your Easy Pecan Pie Bars Step-by-Step
Alright, let’s get these easy pecan pie bars into the oven! This is where Sprout’s speed meets Spoon’s precision. While I’m not one for complicated pastry rolling, Spoon insists on a few key steps regarding temperature and timing to make sure these bars truly taste like their classic pie cousin. Pay attention to that first bake; it’s what keeps the crust perfectly sturdy underneath that gorgeous filling.
Building the Foundation: Baking the Shortbread Crust for Pecan Pie Bars
First things first, get your oven singing! Preheat it right away to 350°F (175°C). Before anything touches the pan, line that 9×13 inch baking dish with parchment paper, cutting it so you have an overhang on the sides—this is your built-in handle for getting these beauties out later. No drama, just easy removal!
Now for the crust mixture. Grab that softened 1 cup of butter, the powdered sugar, flour, and salt. Mix it all up. You can use a fork, but honestly, just using your hands gets the job done fastest! You’re looking for coarse crumbs, but keep mixing until it just starts clumping when you squeeze it. Spoon always tells me to press this mixture down firmly and evenly into the bottom of that prepared pan. He says, “If the foundation is weak, the whole house tumbles!” Bake this base for about 15 to 18 minutes. You want those edges to just barely start kissing gold—that slight browning is crucial for flavor development. If you want to see how we play with fruit and nuts in a similar bar format, check out our apple pie crumb bars, but keep this one focused on that rich pecan flavor!
Creating the Gooey Filling for Simple Nutty Bars
While that crust is getting its head start, switch gears to the filling. It’s quick! In another bowl—don’t worry about washing the first one, we’re keeping it simple—whisk together your brown sugar, corn syrup, the 1/4 cup of melted butter, eggs, and vanilla until everything looks smooth and uniform. Give it a final stir and fold in those pecans.
This is the important bit: the crust should be hot when you pour the filling over it! Take that glorious brown sugar and pecan mixture and pour it evenly right over the hot, partially baked shortbread. This little bit of heat helps the filling marry into the crust perfectly.
Final Bake and Cooling for Perfect Pecan Pie Bars
Back into the 350°F oven it goes. Let it bake for another 20 to 25 minutes. You’re looking for the filling to be mostly set. It shouldn’t be running wildly if you gently shake the pan, but don’t expect it to be rock hard either yet. They darken up nicely, and the pecans get just toasted enough.
Now, here’s the hardest part: waiting! You absolutely must let these pecan pie bars cool completely in the pan on a wire rack. Seriously, don’t even think about cutting them warm, or you’ll have a sweet, sticky puddle. Once they are totally cool—and I mean room temperature cool—use that parchment overhang to lift the whole slab out. Then, and only then, slice them into your desired squares!
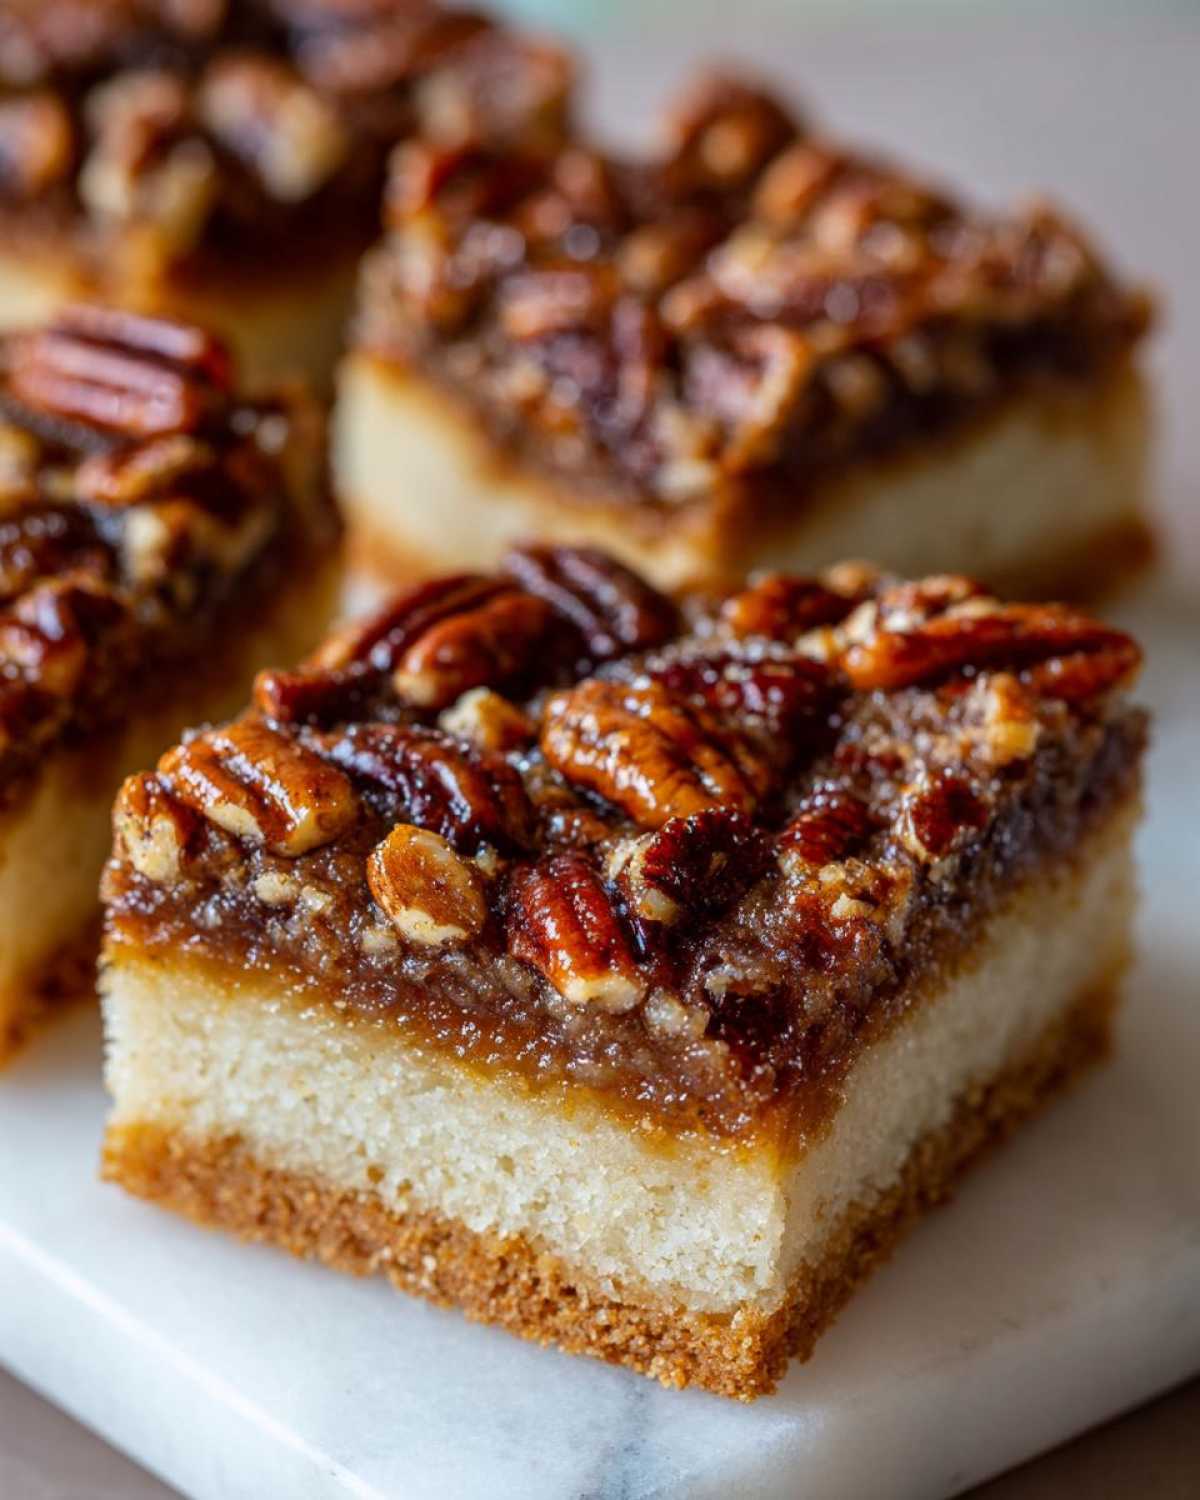
Tips for Success with Caramelized Pecan Squares
Even though these are our “Easy” pecan pie bars, there are just a couple of little secrets Spoon and I rely on to take them from “good” to absolutely unforgettable. If you want that perfect, clean slice every single time—which is key when you are serving them up for guests or taking them to a gathering—you need to listen up!
My biggest piece of advice for the cleanest cuts involves temperature. When they first come out, they look gorgeous, right? But if you slice them then, that gooey filling squishes everywhere. My favorite trick is to let them cool completely on the counter, and then stick the whole pan (still in the parchment sling) into the refrigerator for at least an hour before you slice them.
Chilling them makes the buttery shortbread firm up just enough so that when you run a sharp knife through them, boom! Perfect, clean squares every time. These become fantastic make ahead dessert bars this way, too, because they hold their shape beautifully.
Another thing that makes the flavor pop? Toasting your pecans! You don’t have to do it, but Spoon swears by it. Just spread your pecan halves or pieces on a small rimmed baking sheet and pop them in the oven for about 5 to 7 minutes while you are making the crust. Keep an eye on them—nuts burn fast! Once they smell fragrant and look slightly darker, pull them out. This little step deepens the nutty flavor of your caramelized pecan squares immensely. If you love that combination of maple, brown sugar, and pecans, you absolutely must try our sticky buns recipe too; it uses similar flavor magic!
Ingredient Notes and Substitutions for Pecan Pie Bars
When you’re dealing with a recipe as classic as these pecan pie bars, I understand that kitchens look different everywhere. Spoon and I have different pantries, and I’m sure you do too! That’s why I always try to keep an open mind about substitutions—though I always warn that if you change something fundamental, it’s going to change the character of the final product. That’s the beautiful trade-off of baking, isn’t it?
For instance, that gooey quality in the filling? That comes primarily from the corn syrup. If you absolutely cannot find corn syrup, you have a couple of options, but you need to know the trade-off. You can substitute an equal amount of molasses or maple syrup, but be prepared for a much darker color and a distinctly different, earthier flavor profile than this traditional version.
If you decide to use maple syrup, remember that it’s usually thinner than corn syrup, so you might want to reduce the melted butter slightly or add an extra teaspoon of the flour mixture from the crust batch, just to help things bind. Remember, Spoon’s wisdom always reminds us that substitutions in baking are a balancing act!
Now, a quick but important note about the stars of the show, the pecans. If you are making these for a group, always, always ask about nut allergies first. Since these simple nutty bars are so heavily reliant on the nuts for texture and flavor, if someone has an allergy, you’ll need a completely different recipe, perhaps one based on seeds or just a plain caramel square. If you *do* use the pecans, consider toasting them first—I mentioned that above, but I’m mentioning it again because it’s just that important for getting that deep, caramelized flavor!
And speaking of nuts, if you ever decide to venture into richer, honey-sweetened territory, you should check out how we handle nuts in our fig and walnut baklava. It’s a completely different world, but it shows how much the sweetener impacts the final nut flavor!
Serving Suggestions for This Easy Pecan Dessert
Oh, these Easy Pecan Desserts are rich, right? That buttery shortbread base combined with that thick, caramelized pecan layer means they are already shouting flavor. When Spoon and I serve these up, especially after a big, hearty meal (which is often!), we like to offer something that cuts through that incredible sweetness just a tiny bit. You want a counterbalance, not another heavy layer of sugar!
It’s funny, I spend all my time trying to keep things fresh and light from the garden, but sometimes you just have to lean into decadence—and these bars are definitely decadent! These are perfect for those holiday tables where everything is heavy, or when you just need a single, perfect square to satisfy a craving.
Pairing Rich Dessert Bars with Cold Toppings
My go-to solution, every single time, is something cold and simple. The contrast in temperature is just fantastic against that dark caramel. You absolutely cannot go wrong with a simple scoop of really good quality vanilla bean ice cream. The cold creaminess melts right into the gooey spaces between the pecans. If you’re less into ice cream, a dollop of slightly sweetened or even unsweetened whipped cream works like a charm to lighten the bite.
When we serve something really rich like these pecan pie bars, I often try to pair it with a brighter dessert on the table later in the week, just to keep things balanced. If you’re looking for something beautifully bright and spiced that relies on beautiful seasonal fruit instead of syrupy sweetness, you have to try our pear ginger cobbler recipe. It’s the perfect palate cleanser after indulging in these rich bars!
Frequently Asked Questions About Pecan Pie Bars
We get asked so many great questions about these pecan pie bars because everyone wants them to turn out perfectly fudgy and sliceable! I pulled together a few of the most common things I hear from folks in the kitchen. Don’t be shy if you have another question—just send us a note on the blog!
Can I use store-bought dough for these pecan pie bars?
That is the ultimate question for the busy cook! The honest answer is yes, you technically can, especially if you’re aiming for ultra-quick results. Many people use store-bought sugar cookie dough as a shortcut, and it will certainly work in a pinch!
However, here’s where Spoon and I put our foot down: the homemade shortbread crust truly makes these pecan pie bars what they are. That crust is so simple—flour, powdered sugar, and butter, mixed by hand! It creates a buttery richness and a tender structure that the pre-made dough just can’t match if you are trying to achieve the best pecan bar recipe. If you try the homemade version once, I bet you won’t go back to the box!
Why are my gooey pecan squares runny in the center?
Oh, the dreaded runny center! That is the most common heartbreak when making these kinds of bars, and it almost always comes down to two specific moments in the process. First, you have to trust the visual cue during the second bake. When you think they are done, give the pan a very gentle nudge. If the entire filling jiggles like water, put it back in for another five minutes. You want it to look mostly set, with just a tiny bit of wobble in the very center.
But the actual secret weapon against runniness is the cooling period! These bars are still cooking slightly when they come out of the oven, and the filling needs time to stabilize. You simply cannot rush this part. If you try to cut them warm, they will definitely be messy. Seriously, cover them and let them cool completely—ideally chilling them for an hour, as I shared before. That cooling time is non-negotiable if you want those beautiful, clean slices of gooey pecan squares for your guests. If you’re curious about other highly rated recipes, you can always check out how Natasha handles her excellent version here.
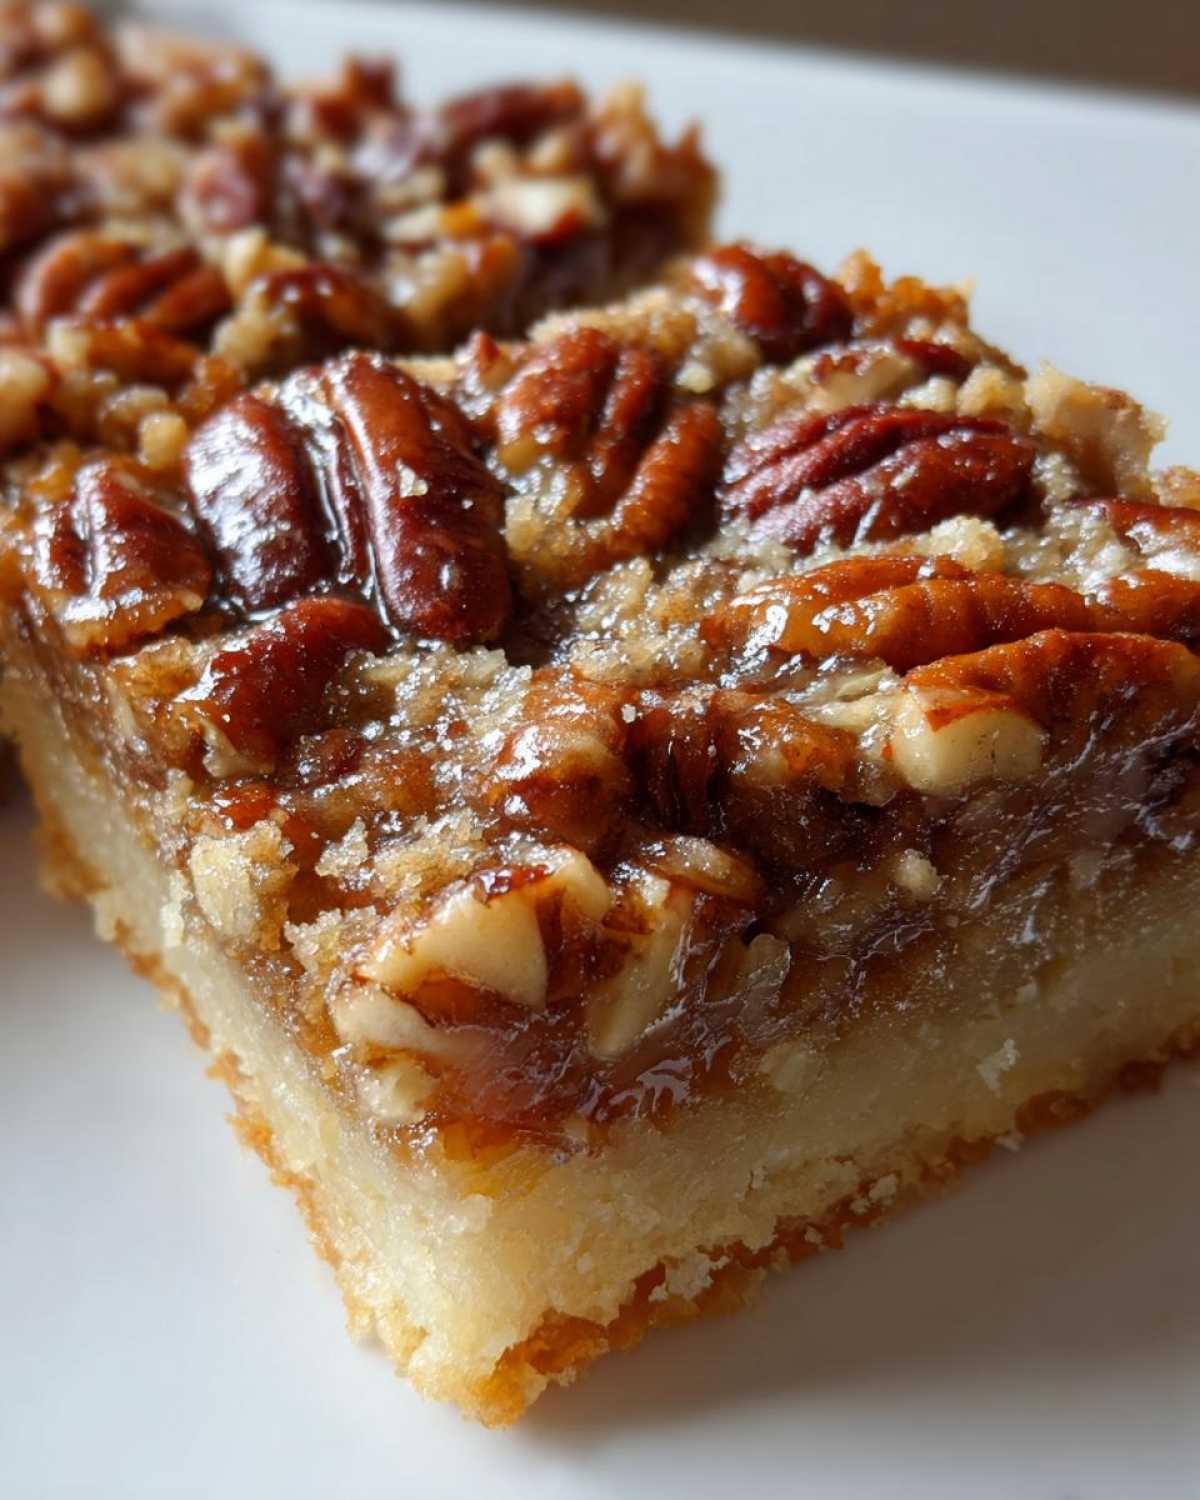
Storage and Reheating Instructions for Homemade Pecan Slices
One of the biggest blessings of making bar cookies instead of a full pie is how wonderfully they store! These luscious homemade pecan slices really shine as a make-ahead item, which is perfect for me when the holidays get hectic and I need to get ahead of the game. Spoon hates any kind of food waste, and thankfully, these keep beautifully.
If you managed to keep any leftovers (which is a feat in itself, truthfully!), you don’t need to worry about scrambling for oven space to reheat them. They are actually intended to be served at room temperature or even slightly chilled.
For general storage at room temperature—and this assumes your kitchen isn’t blazing hot—you can store these right on the counter in a single layer or separated by parchment paper in a tightly sealed container. Properly stored this way, they should stay fresh and delicious for up to 4 days. That high sugar content in the filling acts like a little preservation shield, which is fantastic!
If you made a giant batch, or if you just want them ready for a party next week, the freezer is your friend. Wrap the entire cooled slab—or individual squares wrapped tightly in plastic wrap and then foil—and tuck them into a freezer-safe bag. They freeze like a dream for up to three months. When you decide you need a sweet fix, just pull them out and let them thaw on the counter for an hour or two. They taste just as gooey and divine!
If you’re wanting to refresh them just a tiny bit after a day or two sitting out, a quick 10-second zap in the microwave can bring back that fresh-from-the-oven softness, though I usually prefer them room temperature for cleaner slicing. For other make-ahead comfort foods that survive the fridge beautifully, check out how we handle leftovers in our enchilada recipe; it’s the same principle of easy storage!
Estimated Nutritional Data for Classic Pecan Pie Bars
Now, I know not everyone dives into the nutrition facts every time they bake an indulgent treat, but Spoon always reminds me that being informed is part of being responsible in the kitchen. Since these pecan pie bars deliver big flavor, they also deliver on richness. We put together this estimate just so you have a general idea of what you’re enjoying!
Please remember, just like with Spoon’s inherited recipes—even when we make them easy—ingredients vary! If you use slightly different corn syrup, or maybe you’re heavy-handed with the butter in the crust, these numbers will change slightly. For the most detailed breakdown, you can always check out our general cooking disclaimer page.
Here’s the general breakdown based on our standard batch yield of 24 squares:
- Serving Size: 1 bar
- Calories: Approximately 250
- Sugar: Around 22 grams (That gooey caramel is potent!)
- Fat: About 16 grams
- Saturated Fat: Roughly 6 grams
- Carbohydrates: About 25 grams
- Protein: Approximately 4 grams
- Cholesterol: About 40 mg
See? It looks rich because it IS rich! But that buttery shortbread and the caramel layer are the whole point, right? Enjoy one (or two) knowing that you created something absolutely wonderful for your family!
Share Your Spoon & Sprout Pecan Pie Bars Creations
Well, friends, here we are at the end of the journey for these beautiful, easy pecan pie bars! I hope you felt confident walking through this recipe. Whether you followed every single step Spoon insisted upon or adapted it just a tiny bit to suit your own kitchen rhythm, you have made something truly special.
That’s what Spoon & Sprout is all about, isn’t it? Taking that deeply rooted, traditional flavor—the thing that tastes like memory—and giving it new life so it fits perfectly into our busy lives today. These nutty squares are proof that you don’t need hours in the kitchen to create a show-stopping, comforting dessert.
Now, I’m dying to know how yours turned out! Did your shortbread crust bake up perfectly golden? Did you manage to wait for them to cool completely before diving in? (I never do, honestly!) Please, if you made these, give the recipe a rating at the bottom of the page—that helps other cooks know they can trust this simple method.
And if you shared a photo on social media, tag us! We absolutely love seeing how our recipes grow new leaves in your homes. Don’t hesitate to reach out if you have questions or just want to swap stories; you can always find us waiting to chat over at our Contact Page. Happy baking, and may your kitchen always be full of warmth!
PrintBest Ever Easy Pecan Pie Bars with Buttery Shortbread Crust
You get all the rich, nutty flavor of classic pecan pie in easy, sliceable bars. These treats feature a simple, buttery shortbread crust and a gooey pecan filling, making them perfect for holidays or quick desserts.
- Prep Time: 15 min
- Cook Time: 40 min
- Total Time: 55 min
- Yield: 24 servings
- Category: Dessert
- Method: Baking
- Cuisine: American
- Diet: Vegetarian
Ingredients
- 1 cup unsalted butter, softened
- 1 cup powdered sugar
- 2 cups all-purpose flour
- 1/2 teaspoon salt
- 1 cup packed light brown sugar
- 1/2 cup light corn syrup
- 1/4 cup granulated sugar
- 1/4 cup (4 tablespoons) unsalted butter, melted
- 2 large eggs
- 1 teaspoon vanilla extract
- 1 1/2 cups pecan halves or pieces
Instructions
- Preheat your oven to 350°F (175°C). Line a 9×13 inch baking pan with parchment paper, leaving an overhang on the sides for easy removal.
- Prepare the shortbread crust: In a medium bowl, combine the 1 cup softened butter, powdered sugar, flour, and salt. Mix with a fork or your hands until the mixture resembles coarse crumbs and comes together when pressed.
- Press the crust mixture evenly into the bottom of the prepared baking pan. Bake the crust for 15 to 18 minutes, until the edges are lightly golden.
- While the crust bakes, prepare the gooey pecan filling: In a separate bowl, whisk together the brown sugar, corn syrup, 1/4 cup melted butter, eggs, and vanilla extract until smooth. Stir in the pecans.
- Pour the pecan filling evenly over the hot, partially baked shortbread crust.
- Return the pan to the oven and bake for 20 to 25 minutes, or until the filling is set and the pecans are lightly toasted. The center should look mostly set, not liquid.
- Let the bars cool completely in the pan on a wire rack. This step is important for clean slicing.
- Once fully cooled, use the parchment paper overhang to lift the bars out of the pan. Cut into squares.
Notes
- For the cleanest slices, chill the cooled bars in the refrigerator for at least one hour before cutting.
- You can toast your pecans lightly before adding them to the filling for deeper flavor.
- These **make ahead dessert bars** store well in an airtight container at room temperature for up to 4 days.
Nutrition
- Serving Size: 1 bar
- Calories: 250
- Sugar: 22
- Sodium: 75
- Fat: 16
- Saturated Fat: 6
- Unsaturated Fat: 10
- Trans Fat: 0
- Carbohydrates: 25
- Fiber: 1
- Protein: 4
- Cholesterol: 40