

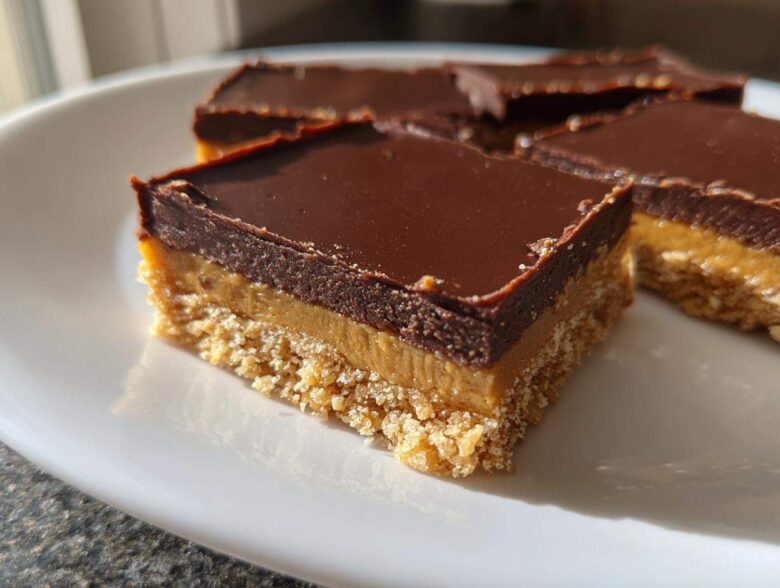
Oh, listen, I know the feeling. You get that huge craving—you know the one, that intense pull toward salty peanut butter mixed with glorious, deep chocolate—but the thought of heating up the kitchen is just a no-go, especially when it’s warm out. Trust me, I live for desserts that come together faster than I can talk myself out of them! That’s why I’m thrilled to share this recipe for my absolute favorite **Easy No-Bake Peanut Butter Chocolate Bars**.
These aren’t just good; they are famous at every family picnic and potluck I bring them to. Why? Because there’s zero oven time involved, they set beautifully in the fridge, and the layering is so satisfying to watch. I’ve perfected this technique over many summer holidays when I just didn’t want the oven on. You get that perfect, crisp crust, a creamy sweet filling, and a snappy chocolate finish. It’s dessert magic, truly!
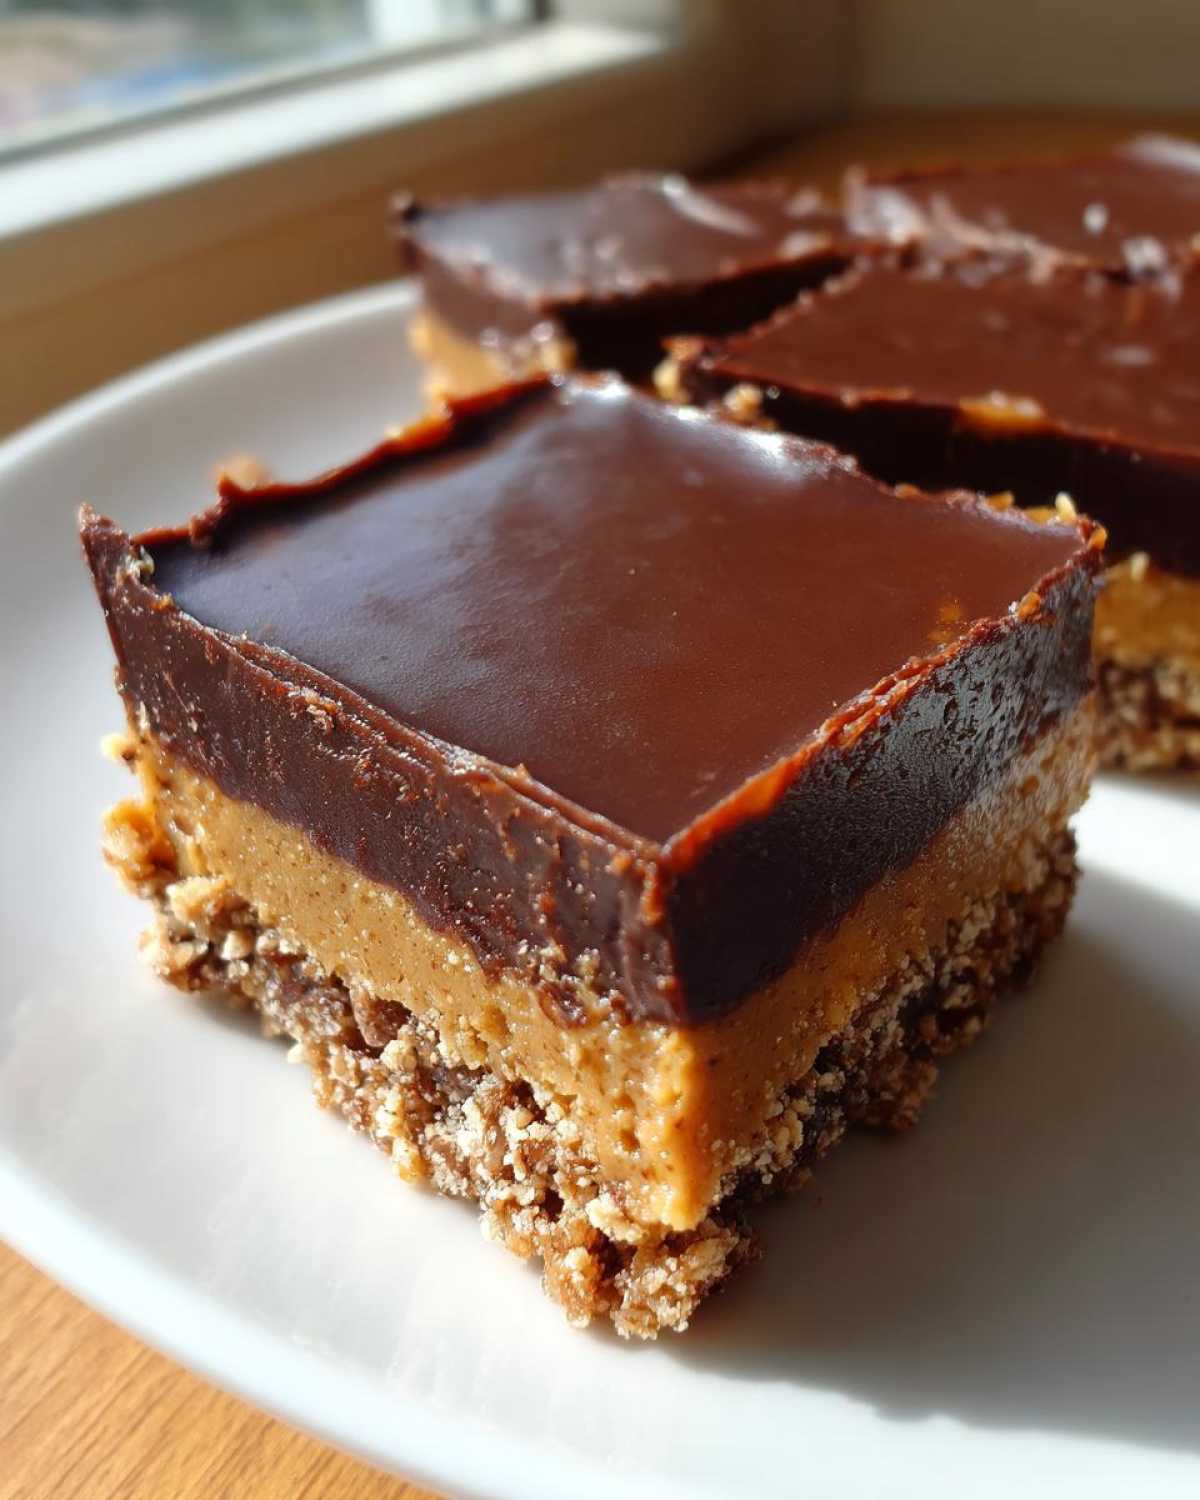
Why You Will Make These Easy No-Bake Peanut Butter Chocolate Bars
Seriously, if convenience and massive flavor are what you’re after, then you’ve hit the jackpot. These bars are designed for speed and maximum snack impact. You don’t even need measuring cups if you’re brave, though I wouldn’t recommend it!
- Zero Oven Required: That’s right, we aren’t turning on a single burner or element. Keep your kitchen cool!
- Prep Time is a Breeze: You can mix up the entire crust and filling in about fifteen minutes flat. The waiting part is the chilling, and that’s hands-off time!
- The Perfect Texture Combo: You get that sweet, slightly grainy crust, the smooth, rich peanut butter middle, and that satisfyingly firm chocolate shell on top. It’s heaven in a square.
- Great for Last Minute: Need a quick dessert for unexpected guests? Stick these in the fridge, and they are perfect and firm in two hours. These are my go-to make ahead dessert recipes for a reason.
- Kid Approved (Guaranteed): If you’re looking for quick peanut butter treats that the little ones will devour, this layered dessert bars recipe is your winner.
Essential Ingredients for Your Easy No-Bake Peanut Butter Chocolate Bars
Okay, gathering the supplies for these is almost as fun as eating them, because they use things most of us already have hanging around! We can’t skip anything here, though, because every piece plays a role in making sure these bars set up perfectly and taste incredibly rich. Remember, we’re aiming for that perfect texture that only comes from the right ratios!
Since we aren’t baking, the texture relies totally on the ingredients working together when they chill. Here is exactly what you need to have ready before you start assembling your Simple peanut butter bars recipe:
- 1 cup graham cracker crumbs – Make sure they are finely crushed!
- 1/2 cup unsalted butter, melted – This is what binds our foundation together.
- 1 cup creamy peanut butter – Stick with creamy for the best smooth filling layer.
- 1 cup powdered sugar – Absolutely needs to be sifted if it’s clumpy!
- 1 teaspoon vanilla extract – Don’t skimp on this; it rounds out the flavors.
- 1 1/2 cups semi-sweet chocolate chips – These make our lovely, fudgy top layer.
- 1/4 cup creamy peanut butter (for topping) – Yes, we add a little more peanut butter to the chocolate for that softer, meltier texture.
- You’ll need an 8×8 inch baking pan ready to go!
That’s it! Seven core ingredients, and you’re on your way to having some of the best No bake chocolate desserts you’ve ever made. The quantities are important here, especially the ratio of powdered sugar to peanut butter in the middle layer!
Tips for Perfecting Your Simple Peanut Butter Bars Recipe
Whenever I make these, I think about what confuses people the most. Since we aren’t baking to set things, all the structure comes from how you mix and press! Don’t assume just mixing will do; you have to be intentional about that base layer. If you’re looking for more peanut butter inspiration, you might love checking out this amazing no-bake peanut butter cup cheesecake sometime, too, but back to our bars!
Crust Consistency and Pressing
The number one thing people mess up on these Best no bake peanut butter squares is the crust. You absolutely need to press that graham cracker crumb mixture down firmly into the pan. Use the bottom of a dry measuring cup to really tamp it down hard! If you leave it loose, the whole bar crumbles when you try to cut the top chocolate layer later. A solid base is crucial for the final structure of these easy layered dessert bars.
Achieving Smooth Peanut Butter Layer
When you mix up that second layer—the one with the powdered sugar and vanilla—make sure you beat it until it’s completely homogenous. I’m talking baby-smooth! If you see any dry pockets of powdered sugar, smash them out against the side of the bowl until everything is creamy. Lumps in this middle layer will make your final Quick peanut butter treats look messy and ruin that silky texture.
Step-by-Step Instructions for Easy No-Bake Peanut Butter Chocolate Bars
Okay, this is where we bring the magic to life! Since these are the ultimate no oven required sweets, precision in layering and chilling is everything. Take your time on the pressing steps, and you won’t regret it when you have gorgeous, clean cuts of your **Easy No-Bake Peanut Butter Chocolate Bars**!
Preparing the Pan and Crust
First thing’s first: grab that 8×8 pan and line it really well with parchment paper. I always leave big overhangs, like little handles, sticking up over the short sides. This is your absolute ticket to getting these things out in one glorious square later! Once it’s lined, toss your graham cracker crumbs and melted butter into a bowl, mix until it looks like wet sand, and press it down *hard* into the bottom of the pan. Really pack it in there!
Creating the Peanut Butter Middle Layer
Next, grab a separate bowl. We’re mixing the primary filling for our **Simple peanut butter bars recipe**. Use your spoon or a hand mixer to beat together the 1 cup of creamy peanut butter, the powdered sugar, and the vanilla extract. Keep mixing until it transforms from grainy to smooth and easily spreadable. Don’t stop until you can’t see any white streaks! Then, gently spread this peanut butter dream layer right on top of your set crust, smoothing it out so it’s perfectly flat.
Making and Layering the Fudgy No Bake Chocolate Topping
Time for the best part! Pop your 1 1/2 cups of chocolate chips into a microwave-safe bowl. Microwave in 30-second bursts, stirring well after each one until it’s mostly melted and smooth. Take it out when there are just a few lumps left and stir in that final 1/4 cup of peanut butter. This makes our topping softer and creamier so it’s less likely to crack when you cut it! Pour this chocolate mixture over the peanut butter layer immediately and spread it evenly using an offset spatula.
Chilling and Cutting Your Easy Layered Dessert Bars
Now comes the patience test—and trust me, it’s worth it. Pop the whole pan into the refrigerator. You *must* chill these for a minimum of two hours. If you try to cut before then, the chocolate top will smear everywhere! Once they are totally firm, use the parchment handles to lift the entire block out onto a cutting board. For the cleanest slices, let the bars sit outside the fridge for about five minutes before you use a big, sharp knife to cut them into squares.
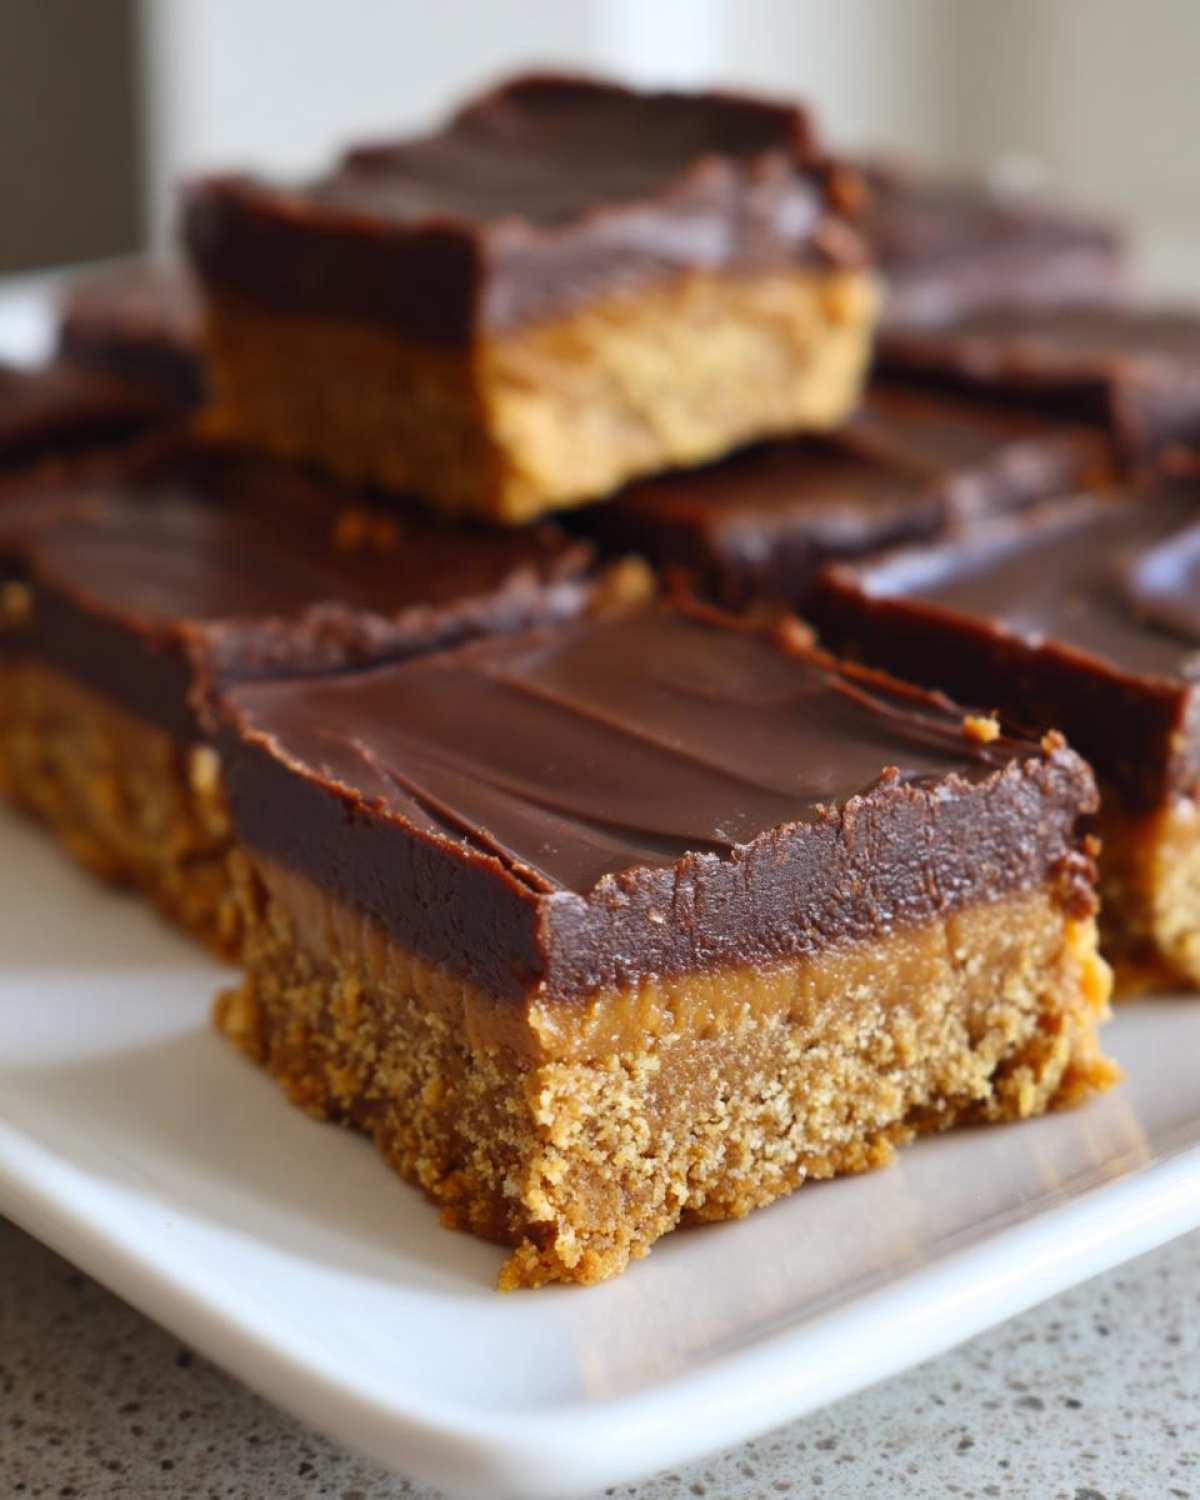
Storage and Make Ahead Dessert Recipes for Easy No-Bake Peanut Butter Chocolate Bars
This is fantastic news for anyone who loves planning ahead! Since these make ahead dessert recipes involve chilling instead of baking, they actually get *better* after a day or two in the fridge. They firm up even more, making handling and transport a total dream.
You absolutely must store these bars in an airtight container. I usually just cover the pan tightly with plastic wrap if I’m keeping them there, or I transfer the cut squares into a sturdy plastic container. They stay wonderfully fresh when refrigerated for up to a week. Seriously, one week! That shelf life makes them the ultimate no bake dessert bars for parties because you can whip them up and forget about them until the big day.
If you’ve got a huge batch, you can actually freeze them too! Just make sure you separate the layers with a little wax paper before you seal them up tight. They thaw out perfectly on the counter in about 30 minutes. This is truly my favorite strategy when I’m prepping for holidays or big game-day snacks—I get them done early, and they are ready to go!
Serving Suggestions for Homemade Peanut Butter Candy Bars
Now that you have these perfect, gorgeous squares of peanut butter and chocolate heaven, how should you serve them? Honestly, they are fantastic just sitting on a platter exactly as they are!
But if you want to dress them up just a tiny bit, I have a few go-to tricks that make these Homemade peanut butter candy bars feel a little fancy:
- The Classic Pairing: You absolutely cannot go wrong serving these alongside a tall, cold glass of milk. It’s nostalgic, satisfying, and the perfect contrast to the richness of the chocolate.
- Coffee Date Treat: If you’re enjoying these as an afternoon treat, a cup of strong, black coffee cuts through the sweetness beautifully. It’s the best way to balance that heavy peanut butter flavor.
- A Little Sprinkle Magic: Before the chocolate topping completely sets in the fridge, sprinkle on just a few mini chocolate chips or some crushed peanuts on top. It gives a nice textural pop and looks really professional.
Keep it simple, though. These bars are so flavorful on their own that they never need much fuss. Just cut them evenly, and people will be thrilled!
Frequently Asked Questions About No Bake Chocolate Desserts
I know how it is when you’re eyeing a great recipe but you just need that one little confirmation before you dive in. Since these are no-bake, sometimes people worry about the set or the texture. Don’t you worry! I’ve collected the most common questions I get about these **Easy No-Bake Peanut Butter Chocolate Bars** right here.
Can I use crunchy peanut butter in this Simple peanut butter bars recipe?
Oh, you definitely *can*, but you have to be prepared for a textural change! If you use crunchy peanut butter, your creamy middle layer will have little bits of peanut crunch throughout. This is totally fine if you love that texture, but remember, the classic results you see in my pictures come from smooth peanut butter in that middle layer. If you use crunchy, the overall bar will feel a little less smooth and silky beneath the chocolate, which is a big difference in these types of **Homemade peanut butter candy bars**!
What is the best way to cut these bars neatly?
This is key to making them look professional, especially when you’re serving them at a party! The trick is twofold: chilling time and temperature control right before the cut. Make sure they are rock solid from the fridge—at least two hours! Then, the move I swear by is to take a large, sharp knife and briefly run the blade under hot water. Wipe it dry quickly, and then press straight down to make your first cut. Repeat this process for every cut. The warm, clean blade glides right through the firm chocolate and peanut butter layers without smearing. It makes all the difference in these no bake dessert bars for parties!
Are these Kid friendly no bake snacks easy enough for children to help make?
Absolutely! These are fantastic **Kid friendly no bake snacks** because almost every step is safe and fun for little helpers! They can dump the graham cracker crumbs and the melted butter together, they love pressing the crust down (that’s a great job for tiny muscles), and they can definitely help mix the final peanut butter filling. Melting the chocolate or handling the hot knife for cutting should be strictly for the adults, but all the mixing and pressing is perfect for getting kids involved in making these Quick peanut butter treats!
Estimated Nutritional Data for Easy No-Bake Peanut Butter Chocolate Bars
Now, I know what some of you might be thinking when you see a rich, delicious treat like this: “What about the numbers?” Since these are layered bars that use butter and chocolate chips, they are definitely more of a treat than an everyday staple, but it’s good to know what you’re working with when you make a big batch of these no bake chocolate desserts.
The data below is based on cutting the recipe yield (16 bars) exactly as directed. Remember, since we aren’t actually baking anything, these figures are calculated based on the raw ingredients we mixed together. Every brand of peanut butter or chocolate chip is a little different, so please treat these figures as good estimates for your **Easy No-Bake Peanut Butter Chocolate Bars**.
- Serving Size: 1 bar
- Calories: around 250
- Fat: about 16g (with 6g of that being saturated fat)
- Carbohydrates: approximately 24g
- Sugar: around 20g
- Protein: 5g
- Sodium: 110mg
- Cholesterol: 15mg
I always say, enjoy them in moderation! The satisfaction of skipping the oven on a hot day makes these easy layered dessert bars completely worth it. If you’re keeping track, you’ll notice the sugar is pretty high, which is expected since we use powdered sugar and chocolate chips, but wow, are they worth every single bite!
Share Your Experience Making These No Bake Peanut Butter Treats
I’ve shared all my best secrets for getting these No bake chocolate desserts perfect, from pressing the crust to getting those clean cuts. Now, I really want to hear from you! Did you try swapping out the graham cracker crust? Maybe you added a dash of sea salt to the chocolate topping? Tell me everything!
When you try these **Easy No-Bake Peanut Butter Chocolate Bars**, please pop back over here and leave a rating down below. Knowing that these treats are making your quick dessert life easier is the best reward for me. Your feedback helps everyone else who comes looking for the simplest, most delicious Simple peanut butter bars recipe!
If you’re sticking around on the blog, you know I’ve got hundreds of other quick and fun recipes waiting for you. Check out the main recipe index to see what else we can cook up (or, you know, no-cook up!) next time!
PrintEasy No-Bake Peanut Butter Chocolate Bars
Make these simple, layered peanut butter and chocolate bars without turning on your oven. They set quickly and are perfect for a fast dessert.
- Prep Time: 15 min
- Cook Time: 0 min
- Total Time: 2 hours 15 min
- Yield: 16 bars
- Category: Dessert
- Method: Chilling
- Cuisine: American
- Diet: Vegetarian
Ingredients
- 1 cup graham cracker crumbs
- 1/2 cup unsalted butter, melted
- 1 cup creamy peanut butter
- 1 cup powdered sugar
- 1 teaspoon vanilla extract
- 1 1/2 cups semi-sweet chocolate chips
- 1/4 cup creamy peanut butter (for topping)
Instructions
- Line an 8×8 inch baking pan with parchment paper, leaving an overhang on two sides for easy removal.
- In a medium bowl, combine the graham cracker crumbs and melted butter. Press this mixture firmly and evenly into the bottom of the prepared pan.
- In a separate bowl, mix together 1 cup of peanut butter, powdered sugar, and vanilla extract until smooth.
- Spread the peanut butter mixture evenly over the crust layer in the pan.
- In a microwave-safe bowl, melt the chocolate chips in 30-second intervals, stirring until smooth. Stir in the remaining 1/4 cup of peanut butter until fully combined.
- Pour the chocolate mixture over the peanut butter layer and spread it evenly to cover the surface.
- Chill the bars in the refrigerator for at least 2 hours, or until the chocolate topping is firm.
- Use the parchment paper overhang to lift the bars from the pan. Cut into squares before serving.
Notes
- For cleaner cuts, let the bars sit at room temperature for 5 minutes before slicing.
- Store leftovers in an airtight container in the refrigerator.
- You can substitute vanilla wafers or shortbread crumbs for graham crackers in the crust.
Nutrition
- Serving Size: 1 bar
- Calories: 250
- Sugar: 20
- Sodium: 110
- Fat: 16
- Saturated Fat: 6
- Unsaturated Fat: 10
- Trans Fat: 0
- Carbohydrates: 24
- Fiber: 1
- Protein: 5
- Cholesterol: 15