

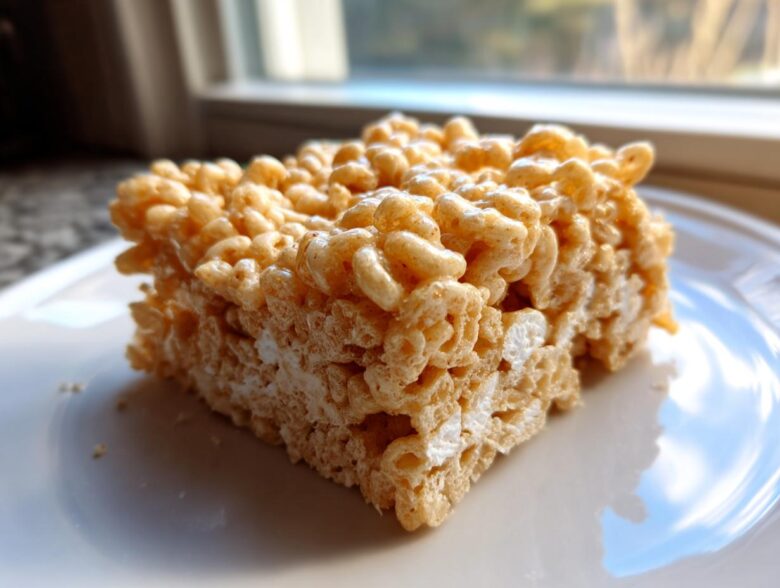
Oh, you know those treats that just instantly send you right back to childhood? The kind you could whip up on a rainy Tuesday afternoon because you had exactly three things in the pantry? That’s the magic of a truly perfect, **Classic Rice Krispie Treats Squares** recipe. I’ve seriously wasted too many bags of marshmallows trying wildly complicated flavor twists, but honestly, nothing beats the original.
I promise you, I have sweated (quietly, over a sticky pot) to nail the texture of these nostalgic treats. We’re talking about that ideal balance: crisp on the outside, supremely gooey and chewy in the middle, and never, ever cement-hard. This is the tried-and-true method my family uses, and I’m sharing every sticky detail so yours turn out perfectly chewy, just like they should.
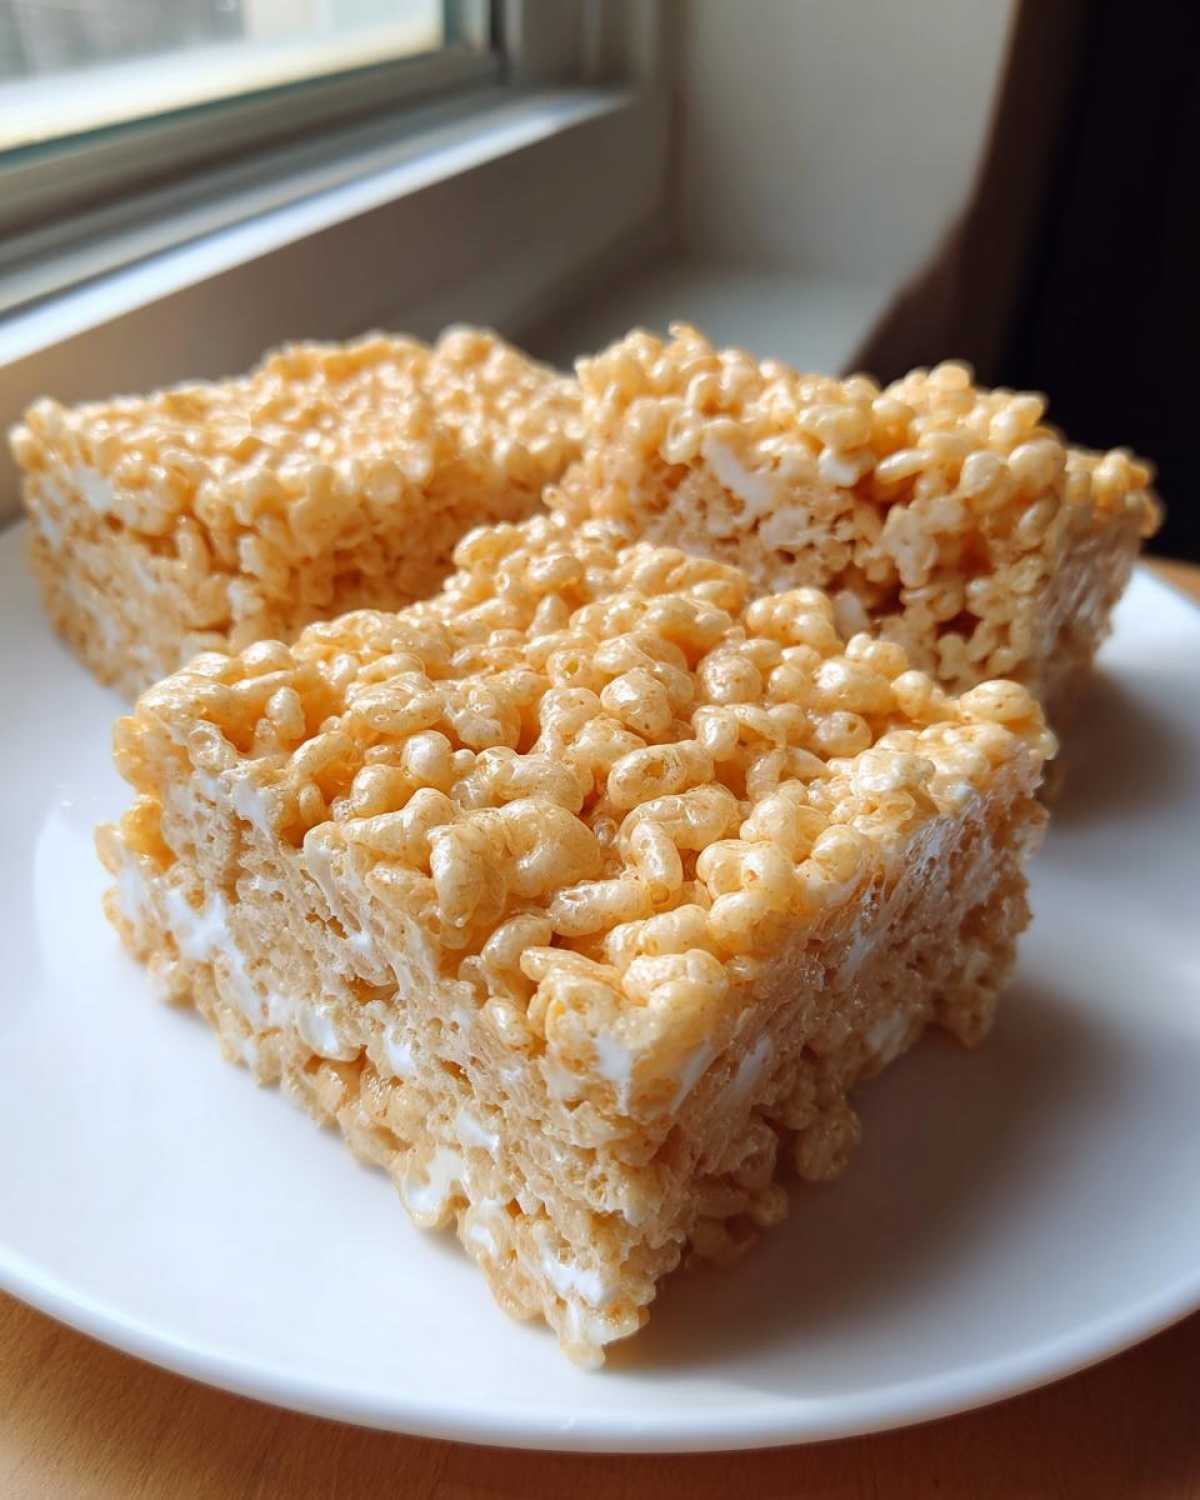
If you’re looking for a fun project that takes less time than it takes to decide what movie to watch, you’re in the right place. You can check out more foolproof recipes over on my general blog page, but for now, let’s get sticky!
Why You Will Make These Classic Rice Krispie Treats Squares
Look, there are a million ways to dress up puffed rice cereal, but people only really want one thing: that perfect, nostalgic bite. If you’ve ever ended up with a tray of treats that could double as doorstops, I hear you. I’ve fixed that common problem right here.
- Guaranteed chewiness that keeps you coming back for more.
- Takes under 15 minutes of active time—seriously, the oven stays off!
- It’s the definition of a family favorite cereal treats recipe that always works.
Perfect Texture Guaranteed for Classic Rice Krispie Treats Squares
The absolute secret to avoiding hard bars lies in two places: not overheating your marshmallows and not pushing down too hard when pressing them into the pan. We want these gooey and bendy, not brittle! Trust me on this one; I’ve learned from painful experience.
Quick and Easy No Bake Crispy Marshmallow Squares
This recipe is my go-to when I need a dessert faster than I can boil water. It’s simple, it uses ingredients you always have, and it delivers pure, comforting flavor without ever having to preheat the oven. It’s the ultimate quick dessert bars no oven solution!
Essential Ingredients for Ultimate Classic Rice Krispie Treats Squares
When you’re aiming for the classic perfection, you can’t mess around with the ingredients. This recipe is so simple—it’s a three-part harmony, really—which means every single part has to be fresh and accounted for. We are sticking to the basics here to get those best buttery puffed rice squares.
Here’s exactly what you need:
- 6 cups puffed rice cereal (use your favorite brand, but make sure it’s fresh!)
- 1 package (10 ounces) marshmallows – This is key!
- 4 tablespoons unsalted butter
Ingredient Notes and Substitution Guidance
The difference between a chewy bar and a hard brick almost always comes down to the marshmallows. You absolutely must use soft, fresh marshmallows. If your bag has been hiding in the pantry since last Halloween, please toss it! Stale marshmallows = rock-hard treats, no matter what magic you do with the rest of the steps.
I use unsalted butter because I like to control the salt level myself, but four tablespoons is non-negotiable for the right richness. If you want to feel like a total baking genius, go ahead and brown that butter first; it adds this amazing, nutty note that elevates everything without losing that traditional feel. Just watch it closely!
Equipment Needed for Perfect Classic Rice Krispie Treats Squares
You won’t need a million gadgets for these nostalgic bars, which is part of the fun! Having the right tools ready means you can move fast when the marshmallow magic starts happening. Clean-up is a breeze too, especially if you grab the right pan liner.
Before you even turn on the stove, lay everything out. This is essential when making gooey cereal treats because once you melt those marshmallows, you have maybe two minutes to get everything mixed and into the pan before things start setting up too fast.
Here’s the minimal lineup you’ll need for the best buttery puffed rice squares:
- A large, heavy-bottomed saucepan (you need space for all that cereal!).
- A large rubber or silicone spatula (for stirring and pressing).
- A measuring cup for the cereal.
- The most important piece: A 13×9 inch baking pan. I highly recommend lining it completely with parchment paper that hangs over the sides. Trust me, this little bit of overhang saves your sanity later when you’re trying to get them out in one piece!
Step-by-Step Instructions: How to Make Classic Rice Krispie Treats Squares
Okay, this is where the real magic happens, and remember what I said about timing being everything? Read these steps once, then grab your things because once you start melting the butter, the clock is ticking!
We are talking about the simplest simple gooey cereal treats instructions here. The goal is smooth, uniform melted marshmallow goo—no burning, no lumps!
Melting Butter and Marshmallows Correctly
First things first: place your saucepan over low heat. I cannot stress this enough—low heat! If you crank that dial up, you risk burning the butter or, worse, actually cooking the marshmallows, which makes them stiff and snappy later on. Melt your four tablespoons of butter until it’s just liquid. Then, toss in the entire bag of marshmallows.
Stir constantly using your spatula. Keep pushing those puffy things around until they completely disappear into a silky, glossy sauce with the butter. The second that mixture is smooth and uniform, yank the whole pan right off the burner. Don’t let it sit even for a second while still on the heat!
Mixing Cereal and Pressing the Classic Rice Krispie Treats Squares
Now, work fast! Dump your six cups of puffed rice cereal directly into the gooey marshmallow mix. Use your spatula to gently fold everything together. You want every single piece of cereal coated in that sweet marshmallow layer, but you don’t want to smash the cereal while mixing. Be quick and gentle here.
Scrape the whole sticky mess into your prepared 13×9 pan. This is where most people go wrong trying to make perfect squares! Grab a small piece of wax paper, lightly grease it with butter or spray, and very gently spread the mixture out evenly across the pan. If you press down hard, you are compacting the air out, and that’s how you get hard treats. Just guide the mixture gently until it fills the pan. That’s it—no more pushing!
Tips for Cutting Clean Squares and Achieving Chewy Results
You’ve let them cool, and now you are staring at a giant, beautiful slab of golden goodness. Cutting them cleanly without dragging marshmallow strands across the entire pan can feel like a high-stakes operation, I know! Honestly, my first few attempts at these looked more like abstract art than neat little squares.
You have to let them cool completely, which usually means waiting about an hour at room temperature. Don’t rush this part by sticking them in the fridge—that always changes the texture and makes them brittle. Let them set up slowly.
Once they are fully cooled, use that parchment paper overhang we talked about earlier. If you lined the pan correctly, you can lift the entire block right out onto a cutting board. Then comes the trick for those Instagram-worthy edges. Forget grabbing a regular dull butter knife; you need something sharp!
For the absolute cleanest slices when cutting your Rice Krispie Treats Squares, grab a long, sharp chef’s knife. Wipe the blade down with a paper towel dipped in neutral oil (like canola or vegetable oil). The oil stops the sticky goodness from clinging to the metal. Make one clean, decisive downward cut. Don’t drag the knife back and forth cutting—just press down firmly and lift straight up between each cut. This is my top tip for anyone asking how to make perfect chewy rice krispies that look as good as they taste.
And I’ll remind you one last time: remember that rule about not pressing too hard when you put them in the pan? That rule absolutely applies to the final appearance too! Light hands during the pressing stage ensure that those treats stay delightfully soft and chewy inside when you pull them apart later.
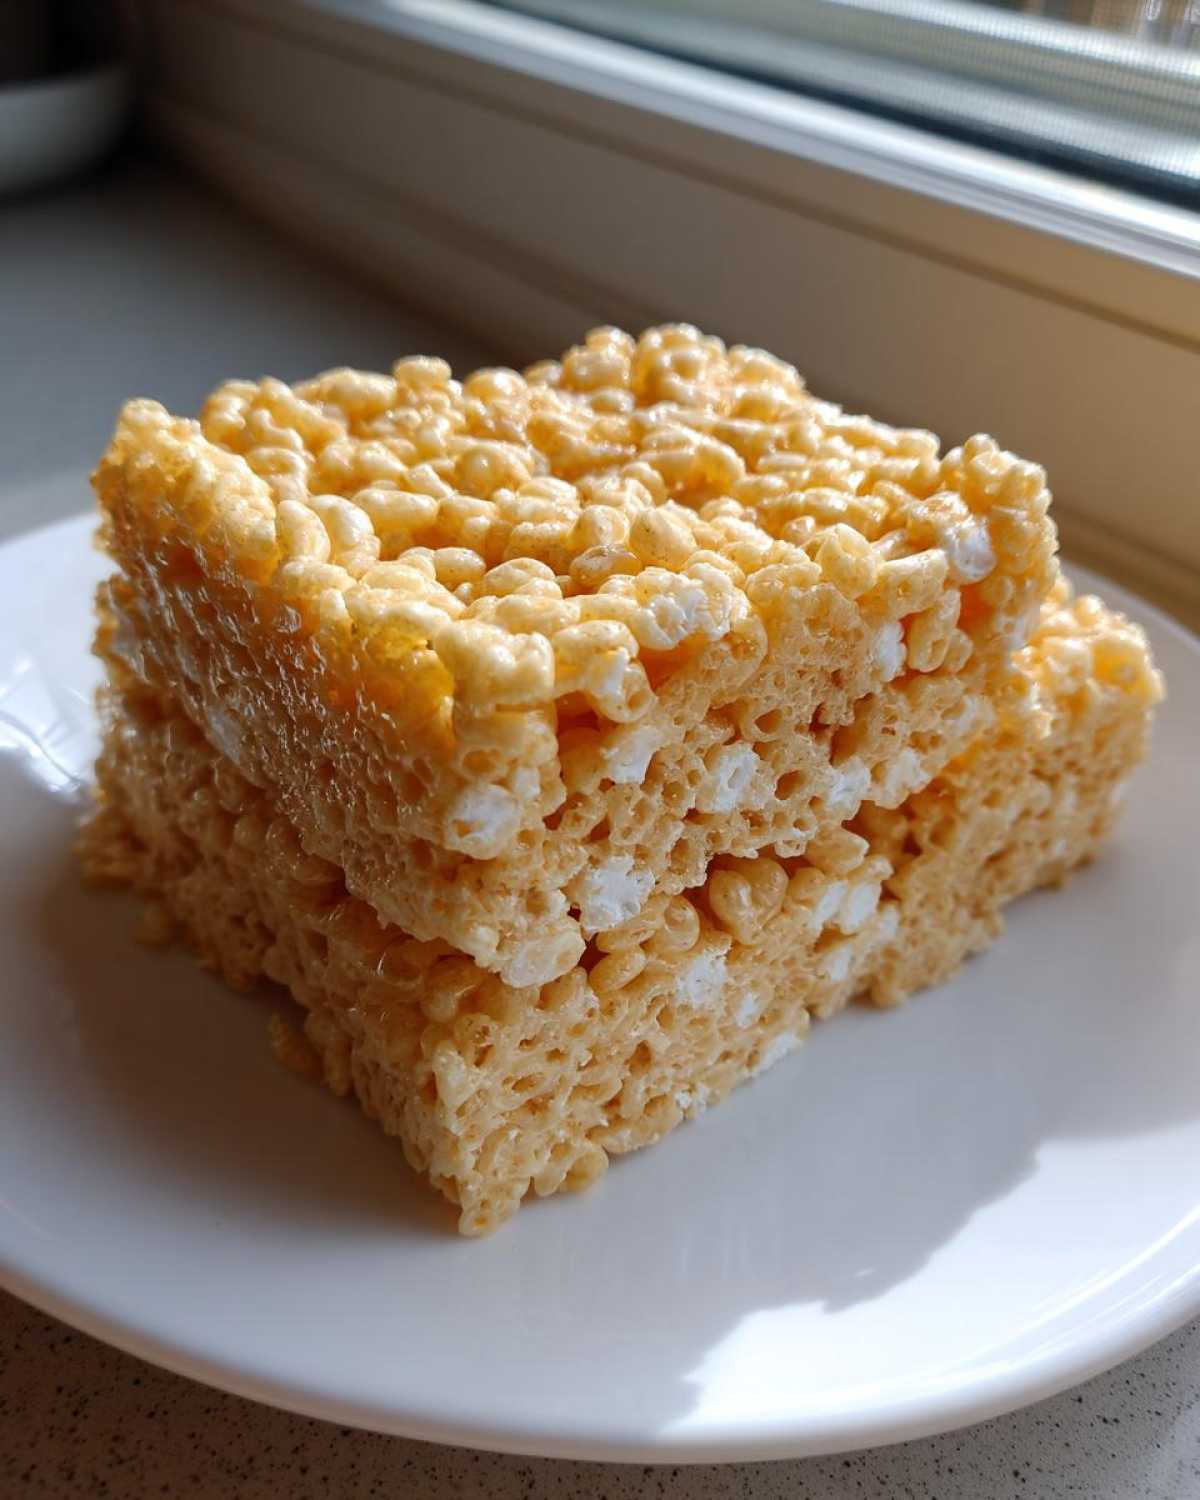
Storage and Shelf Life for Your Classic Rice Krispie Treats Squares
Now that you’ve made these perfect, gooey bars, the big question is: how long will they stay that way? Homemade treats are always best enjoyed fresh, but luckily, these simple squares are pretty resilient if you store them right. The goal here is to keep air *out* so the humidity doesn’t have a chance to ruin that delicate balance between crisp and chewy.
Do not, under any circumstances, try to keep these in the refrigerator! Cold air aggressively dries things out, and you’ll turn those beautiful, nostalgic bars into crunchy little pebbles overnight. We want them out on the counter, just like how we left them to cool.
The best way to handle storage is using an airtight container. You can stack them if you want, but put a sheet of wax paper or parchment paper between the layers. This stops them from sticking to each other as the butter softens a little bit over time.
If you make a massive batch (and honestly, who doesn’t?), they should stay delightfully fresh, gooey, and tender at cool room temperature for about three to four days. After that, they usually start shrinking a little and losing that fresh marshmallow bounce. But let’s be real—do they ever actually last four days?
Variations on the Traditional Puffed Rice Squares
While I’m obsessed with the purity of the three-ingredient bar, I totally get that sometimes you want a tiny little something extra without turning it into a whole new recipe. When I play around with this classic, I keep the changes incredibly subtle, just enough to give it a little pop without losing that foundational, nostalgic flavor.
If you’ve mastered the standard recipe and feel brave, try one of these easy tweaks next time you make a batch. These won’t confuse anyone looking for the benchmark recipe, but they’ll make your batch feel a little extra special. You can find more inspiration for flavors just like this over at classic buttery puffed rice squares!
Remember, the key here is respecting the butter and marshmallow base. Don’t go wild with mix-ins that require extra binding agents or baking time; we’re keeping this firmly in the “no bake bar” category.
- A Dash of Vanilla: This is my absolute favorite addition! Just before you take the pan off the heat, stir in about 1/2 teaspoon of good quality vanilla extract. It rounds out the sweetness from the marshmallows beautifully and makes the whole kitchen smell incredible.
- Salt Balance: If you used unsalted butter and find yourself thinking, “It needs something,” try sprinkling just a tiny pinch of flaky sea salt over the top right before it cools. It contrasts the sweetness perfectly.
- Chocolate Drizzle (The Easy Way!): You don’t need to mix chips into the batter, which can get messy! Once your squares are fully cooled and cut, take some semi-sweet chocolate chips, melt them gently with a tiny bit of coconut oil, and drizzle it haphazardly over the top. Let that set up, and boom—fancy-looking, but still totally classic, marshmallow cereal bars.
I stay away from adding heavy things like nuts or candy pieces to this standard recipe because those additions often require you to press the mixture harder into the pan, which, as we’ve discussed multiple times, leads to hard bars!
Frequently Asked Questions About Classic Rice Krispie Treats Squares
I get so many messages about texture—it’s clearly the number one thing people worry about when making these! It’s totally fine; even I sometimes have to double-check my heat settings. Here are the most common questions I hear about making these incredibly easy marshmallow cereal bars recipe.
Can I use store-brand marshmallows in this recipe?
Yes, you absolutely can! You don’t need to buy the fancy, name-brand ones, but you absolutely must make sure they are fresh. Really, that’s the only rule for the marshmallow component. If they are older or look a little dry inside the bag, they won’t melt down into that lovely, stretching goo we want. They need to be soft when you start!
Why are my treats hard instead of gooey?
This is the moment of truth, and it usually boils down to just one of two things (maybe both!). First, did you overheat your marshmallows? If you leave them on the stove too long after they melt, they start to recrystallize and get tough. Always yank that pan off the heat before adding the cereal! Second, did you mash them down into the pan like you were packing cement? If you press too firmly, you squeeze out all the air, and they turn rock-hard. Gentle pressure, remember?
Can I use salted butter for these no bake crispy marshmallow squares?
You certainly can substitute salted butter for the unsalted, but you need to be careful with your salt levels! Since the recipe calls for four tablespoons of butter and no extra salt in the main ingredients, if you use salted butter, you might find the final result is just a little too savory. My advice? Use salted butter, and just skip adding any extra salt you might see in other recipes. You’ll still get that rich flavor, but you maintain control over the final taste profile.
Review Your Family Favorite Cereal Treats
Whew! We made it through the sticky bits and the careful stirring, and now you have a pan full of what I truly believe are the best **Classic Rice Krispie Treats Squares** out there. I hope they taste exactly like the happy memories I get every time I make a batch. They are such a quick, joyful thing to share.
I would absolutely love to hear how yours turned out! Did you use the parchment overhang trick? Did you manage to resist pressing the mixture down too hard? Drop a comment below and let me know if these became your go-to quick dessert bars no oven staple. Did you try my little vanilla trick?
If you’re already looking for what fun, fast snack to tackle next, you can browse through all my other easy recipes in the snacks category. Happy baking—or, well, happy not-baking—and tell your friends about these buttery squares!
PrintClassic Rice Krispie Treats Squares
Follow these simple steps to make the traditional, chewy, and crisp puffed rice cereal bars.
- Prep Time: 10 min
- Cook Time: 5 min
- Total Time: 75 min
- Yield: 12 large squares
- Category: Dessert
- Method: No Bake
- Cuisine: American
- Diet: Vegetarian
Ingredients
- 6 cups puffed rice cereal
- 1 package (10 ounces) marshmallows
- 4 tablespoons unsalted butter
Instructions
- Lightly grease a 13×9 inch baking pan or line it with parchment paper, leaving an overhang for easy removal.
- In a large saucepan over low heat, melt the butter completely.
- Add the marshmallows to the melted butter. Stir constantly until the marshmallows are fully melted and smooth. Remove the saucepan from the heat.
- Quickly add the puffed rice cereal to the marshmallow mixture. Stir gently until the cereal is evenly coated. Work fast to prevent the mixture from hardening.
- Transfer the mixture to the prepared baking pan.
- Lightly grease your hands or a spatula with butter or cooking spray. Gently press the mixture evenly into the pan. Do not press too firmly, as this will result in hard treats.
- Let the treats cool completely at room temperature for about 1 hour.
- Lift the mixture out of the pan using the parchment paper overhang, if used. Cut into 12 or 16 squares.
Notes
- Use fresh marshmallows for the best, chewiest results. Stale marshmallows make hard treats.
- If you prefer a slightly richer flavor, use browned butter instead of regular melted butter.
- To cut clean squares, use a sharp, lightly oiled knife.
Nutrition
- Serving Size: 1 square
- Calories: 150
- Sugar: 15
- Sodium: 110
- Fat: 4
- Saturated Fat: 2.5
- Unsaturated Fat: 1.5
- Trans Fat: 0
- Carbohydrates: 28
- Fiber: 0.5
- Protein: 2
- Cholesterol: 10