

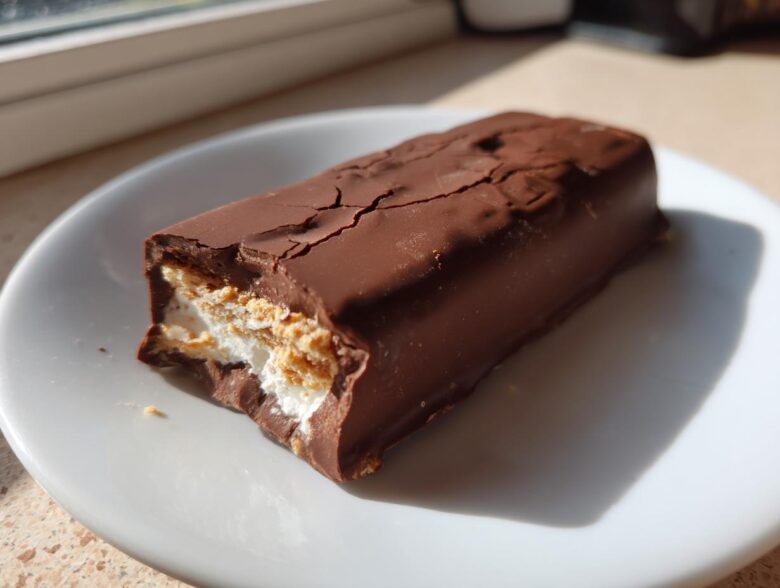
Oh my goodness, if you’ve been scrolling online lately, you know exactly what I’m talking about! That viral sensation—the rich, crunchy chocolate bar from Dubai—has completely taken over, and frankly, I couldn’t resist trying to recreate that magic at home. But instead of just a square, I wanted something totally refreshing! So, I’ve mapped out the best way to turn that decadent layer of chocolate and crunch into frozen, handheld perfection. Trust me, making these Dubai Chocolate Bar Ice Cream Bars right in your own kitchen is easier than you think, and you get that satisfying crack when you bite in!
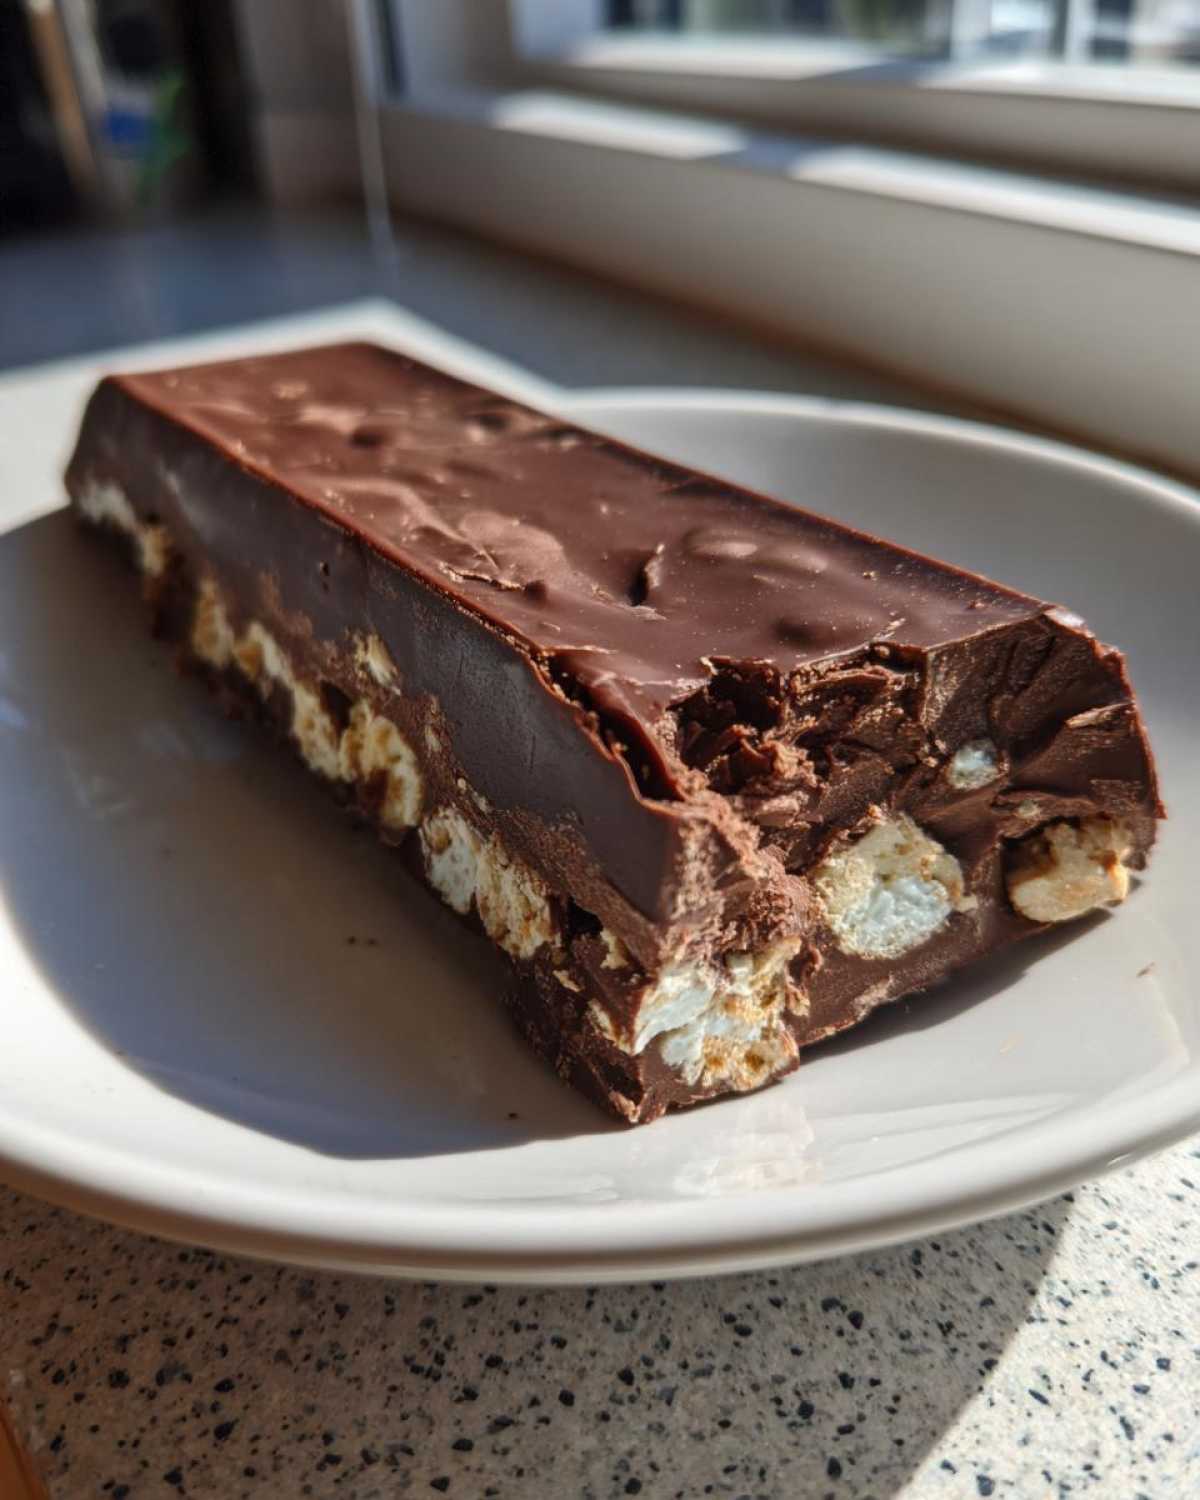
Why You Will Love These Dubai Chocolate Bar Ice Cream Bars
Seriously, this recipe is a winner. I know we all see those amazing viral foods and think, “That looks impossible to make,” but this one is surprisingly simple. You get all the indulgent, show-stopping flavor without needing an ice cream maker or spending all day fussing.
- The Texture Contrast is Everything: This is the main event! You have that super thick, satisfyingly crunchy chocolate shell—the signature of the viral bar—giving way to a wonderfully smooth, cold, and creamy center. It’s just pure joy in every single bite.
- Super Simple No-Churn Base: Forget the custard base nightmares! We are using heavy cream and sweetened condensed milk here. It whips up fast, tastes incredibly rich, and freezes perfectly hard for that bar format. You can check out my trick for a similar texture in this no-bake cheesecake recipe if you want even more inspiration!
- Instant Gourmet Feel: Even though the steps are easy, the result looks like it came from a fancy artisan shop. They are perfect for impressing guests or just treating yourself after a long Tuesday. Who doesn’t love feeling like they mastered a trending dessert?
- Infinitely Customizable Crunch: The original bar has that distinctive texture, and we can nail that here by adding crushed pistachios or whatever nuts you love right into the chocolate dip. It’s truly an indulgent frozen treat!
Essential Ingredients for Dubai Chocolate Bar Ice Cream Bars
Okay, if you look at the ingredient list for just one of these **Homemade Dubai Chocolate Ice Cream** bars, it looks deceptively simple, right? That’s the beauty of it! We rely on a few powerhouse components to give you that restaurant-quality finish. Remember, the quality of your chocolate makes or breaks that famous coating, so don’t skimp here. You’ll need heavy cream and sweetened condensed milk for the base, which keeps things unbelievably creamy without any churning fuss.
For the crunch elements, I love using finely crushed graham crackers right into the ice cream—it adds texture without freezing rock hard. You can see how I use crunchy bits in my chocolate hazelnut truffles recipe, too! Then, for the coating, grab a good quality milk chocolate and a tiny bump of neutral oil. That oil is our secret weapon for getting a thin, snappy shell rather than a thick, gummy mess around the bar.
- 1 cup heavy cream, super cold
- 1 (14 ounce) can sweetened condensed milk
- 1 teaspoon vanilla extract
- 1/4 cup finely crushed biscuits or graham crackers
- 10 ounces high-quality milk chocolate, chopped finely
- 1/4 cup crushed pistachios or favorite nuts (totally optional, but highly recommended for the signature look!)
- 2 tablespoons neutral oil (like coconut or vegetable oil)
Step-by-Step Guide to Making Dubai Chocolate Bar Ice Cream Bars
Alright, let’s get mixing! This whole process takes about 20 minutes of active work, plus that crucial freezing time. With a total time hovering around 6 hours and 25 minutes (mostly hands-off!), you can easily whip these up after dinner and have them ready the next day for an amazing dessert! Remember, we are aiming for 6 to 8 perfect bars here. The fun part is seeing how ridiculously easy it is to make something that looks so gourmet.
Creating the Rich Creamy Ice Cream Base
This is where we build that amazing velvety interior. First thing: your heavy cream needs to be chilly—like, straight-from-the-back-of-the-fridge cold. Whip it up in a stand mixer or with a hand mixer until you get stiff peaks. You want it firm enough so that when you lift the whisk, a pointy top stays standing up straight. That air is what makes this a successful no-churn ice cream! You can see how I get great volume in my no-churn mason jar tutorial.
Next, you gently fold in your sweetened condensed milk and vanilla. When I say gently, I mean it! Use a spatula and cut down the middle, then sweep up the side of the bowl. We are just trying to combine, not deflate all that beautiful air we just whipped in. Once that’s just mixed, sprinkle in your crushed biscuits and fold those in until they look speckled throughout. Pour this mixture right into your popsicle molds. Make sure to leave a tiny bit of space at the top because things expand when they get that cold. Pop those sticks in and freeze them until they are rock solid—at least six hours, but overnight is safest!
Achieving the Perfect Snap: Dipping the Dubai Chocolate Bar Ice Cream Bars
This is the moment of truth! Once your bars are frozen solid, you need to start melting the chocolate for the coating. I always use a double boiler because it keeps the heat indirect, preventing the chocolate from burning. If you’re using a microwave, do it in 15-second bursts, stirring hard in between, until it’s almost completely melted. Then, add your 2 tablespoons of neutral oil and stir until it’s completely smooth. That oil is the secret sauce, I promise—it keeps the coating fluid so you get that thin, snappy shell rather than a thick, gummy mess around the bar. This technique is key for any great chocolate shell ice cream recipe!
Quickly run the outside of the mold under *briefly* warm water to loosen the bars. Pull them out, and immediately pat them dry with a paper towel. Water equals seized chocolate, and we absolutely do not want that! Working fast, dip each frozen bar into the melted chocolate—make sure it gets fully covered. If you are using crushed nuts, sprinkle them on right after dipping. Place the dipped bars on parchment paper and rush them back into the freezer for about 15 minutes to set that shell until it’s perfect and snappy. Enjoy how fast that chocolate sets!
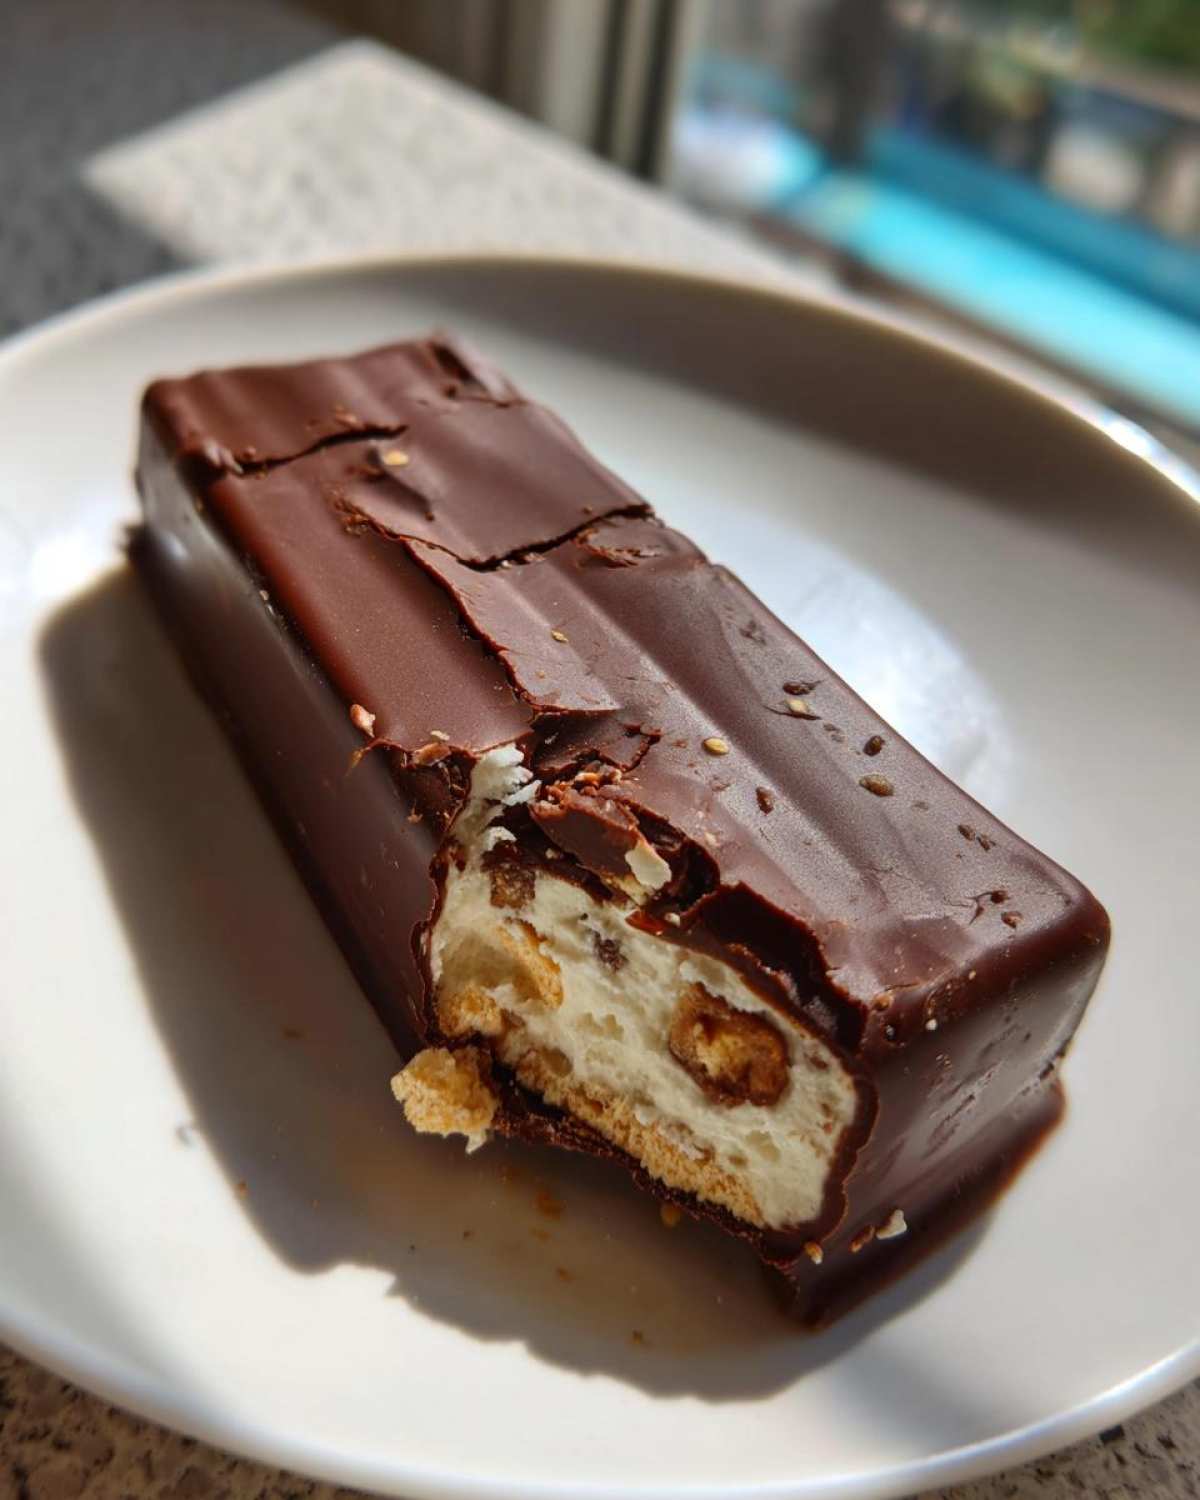
Expert Tips for Perfect Dubai Chocolate Bar Ice Cream Bars
Even though this is an **Easy Ice Cream Bar Recipe** in theory, sometimes those chocolate coatings give you real trouble! I’ve learned a few things over my test batches that help ensure you get that satisfying, artisan quality every single time. You don’t want a thick, soft coating; you want that satisfying ‘snap’ when you bite in!
First, let’s talk chocolate. You absolutely must use high-quality milk chocolate chunks, not chocolate chips. Chips have stabilizers meant to help them keep their shape during baking, and that makes them melt weirdly for coatings. I noticed that when I used really good couverture chocolate, the shell hardened beautifully and tasted so much richer. For the best results, I recommend chilling that melted chocolate mixture for just 5 minutes in the fridge before dipping—it thickens it up just enough.
Speaking of thickening, play with that oil! The recipe calls for a neutral oil like coconut, but if you want an even harder shell, slightly reduce the oil to just 1 1/2 tablespoons. It makes the chocolate a little less fluid, which means the bars get coated faster, locking in the cold!
Mold removal is always a minor panic moment, right? If you are having trouble, let the bars sit out on the counter for just 2 minutes before dipping. That slight softening on the outside lets them wiggle free without breaking. Also, if you skip the optional nuts, you can still add texture by mixing some finely crushed wafer cookies right into the melted chocolate dip—it’s my favorite way to experiment with this **Gourmet Chocolate Frozen Dessert**!
If you want to explore other ways to make frozen delights look fancy, you should definitely check out some of my ideas on making artisan ice cream bars at home. It’s all about presentation once you master the base recipe!
Ingredient Substitutions for Your Dubai Chocolate Bar Ice Cream Bars
One of the best parts about making a **Copycat Dubai Chocolate Bar** recipe at home is that you get to customize it exactly how you like it! While the original recipe sings with high-quality milk chocolate, I know not everyone has the same favorites, and that’s perfectly fine. You don’t need to stress if you are missing one specific item; we can easily swap things around and still get a phenomenal result.
If milk chocolate just isn’t your jam, go dark! Using semi-sweet or dark chocolate instead makes these frozen treats much richer. Just be warned, the flavor profile shifts away from that classic sweet bar. If you go that route, I’d suggest using maybe just one tablespoon of oil instead of two, because dark chocolate seems to melt a bit thinner naturally. White chocolate is another fun option, though that moves you far away from the original flavor profile, creating more of a creamy vanilla coating instead.
Now, let’s talk about the crunch layered inside your ice cream. I called for graham crackers or simple biscuits because they break down nicely and don’t freeze like little pebbles, but you have options! If you have leftover pretzels, crush those up—the tiny bit of salt is heavenly against the sweet condensed milk. Or, for a chewier texture, try a quarter cup of rolled oats tossed in with the batter. The goal is just to add a little texture contrast!
And finally, those nuts! Pistachios give us that beautiful green-flecked look, but if you have an allergy or just don’t love them, substitution is easy. You can use finely chopped salted peanuts for a classic pairing, or even replace the nuts entirely with crispy puffed rice cereal tossed into the melted chocolate coating. If you happen to be watching your sugar or dairy intake, you might want to peek over at my cottage cheese ice cream recipe for inspiration on changing up the base entirely, though that will certainly change the final texture of your **Rich Creamy Ice Cream Bars**.
Storing Your Homemade Dubai Chocolate Bar Ice Cream Bars
So you made a massive, delicious batch of these incredible frozen treats! Now, how do we keep them perfect until you decide it’s time for another snack? The biggest danger here is freezer burn on the ice cream and, worse, humidity making that beautiful chocolate shell soggy. Nobody wants a gummy shell on their **Crunchy Chocolate Ice Cream Bars**!
Once your chocolate coating is completely set—give them a good 15 minutes sitting out on the counter after their final freeze—you need to wrap them individually. I find that a sheet of plastic wrap tightly tucked around each bar works best first. This keeps tiny ice crystals from forming directly on that glossy chocolate dip. After the initial plastic wrap layer, stack them in a single layer inside a heavy-duty freezer bag or an airtight plastic container. If you stack them, put a small square of parchment paper between each bar just to be safe.
Keep them in the coldest part of your freezer, meaning the back, away from the door. If you keep them buried deep in the frost line, they will stay perfect for weeks! Honestly, they usually don’t last that long around my house, but knowing they are there makes evenings so much better. If you follow this quick wrapping method, you’ll avoid sogginess and keep that signature snap!
Serving Suggestions for This Gourmet Chocolate Frozen Dessert
Now that you’ve mastered the magic of the **Dubai Chocolate Bar Ice Cream Bars**, you have to serve them right! These are decadent enough to stand proudly on their own, but why stop there? I always love taking a simple treat and dressing it up just a tiny bit before serving, especially if my friends are over.
If you want to take these **Indulgent Frozen Treats** to the next level, think about temperature contrast. Since the bar is deeply frozen, something slightly warm on top is divine. A quick drizzle of warm salted caramel sauce right before serving adds another layer of flavor complexity. It’s incredible how well that salty, sweet drizzle plays with the dark crunch of the chocolate shell. You can find my favorite easy caramel recipe here, which also works perfectly for drizzle applications: caramel apple crisp with ice cream.
For a truly grown-up presentation, try serving the bar alongside a small espresso or a robust black coffee. The slight bitterness of the coffee cuts right through the richness of the cream and the sweetness of the chocolate coating. It’s my favorite way to enjoy one after dinner!
If you’re feeling extra creative and want to make a sundae situation, don’t thaw the bar first! Just place the bar in a shallow bowl and pour over a thin fudge sauce. The cold makes the fudge sauce set up a little firmer, giving you a sort of shell-within-a-shell experience. It’s messy, yes, but totally worth it for the ultimate chocolate experience!
Frequently Asked Questions About the Viral Dubai Chocolate Bar Ice Cream Bars
I figured you might have a few last-minute thoughts running around your head before you rush off to grab your chocolate! These **Trending Food Recipes 2024** always spark a ton of questions, so I gathered the ones I get asked most often about turning this into the **Best Chocolate Coated Ice Cream** you’ve ever made.
Can I really make these without popsicle molds?
Oh, absolutely, don’t let equipment stop you! If you don’t have molds, that’s fine. Line a small loaf pan or an 8×8 dish with plastic wrap, making sure the plastic hangs way over all the sides. You’ll spread your ice cream mixture in there just like a standard ice cream slab. Once it’s rock hard (after 6 hours, minimum), use the overhanging plastic wrap handles to lift the whole block out onto a cutting board. Then, you just slice it into your desired bar sizes. You’ll need to work fast once you start dipping, or the block will get too soft, but it works perfectly for making custom-sized **Dessert Bar Recipe Inspiration**!
How do I make the chocolate coating thicker so it really cracks?
The snap is everything! If you want that dramatically thick shell, you need two things: chilling the chocolate and a slightly higher ratio of chocolate to oil. First, after you melt the chocolate and oil together, stick that bowl of melted chocolate in the fridge for about 10 minutes before you dip anything. It needs to cool down just enough where it starts to thicken its consistency slightly, but it must still be pourable—if it gets too thick, it’ll just clump on the bar.
Also, for the **Thick Chocolate Coating Dessert**, you need to ensure your ice cream bars are completely frozen solid—I mean frosty! The colder the bar, the faster the chocolate sets, which traps more of that melted chocolate thickness onto the exterior, giving you a better, crunchier layer. If you’re looking for other indulgent treats, you might enjoy the tips in my copycat recipes section!
Is it okay if I skip the crushed biscuits in the ice cream base?
You certainly can! If you skip the biscuits, you’re going to end up with a smoother, more classic ice cream texture—kind of like a traditional premium vanilla scoop. The biscuits are mostly in there to give the base some toothiness and structure, especially without churning. If you skip them, you’ll have a purer flavor relying only on the dairy and vanilla, making it an excellent **No Churn Ice Cream Bar Version** that is just slightly creamier and less textured.
Why do I need oil in the chocolate coating?
This is the single most important trick if you want that incredible, snappy chocolate shell instead of a soft, waxy coating that melts all over your fingers! Chocolate contains cocoa butter, which is solid at room temp. When you dip something frozen into straight melted chocolate, the temperature shock makes the cocoa butter crystalize too quickly into a harder, less appealing texture. Adding a neutral oil—like coconut or canola—lowers that melting point just enough. It keeps the coating flowing so you can get a nice, thin layer, and when that thin layer hits the -9 degrees of your ice cream bar, it hardens instantly with that perfect, satisfying crack!
Nutritional Snapshot of These Rich Creamy Ice Cream Bars
Now, look, I like to keep things honest around here. When you are making something as unbelievably delicious and indulgent as a **Homemade Dubai Chocolate Ice Cream** bar, you know it’s going to be a treat, not a diet food! But since you asked for all the details on these **Rich Creamy Ice Cream Bars**, here is the breakdown of what’s going into one standard bar, based on my calculations.
Just remember, these numbers are estimates only! The actual values might shift slightly depending on the exact brand of chocolate coating you choose or if you decide to use salted peanuts versus pistachios for your crunch factor. But this gives you a fantastic ballpark idea of what you’re enjoying!
- Serving Size: 1 bar
- Calories: About 450
- Sugar: Roughly 45 grams (It’s dark brown sugar and condensed milk, so this isn’t shocking!)
- Fat: Around 28 grams (Hello, heavy cream and butter in the chocolate!)
- Saturated Fat: Approximately 18 grams
- Protein: 7 grams
- Carbohydrates: 48 grams
- Sodium: 75 mg
This is definitely dessert territory, folks—a real special occasion treat that satisfies that craving for the **Viral Chocolate Bar Recipe** perfectly in a frozen format. Enjoy every single decadent bite!
PrintHomemade Dubai Chocolate Bar Ice Cream Bars
Make your own version of the viral Dubai Chocolate Bar as creamy ice cream bars with a thick, crunchy chocolate shell.
- Prep Time: 20 min
- Cook Time: 5 min
- Total Time: 6 hr 25 min
- Yield: 6-8 bars
- Category: Dessert
- Method: Freezing
- Cuisine: International
- Diet: Vegetarian
Ingredients
- 1 cup heavy cream
- 1 (14 ounce) can sweetened condensed milk
- 1 teaspoon vanilla extract
- 1/4 cup finely crushed biscuits or graham crackers (for ice cream base)
- 10 ounces high-quality milk chocolate, chopped
- 1/4 cup crushed pistachios or other nuts (optional, for coating)
- 2 tablespoons neutral oil (like coconut or vegetable oil, for coating)
Instructions
- Prepare the ice cream base: In a large bowl, whip the heavy cream until stiff peaks form.
- Gently fold in the sweetened condensed milk and vanilla extract until just combined. Do not overmix.
- Fold in the crushed biscuits or graham crackers.
- Pour the mixture into popsicle molds, leaving a small space at the top for expansion. Insert popsicle sticks.
- Freeze for at least 6 hours, or until completely firm.
- Prepare the chocolate coating: Melt the chopped milk chocolate with the neutral oil in a double boiler or microwave in short bursts, stirring until smooth. Stir in the crushed nuts, if using.
- Remove the frozen ice cream bars from the molds. You may need to run the outside of the mold briefly under warm water to release them. Pat them dry immediately.
- Dip each frozen bar into the melted chocolate mixture, ensuring a thick, even coating. Work quickly as the chocolate will set fast.
- Place the coated bars on a parchment-lined baking sheet.
- Return the bars to the freezer for 15 minutes to allow the chocolate shell to harden completely before serving.
Notes
- For a thicker chocolate snap, chill the melted chocolate mixture slightly before dipping.
- If you want a no-churn base without the biscuits, simply use the cream, condensed milk, and vanilla.
- Use high-quality chocolate for the best flavor and texture in the coating.
Nutrition
- Serving Size: 1 bar
- Calories: 450
- Sugar: 45
- Sodium: 75
- Fat: 28
- Saturated Fat: 18
- Unsaturated Fat: 10
- Trans Fat: 0
- Carbohydrates: 48
- Fiber: 2
- Protein: 7
- Cholesterol: 80