

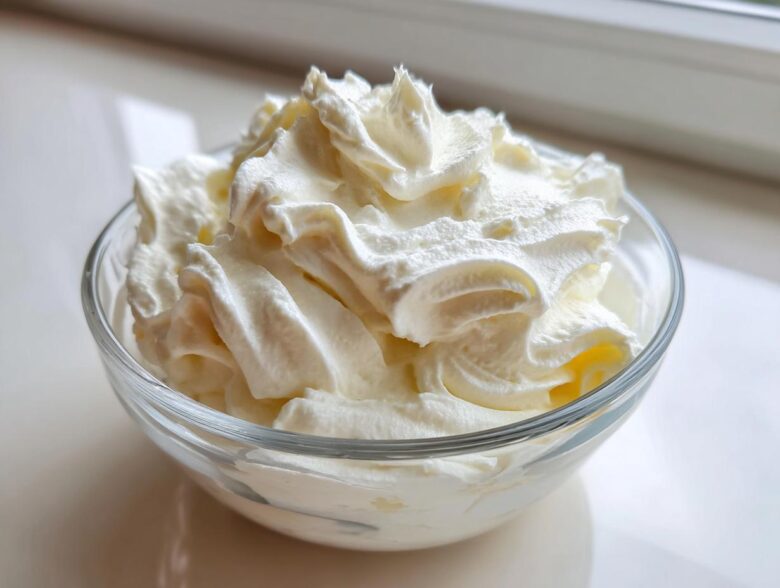
Oh, let’s talk frosting! Because honestly, what’s a perfect spiced cake or a warm cinnamon roll without the crowning glory? If you’ve ever ended up with lumpy topping or icing that’s overwhelmingly sweet, stop right there, because I’ve got your back. This right here is *the* cream cheese frosting recipe that changed my baking life. It’s the smoothest, easiest, and totally reliable topping that holds its shape beautifully for piping, but it’s also just divine spooned over those gooey cinnamon rolls we all crave. After years of playing with the ratio, I finally landed on the perfect balance of creamy richness and that essential little tang that keeps it from tasting like pure sugar. It comes together in about ten minutes flat—trust me on this one!
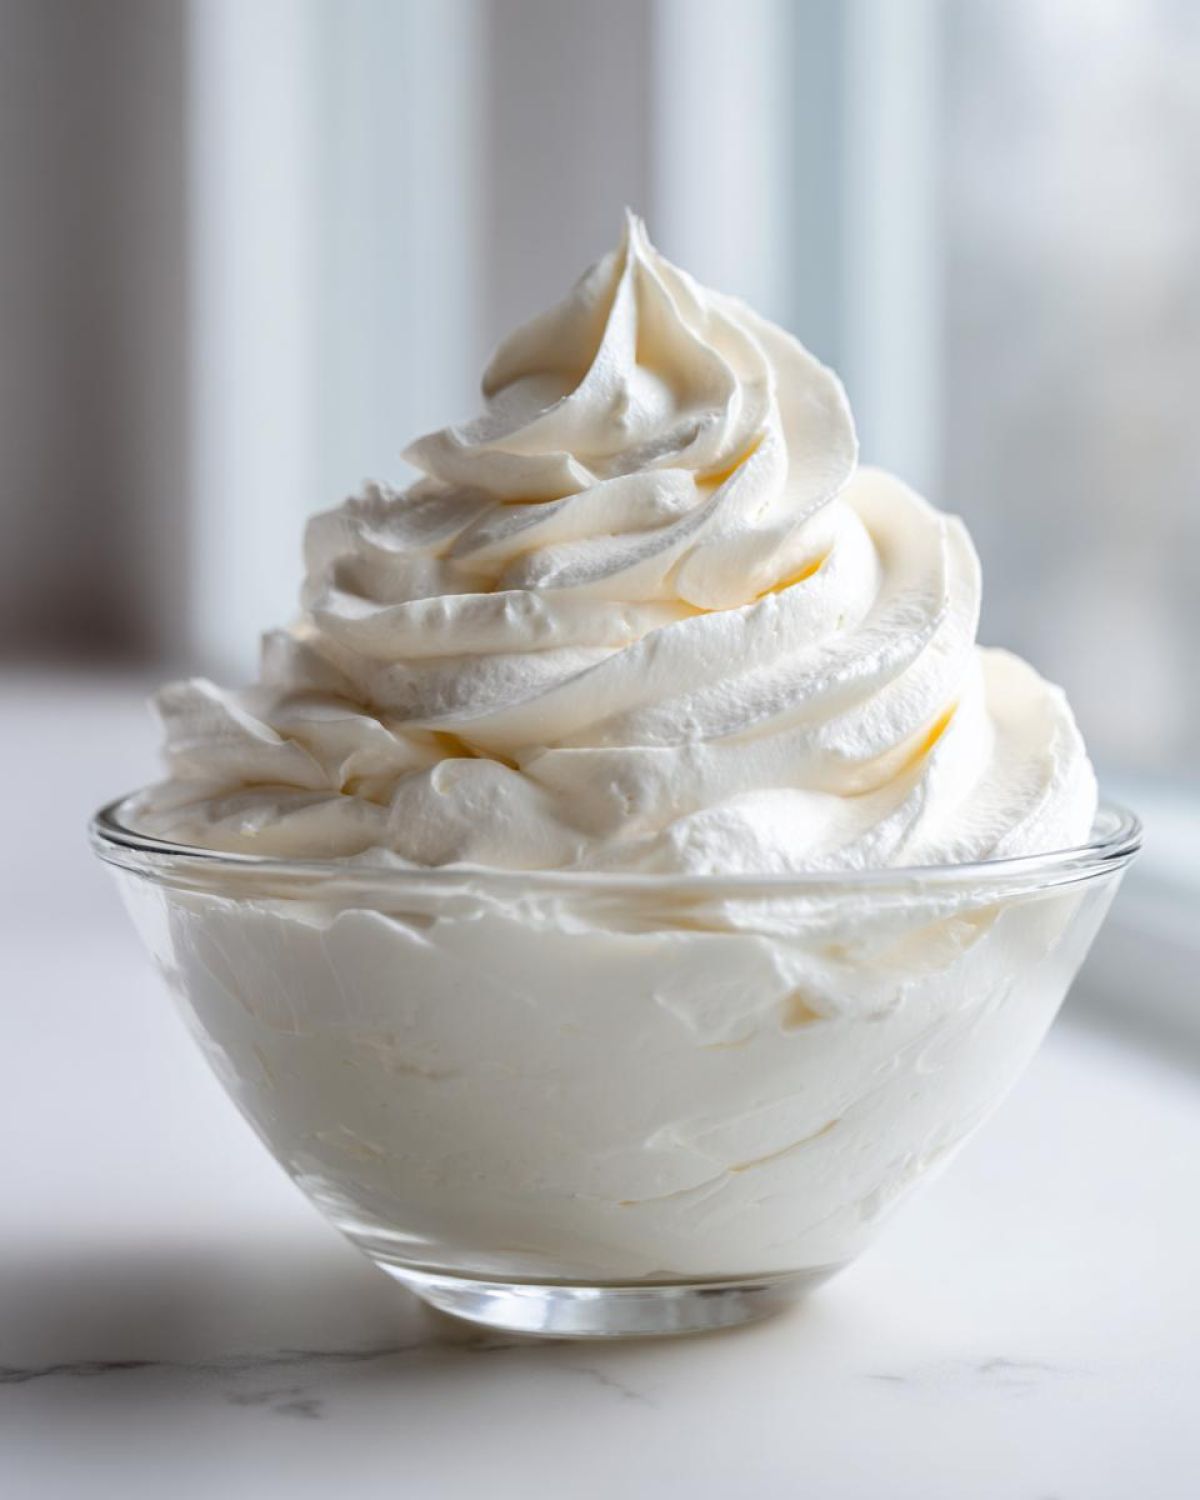
Why This is the Best Classic Cream Cheese Frosting
I know, everyone claims to have the best cream cheese frosting, but mine is different because it solves the problems that drive us crazy! I’ve engineered this recipe specifically to be a fantastic smooth buttercream alternative that still gives you that signature zing. You don’t need to compromise!
- It whips up beautifully into a fluffy cream cheese frosting that holds those sharp piping edges.
- It delivers that perfect, pleasant tang—it’s a truly tangy cream cheese icing, not just sweet goo.
- It’s fast! We are talking about a quick homemade frosting that takes less than 10 minutes.
- It’s stable enough to sit on a cake without weeping, but soft enough to spread on warm pastries, like a phenomenal cream cheese frosting for cinnamon rolls.
We achieve this reliability by respecting the temperature of the dairy and demanding sifted sugar. It’s the method that makes all the difference when you’re aiming for amazing results every time. Check out my thoughts on these techniques below! And if you want to see this topping in action, look at how gorgeous it is on these pumpkin cheesecake brownies!
Achieving Fluffy Cream Cheese Frosting Texture
Texture is everything, right? A dense, heavy topping just sinks into your cake. My secret for that incredible fluffy cream cheese frosting starts way before you turn on the mixer. You need room-temperature butter and cream cheese—softened, but not melted! When you cream those two together first, you’re incorporating critical air bubbles. Think of it like fluffing a pillow before you put the case on. This initial step gives the finished product lift, so it doesn’t end up dense like a brick.
The Secret to No Lump Frosting
Lumps are the enemy of a perfect topping, plain and simple. Nobody wants that grainy mouthfeel! To guarantee a no lump frosting experience, you absolutely must sift your powdered sugar. Don’t skip it! I’ve seen people try putting the sugar in dry, and you just end up spending forever trying to beat the little clumps out later. Also, make sure your cream cheese feels soft, not cold straight from the fridge. Cold dairy beats together poorly and creates those sneaky little pockets of hard cream cheese.
Ingredients for Your Perfect Cream Cheese Frosting
When you’re aiming for that gorgeous texture we just talked about, precision matters more than ever! This recipe is designed to be ultra-reliable, which means sticking to the measurements and conditions I’ve laid out here. You’ll end up with about 3 cups of the most wonderful cream cheese topping you’ve ever made. This is the base for everything—whether you’re making a basic cream cheese icing or something fancy!
Keep these ingredients right on your counter for about an hour before you start whipping. That room temperature step is non-negotiable for mixing ease!
- 8 ounces cream cheese, softened (Not melted—just soft to the touch!)
- 1/2 cup (which is exactly 1 stick) unsalted butter, softened
- 3 to 4 cups powdered sugar, sifted (Yes, sift it first!)
- 1 teaspoon vanilla extract
- 1/4 teaspoon salt (Don’t skip this! It balances the sweetness.)
I love that this recipe often only needs 5 ingredients if you stick to 3 cups of sugar, making it a great 5 ingredient frosting option. Having everything ready before you start means your mixer is only running for about 10 minutes total. If you’ve got the ingredients ready, you’re practically done! Speaking of things that call for this delicious icing, you might want to try these apple pie crumb bars soon once you have the topping ready!
Step-by-Step Guide to Making Quick Homemade Cream Cheese Frosting
This is where the magic happens, and I promise you, it’s so fast! You can have this glorious topping ready to go in about 10 minutes total. That’s how we make it a practical homemade cake icing that you don’t dread making after a long baking session. We are moving quickly here, so have that electric mixer ready to go!
Creaming the Base for Smooth Cream Cheese Frosting
First things first: we need zero lumps in our base. Grab your softened cream cheese and butter and pop them into your mixing bowl. Start beating these two together right away. You’ve got to get them working in harmony until the mixture looks completely smooth and creamy—no little chunks of cold butter allowed! I mean it when I say scrape down the sides of the bowl halfway through this part. If you leave any bits stuck up there, they turn into rogue lumps later. We are aiming for pristine smoothness right from the start!
Incorporating Sugar for Tangy Cream Cheese Icing
Once that base is perfect, toss in your vanilla and salt and give it a quick swirl. Now comes the powdered sugar, which you already sifted, right? Good. Add it in slowly, about one cup at a time, keeping your mixer speed low. If you dump it all in high speed, you’ll end up with a sugar cloud in your kitchen, which is never fun! Once that first cup is mixed in, you can bump the speed up to medium-high. Beat it hard for a full 2 to 3 minutes. This final whipping step is what turns a nice basic cream cheese icing into that light, unbelievable texture that makes this recipe a standout. Check out how these toppings look on my maple walnut blondies!
If you are aiming for that incredibly stable, pipeable cream cheese frosting, this is where you might consider adding that full 4th cup of sugar. If it still seems a little loose after that long beat, just add one more tablespoon of sugar at a time until it feels stiff enough for your piping bag!
Tips for the Ultimate Pipeable Cream Cheese Frosting
Now that you’ve got your beautifully fluffy cream cheese frosting, we need to make sure it behaves itself, especially if you’re using it as a smooth buttercream alternative for swirling delicate borders! If you find your frosting a little too soft after mixing, don’t panic. My recipe accounts for slightly warmer kitchens by letting you adjust easily. If it’s thin, just mix in one more tablespoon of sifted powdered sugar at a time until it firms up. Remember, the goal is stability!
If you accidentally went too far and it’s stiff like cement? That’s why we added the milk/cream option in the recipe! Add it in teaspoon by teaspoon until it loosens up just enough. Personally, if I need the frosting to hold super sharp details for a cake from the peanut butter cheesecake guide, I pop the whole bowl into the fridge for about 15 minutes. A little chilling time firms everything up perfectly without making it hard, giving you that ideal pipeable cream cheese frosting texture every single time.
Versatile Uses for Cream Cheese Frosting for Cinnamon Rolls and More
This is the amazing part about nailing the best cream cheese frosting recipe—it does *everything*! Honestly, once you get this ratio down, you’ll be looking for excuses to frost things all the time. While it’s the quintessential pairing for red velvet, you absolutely need to try it on warm baked goods. My favorite indulgence is spooning a generous amount over fresh-out-of-the-oven gingerbread cinnamon rolls. The contrast between the warm spice and the cool, tangy topping is just heavenly. You can find my recipe notes for those sweet beauties right here: maple pecan sticky buns.
It’s also the only true companion for a classic red velvet cake, which is why I made sure this version is sturdy enough to handle stacking and decorating without sliding off! But what if you need something lighter, more of a drizzle than a thick blanket? Say you’re topping plain pound cake or something delicate.
Don’t worry, we can easily adjust the consistency. To thin this perfect cream cheese frosting down into a lovely, slightly runny cream cheese glaze—perfect for drizzling over those sticky buns when you want a thinner coat—just add milk or cream one teaspoon at a time while mixing on low speed. You usually only need a tablespoon or two max. Stop as soon as it starts to look glossy and pourable. But remember, if you thin it out this much, it won’t hold up to any serious piping detail, so use it right away while it’s fresh!
Storage and Reheating Instructions for Homemade Cream Cheese Frosting
This cream cheese frosting is so good you’ll probably be tempted to lick the bowl clean, but good news: you can totally save some for later! Since it’s loaded with real dairy, storage is super important to keep it fresh and safe. Don’t ever leave this luscious topping sitting out at room temperature for too long, especially if you have a warm kitchen.
For leftovers, you want an airtight container. Seal it up tight and pop it straight into the refrigerator. It keeps really well in there for about a week, sometimes a little longer if your ingredients were fresh. I always use one of those plastic containers with the snapping lids—I’ve got about twelve cluttering up my pantry because I bake so often! You can even freeze it, though I prefer chilling it for short-term storage.
Now, here’s the critical part: reheating. You can’t just slap cold, rock-hard frosting on a cake and expect miracles. When you pull it out of the fridge, let it sit on the counter for at least an hour. This allows it to slowly come back to that perfect, spreadable temperature. If you’re in a huge rush, you can microwave it, but you have to be SO careful! Just 5 or 10 seconds at a time on 30% power, mixing in between. You only want it soft, not melted. A slightly softened state is perfect for swirling onto those cookie dough truffles!
If you feel like it has turned a little stiff after sitting out, just beat it again with your electric mixer for about 30 seconds. That short burst whips the air right back into it, restoring that fluffy texture we worked so hard for earlier. Keep it sealed, and it’ll be ready whenever the next craving hits!
Frequently Asked Questions About Cream Cheese Frosting
I always get emails about making this topping work perfectly, especially when people are trying to balance that rich sweetness with the necessary tang. Don’t worry if you have questions; we all start somewhere! Here are a few things I hear most often when readers are aiming for the perfect frosting for red velvet cake or just a great general topping.
How do I make my cream cheese frosting less sweet?
That’s a very common request! If you find things are tipping too far into the sweet side, you have a couple of easy fixes. First, I always recommend cutting back on the vanilla extract slightly—it adds sweetness perception as much as flavor. But for the real tang, you want to lean into the cheese! Try adding just a tiny pinch more salt than the recipe calls for, or if you’re feeling adventurous, add about a teaspoon of fresh lemon juice. That little hit of acid cuts right through the sugar without drastically changing the texture. It really makes for a wonderful tangy cream cheese icing!
Can I use salted butter in this cream cheese frosting recipe?
Yes, you *can*, but I always, always recommend unsalted butter for anything you’re frosting or baking where you control all the salt. When you use unsalted butter, like in our recipe, you get complete control over the sodium level in your final product. If you only have salted butter on hand, go ahead and use it instead of the unsalted butter, but then you absolutely must omit the 1/4 teaspoon of salt specified in the instructions. If you forget to omit it, your homemade cake icing might taste a little… sharp! Stick to unsalted for the most predictable results for your next batch of chai cupcakes!
My frosting seems too soft to pipe; how do I fix this?
This usually happens if your room temperature butter was a little too warm to begin with, or if your kitchen is hot! Don’t panic—we aren’t using too much powdered sugar because we want that wonderful fluffy texture, but sometimes we need a little extra insurance for piping. The best trick for a firm, pipeable cream cheese frosting is chilling! Pop the bowl right into the refrigerator for about 15 to 20 minutes. Give it a quick stir after 10 minutes. That cold sets the fat just enough so it holds its shape beautifully for star tips or decorative borders, and it doesn’t lose any of that essential fluffiness.
Why do I need to sift the powdered sugar for this easy cream cheese frosting recipe?
I cannot stress this enough: Sifting is your passport to a lump-free experience! Powdered sugar loves to clump together, especially in humid weather, because it contains a little bit of cornstarch to keep it free-flowing. If you dump those clumps into your mixer, you are guaranteed to end up with those little grit pockets in your beautiful, whipped cream cheese topping. Sifting breaks up those premature clumps so the sugar dissolves evenly into the butter and cream cheese base, guaranteeing an easy cream cheese frosting recipe that is unbelievably smooth.
Estimated Nutritional Data for Cream Cheese Frosting
Okay, let’s be real—this is pure indulgence, and we aren’t making this topping for its health benefits, though it tastes like a million bucks! If you are tracking things, here is a breakdown of what you can expect in a standard serving size. Remember, these numbers are just estimates based on the ingredients we use, so yours might shift slightly depending on brands or whether you used 3 cups or 4 cups of sugar!
This information is based on a serving size of 1/4 cup of the finished cream cheese frosting. It’s a rich topping, but that’s why it tastes so incredibly good on our baked goods, like the ones you can check out on my main baking index page!
- Serving Size: 1/4 cup
- Calories: About 350—worth every bite!
- Fat: About 21g (With 13g of that being saturated fat)
- Carbohydrates: Around 42g
- Sugar: A healthy helping at 40g!
- Protein: About 3g
- Sodium: Roughly 100mg
See? Pure decadence! If you’re watching sugar, remember that scaling back to 3 cups of powdered sugar helps tame that number a little bit without losing the structure we worked so hard to build. Enjoy it guilt-free!
Share Your Perfect Frosting Creations
Whew! We made it! Now that you’ve got bowls of that incredible, smooth, and perfectly tangy cream cheese frosting, it’s time for the fun part: decorating! I truly hope this recipe becomes one of your kitchen staples, just like it is in mine. There is nothing better than seeing my creations brought to life by you all!
I’m dying to know what you decided to top with this magnificent icing. Did you go classic and frost a zucchini loaf? Did you use it on those cinnamon rolls? Or maybe you just ate a big spoonful while standing over the sink—I won’t judge you, I promise!
Please, please leave a comment below and tell me how it worked out for you. How many stars are you giving this recipe? Knowing what you thought helps me keep perfecting these guides for everyone else. And if you took a picture of your magnificent creation—maybe a beautifully piped border or a thick glaze dripping down the sides of something incredible—I’d absolutely love to see it!
Send me a picture via my contact page anytime. Happy baking, and enjoy every single creamy, dreamy bite of that homemade goodness!
PrintBest Classic Cream Cheese Frosting
Make a smooth, fluffy, and tangy cream cheese frosting quickly. This recipe yields a stable icing perfect for piping on cakes, cupcakes, or topping cinnamon rolls.
- Prep Time: 10 min
- Cook Time: 0 min
- Total Time: 10 min
- Yield: About 3 cups
- Category: Dessert Topping
- Method: Mixing
- Cuisine: American
- Diet: Vegetarian
Ingredients
- 8 ounces cream cheese, softened
- 1/2 cup (1 stick) unsalted butter, softened
- 3 to 4 cups powdered sugar, sifted
- 1 teaspoon vanilla extract
- 1/4 teaspoon salt
Instructions
- Beat the softened cream cheese and butter together in a large bowl using an electric mixer until the mixture is completely smooth and creamy. Scrape down the sides of the bowl.
- Add the vanilla extract and salt. Mix briefly to combine.
- Gradually add the sifted powdered sugar, one cup at a time, mixing on low speed until incorporated.
- Increase the mixer speed to medium-high and beat for 2 to 3 minutes until the frosting is light and fluffy.
- If the frosting is too thick, add 1 teaspoon of milk or heavy cream at a time until you reach your desired consistency. If it is too thin, add more sifted powdered sugar, one tablespoon at a time.
- Use immediately for spreading or piping.
Notes
- Use room temperature cream cheese and butter to prevent lumps.
- Sifting the powdered sugar is key to achieving a smooth, no-lump texture.
- For a tangier flavor, reduce the vanilla extract slightly.
- If you need a very stiff frosting for detailed piping, use 4 cups of powdered sugar and chill the frosting for 15 minutes before using.
Nutrition
- Serving Size: 1/4 cup
- Calories: 350
- Sugar: 40
- Sodium: 100
- Fat: 21
- Saturated Fat: 13
- Unsaturated Fat: 8
- Trans Fat: 0.5
- Carbohydrates: 42
- Fiber: 0
- Protein: 3
- Cholesterol: 55