

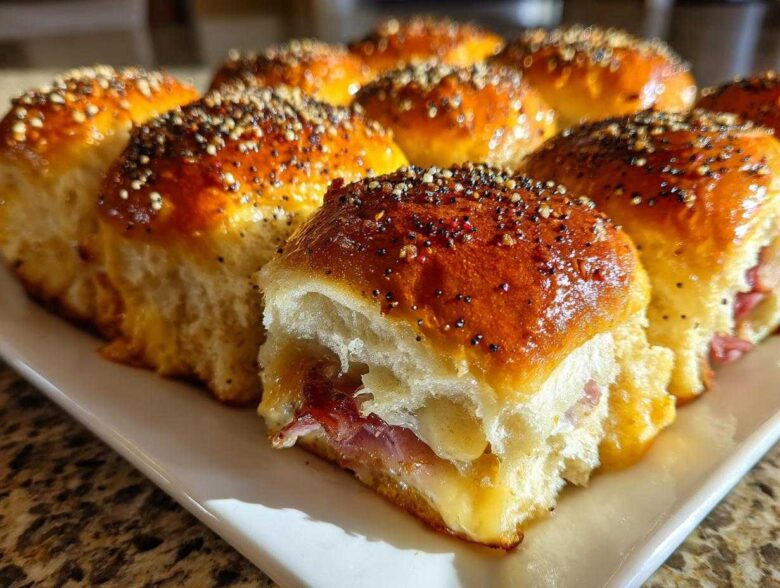
If you’re anything like me, the minute you hear “game day” or “holiday potluck,” you panic about your appetizer contribution. It needs to be easy, it needs to taste amazing, and frankly, it needs to disappear fast!
Well, stop worrying, because I’ve got the ultimate solution that never fails: these incredible Ham and Cheese Sliders. Forget fiddly assembly or spending hours on complicated puff pastry. The real secret sauce here isn’t the ham or the sweet Hawaiian rolls—though those are crucial—it’s that signature buttery mustard glaze we brush over the top. It melts down into every nook and cranny, making the tops crispy and the inside gooey perfection. Seriously, these baked sliders are my go-to. I’ve made batches for Super Bowl parties where they vanished before halftime, and every single time, someone asks me exactly how I get that perfect, sweet and savory crust. Trust me, serving these makes you look like a catering genius with minimal actual effort! For more inspiration on crowd-pleasing comfort food, check out my guide on Ham Cheese Party Sliders.
Why You Will Love These Ham and Cheese Sliders
Honestly, I don’t know why anyone bothers with complicated party food when these exist. When you walk into a party and see a platter of these beauties, you just *know* it’s going to be good. They are pure magic! Here’s why I keep reaching for this recipe:
- They are unbelievably fast to assemble—we’re talking 10 minutes max before they go into the oven.
- The Hawaiian rolls themselves are half the battle; that subtle sweetness is the perfect counterpoint to savory ham and earthy Swiss.
- That glaze! The Dijon and Worcestershire mixed with butter creates the crispiest, most addictive brown topping you have ever tasted on a sandwich.
- They travel like champs! They are perfect make ahead appetizers for a long drive to the tailgate.
- You can easily double or triple the batch without any fuss. More sliders, more happy guests!
- They work year-round, whether it’s a summer barbecue or a cozy winter holiday gathering.
Essential Ingredients for Perfect Ham and Cheese Sliders
Okay, let’s talk turkey—or rather, ham and Swiss! The beauty of these ham and cheese sliders is that they rely on fantastic simplicity. You don’t need a cart full of specialized items; you just need the right high-quality basics. I always grab my ingredients the day before so everything is ready to go.
When you assemble them, pay close attention to how finely the ham is sliced. We aren’t making chunky deli sandwiches here; we need that thin, fold-able meat so it lays flat across the rolls. And please, use the good Hawaiian rolls—they really make all the difference in texture and moisture!
Here’s what you need hanging out on my counter when I get ready to bake:
- One full 12-count package of those wonderful Hawaiian sweet rolls. Don’t try to separate them until the very end!
- About a pound of thinly sliced deli ham. If you can get it sliced deli-thin, do it.
- Twelve slices of good Swiss cheese. I find the nuttiness of Swiss pairs perfectly with the sweet roll, but feel free to play around later!
- A full 1/2 cup (that’s one whole stick) of unsalted butter, melted down until it’s smooth and golden.
- Two tablespoons of Dijon mustard. Don’t substitute the Dijon for yellow mustard here; you need that spicy kick.
- One teaspoon of Worcestershire sauce—this secretly amps up the savory flavor.
- One teaspoon of poppy seeds. These are non-negotiable; they give the top that famous, slightly crunchy texture.
Step-by-Step Guide to Making Ham and Cheese Sliders
This is the fun part! Honestly, unless you’re completely new to baking, you can probably do this recipe blindfolded. It’s that easy. You take a 9×13 pan, you cut a block of rolls, and you layer. That’s the whole secret to fantastic baked sliders. We aren’t doing individual sandwiches here; we are using the power of interconnected rolls to save time. If you’ve ever made delicious garlic bread, you’ll recognize the feeling of brushing on that rich, savory topping. If you are interested in other bread magic, you have to check out how they make Garlic Butter Parker House Rolls.
Preparing the Rolls and Oven for Ham and Cheese Sliders
First things first, get that oven set to 350 degrees Fahrenheit. You want it nice and hot when these go in. Lightly grease your 9×13 dish—don’t skip this or you’ll be crying later when you try to pull them out! Now for the trick: take your whole package of Hawaiian rolls and, holding them snugly together, slice them straight across horizontally. Think of slicing a loaf of bread, but you’re cutting the entire connected slab in half. Place the entire bottom layer into your prepared dish. Easy, right?
Layering the Ham and Cheese for Your Ham and Cheese Sliders
Time to build! You’ll be layering thin ingredients, so make sure you spread them out evenly so every single slider gets some goodness. Lay out that thinly sliced ham over the base layer of rolls. I try to get it to cover almost every square inch of bread. Once the ham is down, drape those 12 slices of Swiss cheese right over the top of the ham. Don’t worry if they overlap a tiny bit; the melting process is very forgiving!
Creating the Signature Buttery Mustard Glaze
This is where we separate the good game day sliders from the *OMG-what-is-in-this* sliders. Grab a small bowl—I use a little glass measuring cup—and whisk together your melted butter, your Dijon mustard, and that splash of Worcestershire. It will look a little thick, but just whisk until it’s completely emulsified. Once it’s mixed, sprinkle the poppy seeds right over the top of that liquid mixture. That’s your power coating!
Baking Instructions for Fluffy Ham and Cheese Sliders
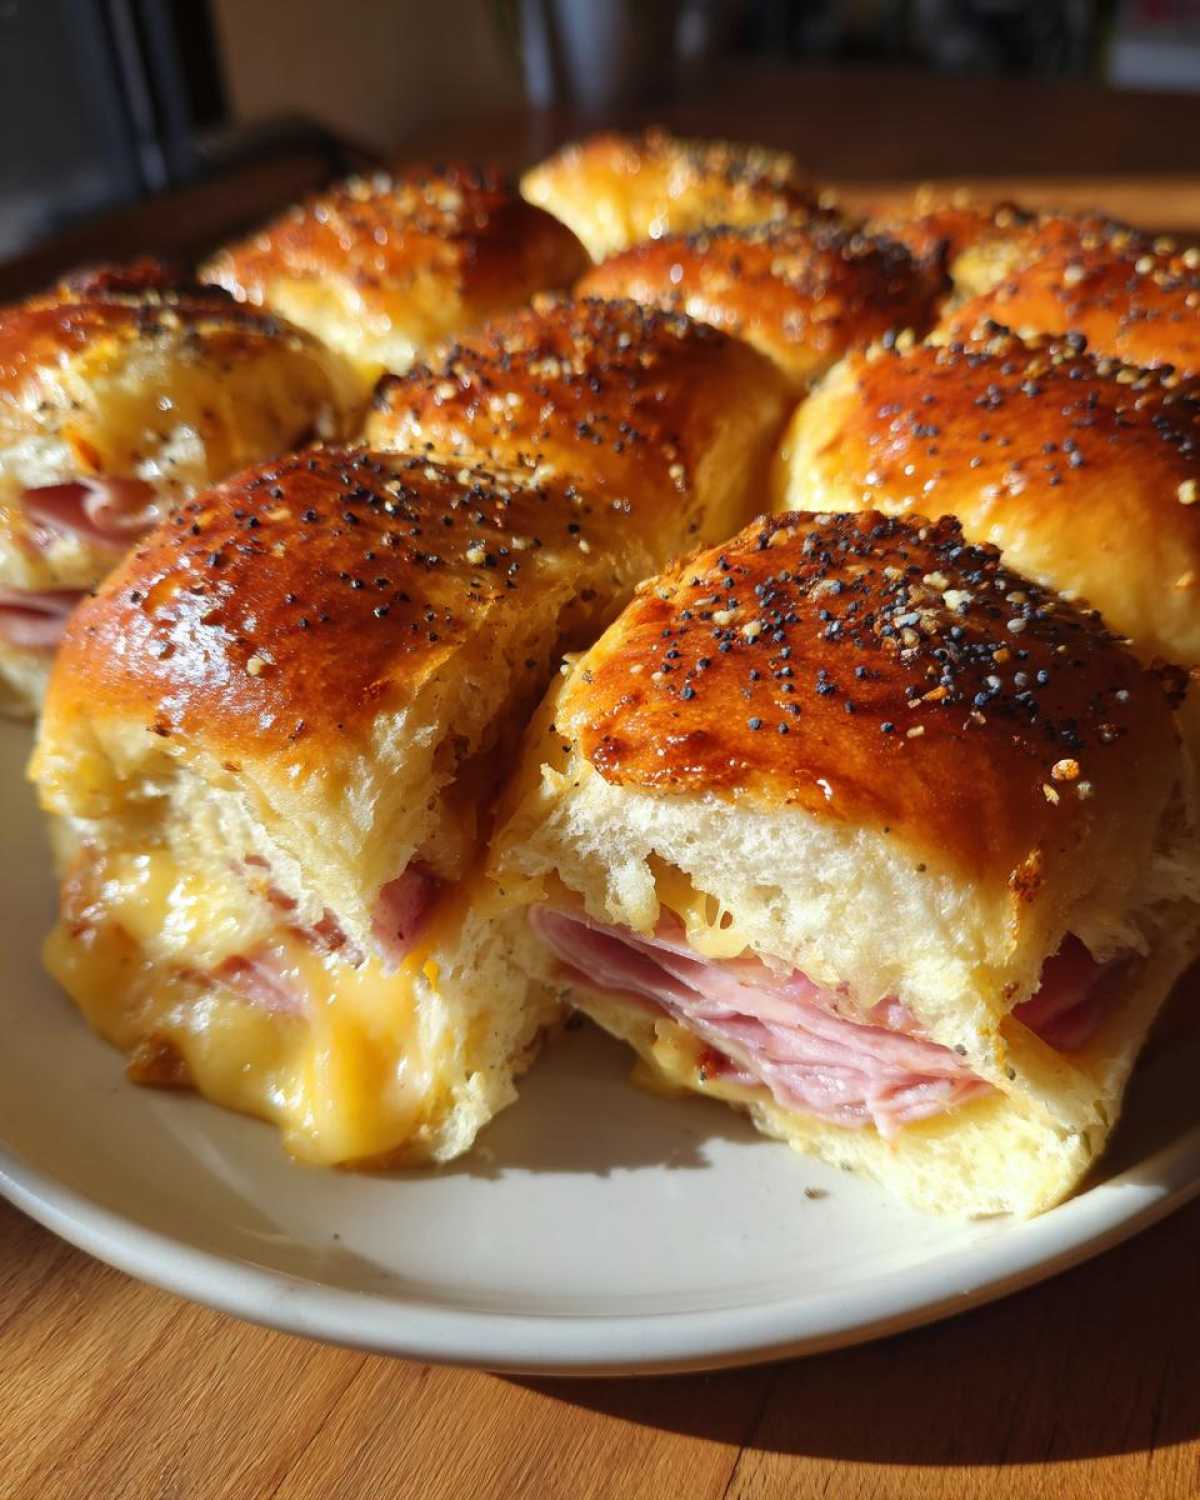
Take a pastry brush, or seriously, even a spoon if you’re in a rush, and cover the entire top surface of the rolls with that buttery mixture. Cover the whole baking dish tightly with aluminum foil—this traps the steam and melts everything perfectly without burning the tops immediately. Bake it this way for 15 minutes. After that, take the foil off and let them bake for another 5 to 10 minutes. You’re looking for the cheese totally melted and those beautiful tops turning golden brown speckled with poppy seeds!
Expert Tips for Perfect Ham and Cheese Sliders Every Time
You want these ham and cheese sliders to be perfect, right? It’s all about those tiny details you learn after making them one hundred times. My biggest recommendation is patience during the resting stage. Once they come out of the oven, piping hot with that shiny glaze, you *must* let them sit for five minutes. I know, I know, the kids are already hovering, but let them rest! This time allows the cheese to firm up just enough so it doesn’t all ooze out when you try to separate them.
When it’s time to serve, don’t just try to pull them apart like messy burgers! That rips the bread. Instead, grab a serrated knife—the kind you use for bread—and slice down *between* the connected rolls after they’ve rested. It creates neat, clean separation. If you’re looking for more hearty, shreddable versions perfect for a game day crowd, you should definitely peek at my recipe for Shredded Barbecue Beef Sandwich Sliders. They follow similar layering magic!
Make-Ahead and Storage for These Party Sandwiches
One of the real reasons these party sandwiches have earned a permanent spot in my rotation is that I can prep them almost entirely the day before! Seriously, I usually put them together right after dinner the night before a big event, and they sit happily waiting in the fridge until it’s showtime. This is a lifesaver when you’re trying to manage appetizers, mains, and desserts all at once.
You can assemble the entire thing—rolls, ham, cheese, even the glaze brushed on top—and cover it tightly with plastic wrap or foil. You can keep them refrigerated for up to about four hours before baking. Just make sure that dish is sealed up tight so they don’t dry out, even though the glaze helps a ton!
Now, if you bake them straight from the fridge, you need to add a little extra warming time. I always add an extra 5 to 10 minutes to the initial covered baking step. Because they start cold, they need that extra nudge to get the cheese melting properly before you uncover them. Don’t worry; the buttery mustard glaze protects them beautifully in the oven.
What about leftovers? Oh, they rarely last, but if they do, store any extras in an airtight container in the fridge for up to three days. When you reheat them, I find that popping them in the oven (maybe 325°F, loosely tented) for about ten minutes is best. That brings back the crusty top without microwaving them into soggy sadness. If you need more ideas for recipes you can tackle ahead of time, you really should look at my collection of Make Ahead Appetizers!
Variations on Classic Ham and Cheese Sliders
While I swear by the classic Swiss and ham pairing in these ham and cheese sliders because the nuttiness of the Swiss is just heaven with that sweet bun, I totally encourage playing around! Baking is supposed to be fun, right? You don’t have to stick to the exact recipe every time you make these party sandwiches.
I’ve tried a few swaps over the years, especially when I’m clearing out the fridge before a big grocery run. Sometimes the original blueprint just needs a little jazzing up depending on what I have on hand. Here are my favorite ways to pivot without messing up the crucial glaze.
Adding Tangy Pickles or Onions to the Layers
This is my absolute favorite upgrade, and it changes the whole profile! If you want a little zing to cut through all that butter and cheese, you must add thin slices of dill pickles. I layer them right on top of the ham before the cheese goes on. They get warm and soften up just a tiny bit, and trust me, the pickle juice mixes perfectly with that buttery mustard layer.
Another great addition is thinly sliced, sweet Vidalia onions. You don’t even need to cook them first. Just make sure they are paper-thin! They caramelize slightly in the oven and just melt into the background flavor. Honestly, if you like a little crunch, this is the way to go!
Swapping Out the Cheese Alternatives
Swiss is amazing, but if you’ve run out or just want something different for your next batch of Hawaiian roll sliders, don’t sweat it. Provolone is my next go-to. It melts incredibly well and offers a slightly milder flavor profile than Swiss, so it lets the ham shine through a bit more.
If you’re feeling brave, try Monterey Jack. It gets super gooey and stretches beautifully when you pull those individual sandwiches apart after baking. I wouldn’t go with cheddar unless you are making these more like a grilled cheese slider, because cheddar tends to get a little oily when baked this way. Stick with the smooth melters for the best results!
Spice Up that Glaze for Extra Kick
The glaze is where you can really introduce some heat if that’s your thing! You don’t want to change the ratios of butter, Dijon, and Worcestershire, but you can sneak some extra flavor in there. I’ve experimented by adding a tiny dash of cayenne pepper to the mix, just before I brush it on.
Or, if you’re making these for a tailgating crowd that loves a little smoke, mix in about a half teaspoon of smoked paprika into the butter mixture. It deepens the color of the glaze to a gorgeous dark gold and gives these make ahead appetizers a wholly different, savory taste. It’s subtle, but people definitely notice something different is going on!
Frequently Asked Questions About Baked Sliders
I always get a ton of questions about these little gems, especially when people are planning big events like watching the game or hosting family. They seem too easy to be true, I guess! Here are a few things folks ask me most often about serving the best baked sliders.
How far ahead can I assemble these Hawaiian roll sliders?
You can totally get these prepped ahead of time, which is why they are my number one choice for party food! I usually assemble the whole thing—rolls, meat, cheese, and glaze brushed on top—and then cover it tightly with foil. You can safely store them in the refrigerator for up to four hours before you plan to bake them. Just remember that when you do bake them straight from the cold, you’ll need to add that extra 5 to 10 minutes to the covered baking time so everything warms through evenly.
Can I substitute the ham or Swiss cheese?
Absolutely! While I live for the classic ham and Swiss combo, you can totally make swaps. If you use turkey instead of ham, it works just as well! For cheese, provolone melts beautifully and keeps that nice mild flavor. Some people even use pepper jack if they want a little built-in spice for their tailgate food. The key is making sure whatever cheese you use is sliced thinly so it melts fast and evenly over the meat.
Why is the two-stage baking process important?
That two-stage baking is how we get that perfect crust without drying out the inside. Covering the pan (usually with foil) for the first 15 minutes traps the steam from the melting cheese and the butter mixture. This steams the bread slightly, making it incredibly soft, and ensures the cheese is totally melted throughout. Then, removing the foil is just to crisp up the topping and get that gorgeous golden-brown color on the poppy seeds. It’s a controlled environment to get guaranteed gooey centers and crispy tops!
What’s the best way to reheat leftovers?
If you are lucky enough to have leftovers (which, honestly, rarely happens at my house!), keep them stored in the fridge in an airtight container. I really advise against using the microwave unless you are in a desperate rush, because it turns the beautiful crust soggy fast. The best way to revive them is to pop them back into a 325°F oven, loosely tented with foil, for about ten minutes. That brings back the softness of the bread and warms the cheese without overcooking everything. If you’re planning a larger menu, you might also want to check out my tips for enjoying leftovers by revisiting recipes like my Classic Chicken Noodle Soup later in the week!
Nutritional Estimates for Ham and Cheese Sliders
Since we’re talking about feeding a crowd, sometimes folks wonder what they’re actually eating when they grab a couple of these sliders. I always want to be super transparent about the numbers, even though I’m hardly tracking calories when I’m making these for game day!
Please remember that these figures are just my best estimate based on using standard deli ham, typical Swiss cheese slices, and the standard Hawaiian roll package. If you swap out the Swiss for something fattier, or use honey-roasted ham, the numbers will definitely shift!
But generally, when you break down the whole dish into 12 individual servings, here’s what one slider clocks in at:
- **Calories:** Right around 300 per slider. Not bad at all for something that tastes this decadent!
- **Fat:** About 15 grams. Remember, a good chunk of that comes from the melted butter in our amazing glaze, so that’s flavor we are paying for!
- **Protein:** These are surprisingly high in protein, usually coming in at 18 grams, which keeps everyone satisfied through the second half of the party.
- **Carbohydrates:** About 25 grams, mostly coming from those sweet Hawaiian rolls.
They do happen to be on the higher side for sodium, mostly thanks to the deli ham and the Worcestershire sauce, so keep that in mind if you’re watching your salt levels. But honestly, for an appetizer that makes everyone happy, these are a wonderful mid-range choice!
Share Your Slider Creations
Look, I can tell you all day long how amazing these ham and cheese sliders are, but the real fun happens when you bring them to your own table! I absolutely live to hear about how they were the unexpected hit at someone’s big family gathering or how they saved someone’s tailgate menu planning.
So once you bake up that buttery, gooey goodness, please don’t keep the magic to yourself! Head down to the comments section below and give me the scoop. Tell me what party you served them at—was it a huge holiday bash, or just a casual Friday night movie marathon? Did your family behave and wait the five minutes before cutting into them?
And if you snap a picture of that beautiful, shiny, poppy-seed-dotted top, please tag me on social media! Seeing you guys recreate my favorite easy party sandwich warms my heart more than anything. It helps me keep putting out new recipes, too, so feel free to check out what else is new over on the main blog!
PrintHam and Cheese Sliders with Buttery Mustard Glaze

Assemble these easy sliders using Hawaiian rolls, ham, and Swiss cheese, topped with a savory butter and mustard sauce, then bake until golden.
- Prep Time: 10 min
- Cook Time: 25 min
- Total Time: 35 min
- Yield: 12 sliders
- Category: Lunch
- Method: Baking
- Cuisine: American
- Diet: Vegetarian
Ingredients
- 1 (12 count) package Hawaiian sweet rolls
- 1 pound thinly sliced deli ham
- 12 slices Swiss cheese
- 1/2 cup (1 stick) unsalted butter, melted
- 2 tablespoons Dijon mustard
- 1 tablespoon Worcestershire sauce
- 1 teaspoon poppy seeds
Instructions
- Preheat your oven to 350 degrees Fahrenheit. Lightly grease a 9×13 inch baking dish.
- Slice the entire package of Hawaiian rolls in half horizontally, keeping the rolls connected. Place the bottom half of the rolls in the prepared baking dish.
- Layer the ham evenly over the bottom rolls. Top the ham with the slices of Swiss cheese.
- Place the top half of the rolls over the cheese layer.
- In a small bowl, whisk together the melted butter, Dijon mustard, and Worcestershire sauce.
- Brush the butter mixture evenly over the top of the rolls. Sprinkle the poppy seeds over the buttered tops.
- Cover the baking dish tightly with aluminum foil. Bake for 15 minutes.
- Remove the foil and bake for another 5 to 10 minutes, or until the cheese is melted and the tops are lightly browned.
- Let the sliders rest for 5 minutes before slicing between the rolls to create individual sandwiches. Serve warm.
Notes
- You can assemble these sliders up to 4 hours ahead of time. Cover and refrigerate them before baking. Add an extra 5 to 10 minutes to the covered baking time if baking directly from the refrigerator.
- For easy serving, use a serrated knife to slice through the connected rolls after baking.
Nutrition
- Serving Size: 1 slider
- Calories: 300
- Sugar: 8
- Sodium: 750
- Fat: 15
- Saturated Fat: 8
- Unsaturated Fat: 7
- Trans Fat: 0
- Carbohydrates: 25
- Fiber: 1
- Protein: 18
- Cholesterol: 40