

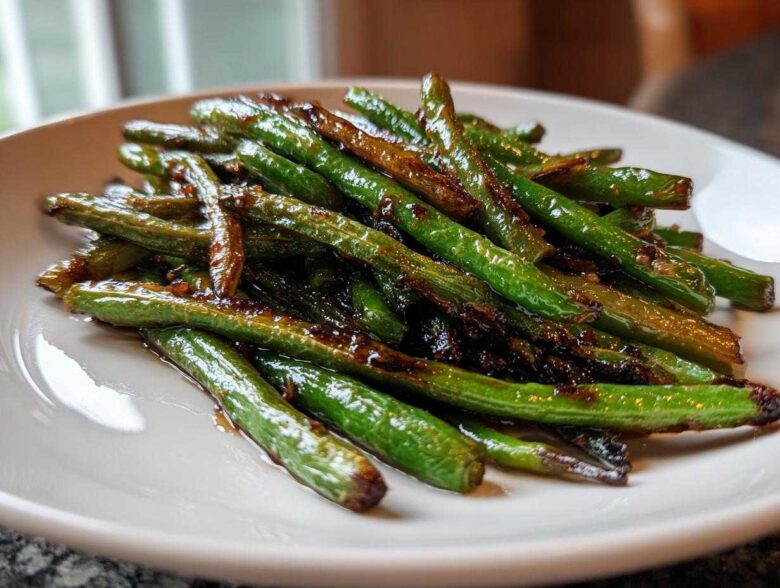
You know that moment when you’ve ordered Chinese takeout and you pick up that little white carton of green beans? They look slightly wrinkled, maybe a little bit browned? That char! That smoky, salty flavor just screams comfort. Well, I spent way too long trying to figure out how they got that perfect texture at home without spending forever stoking a massive fire.
The trick to incredible chinese green beans with garlic sauce isn’t complicated, but you absolutely need high heat. We’re talking about achieving that beautiful, blistered texture right in your wok or even a heavy skillet. Forget soggy steamed vegetables, we’re going for deeply savory, punchy garlic flavor that hits every note. Trust me, once you nail this 20-minute method, you’ll never go back to the delivery version. Plus, this recipe makes a truly fantastic and quick vegan chinese side dish!
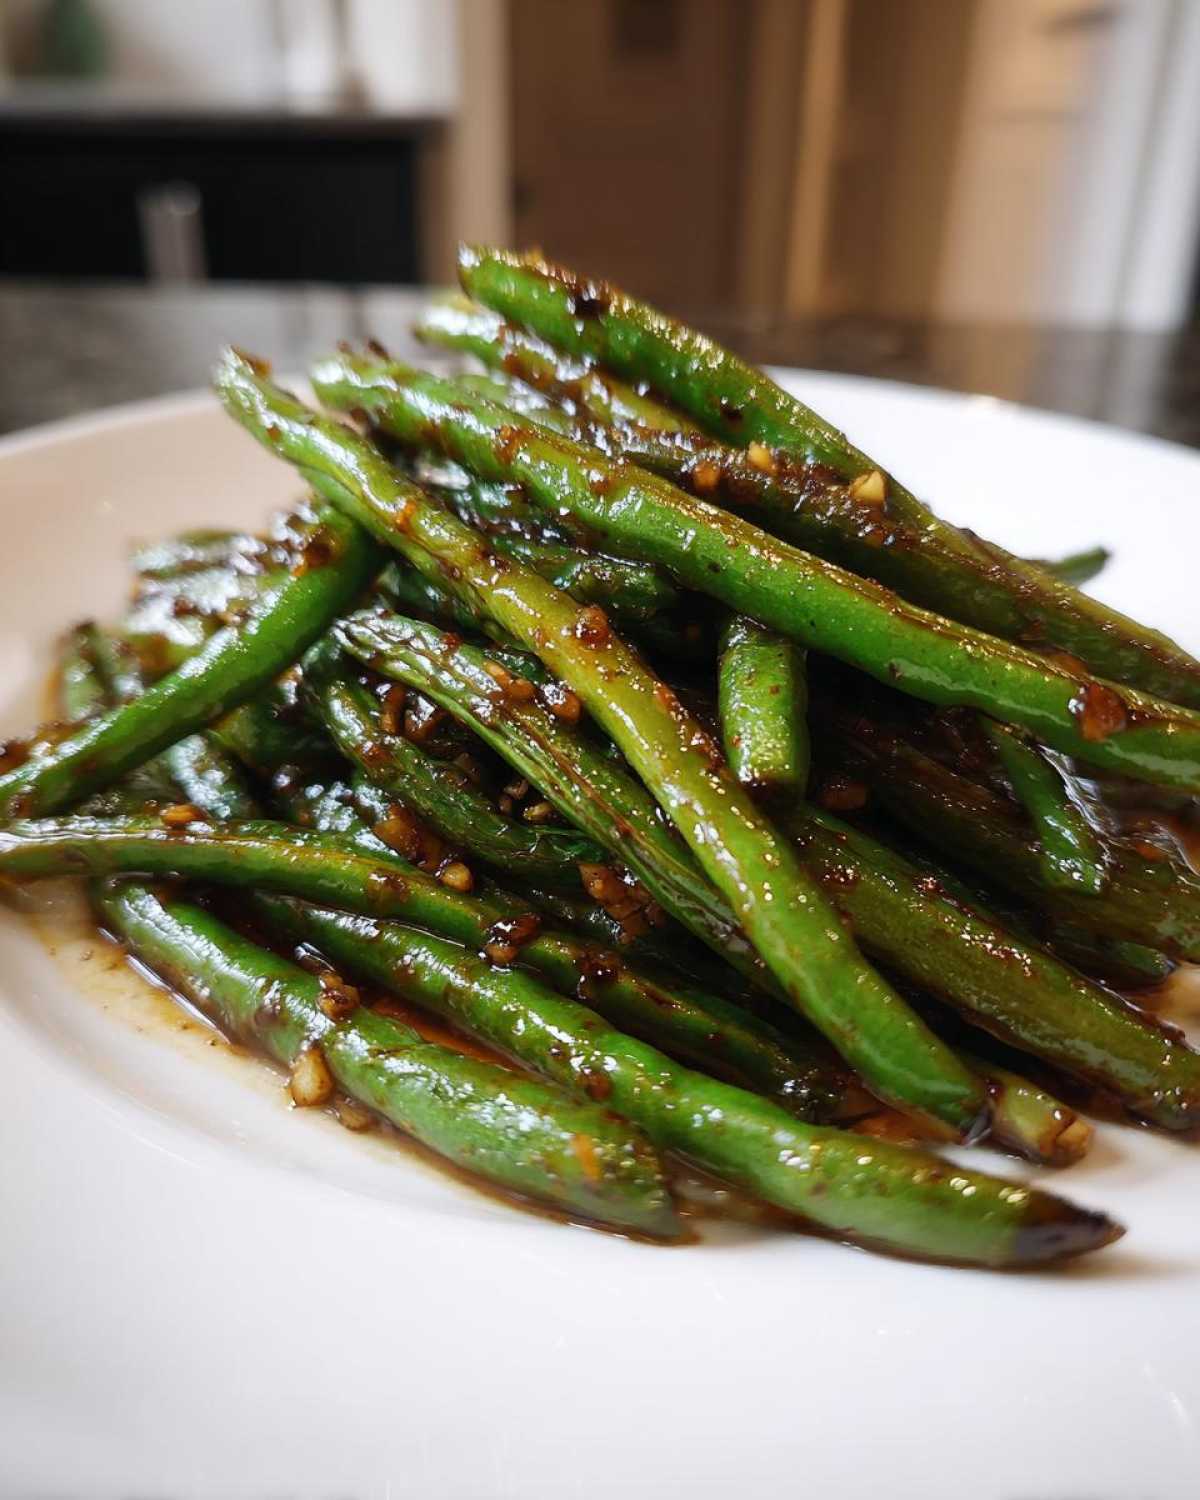
Why This Recipe for chinese green beans with garlic sauce Works So Well
I’m obsessed with how quickly this dish comes together. Honestly, you get that amazing takeout flavor and texture in about 20 minutes flat. That’s the magic here. No tricks, just pure stir-fry science!
- Speed King: Prep is 10 minutes, cook time is 10 minutes. Perfect for a weeknight rush.
- Texture Focus: We’re intentionally looking for those deep brown spots on the beans—the char is the goal for real blistered green beans.
- Incredible Flavor: The sauce is simple but punchy! That heavy dose of garlic just sings against the tender-crisp snap of the beans.
- Easy Fit: This is a naturally vegan chinese side, so it works for almost everyone at the table. I can only imagine the deliciousness you’ll find! Check out my blog for more simple sides.
Essential Ingredients for Authentic chinese green beans with garlic sauce
Okay, the ingredient list for this dish is short, which is part of why I love it so much! You don’t need a million obscure things. But precision in what you *do* use really makes the difference between a soggy mess and fantastic garlic green beans.
For the main event, grab one pound of fresh green beans. Make sure they’re well-trimmed—no one wants a woody stem end in their bite!
When it comes to the cooking oil, you need something sturdy that won’t smoke the second it hits the heat. I always reach for a neutral, high-heat oil like vegetable or peanut oil. That’s non-negotiable for getting the proper char!
Now for the punch—the sauce ingredients. You’ll need:
- 4 cloves of garlic, chopped up real fine. Don’t skimp here; this is a garlic dish!
- 1 teaspoon of fresh ginger, grated right off the root.
- 2 tablespoons of soy sauce. If you’re keeping this gluten-free, switch immediately to tamari—it works just as well!
- 1 tablespoon of rice vinegar for that necessary tang.
- 1 teaspoon of sugar. This balances the saltiness perfectly.
- 1/4 cup of water or veggie broth—this helps create steam when we add it later, which keeps the beans from burning before they cook through.
- And just a tiny drizzle of sesame oil right at the end for that signature nutty aroma.
Keep everything measured out beforehand. Once that wok gets hot, you’ll be moving fast!
Mastering the Wok: How to Make chinese green beans with garlic sauce
This is where the magic happens, folks! If you have a wok, use it. If you don’t, a nice heavy skillet will do the trick, but you have to be smarter about it. The entire goal here is extreme heat to get those gorgeous charred spots. We aren’t just cooking the beans; we are giving them attitude!
First things first: get your wok screaming hot—I mean smoking hot—before the oil even hits it. Add your oil and then, here’s the really important part, add the beans and then back off. Don’t touch them for a full 2 to 3 minutes. This stillness allows the oil to actually start cooking the surface really hard, creating that signature texture that makes these dry fried green beans so famous.
Once you see those dark, delicious little marks appearing, toss them only enough to catch the other sides. Continue this dance for another few minutes until they are tender-crisp, meaning they still snap when you bite them. If you overcrowd your pan, they end up steaming. If that happens, just pull half out and do a second batch! It’s easier to cook in batches than to deal with soggy beans.
Achieving the Perfect Blister on Your chinese green beans
Listen, achieving the char is all about patience in the first minute! You absolutely need high heat because we are aiming for *blistering*—that’s just the beans cooking directly on the searing hot metal of the wok. If you stir them immediately, you are just gently steaming them in the residual moisture, and that’s not what we want for restaurant-style wok fried green beans.
If you are using a standard skillet, you must work in batches. A skillet is much wider than a round wok bottom, so it’s easier to make the beans overlap. If you dump a whole pound in, the temperature drops immediately and you get a sad puddle of green water. Cook small batches until they are blistered, remove them, and keep them warm while you cook the next batch. Then they all go back in together for the sauce finish!
Building the Savory Garlic Sauce Base
Once those beans are charred perfectly, push them all over to one side of the wok. You need that empty space to create flavor! Shove the minced garlic and grated ginger right into that hot, oiled area. They’ll start smelling amazing in about 30 seconds—be quick! You just want them fragrant, not brown, or they get bitter.
While that’s happening, make sure you have your sauce pre-mixed—soy sauce, vinegar, sugar, and water whisked together. Pour that mix directly over the garlic and ginger first, let it bubble for just a second, and then quickly toss everything—beans and sauce—together. This whole thing only takes about 60 seconds before the sauce starts to thicken up. Pour it all in and toss, toss, toss to coat everything evenly! Don’t walk away now, or you’ll burn that glorious garlic!
Ingredient Notes and Substitutions for chinese green beans with garlic sauce
One thing I learned the hard way is that sometimes you just don’t have exactly what a recipe calls for, right? Don’t panic! This recipe for garlic green beans is super forgiving, which is why it’s one of my go-to chinese side dishes.
Let’s talk about gluten. If you need to keep this meal strictly gluten-free, you can absolutely swap the soy sauce for tamari. It has a slightly deeper, richer flavor profile, but it works beautifully here and doesn’t change the texture one bit. It’s my go-to hack for that! I talk more about simple swaps on my main blog page.
Also, about that liquid for thinning the sauce—water versus broth. Water works just fine if you have nothing else on hand. But if you have some vegetable broth lying around, use that! It adds a tiny, unnoticeable layer of savory depth that really makes these wok fried green beans taste like they came straight from your favorite restaurant. It’s a small choice that makes a difference.
And for those of you who like things spicy—and I know you’re out there!—remember that hint in the notes about chili flakes? If you want these to verge on that delicious, tingling Sichuan flavor, toss about a half teaspoon of red chili flakes in there right when the garlic hits the pan. Just don’t add them too early, or they’ll burn before the beans are even tender-crisp. A little caution goes a long way to keeping those fantastic blistered green beans from tasting bitter!
Serving Suggestions for these chinese side dishes
These garlic green beans are fantastic on their own because they have such a punchy flavor, but why stop there? When I make a batch of these, I’m usually aiming for a full takeout experience right here in my kitchen, you know? It feels a little sad just eating a pile of beans, even if they are perfectly charred!
The easiest way to round out the meal is to serve them alongside a big bowl of carbohydrates. My personal favorite pairing is my copycat Hibachi Fried Rice. The savory rice soaks up any extra sauce that drips off the beans, and you get that great textural contrast between the soft rice and the crisp beans.
If you’re leaning more toward noodles, these chinese green beans go perfectly with a simple sesame noodle or even just some plain lo mein. You toss the noodles in a light sauce, and then you spoon these bright, garlicky beans right over the top. It makes the whole dish feel instantly upgraded!
And of course, if you’re looking for protein, these work wonderfully next to anything that needs a splash of umami flavor. Think about beef and broccoli, General Tso’s chicken, or even just some crispy tofu cubes tossed in teriyaki. Honestly, because these beans are so fast to make, I often whip them up while the main protein is simmering on the stove. They become the perfect, speedy little addition to bulk out any dinner spread!
Storage and Reheating Tips for leftover chinese green beans
Now, I’d *love* to say that these chinese green beans with garlic sauce never last long enough to need storage, but hey, sometimes I just cook too much! If you do manage to tuck some away, you need to handle them gently, because that amazing char we worked so hard for doesn’t exactly love the refrigerator.
The absolute #1 rule is airtight containers. Don’t just cover the bowl with plastic wrap; seal them up tight! This keeps the moisture inside the beans from getting weirdly watery, and it keeps the strong garlic smell from taking over your fridge. You can generally keep them for three or four days like this, though they definitely lose their initial *snap*.
When it comes to reheating, forget the microwave if you care about texture. Microwaves are the sworn enemy of crispness, and you’ll end up with squishy beans. Instead, heat up your wok or your heaviest skillet again over medium-high heat. Add just a *tiny* splash of oil—seriously, just enough to coat the pan thinly—and toss the cold beans in.
You’re not cooking them from scratch; you’re just waking them up! Keep them moving constantly, and within two or three minutes, you’ll find that those garlic green beans firm right back up and start getting those dark spots to reappear. That little trick basically eliminates the need for me to worry about leftovers, because they taste almost as good the next day!
Frequently Asked Questions about dry fried green beans
I totally get it—when you’re trying to recreate that perfect dish, you always have a few questions left over! Don’t sweat it. I’ve compiled the ones I get asked most often about getting these dry fried green beans just right, so you can stop worrying and start eating!
Can I make these garlic green beans spicy like Sichuan style?
Oh, you want some fire? I love that energy! If you want to push these garlic green beans into proper heat territory, you absolutely can. Remember how I mentioned adding a half teaspoon of chili flakes when the garlic goes in? If you’re feeling bold, double that amount, or better yet, grab some dried Sichuan peppercorns. Don’t just toss them in whole, though—you need to dry-toast them in the empty wok first until they smell fragrant, then grind them up before adding them with the sauce. That little numbing sensation from true Sichuan seasoning is totally fantastic with the garlic and soy!
What is the key difference between these and regular steamed green beans?
The difference is night and day, honestly. Steamed green beans are fine, they’re healthy, they’re green—but they are soft and kind of one-note. When we make these wok fried green beans, we are harnessing high, intense heat. That heat allows the sugars and natural moisture in the vegetable to caramelize right on the surface of the metal. That’s what gives you the signature spots—the char! It’s that caramelization that creates the intense, slightly smoky flavor coating the bean. Steaming just can’t give you that crucial texture boost.
Can I use frozen green beans for this wok fried green beans recipe?
Oh, please don’t! This is one time where frozen just won’t cut it, and I learned this the hard way, too. Frozen green beans have already been blanched, which means they have way too much internal water trapped inside. When you toss them into that screaming hot wok hoping for char, what you actually get is a flood of cold water hitting the pan. The temperature instantly plummets, and instead of creating those gorgeous blistered green beans, you just end up gently boiling them in their own icy water until they get mushy. Stick to fresh beans if you want that snappy texture!
Nutritional Estimates for this Vegan Chinese Side Dish
Now, I’m no nutritionist, and frankly, when I’m making something this delicious, I try not to look too closely at the numbers! But since this is a super healthy, vegetable-forward dish, I wanted to give you an idea of what you’re getting with this recipe for vegan chinese sides. Remember, because we use such simple ingredients—mostly beans, oil, and a splash of soy sauce—the numbers are pretty reasonable!
These estimates are based on prepping the whole recipe and dividing it into four healthy servings. I always feel better eating things when I know they aren’t secretly loaded with sugar or bad fats, and these chinese green beans pass the test!
Here’s what you’re looking at per serving:
- Serving Size: 1/4 of recipe
- Calories: 110
- Fat: 7 grams (Most of this is the good, necessary cooking oil!)
- Carbohydrates: 10 grams (That’s mostly fiber from the beans!)
- Protein: 3 grams
- Fiber: 4 grams
- Sugar: 4 grams (Mostly comes from the tiny bit we add to the sauce to balance the soy!)
The sodium content comes primarily from the soy sauce, so if you’re watching that—and I totally get it—that’s where you’ll want to substitute with a low-sodium tamari. Enjoy these knowing you’ve got a flavorful, low-calorie, veggie powerhouse on your hands!
Share Your Perfect chinese green beans with garlic sauce
Well, that’s it! You’ve mastered the high heat, you’ve got the smoky char, and you’ve got a heaping pile of the best garlic green beans you’ve ever made at home. I really hope this recipe has you feeling confident about tackling your own stir-fries!
Now, I love hearing what you think! Did you manage to get that perfect blister on the first try? What did you pair these fantastic chinese green beans with? Did you go for plain rice, or something spicier?
Please, please, leave a star rating right below this section so others know how much you loved them! And if you snapped a glorious photo of your finished platter—maybe sitting next to some crispy tofu or chow mein—I would absolutely love to see it! Tag me when you post it online. If you have questions or just want to say hi, you can always reach out to me over on my contact page. Happy cooking, everyone!
PrintWok-Fried Green Beans with Garlic Sauce
Make restaurant-style blistered green beans quickly in a wok or skillet with a savory garlic soy sauce.
- Prep Time: 10 min
- Cook Time: 10 min
- Total Time: 20 min
- Yield: 4 servings
- Category: Side Dish
- Method: Stir-Frying
- Cuisine: Chinese
- Diet: Vegan
Ingredients
- 1 pound fresh green beans, trimmed
- 2 tablespoons vegetable oil
- 4 cloves garlic, minced
- 1 teaspoon fresh ginger, grated
- 2 tablespoons soy sauce (or tamari for gluten-free)
- 1 tablespoon rice vinegar
- 1 teaspoon sugar
- 1/2 teaspoon sesame oil
- 1/4 cup water or vegetable broth
Instructions
- Heat a wok or large skillet over high heat until very hot. Add the vegetable oil.
- Add the trimmed green beans to the hot wok in a single layer if possible. Cook without stirring for 2-3 minutes to allow the beans to blister and char slightly.
- Toss the beans and continue cooking for another 3-4 minutes until they are tender-crisp.
- Push the beans to one side of the wok. Add the minced garlic and grated ginger to the empty space and cook for about 30 seconds until fragrant.
- In a small bowl, whisk together the soy sauce, rice vinegar, sugar, and water or broth.
- Pour the sauce mixture over the beans and aromatics. Toss everything quickly to coat. Cook for 1 minute until the sauce thickens slightly.
- Remove from heat and drizzle with sesame oil. Serve immediately.
Notes
- For a spicier version, add 1/2 teaspoon of chili flakes with the garlic.
- If you do not have a wok, use a heavy-bottomed skillet and work in batches to avoid overcrowding, which prevents proper blistering.
- Pair these beans with fried rice or noodles for a complete meal.
Nutrition
- Serving Size: 1/4 of recipe
- Calories: 110
- Sugar: 4
- Sodium: 450
- Fat: 7
- Saturated Fat: 1
- Unsaturated Fat: 6
- Trans Fat: 0
- Carbohydrates: 10
- Fiber: 4
- Protein: 3
- Cholesterol: 0