

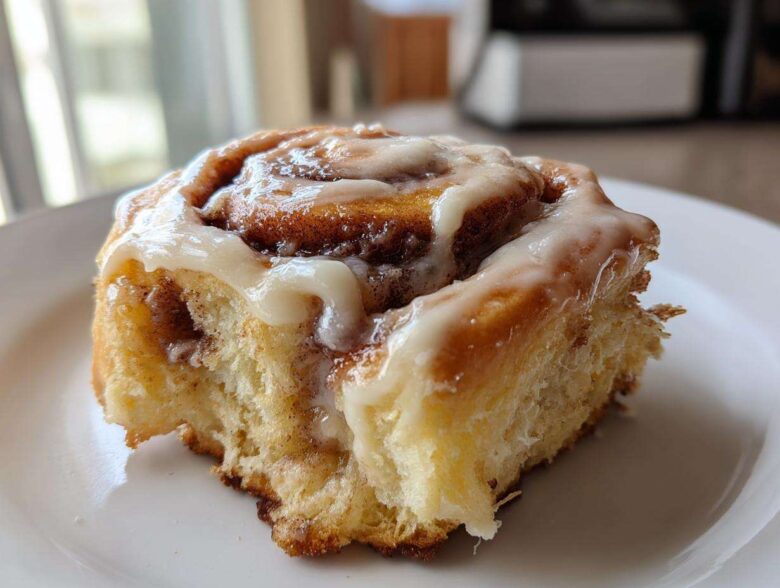
You know that moment when you walk into a bakery, and the air is just thick with the smell of warm yeast, melted butter, and ground cinnamon? That is the exact, magical aroma I’m trying to capture in your house right now! Forget those sad, dry rolls from the can; I’m handing you the keys to the most foolproof, truly bakery-quality **cinnamon roll** recipe you will ever put together.
It took me ages—and many, many failed rises—to figure out the perfect balance for this yeast dough. Seriously, I almost gave up! But I promise you, once you feel that dough become smooth and elastic under your hands, you’ll know you’ve hit the jackpot. This method guarantees those impossibly soft, pull-apart centers we all dream about. We’re making memories today, friend!
If you’re looking for an overnight solution, check out my tips on making the dough ahead, which you can find over on my Cinnamon Roll Casserole guide, but for the absolute fluffiest result, we’re making these fresh today!
Why This is the Best Cinnamon Roll Recipe for Soft, Fluffy Pastry
Listen, if you want fluffy, you need to treat your dough right, and that’s exactly what we’re doing here. This recipe is my go-to because it delivers that incredible, melt-in-your-mouth texture that makes you close your eyes after the first bite. We aren’t messing around with dry results; we are aiming for the absolute **best cinnamon roll** you’ve ever made at home.
The secret lies in the butter-to-sugar ratio in that filling, which creates a supremely gooey center, making this **homemade pastry** something you’ll want to make every weekend. Trust me, the effort in these rising times pays off tenfold when you pull that golden pan out of the oven!
Need a little cocktail inspiration to pair with these? I’ve got a great Maple Cinnamon Old Fashioned that’s perfect for sipping while you wait for them to cool just slightly!
Quick Facts: Prep Time and Yield for Your Cinnamon Roll
Planning is key when you’re making something this special, so here are the essentials you need to know before you dive in. This helps you budget your morning:
- Prep Time: 45 min
- Cook Time: 25 min
- Total Time: 170 min (Don’t forget the rising time counts in that total!)
- Yield: 12 servings
Gathering Ingredients for Your Soft Homemade Cinnamon Roll
Okay, we are moving onto the fun part—gathering our supplies! I always lay everything out before I start mixing, so I don’t have to stop mid-knead to find the salt canister. You’ll notice we break this down into three main groups: what goes into the fluffy dough, what makes that amazing gooey filling, and finally, the icing that goes on top. Remember, the quality of your ingredients really shows through in a **homemade pastry** like this!
If you want to see another great recipe that uses similar flavors, you should definitely check out this Cinnamon Swirl Coffee Cake! But back to our rolls!
Dough Ingredients for the Perfect Yeast Roll Recipe
This is where the magic starts, especially with the temperature controls. Yeast needs warmth to wake up, but if it’s too hot—say, boiling hot—you’ll kill it, and then you’ll have sad, pancake-like dough. I always test the milk with a clean finger; it should feel pleasantly warm, not hot at all.
- 1 cup whole milk, warm
- 2 1/4 teaspoons active dry yeast
- 1/2 cup granulated sugar, plus 1/4 cup for filling
- 1/2 cup unsalted butter, softened, plus 1/2 cup for filling
- 1 large egg
- 1 teaspoon salt
- 4 cups all-purpose flour, plus more for dusting
The Gooey Cinnamon Filling Ingredients
Don’t skimp on the cinnamon here, people! This is what gives you that gorgeous swirl and the famous aroma. And make sure that brown sugar is packed tightly into your measuring cup; that molasses gives us essential moisture.
- 1/4 cup packed light brown sugar, for filling
- 2 tablespoons ground cinnamon, for filling
Cream Cheese Icing Ingredients for the Best Cinnamon Roll
The icing needs to be made while the rolls bake so it’s perfectly warm when you pull them out. Make sure your cream cheese and butter are fully softened—if they are cold, your icing will end up lumpy, and we want smooth perfection!
- 4 ounces cream cheese, softened
- 1/2 cup unsalted butter, softened
- 2 cups powdered sugar
- 1 teaspoon vanilla extract
- 1-2 tablespoons milk
Step-by-Step Instructions to Make Incredible Cinnamon Roll Dough
Alright, we’re finally in the kitchen mixing! This is where we build the foundation for your **cinnamon roll**. If you’re nervous about working with yeast, don’t be! Yeast is just a little living thing that needs the right environment to thrive. Think of this like prepping the perfect bed for a baby—nice and cozy, but not too hot!
We are aiming for a dough that is soft and elastic, not stiff like bread dough. Feel it when you knead it; if it feels like it’s fighting back too hard, it’s probably a little dry. This whole process is about patience, but it goes faster than you think!
If you want some more general tips on handling yeasted doughs for future baking inspiration, take a peek at my guide for a simple yeast roll recipe!
Activating Yeast and Mixing the Base
First things first: we need to proof the yeast. Grab your warm milk—and I mean pleasantly warm, folks, not sizzling—and sprinkle that yeast right on top. Let it sit for about five minutes. When it starts to get foamy, that’s your green light! It means the yeast is alive and ready to party.
Once foamy (Step 1 done!), we add the softened butter, about half a cup of the sugar, the egg, and the salt right into that yeasty bowl. Just mix it gently until it looks vaguely combined. Now we move onto the bulk of the ingredients.
Kneading and First Rise for Fluffy Texture
Now we add the flour gradually. Add it slowly while mixing. When it starts to look too shaggy to mix with a spoon, turn it out onto a lightly floured surface. You need to knead this for a solid five to seven minutes. You are checking for that elastic push-back—it should spring back slowly when you poke it!
Once it’s smooth, plop that beautiful dough into a lightly oiled bowl, turn it over once to coat, cover it up tight, and tuck it away somewhere warm. It needs to sit there for a minimum of an hour, maybe an hour and a half, until it has visibly doubled in size. Seriously, it should look like a big, puffy cloud!
Assembling and Baking Your Sweet Breakfast Recipe
Okay, the dough is puffy, you’re smelling cinnamon in the air already—let’s get these gorgeous sweet breakfast recipe treasures assembled! This next part is all about precision rolling. If you roll too thin, the filling tries to escape during baking; roll too thick, and you get dense, doughy centers.
We are aiming for a large, even rectangle—think about 12 by 18 inches. I find it helps if I physically measure it out with my ruler the first few times, just so I can get a feel for the right thickness. Once that dough is rolled out, it’s pure assembly line time!
If you love making things easy, this whole process is detailed for beginners, but if you want to check out some other ideas for a great sweet breakfast recipe, definitely browse around!
Rolling, Spreading the Filling, and Shaping the Log
First, punch that air out of the dough gently—we aren’t trying to deflate it completely, just get it manageable. Roll it out nice and even into that 12×18 inch rectangle on a lightly floured surface. Remember that step where we mixed the filling? Now we use it!
Take that soft, buttery, sugary cinnamon mixture and spread it evenly across the rectangle. Here’s my trick: leave about a half-inch border totally bare on one of the long edges. This bare edge acts like glue later!
Starting on the opposite long edge, roll that dough up as tightly as you dare without squeezing the air out! When you reach that bare edge, wet it slightly with a finger dipped in water to help it seal. Pinch that seam down firmly. It has to be pinched well, or your gooey filling is going to ooze out all over the pan while baking. After that? Grab a piece of unflavored dental floss or a sharp knife to cut it into 12 equal pieces. You want clean cuts!
Second Rise and Oven Baking Tips
Place those beautiful rounds cut-side up into your greased 9×13 pan. They should be cozy but not completely touching yet. Now, cover the pan loosely and let them proof again for about 30 to 45 minutes. They should look visibly puffy and swelled up before they ever see the oven. This second rise is crucial for that final, fluffy texture!
Once they’re puffy, preheat your oven to 375 degrees Fahrenheit. Bake them for 20 to 25 minutes. You’re looking for a gorgeous deep golden brown color across the top. Don’t overbake them! You want to take them out when there are still a few pale spots, because the residual heat keeps cooking them while you put the icing on.
Making the Cream Cheese Icing for the Ultimate Cinnamon Roll
The rolls are cooling just enough, and now we tackle the grand finale: the famous cream cheese icing! This step is what officially bumps your rolls from “really good homemade pastry” into that incredible, I-need-a-nap-after-eating-this category. You need to work on this while the rolls are still quite warm, trust me—spreading thick icing on cold rolls is basically impossible.
Make sure your cream cheese and butter are seriously soft, almost mushy. If you try to beat cold blocks, you’ll end up with big cream cheese chunks that just won’t melt into that sweet stream of goodness we want over our **cinnamon roll**.
In your mixer, beat the softened cream cheese and butter together until it’s completely smooth and looks creamy—no lumps allowed! This is the foundation for a truly great topping. You can find my full guide on perfecting this specific icing over at Cream Cheese Icing if you want extra detail!
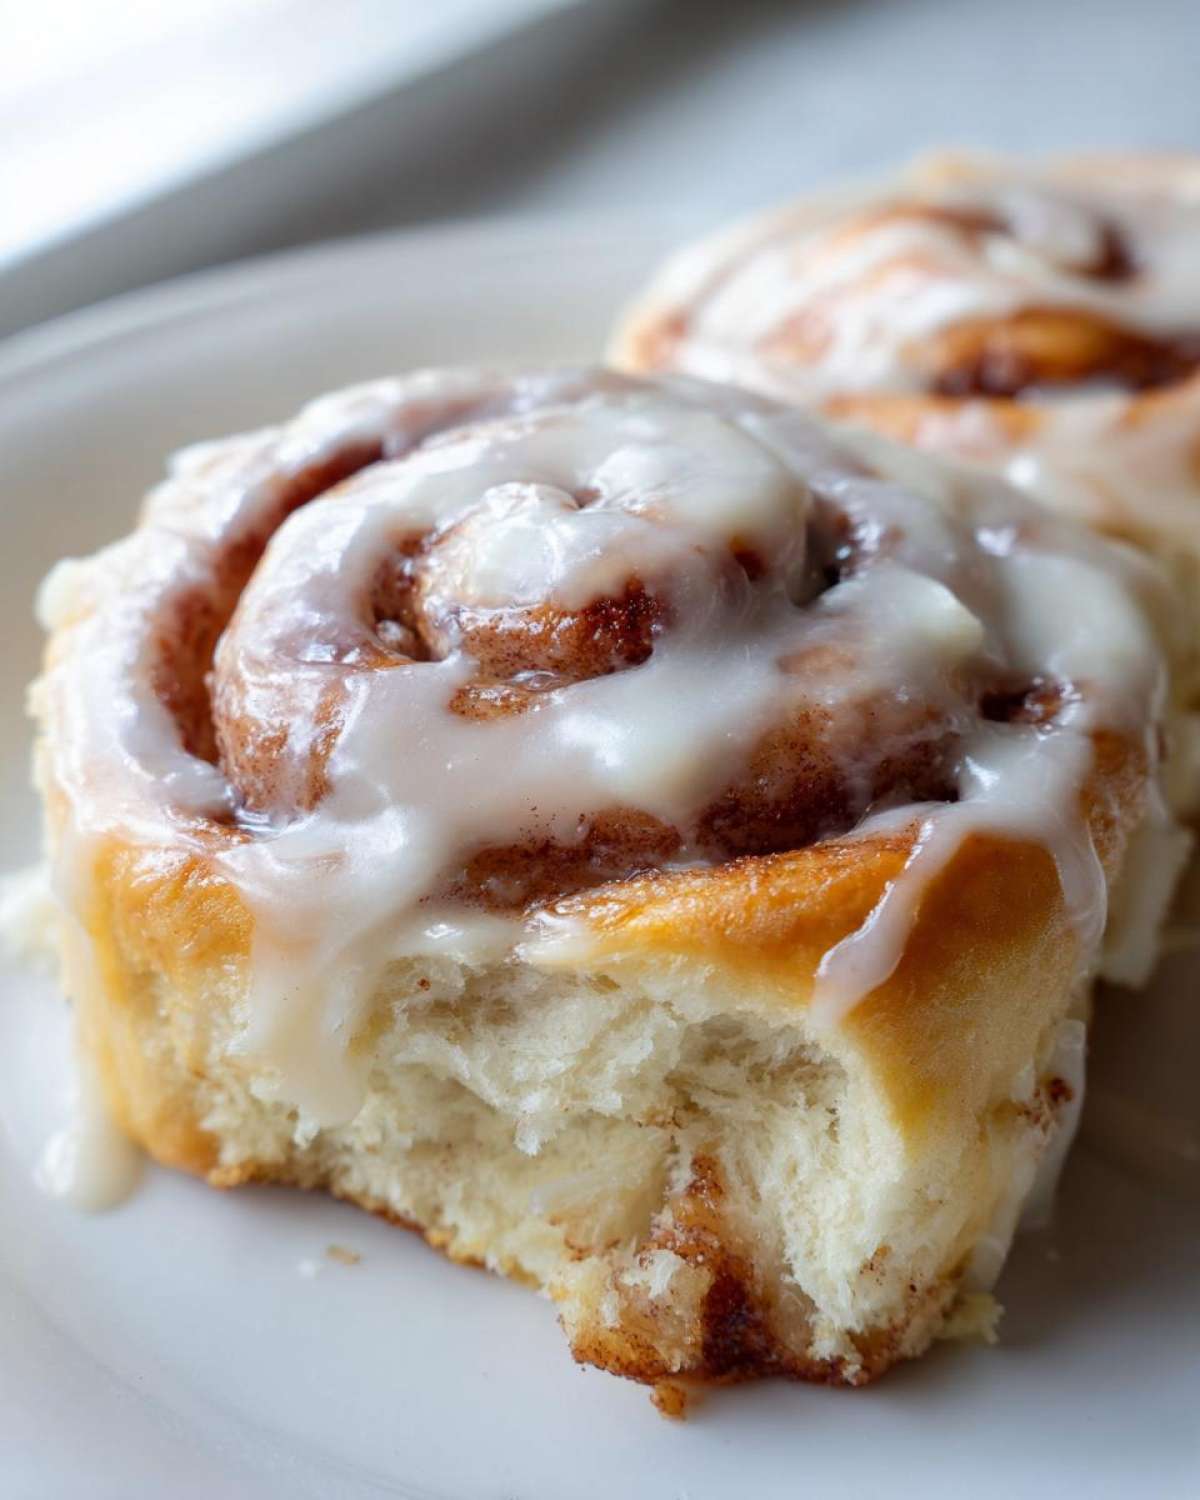
Next, slowly start adding that powdered sugar, alternating it with the vanilla extract. You want to mix this slow at first, or you’ll end up with a sugary cloud engulfing your entire kitchen! Seriously, cover the mixer bowl if you can when you first add the sugar.
The key to spreading consistency—the secret to making this perfect for drizzling but thick enough to stick—is controlling the milk. Add it one tablespoon at a time. You only need enough to thin it out so it drizzles nicely off your spoon. If you dump in two tablespoons at once, you’ll have sweet milk running everywhere instead of glorious icing dripping down the sides of your rolls.
Once you hit that sweet spot—smooth, rich, slightly tangy, and perfectly spreadable—pull those warm rolls from the pan and slather that icing everywhere. Don’t be shy! That warm icing melts just slightly into the warm cinnamon swirl, and honestly, that is heaven on a plate.
Tips for Easy Cinnamon Rolls That Look Bakery-Quality
Getting bakery-quality results doesn’t have to mean adding ten extra complicated steps. I’ve tweaked this recipe over the years to make it genuinely manageable, even for a weekend morning when you’re running on fumes. These tricks will help you avoid the two biggest mistakes people make with this recipe: dry dough and runny icing. We are aiming for those perfectly soft, **easy cinnamon rolls** every single time!
If you want to know more about cutting down on the morning work, I have a whole post dedicated to making easy cinnamon rolls that goes into detail on speeding up the process!
Ingredient Notes and Substitutions
Let’s talk specifics on what you’re using. Stick to whole milk if you can; that higher fat content seriously contributes to the richness and softness of the final **yeast roll recipe**. Skim milk just won’t give you the same luxurious crumb.
When you are measuring your flour, please, please don’t scoop it directly out of the bag with your measuring cup. That compacts it, and you end up dumping way too much flour into the dough, which leads straight to dryness. Spoon the flour lightly into the measuring cup and then level it off. That small change makes a huge difference in keeping things soft!
As for the brown sugar in the filling, if you absolutely run out, you *can* use white granulated sugar, but honestly, you’ll lose that deep, molasses flavor that balances the cinnamon so well. I really wouldn’t recommend swapping it out if you can avoid it; the dark brown sugar is key to the overall taste profile.
Make-Ahead and Storage for Your Cinnamon Roll
This is my favorite time-saver—the overnight dough! If you get through the kneading stage (Step 4) but aren’t ready to roll out and bake, cover that oiled bowl tightly and stick it in the fridge. The cold temperature slows the yeast way down. It will chill and slowly rise overnight. In the morning, just pull it out, let it sit on the counter for about 30 minutes to take the chill off (still covered!), and then proceed with rolling and filling.
Now, how to store the baked rolls? They are best the day they are made, obviously, slathered in warm icing. But if you have leftovers? Keep them covered tightly at room temperature. They usually stay pretty soft for two full days, thanks to all that butter and cream cheese icing. If you need to keep them longer, wrap the cooled, un-iced rolls tightly in plastic wrap, then foil, and freeze them. Reheat them straight from frozen, covered in foil, in a 350°F oven for about 15 minutes, and then ice them warm.
Serving Suggestions for Your Homemade Pastry
Now that you’ve created the most incredible, ooey-gooey **homemade pastry**, you have to decide what to serve alongside it! Honestly, one of these rolls is a meal on its own, but if you’re making a big brunch spread, you need the right supporting cast.
My absolute favorite pairing is a hot, strong cup of coffee. The slight bitterness cuts through the richness of the cream cheese icing perfectly. If you want to go all out on the warm spice theme, try making a lovely Maple Cinnamon Oat Milk Latte—it’s creamy, flavorful, and pairs so well with these rolls. You can find my simple recipe for that latte right here!
If you’re serving these for a crowd and need something lighter to balance out all that sweetness, don’t forget fresh fruit! A simple bowl of bright, slightly tart berries—strawberries, raspberries, maybe some sharp orange segments—really wakes up your palate between bites of that sweet dough. It makes the whole experience feel a little less heavy, which is nice when you’re already eating three rolls!
Frequently Asked Questions About Making the Best Cinnamon Roll
I get so many questions once people start trying this recipe out, and honestly, I love hearing how excited you all are to master the art of the perfect **cinnamon roll**! Most of the confusion happens around the yeast activity or making sure that beautiful filling doesn’t turn crunchy. Here are the most common fixes I share with readers trying to achieve those perfectly soft, **easy cinnamon rolls**!
If you need help with something completely different, perhaps a classic soup, I have a great recipe for Classic Chicken Noodle Soup tucked away on the site!
Can I use instant yeast instead of active dry yeast for this cinnamon roll recipe?
Yes, you totally can! Instant yeast is more forgiving, which is great for us busy bakers. If you use instant yeast, you can skip Step 1 completely—no need to proof it in the milk first. Just whisk the instant yeast right in with your dry ingredients (the flour, salt, and the sugar you are adding to the flour). Then, when you add your wet ingredients (the warm milk, egg, etc.), the dough will come together. The first rise time might even be slightly shorter, so keep an eye on it!
How do I get the filling to stay gooey and not dry out?
This is the million-dollar question! The secret here is ensuring you use the 1/2 cup of softened butter specified for the filling, combined with that packed light brown sugar. The brown sugar holds moisture, but the butter is the binding agent that keeps it soft. When you spread that mixture, make sure you get it right to the edge—almost to that border you leave un-spread—and roll quickly. If the filling mixture sits out too long before rolling, it starts to firm up. Work fast during assembly, and you’ll have guaranteed gooeyness!
Nutritional Estimates for One Cinnamon Roll Serving
If you’re anything like me, you try not to stress too much about the numbers when you’re indulging in something this delicious, but I know some of you appreciate having the data handy! Remember, this is a rich **homemade pastry**, stuffed with butter and covered in cream cheese icing, so these numbers aren’t exactly light!
I always stress that these are just estimates based on the exact ingredients measured out for this recipe. If you use extra butter in your pan or sneak an extra spoonful of sugar into your icing, those counts will change! I pulled this data together so you have a general idea of what one serving looks like, based on a yield of 12 rolls.
If you are looking for more general baking tips or want to see what else is happening on my kitchen adventures, feel free to browse the main blog page!
- Serving Size: 1 roll
- Calories: 450
- Fat: 25g (Includes 15g Saturated Fat)
- Carbohydrates: 55g
- Protein: 6g
- Sugar: 45g
- Fiber: 2g
- Sodium: 300mg
See? A treat worth every single minute of kneading and waiting! Enjoy every bite of your amazing, fresh rolls!
PrintSoft Homemade Cinnamon Rolls

A recipe for making soft, fluffy cinnamon rolls with a sweet cream cheese icing.
- Prep Time: 45 min
- Cook Time: 25 min
- Total Time: 170 min
- Yield: 12 servings
- Category: Breakfast
- Method: Baking
- Cuisine: American
- Diet: Vegetarian
Ingredients
- 1 cup whole milk, warm
- 2 1/4 teaspoons active dry yeast
- 1/2 cup granulated sugar, plus 1/4 cup for filling
- 1/2 cup unsalted butter, softened, plus 1/2 cup for filling
- 1 large egg
- 1 teaspoon salt
- 4 cups all-purpose flour, plus more for dusting
- 1/4 cup packed light brown sugar, for filling
- 2 tablespoons ground cinnamon, for filling
- For Icing: 4 ounces cream cheese, softened
- For Icing: 1/2 cup unsalted butter, softened
- For Icing: 2 cups powdered sugar
- For Icing: 1 teaspoon vanilla extract
- For Icing: 1-2 tablespoons milk
Instructions
- Combine the warm milk and yeast in a large bowl. Let stand for 5 minutes until foamy.
- Add the 1/2 cup softened butter, 1/2 cup granulated sugar, egg, and salt to the yeast mixture. Mix until just combined.
- Gradually add the flour, mixing until a soft dough forms. Knead the dough on a lightly floured surface for 5-7 minutes until smooth and elastic.
- Place the dough in a lightly oiled bowl, turning to coat. Cover the bowl with plastic wrap and let it rise in a warm place for 1 to 1 1/2 hours, or until doubled in size.
- Punch down the risen dough. On a lightly floured surface, roll the dough into a large rectangle, about 12×18 inches.
- In a small bowl, mix the 1/4 cup granulated sugar, brown sugar, cinnamon, and 1/2 cup softened butter until spreadable.
- Spread the cinnamon-butter mixture evenly over the entire surface of the dough, leaving a small border on one long edge.
- Starting from the long edge opposite the border, tightly roll the dough into a log. Pinch the seam closed.
- Cut the log into 12 equal rolls. Place the rolls cut-side up in a greased 9×13 inch baking pan.
- Cover the pan loosely and let the rolls rise again for 30-45 minutes, or until puffy.
- Preheat your oven to 375 degrees Fahrenheit. Bake for 20-25 minutes, or until golden brown.
- While the rolls bake, prepare the icing: Beat the softened cream cheese and 1/2 cup softened butter together until smooth. Gradually beat in the powdered sugar and vanilla extract. Add milk one tablespoon at a time until you reach a smooth, spreadable consistency.
- Remove the rolls from the oven and immediately spread the cream cheese icing over the warm rolls. Serve warm.
Notes
- For the softest rolls, ensure your milk is warm, not hot, to avoid killing the yeast.
- If you prefer a less sweet icing, reduce the powdered sugar slightly.
- You can make the dough ahead of time and let it rise slowly in the refrigerator overnight.
Nutrition
- Serving Size: 1 roll
- Calories: 450
- Sugar: 45
- Sodium: 300
- Fat: 25
- Saturated Fat: 15
- Unsaturated Fat: 10
- Trans Fat: 0.5
- Carbohydrates: 55
- Fiber: 2
- Protein: 6
- Cholesterol: 70