

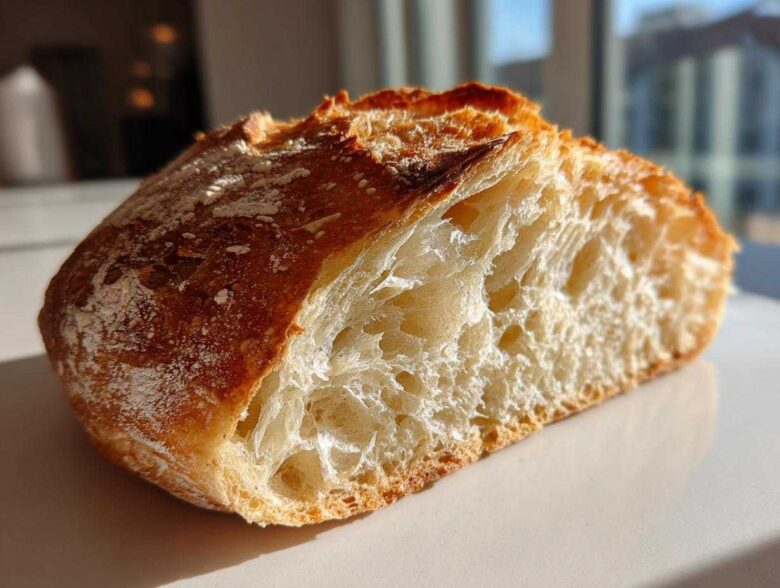
Oh, you just can’t beat that feeling, can you? Walking into the kitchen and smelling proper, yeasty bread baking—it just fixes everything! For years, I chased that elusive bakery perfection, especially when it came to making authentic French bread at home. Honestly, most recipes felt like too much fuss, requiring weird flours or endless rising times. But after what feels like a decade of tweaking and tasting (because, really, who could stop?), I cracked the code. This recipe right here? It’s my absolute favorite simple yeast bread method that guarantees a soft, fluffy inside while still giving you that satisfying, crackly, crusty exterior. Trust me, once you try this Homemade French Bread Recipe, you won’t go back to the store-bought stuff!
Why This is the Best Easy French Bread Recipe (Soft and Crusty)
I call this my ‘Easy French Bread’ because it cuts down on the fuss without cutting corners on texture. We aren’t aiming for a super-thin baguette here; we want something sturdy enough for dipping but soft enough to melt in your mouth. This recipe really shines because it hits that perfect middle ground—speed, simplicity, and that amazing bakery quality people rave about.
- The dough handles beautifully, making it perfect for Beginner Bread Baking.
- Total rising time is kept under 90 minutes, making it a much Quick French Bread Recipe than most.
- We get that deep golden color without needing complicated washes or proofing boxes.
Achieving the Perfect Soft French Bread at Home Texture
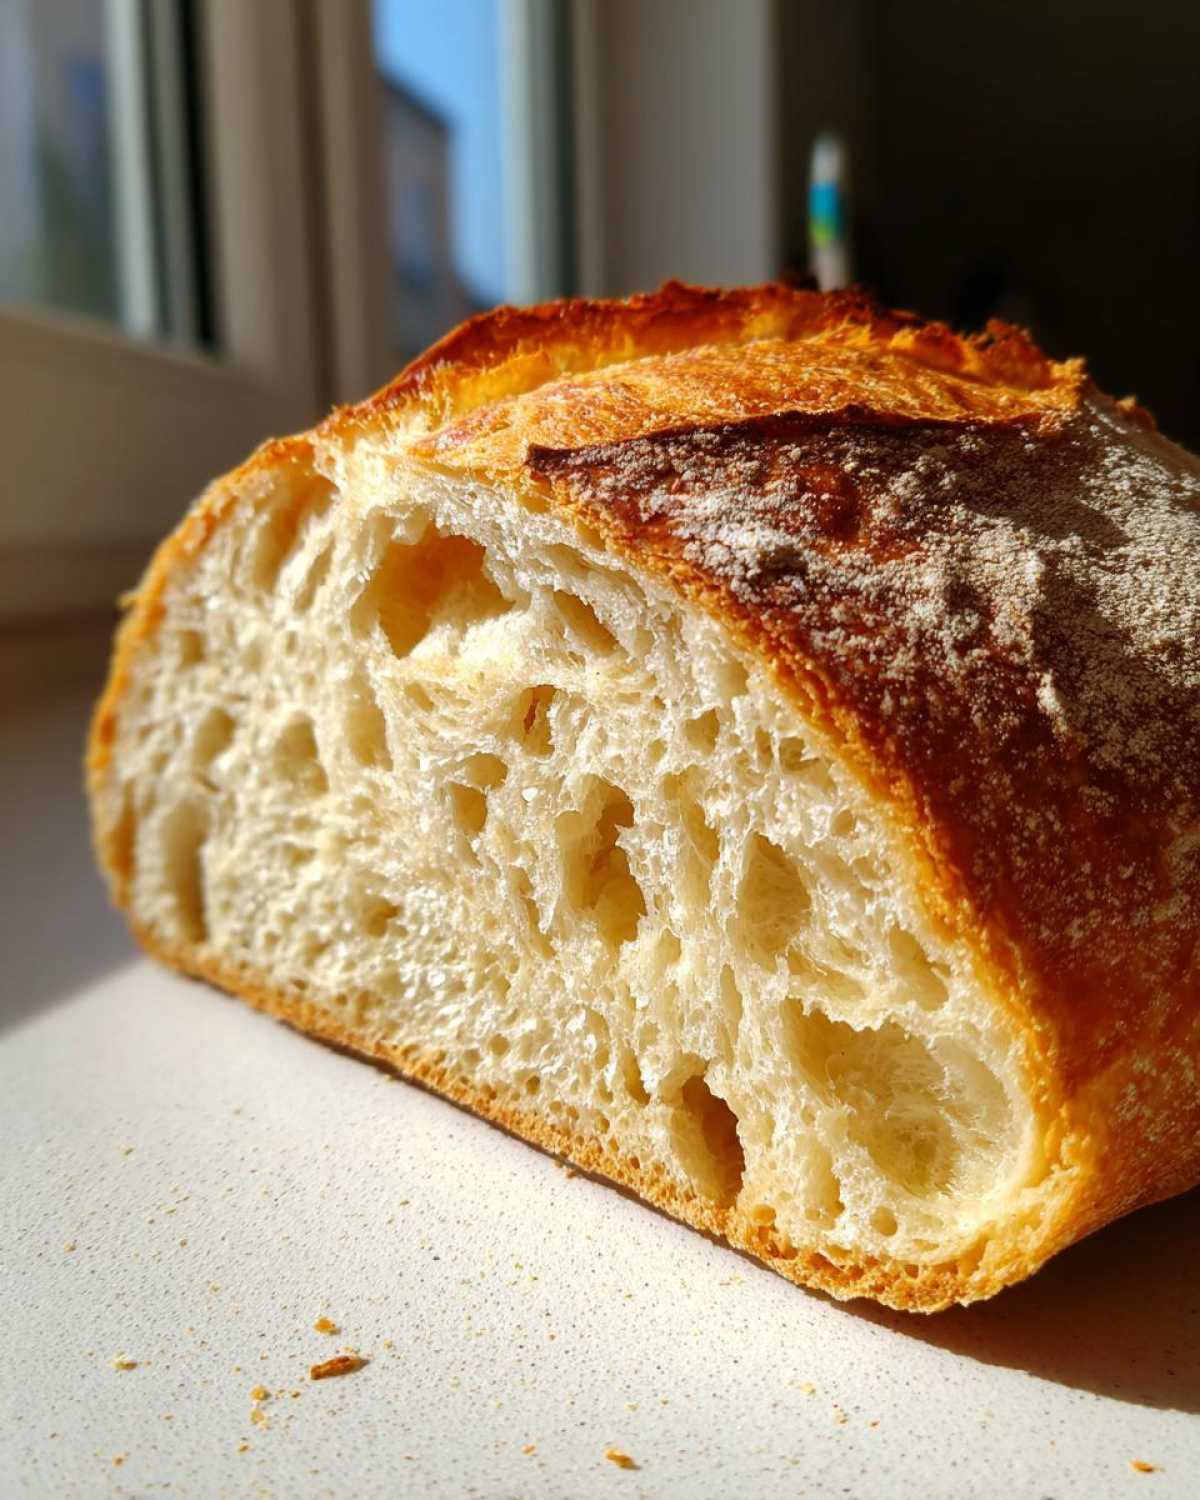
It all comes down to the handling! Once the shaggy dough comes together, you need to knead it really well—that 6 to 8 minutes is non-negotiable. That kneading develops the gluten strands, which traps all the gasses from the yeast. That trapped gas is what makes your final loaf a beautiful, Tender Crumb Bread. Also, keep your warm water around 110°F; too hot and the yeast dies, leaving you with a dense hockey puck instead of Soft French Bread at Home.
Creating a Bakery Style Bread Crust with Steam
This is my secret weapon for getting that true Bakery Style Bread crunch! Most home ovens just dry the top layer out too fast. To combat that, we create a quick steam bath right inside your oven using that shallow pan of hot water we mentioned in the instructions. That blast of moisture keeps the crust supple during the initial bake, allowing the bread to puff up nicely. When you pull that moisture away later in the bake, you end up with a gorgeous, shatteringly crisp, Crusty Exterior Bread that snaps when you slice it!
Gathering Ingredients for Your Homemade French Bread Recipe
Okay, let’s talk about what you need because, honestly, this Homemade French Bread Recipe uses such simple stuff—nothing fancy required! I’ve always found that the simpler the ingredients, the better you can taste the quality of your baking. You’ll need our flour, salt, sugar, olive oil, one egg white for that shiny top, and of course, the yeast. If you’re looking for more dinner roll ideas that use similar pantry staples, check out my recipe for Garlic Herb Dinner Rolls!
A note on the yeast: make sure you grab active dry yeast here. This is key for making a Quick French Bread Recipe work the way it’s supposed to. While instant yeast is great, active dry requires that quick little proofing bath with the warm water and sugar, and watching it foam up is your first sign that everything is going to work perfectly!
Ingredient Notes and Substitutions for Soft French Bread
If you only have bread flour kicking around, you can absolutely use it! It has a slightly higher protein content, so it might make your dough just a touch chewier than the all-purpose version, but it will still be amazing. Just be careful not to knead it for too long, or you might accidentally make it too tough.
Now, don’t skip the teaspoon of sugar! It doesn’t make the bread taste sweet, I promise. Sugar is the first meal for your yeast; without it, the yeast won’t wake up properly, and we just won’t get that beautiful rise we need for that Fluffy Loaf Recipe. If you skip the olive oil, the texture will be slightly less tender, so try not to substitute that out unless you absolutely have to.
Step-by-Step Instructions to Make French Bread
This is where we turn that shaggy mass into glorious, bake-ready dough! Don’t panic when it looks messy at first; shaping and rising are key parts of making great French bread. Follow these steps carefully, and you’ll have your own Simple Yeast Bread shining on the counter in no time. We are aiming for that ultimate fluffy texture with the perfect crispy shell.
Activating Yeast and Mixing the French Bread Dough
First up, we make sure our yeast is alive and kicking! In a little bowl, whisk your yeast and sugar into the warm water—remember, warm, not lava-hot! You want it around 110°F, or just nice and cozy to the touch. Wait about five minutes. If you see foam bubbling up on top, congratulations, your yeast is ready to party! If nothing happens, toss it and start over with fresh yeast, because there’s no wiggle room there.
While that’s going, mix your dry ingredients—flour and salt—in your big mixing bowl. Once the yeast is foamy, pour that entire mixture along with your olive oil right into the flour. Mix it all together until you can’t see any more dry bits of flour. It’s going to look a little rough—that’s what we call a shaggy dough. Perfect!
Kneading and First Rise for Fluffy Loaf Recipe
Now, the workout! Turn that dough out onto a lightly floured cutting board. You need to knead this for a solid six to eight minutes. Don’t skimp! You’re looking for the dough to feel smooth, slightly springy, and elastic when you pull on it gently. This is what sets you up for that soft slice later.
Once it feels right, pop it into an oiled bowl, flip it over so it’s coated, cover it up tight with plastic wrap, and put it somewhere warm. Seriously, find the warmest, draft-free spot in your kitchen. We let this rise for a full 60 minutes until it’s doubled in size. Patience pays off here for a truly Fluffy Loaf Recipe!
Shaping and Baking Your Crusty Exterior Bread
Gently punch that air out once it’s doubled. Now, shape it into one nice long cylinder, or if you’re feeling ambitious, divide it for two smaller baguettes. Lay your shaped loaf on parchment paper. Here’s the next waiting game: let it rest for 20 more minutes while your oven blazes up to 400°F. During this 20 minutes, set up your steam pan on the bottom rack!
Before it goes in, brush the top lightly with that beaten egg white—this is what gives you that beautiful baked shine. Score three quick diagonal peace signs across the top with a sharp knife. Then, the magic: carefully pour half a cup of boiling water into that hot pan on the bottom rack, slam the door shut quickly, and bake it for 25 to 30 minutes until it’s golden brown all over. That steam is your key to a Crusty Exterior Bread!
Baking Homemade Bread Tips for Success
I’ve learned a few little tricks over the years that take this French bread from good to absolutely incredible. You’ve got the recipe down, but baking is all about feel, too! My favorite trick for that extra crispness—the one that really screams ‘I bought this from a Parisian bakery’—is to give the oven walls a little spritz during those first 10 minutes of baking. Just open the door quickly, spray the walls with a little water bottle, and shut it. Do that two or three times. You can find more wisdom on this over at my dedicated page about Baking Homemade Bread Tips!
That’s in addition to the hot water pan! It really supercharges the steam, which guarantees that crunchy shell on your loaf. If you find your bread isn’t browning enough, check the temperature of your oven with a separate thermometer; sometimes the built-in ones lie! Also, remember the note from the recipe: if you absolutely hate the idea of the egg wash for shine, just brush melted butter on immediately when it comes out. That instantly softens the crust if you’re making Bread for Sandwiches instead of serving as a side.
Serving Suggestions for Your Dinner Side Bread
Now that you have this gorgeous, fresh, crusty loaf, what’s best to do with it? Well, obviously I cut big slabs off for dipping—it’s the ultimate Dinner Side Bread! It’s fantastic for soaking up the last bits of sauce from a hearty pasta dish. Seriously, you have to try it with this Creamy Tomato Basil Soup; the contrast between the crust and the smooth soup is just divine.
If you let it cool completely, it also makes the best Bread for Sandwiches. Think about it: a grilled cheese sandwich on this bread? Yes, please! It holds up so much better than typical squishy white bread. It’s perfect alongside a big bowl of Classic Chicken Noodle Soup, too. Enjoy showing this loaf off!
Storage and Reheating Instructions for Fresh French Bread
After all that hard work making this perfect French bread, we definitely want to make sure those leftovers stay amazing! Since this loaf has a lovely, authentic crust, it will naturally firm up as it cools completely—that’s the trade-off for going crusty, but we can fix it easily.
If you plan on eating it the next day, just wrap the cooled loaf tightly in aluminum foil or a clean tea towel and keep it on the counter. I wouldn’t go beyond two days, though; freshness is key here.
To bring that crust back to life, never use a microwave! That just makes it chewy. Instead, unwrap your French bread, spray the entire loaf lightly with water, and pop it directly into a 350°F oven for about five to seven minutes. Pull it out, and that crust will snap just like it did straight out of the oven!
Frequently Asked Questions About Making French Bread
I get so many questions about this recipe because folks want to make sure they get that perfect loaf the first time. Baking can feel intimidating, but this French bread is truly designed to be foolproof! If you’re new to this kind of baking, you might want to check out my general guide for Beginner Bread Baking first. Here are the top things people always ask me about achieving that ideal texture and saving time!
Can I make this Quick French Bread Recipe without an egg wash?
Absolutely, yes! If you’re looking for ultra No-Fuss Bread Baking or you simply don’t have an egg handy, skip it! The egg white is only there to give you that deep, professional shine and color. Your French bread will still bake perfectly, have that gorgeous crackly crust, and taste just as delicious. It’ll just come out a little paler, more matte. Totally fine for slicing up for dinner!
How do I get a chewier texture instead of soft French Bread?
That’s a great question! This recipe leans toward a very Soft French Bread at Home profile, which we love. If you are looking for something chewier, very similar to a traditional baguette, you need more structure. The easiest way is to swap out the all-purpose flour for bread flour—it has higher protein for a stronger gluten network. You could also try reducing the water by about two tablespoons to lower the hydration level slightly. That will result in a firmer, chewier crumb instead of our intended fluffy loaf.
What if my dough didn’t double in an hour?
Don’t panic! Yeast is sensitive to temperature. If your kitchen is chilly, the rise will take longer! Never stick it in a super-hot oven to speed it up—that just kills the yeast. If it’s still looking small after 75 minutes, cover it back up and give it another 15 or 20 minutes. We are aiming for the result, not stressing over the clock, although this is still a relatively quick recipe!
Can I freeze the dough instead of baking immediately?
You totally can freeze it! After you knead the dough and it’s smooth (before the first rise), you can coat it lightly in oil, wrap it very tightly in plastic wrap, and put it in a freezer bag. It lasts great for about a month. When you want to bake it, just thaw it overnight in the fridge, then let it come to room temperature on the counter before kneading it gently and letting it rise as usual.
Estimated Nutritional Information for This French Bread Loaf
I’m not a nutritionist, heavens no! I’m just focused on making sure this French bread tastes incredible. But for those of you who track things closely, based on the ingredients listed above, here is a general estimate per slice. Remember, these numbers are just a guide; they can change depending on exactly how thick you slice your loaf!
- Serving Size: 1 slice
- Calories: 150
- Fat: 1g
- Carbohydrates: 32g
- Protein: 4g
- Sugar: 1g
So, not too heavy, which makes it the perfect accompaniment to any big meal or soup! It’s wonderful when you realize you can make something this delicious with just basic ingredients.
Share Your Homemade French Bread Creations
Well, wow, if you’ve made it this far, you’re officially on the path to becoming a French bread baking pro! I truly hope you stand back and admire that golden crust; you deserve it after all that kneading and waiting. Seeing your loaves pop up in my kitchen makes my entire day, so please, please come back and tell me how it went!
Did your crust snap perfectly? Was the inside as fluffy as you dreamed? I’d absolutely love to see your masterpieces! If you rate this recipe down below—I’m hoping for 5 stars, naturally!—and drop a comment sharing your experience, it helps everyone else feel confident tackling this Homemade French Bread Recipe next. You can always reach out through my contact page if you have a burning question not covered in the FAQ, too. Happy baking, everyone!
PrintEasy Homemade Soft and Crusty French Bread
A simple recipe for making soft, fluffy French bread at home with a desirable crusty exterior, suitable for beginners.
- Prep Time: 20 min
- Cook Time: 30 min
- Total Time: 110 min
- Yield: 1 large loaf
- Category: Baking
- Method: Baking
- Cuisine: French
- Diet: Vegetarian
Ingredients
- 3 cups all-purpose flour
- 1 teaspoon salt
- 1 packet (2 1/4 teaspoons) active dry yeast
- 1 tablespoon sugar
- 1 cup warm water (about 105-115°F)
- 1 tablespoon olive oil
- 1 egg white, beaten (for brushing)
Instructions
- In a large bowl, mix the flour and salt.
- In a separate small bowl, dissolve the yeast and sugar in the warm water. Let it sit for 5 minutes until foamy.
- Pour the yeast mixture and olive oil into the flour mixture. Mix until a shaggy dough forms.
- Turn the dough out onto a lightly floured surface. Knead for 6 to 8 minutes until the dough is smooth and elastic.
- Place the dough in a lightly oiled bowl, turning to coat. Cover the bowl with plastic wrap and let it rise in a warm place for 60 minutes, or until doubled in size.
- Gently punch down the dough. Shape it into a long, even loaf or two smaller baguettes. Place the shaped loaf(ves) on a baking sheet lined with parchment paper.
- Cover the loaf loosely and let it rest for 20 minutes. Preheat your oven to 400°F (200°C) during this rest time. Place a shallow pan on the bottom rack to create steam later.
- Brush the top of the loaf lightly with the beaten egg white. Use a sharp knife to make three diagonal slashes across the top of the bread.
- Carefully pour about 1/2 cup of hot water into the preheated shallow pan on the bottom rack to create steam. Immediately close the oven door.
- Bake for 25 to 30 minutes, or until the crust is golden brown and the internal temperature reaches 200°F (93°C).
- Remove the bread from the oven and cool on a wire rack before slicing.
Notes
- For a crispier crust, spray the oven walls with water a few times during the first 10 minutes of baking.
- If you prefer a softer crust, skip the egg white wash and simply brush the loaf with melted butter after it comes out of the oven.
- Use warm, not hot, water for the yeast; water that is too hot will kill the yeast.
Nutrition
- Serving Size: 1 slice
- Calories: 150
- Sugar: 1
- Sodium: 180
- Fat: 1
- Saturated Fat: 0
- Unsaturated Fat: 1
- Trans Fat: 0
- Carbohydrates: 32
- Fiber: 1
- Protein: 4
- Cholesterol: 0