

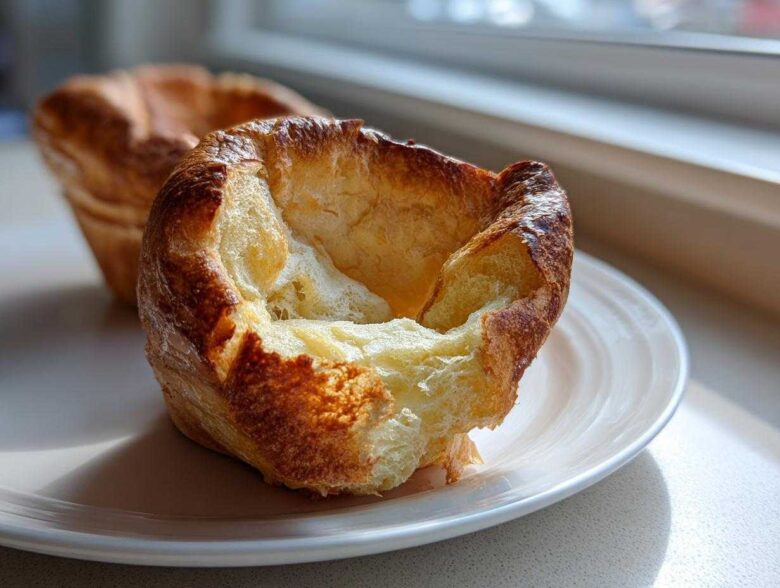
If you’ve ever stared miserably at a tray of flat, sad little discs when you were hoping for magnificent, towering creations, I totally get it. Making a truly brilliant yorkshire pudding that puffs up like a hot air balloon is often treated like some sort of magical dark art, but I promise you, it isn’t!
I’ve ruined more batches than I care to admit perfecting the exact technique you need. But trust me on this: after years of standing guard by the oven—yelling at my family not to open the door—I cracked the code. This is the foolproof way to get that dreamy texture: deeply crispy and golden on the outside, yet so airy and fluffy inside you feel like you’re cheating.
This recipe is built on the foundation of every great Sunday Roast I’ve ever served. It’s the real deal, a true Traditional British Side Dish that stands tall, proud, and ready for gravy. We’re ditching the guesswork and sticking to ratios that simply work every single time.
We’ll be using a simple batter, but the real secret comes down to intense heat, which you’ll see detailed below. If you want to impress everyone at your next dinner party, you’ve found your go-to guide. I even slipped in a link to my best chicken soup recipe for when you need a comforting meal later! Let’s get cooking!
Why This is the Best Yorkshire Pudding Recipe
I’m not going to lie, I’ve made a lot of floppy disappointments trying to nail this classic. But after tweaking temperatures and resting times for years, I’ve landed on a simple formula that guarantees success. This particular Yorkshire Pudding Recipe just works!
You want that perfect rise? You got it. Here is why you should trust my process:
- Guaranteed dramatic rise almost every time. No more sad pancake bottoms!
- The exterior cooks up super crispy—it shatters when you cut into it.
- The inside stays unbelievably light, fluffy, and captures loads of gravy.
If you’re looking for more baking inspiration once you’ve mastered these, check out my general recipe blog for other favorites.
Achieving Golden Brown Puddings Every Time
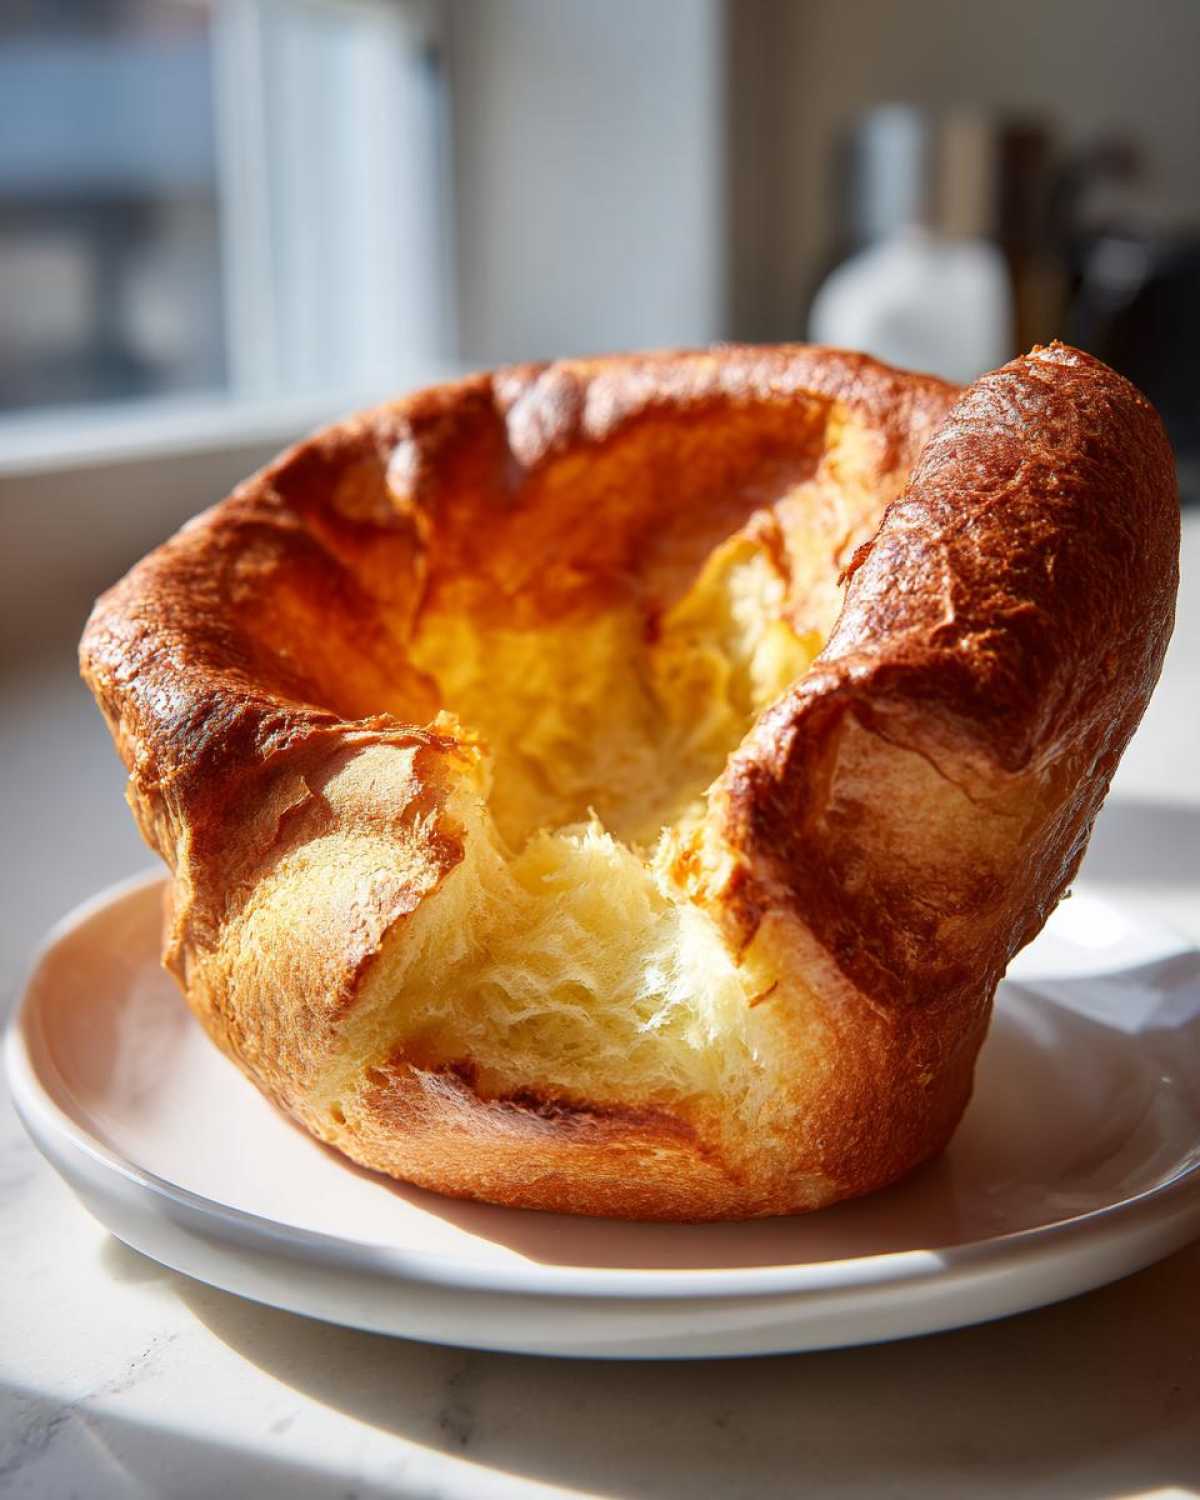
Honestly, the color is half the magic, isn’t it? We aim for that deep, burnished gold that signals pure crispness. My secret here is using fat that is truly smoking hot and plenty of it!
Ingredients for Foolproof Yorkshire Pudding
When it comes to the best Yorkshire pudding, simplicity is our friend. You’re probably already looking at these ingredients in your fridge right now, because they are basic! That’s what makes this such a fantastic, quick baking project.
But we need to be precise about temperature and quality here. Trust me, using milk that’s too cold will sabotage your rise before you even get it near the oven. Here’s the exact list for 12 lovely puddings:
- 140g plain flour (sifted, please! We don’t want any lumps hiding in there.)
- 4 large eggs (these must be room temperature, I always take them out half an hour early.)
- 200ml milk (whole milk is non-negotiable for richness; make sure it’s just slightly warmed up, not hot.)
- A tiny pinch of salt (just to bring out the flavor.)
- Vegetable oil or beef dripping, for cooking (This is important: you need enough to coat the bottom of each hole *generously*.)
If you want that truly traditional, savory flavor that screams ‘Sunday Roast,’ you absolutely must find some good quality beef dripping. It holds the heat better than oil, which helps give you that majestic puff. If you use oil, I suggest a neutral one like sunflower or vegetable.
Pudding Batter Secrets: Preparing Your Yorkshire Pudding Batter
Now we move over to the mixing bowl, and this is where we build the perfect base for our yorkshire pudding. This isn’t just slopping ingredients together; we’re creating structure here! Sifting your flour first is non-negotiable. It knocks the air in and ensures absolutely no sneaky lumps will form later. I always use a fine-mesh sieve—it takes thirty extra seconds, but it’s worth it.
Next, make a little volcano—a well—right in the middle of that sifted flour and salt. Crack your room-temperature eggs right into that hole. Start whisking gently from the center, slowly pulling the flour in from the sides. If you dump the milk in too early, you’ll end up fighting lumps forever! Slowly, slowly, bring it together until you have a smooth, thick paste. It will look almost like thin glue at this stage.
Here’s where the magic starts happening. Now that the eggs and flour are incorporated, we start adding that slightly warmed milk, just a drizzle at a time. Keep whisking purposefully but gently until that thick paste turns into a very thin cream. It should be much thinner than standard pancake batter—runny enough to pour easily off your whisk. If you need more tips on getting this consistency right, I have a great specific guide on just my easy yorkshire pudding batter.
Once you’ve done that, pop a lid on it and shove the whole thing into the fridge. I know, I know, you want to bake them right now because you’re excited, but don’t!
The Importance of Resting the Easy Yorkshire Pudding Batter
The rest is critical, honestly. Resting lets the flour fully hydrate. When the starch in the flour soaks up all that beautiful egg and milk mixture, it builds a stronger framework. That framework is what allows your pudding to stretch tall and hold its shape when it hits that hot fat, ensuring maximum fluffiness!
How to Make Yorkshire Puddings: The High-Heat Baking Method
Alright, this next bit is where all the hard work in mixing the batter pays off, and frankly, where most people accidentally mess up their Yorkshire puddings. We are relying 100% on intense, shocking heat here. If your oven isn’t screaming hot, you’ll get flat, greasy disappointments, and we simply cannot have that!
First things first: turn that oven up! We need it blasting at a solid 220C (or 425F if you’re using my old Imperial conversion charts). Get your muffin tin—or whatever tin you’re using—into the oven right now. The tin and the fat need time to get absolutely furious with heat.
While that’s heating up, quickly grab your batter from the fridge. Don’t let it sit out; we need it cool when it hits the hot fat. Get your oil or, preferably, your beef dripping ready. You want nearly a teaspoon in every single hole. This fat is going to be the engine powering that incredible rise.
Preheating and Oil Temperature for Maximum Puffy Yorkshire Puddings
This is the tip that celebrity chefs like Gordon Ramsay bang on about, and they are absolutely right. You have to wait until that fat in the tin is *smoking*. I mean it—it should be shimmering wildly and creating tiny wisps of smoke when you briefly open the door to check. This smoking hot fat is what instantly turns the cold, wet batter into steam, forcing that glorious puff!
When you take that dangerously hot tin out, work fast! I usually have the batter ladle poised and ready right next to the oven door. Pour the batter evenly among the holes, filling them only about a third of the way up. You need plenty of room for them to expand!
Baking Instructions for Fluffy Yorkshire Puddings
Get that tin straight back into the center rack immediately. This transfer needs to happen in seconds. And now, the hardest part of all: you must not open the oven door for at least 20 full minutes. If you let cold air rush in early, you’ll deflate all that beautiful, trapped steam, and your fluffy Yorkshire puddings will instantly collapse back down.
Leave them alone! Let them do their structural work. After about 20 minutes, you can peek. They should look beautifully risen, deep golden brown, and wonderfully crisp. If they look pale, give them another five minutes. As always, if you need more background on methods like this, take a look at my guide on gnocchi baking techniques for general heat management advice!
Yorkshire Pudding Tips and Tricks for a Perfect Rise
Even with the best recipe, sometimes things go a little sideways. That’s okay! Most flat puddings come down to one of three things: temperature, timing, or batter consistency. Don’t you worry; these are the little fixes that turn a good batch into the absolute best Yorkshire pudding you’ve ever made.
The first thing people always ask is about the fat. Should I use oil or dripping? If you can get your hands on beef dripping, use it! It’s traditional for a reason—it has a higher smoke point than most vegetable oils and that deep, savory flavor is unbeatable. If you use oil, make absolutely sure it’s the kind with a high smoke point, like refined vegetable or sunflower oil, and not extra virgin olive oil, which burns too easily.
If your puddings are coming out flat, check your heat first. Is your oven actually reaching the temperature you set? Use an oven thermometer if you doubt it! Also, confirm that the fat was truly smoking hot before you poured the batter in. If it was only warm, you missed your shot at that big puff.
Another common issue is overcrowding the tin. If you cram twelve puddings into a tin made for ten, the oven temperature drops significantly right around the puddings, and they won’t rise properly. Don’t overcrowd your oven space; give those little guys room to breathe and grow! If you’re using a large roasting tin for giant puddings, you need even more time in the oven.
Lastly, never stir the batter after it has rested! Once it’s done resting, it’s set. Stirring it again knocks all the beneficial air out you worked so hard to create. If you need to make a batch ahead of time, make the batter right up to the resting stage, cover it tightly, and keep it chilled. You can even store the batter overnight before using it! For a great recipe for using up those leftover roast dinner scraps, check out my turkey and cranberry enchiladas.
Variations on the Traditional British Side Dish
While this recipe is scaled perfectly for baking those individual, airy portions that go best with a serious Sunday roast, you can totally play around with the vessels you pour that beautiful batter into! It’s all about understanding volume, really.
If you’re looking to make giant puddings—say, for making Toad in the Hole, which is just brilliant comfort food—you just need a much bigger roasting tin and, crucially, more cooking time. The key is still that smoking hot fat, just make sure the layer is deep enough to generously coat the bottom of that bigger pan. Just be careful when you pour the batter in; a huge volume of that cold mix hitting hot fat is dramatic, so work slowly!
Alternatively, if you want one massive pudding destined for the middle of the table, use a rectangular or square roasting tin. Just remember that the middle takes much longer to cook through than the edges. If you bake gigantic puddings, you might need 35 or even 40 minutes, so keep an eye on the browning!
If you’re a fan of dessert baking, you absolutely have to try my recipe for apple pie crumb bars. They have a thick, buttery base that reminds me of a good shortcrust pastry.
Making Gluten Free Yorkshire Pudding Batter
I get asked a lot about switching this up for gluten-free needs, and yes, you can absolutely adapt it! The structure relies heavily on the gluten in the plain flour, so you can’t just use rice flour, or they’ll likely stay flat. I’ve had the best luck substituting a high-quality, all-purpose 1:1 gluten-free blend. It has the necessary starches to give you that lift.
You might find you need just a tiny splash more liquid in the batter, as GF flours can sometimes absorb moisture differently. But honestly, stick to the ratios above, replace the flour 1:1, and you should still get a respectable, puffy result. They might not soar quite as high as the wheat flour versions, but they’ll still be wonderfully crispy!
Serving Suggestions for Your Homemade British Comfort Food
There’s really only one true way to enjoy a spectacular, puffed-up pudding, and that is when it’s sitting proudly beside a massive joint of roast beef. If you make these right, they should be light enough that they don’t weigh down your plate after you load it up with potatoes and veg.
The number one pairing, obviously, is gravy. You need a rich, deep, savory gravy—preferably one made from the meat juices that have been bubbling away for hours. The whole point of that deep, airy center is to create a perfect little reservoir for that gravy to soak into before you eat it. Don’t be shy with it!
These aren’t just for Sunday dinner, though! They are essential for any traditional British meal featuring a roast. Think about pairing them with roasted lamb, the sauce being a nice minty drizzle, or even serving them alongside rich sausages and onion gravy (though some purists might argue about that one!).
If you’re looking for a lighter, slightly unexpected side to cut through all that richness, sometimes I whip up a bright, acidic salad to have nearby. My orange and fennel salad really lifts the palate after a heavy main course, and you can find the recipe right here. But honestly, when these are fresh from the oven, they don’t need anything more than meat and gravy!
Storage and Reheating Instructions for Yorkshire Puddings
So, you made a huge batch because you know how much everyone loves them? Good choice! They are always better fresh out of the oven, but we can definitely make them work for leftovers. The biggest thing you have to remember about storing these crispy treats is that moisture breeds sadness.
If you try to seal them up tightly while they are still warm, the steam they release will instantly turn the gorgeous, shattered crisp shell into something soft and chewy. Nobody wants a soggy pudding accompaniment!
Once they are completely cooled down—and I mean totally cooled—I lay them out on a wire cooling rack for about 30 minutes more, just to be absolutely sure they haven’t trapped any residual warmth. Then, and only then, I transfer them to an airtight container. They’ll stay perfectly good on the counter for a day, or you can pop them in the fridge for up to three days. They freeze beautifully too, just layer them between wax paper!
Now, for reheating—this is the non-negotiable part: You must use the oven. Do not, I repeat, do not try to microwave these. Microwaving works by heating water molecules, and you’ll just end up with warm, rubbery things that look like deflated stress balls. We are preserving that crunch!
Set your oven to a nice hot 200C (about 400F). Pop the cooled puddings directly onto a baking sheet. You might want to give the bottoms a very quick mist of oil if they look dry, but usually, the fat they cooked in holds enough for reheating.
Bake them for about 5 to 8 minutes. You just want to hear them start to sizzle a little bit, and when you tap the outside, they should sound hollow and crisp again. It’s amazing how fast they revive when they get that blast of heat!
If you need some inspiration for what to do with leftovers that aren’t just part of a second roast dinner, you can get really creative! My recipe for cranberry brie bites shows how you can turn pastry into something totally new, and honestly, you could crumble up leftover puddings over soup like a fancy crouton if you’re feeling adventurous!
Frequently Asked Questions About Perfect Yorkshire Puddings
I always finish up any recipe with a quick chat about the stuff people usually ask me when they come over for dinner. There are always a few sticking points when people try making these for the first time, so I wanted to clear those up right here. Dealing with these common hurdles is key to becoming one of those cooks who always nails the fluffy Yorkshire puddings!
Can I use cold batter for Yorkshire Puddings?
This is a tricky one, because it’s not just the batter temperature that matters—it’s the oil temperature! The rule is this: your batter should be room temperature or slightly chilled, but your fat *must* be smoking hot before you pour the batter in. A cold batter hitting hot fat causes a slight temperature shock, which is actually great for getting that immediate outward expansion. Just make sure that fat is hot enough to truly sizzle when the batter hits it!
Are Gordon Ramsay Yorkshire Pudding methods different?
Oh, everyone asks about the big names! Celebrity chefs certainly have their own flair, and many of them focus heavily on the hot oil, which we totally agree on. Some methods might call exclusively for beef dripping, while others focus on specific egg-to-milk ratios. Overall, the fundamental science for getting those puffy popovers—high heat, rested batter—remains the same across the board. My method here pulls the most reliable elements from classic English home cooking to ensure you don’t end up disappointed!
If you’re looking for more dessert favorites after all that savory success, you have to try my no-bake peanut butter cup cheesecake—it’s always a showstopper!
Estimated Nutritional Data for This Classic English Recipe
Now, I know when you’re making something this comforting and spectacular, you aren’t exactly reaching for a calculator, but it’s good to have a rough idea of what’s in your dinner plate! Since these are simple ingredients—flour, milk, eggs—they are pretty straightforward.
These figures below are based on one small pudding, using standard vegetable oil for cooking, not the richer beef dripping. If you use dripping, you know the fat content will creep up a bit, but the flavor is worth it, right? These are just estimates to give you a ballpark figure for this superb side dish.
Here is the breakdown for one serving:
- Serving Size: 1 pudding
- Calories: About 120
- Fat: Around 6g (This is entirely dependent on how much oil/dripping you use!)
- Saturated Fat: About 2g
- Carbohydrates: 13g
- Sugar: Just 2g (Mostly from the milk, naturally sweet!)
- Protein: 5g
- Cholesterol: 75mg
See? Super simple, nothing fancy involved. They really are just eggs, flour, and milk doing their best! These classic English recipes are built on inexpensive pantry staples, which is part of their historic charm. Enjoy them guilt-free!
Share Your Golden Brown Puddings
Well, that’s it! You have everything you need now to bake glorious, towering works of art for your next roast dinner. I really hope this helps you banish flat puddings from your kitchen forever.
I absolutely live to hear when one of my recipes works its magic for someone else! So please, if you made these and they puffed up like they were supposed to, let me know! Did you use dripping or oil? Did you manage not to open the oven door? I want all the juicy details.
Leave a comment down below with your star rating—it helps other nervous bakers feel confident enough to try the recipe. Seriously, nothing makes me happier than seeing screenshots of those perfect, golden-brown crowns.
And hey, if you’ve got leftovers (unlikely, I know!), why not try something different with them? Before you stress about finding another roast dinner, take a peek at my recipe for pear and ginger cobbler. It’s a totally different vibe, but sometimes you just need a good, warm fruit dessert after all that savory goodness!
Happy baking, and I can’t wait to see how high your puddings rise!
PrintThe Perfect Foolproof Yorkshire Pudding

A reliable recipe for classic British Yorkshire puddings that bake up crispy on the outside and light and fluffy inside, perfect for your roast dinner.
- Prep Time: 10 min
- Cook Time: 25 min
- Total Time: 65 min
- Yield: 12 small puddings
- Category: Side Dish
- Method: Baking
- Cuisine: British
- Diet: Vegetarian
Ingredients
- 140g plain flour
- 4 large eggs
- 200ml milk (whole milk works best)
- Pinch of salt
- Vegetable oil or beef dripping, for cooking
Instructions
- Sift the flour and salt into a large bowl.
- Make a well in the center and crack the eggs into it.
- Gradually whisk the eggs into the flour until you have a smooth, thick batter.
- Slowly whisk in the milk until the batter is the consistency of thin cream.
- Cover the bowl and let the batter rest in the refrigerator for at least 30 minutes, or up to several hours for best results.
- Preheat your oven to 220C (425F). Place a 12-hole muffin tin or a roasting tin with deep indentations into the oven.
- Add about 1 teaspoon of oil or beef dripping into each hole. Heat the oil in the oven for 10 minutes until it is smoking hot.
- Carefully remove the hot tin from the oven. Quickly and evenly divide the batter among the hot holes, filling each about one-third full.
- Immediately return the tin to the oven and bake for 20 to 25 minutes. Do not open the oven door during the first 20 minutes.
- The puddings are ready when they are well risen, golden brown, and crisp. Serve immediately.
Notes
- Use beef dripping instead of oil for the most traditional flavor and best crispness.
- The oil must be smoking hot before you pour the batter in; this is key to a good rise.
- Resting the batter improves the texture significantly.
- Do not overcrowd the oven, as this can lower the temperature and prevent a good rise.
Nutrition
- Serving Size: 1 pudding
- Calories: 120
- Sugar: 2
- Sodium: 80
- Fat: 6
- Saturated Fat: 2
- Unsaturated Fat: 4
- Trans Fat: 0
- Carbohydrates: 13
- Fiber: 1
- Protein: 5
- Cholesterol: 75