

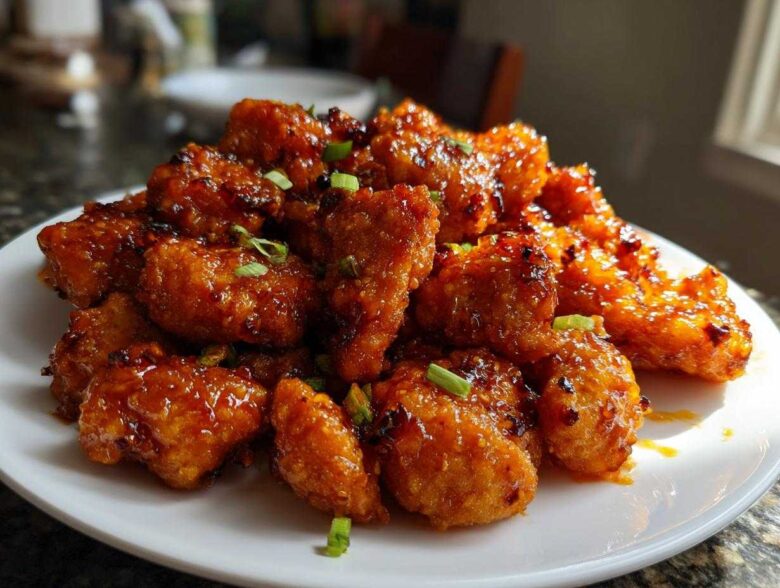
You know that craving, right? That intense pull for that glossy, sticky, tangy goodness you usually only get when you call your favorite local Chinese spot? Well, stop dialing that number! I figured out how to nail the absolute best Orange Chicken Recipe in under 30 minutes, and honestly, it leaves the takeout versions in the dust. Forget soggy coatings; trust me when I say I’ve tested every flour-to-cornstarch ratio under the sun. This particular coating method gives you that superior, almost shatteringly crisp texture you dream about, all without having to deal with a massive pot of hot oil. It’s fast, it’s outrageously flavorful, and it’s officially my go-to Weeknight Asian Recipe.
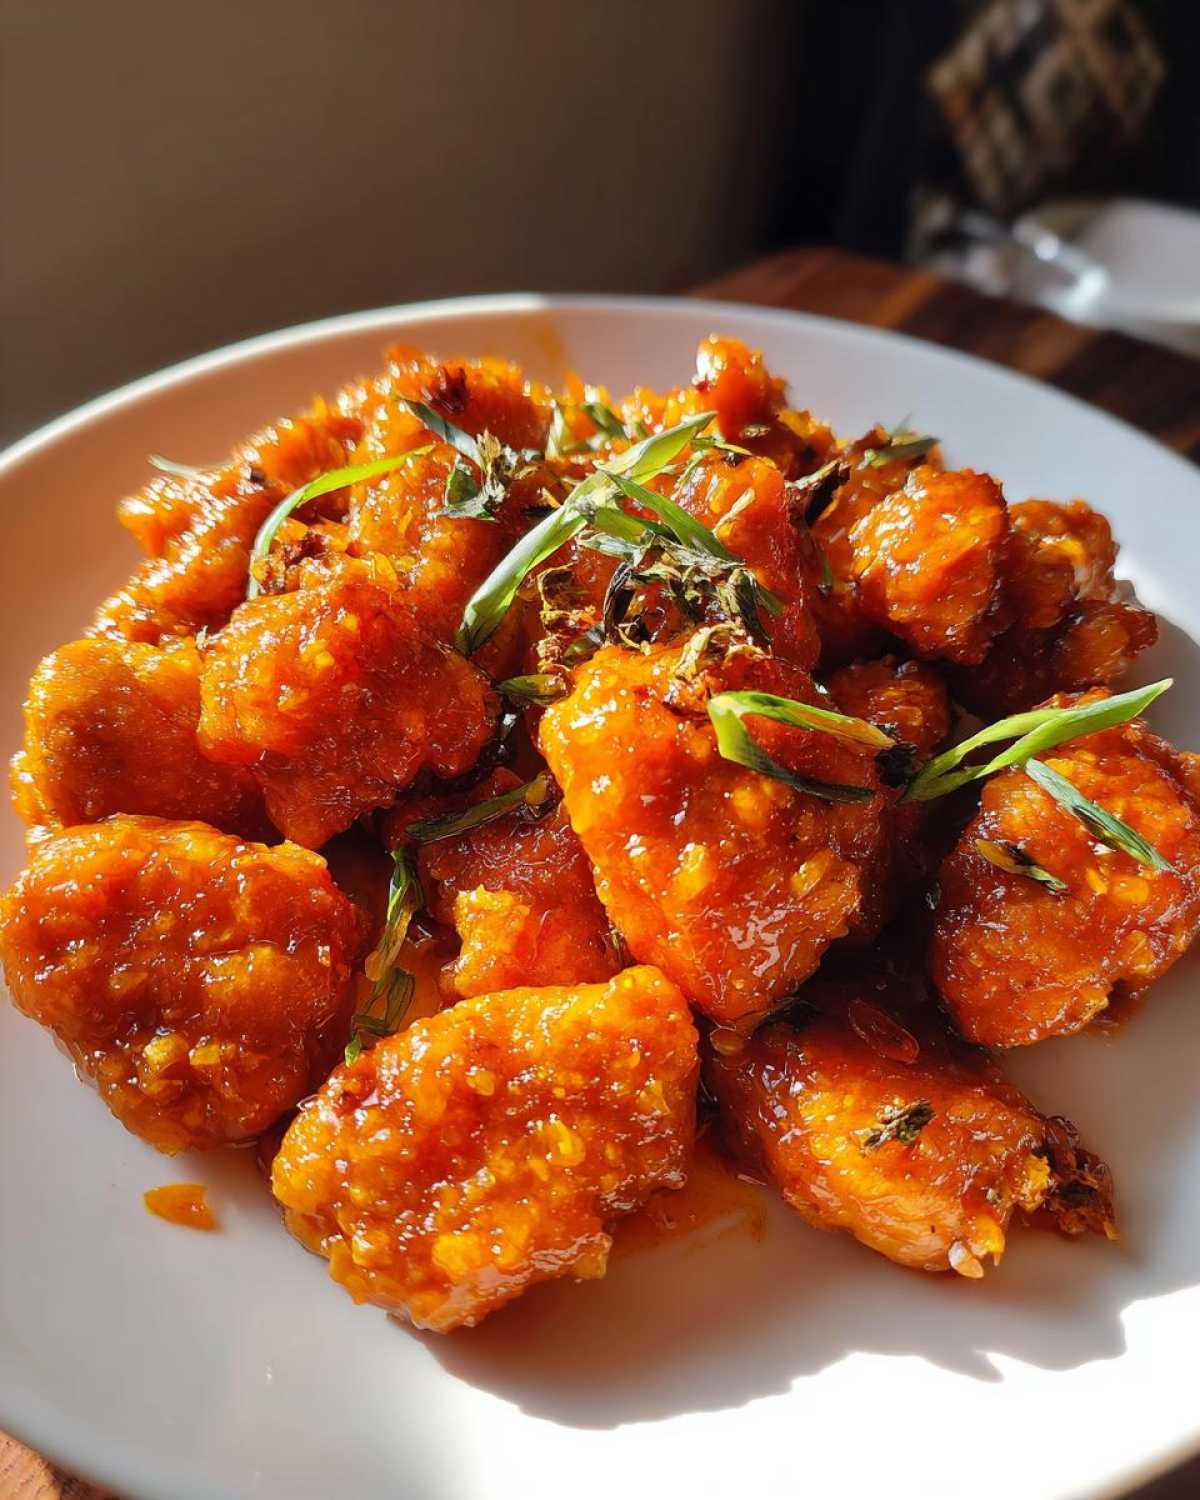
Why This Orange Chicken Recipe Beats Takeout
Why bother waiting 45 minutes for bland, slightly watery chicken when you can dominate dinner in 30? This recipe focuses exactly where takeout fails: texture and fresh flavor. It’s designed to be that perfect Family Favorite Chicken dish that impresses everyone, even picky eaters.
- It is lightning fast! You are looking at a full dinner, from prep to plate, in about 30 minutes. This is peak Quick Chicken Dinner territory.
- Forget flat flavors. We are layering ginger, garlic, and fresh zest, making this better than any Better Than Panda Express Chicken you’ve ever had.
- The chicken stays crisp! Seriously, this is the main event here.
Achieving Ultimate Crispy Orange Chicken Recipe Texture
The secret to this texture is twofold: the coating and the cooking method. We’re using a little flour and a good dose of cornstarch in our dredge. That cornstarch is what grabs the heat and creates that beautiful, slightly craggy exterior. When you pan-fry it quickly, you lock in the juices while crisping up the outside. Don’t let the chicken sit around after coating, or it gets mushy—it needs to hit that hot oil fast!
The Perfect Sweet Tangy Orange Sauce
A great Sticky Orange Glaze can’t just be sweet; it needs punch! I use fresh orange juice and zest, which adds a fragrant depth that bottled stuff just can’t touch. Think bright acidity battling sweetly caramelized sugar. When we add that final cornstarch slurry, the sauce doesn’t just coat the chicken; it clings to it, creating that perfect sticky, glossy finish that’s impossible to stop eating. If you love balancing sweet and tart, check out my recipe for Sweet & Spicy Asian Pork with Pineapple—it uses a similar flavor balancing trick!
Gather Your Ingredients for the Orange Chicken Recipe
Okay, time to get organized! Since this is a 30-Minute Orange Chicken recipe, prepping everything beforehand—what chefs call *mise en place*—is the absolute key to not stressing out when the oil gets hot. You need everything ready to go before that chicken hits the pan. Seriously, one of my top tips for getting the best flavor in any orange chicken recipe is ditching the bottled stuff and using freshly squeezed orange juice. It makes such a difference in the bright, zesty flavor! You can check out how I use fresh citrus in my Orange Fennel Arugula Salad, too; it’s all about those fresh aromatics.
For the Crispy Chicken Coating
We’re using a simple dredge to get that signature crispiness. Grab about 1.5 pounds of boneless, skinless chicken, and make sure you cut it into nice, even 1-inch pieces so they all cook at the same speed.
- 1 large egg
- 1/4 cup all-purpose flour
- 1/4 cup cornstarch (This is crucial for getting it light and crispy!)
- 1/2 teaspoon salt
- 1/4 teaspoon black pepper
- 2 tablespoons vegetable oil (Just for pan-frying the pieces until golden)
For the Sweet Tangy Orange Sauce
This is where the magic happens! We need a nice balance of sweet and tart, with plenty of classic Asian aromatics in the base. Make sure you zest that orange before you juice it!
- 1 cup fresh orange juice
- 1/2 cup granulated sugar
- 1/4 cup rice vinegar
- 2 tablespoons soy sauce
- 1 tablespoon grated fresh ginger
- 2 cloves garlic, minced
- 1 teaspoon sesame oil
- Zest of 1 orange
And here’s the thickener—you have to keep this separate until the very last second:
- 1 tablespoon cornstarch mixed with 2 tablespoons cold water (This is your slurry, mix it really well so there are zero lumps!)
Don’t forget the garnish if you want to make it look professional: sliced green onions and sesame seeds always finish the look.
Step-by-Step Instructions for Your 30 Minute Orange Chicken Recipe
Okay, since we are aiming for that glorious 30-minute mark, organization is your best friend here. Don’t start the sauce until the chicken is coated, and don’t start the chicken until the oil is shimmering hot! If you’ve got all your bowls ready, just like you would for my 30-Minute Homemade Bagels, this whole process flies by. We need to coat these chicken pieces perfectly so they stay crispy underneath that glorious glaze.
Preparing and Cooking the Chicken Bites
First things first: get that dredging station set up. Dip every piece of chicken first into the bowl with the whisked egg. Don’t let it just sit there! Then, immediately transfer it to your dry mix of flour, cornstarch, salt, and pepper. Make sure you press that coating on so it really sticks. Next, heat that tiny bit of oil in your skillet over medium-high heat. You absolutely must cook the chicken in batches—if you crowd the pan, the temperature drops instantly, and bam! No more crispiness. Cook them for about three or four minutes on each side until they look beautifully golden brown all over. Once they look done, pull them out and set them aside—they’ll wait patiently for the sauce.
Making the Sticky Orange Glaze
While the last batch of chicken is frying (or cooling slightly), turn your attention to the sauce base. In the same pan—drain off any excess oil first, we don’t want it greasy—pour in the fresh orange juice, sugar, vinegar, soy sauce, ginger, garlic, and that super important orange zest. Bring that whole mixture up to a nice simmer and stir until everything dissolves. Now for the magic texture! Take your cornstarch slurry (remember, cold water only!) and pour it in slowly while you whisk like crazy. Keep whisking until that sauce bubbles up and thickens into a gorgeous, glossy glaze. That sticky texture means the sauce will actually stick to the chicken instead of sliding off!
Combining for the Final Orange Chicken Recipe
Once the sauce is perfect and thick, stir in that sesame oil for aroma. Now, bring back all those crispy chicken bites you set aside earlier and dump them right into the skillet with the glaze. This is the quick part: use tongs or a spatula and toss everything super gently until every single piece of chicken is shiny and coated head-to-toe. Don’t overcook it now! As soon as it’s coated, take the pan right off the heat. If you let it sit on the burner, that beautiful crispiness we worked so hard for will start turning soft. Serve it immediately!
Tips for the Crispiest Orange Chicken Recipe Variations
I know not everyone wants to stand over a skillet, even for a quick 30-minute dinner! That’s totally fine. What I love about this base orange chicken recipe is that the coating works beautifully for baking or air frying too. This is great if you’re cleaning up after a long day or just trying to keep the grease down a little bit. I tested these methods side-by-side to make sure they give you that required crispiness before we toss it in the glaze. Before you start either method, make sure your chicken is completely coated in the egg wash and the flour/cornstarch mixture we made earlier.
Baking the Orange Chicken Recipe
If you’re going the oven route, preheat it to a good, hot 400°F (200°C). Lay those coated chicken pieces out in a single layer on a baking sheet lined with parchment paper—don’t overlap them, or they steam instead of crisping! You’ll want to bake them for about 15 minutes total. Halfway through that time, I pull the tray out and flip every piece over gently. That ensures both sides get golden brown enough to stand up to the sauce. Once they’re done, toss them right into your warm orange glaze.
Air Fryer Orange Chicken Recipe Method
Oh, the air fryer—my favorite for easy cleanup! For this method, set your basket temperature to 380°F (195°C). Lightly spray your coated chicken pieces with a little cooking spray before you put them in the basket. Again, don’t overcrowd; work in batches! You’ll cook them for about 10 to 12 minutes. I always give the basket a good shake halfway through to redistribute the heat. They come out unbelievably great, and you can check out my full tutorial on getting perfect crispiness with my Air Fryer Chicken Wings for more tips on basket cooking!
Serving Suggestions for Your Homemade Orange Chicken Recipe
Believe it or not, your amazing orange chicken recipe isn’t quite finished until you put it on the right vehicle! This dish is seriously rich and saucy, so you need something sturdy underneath to catch all that delicious glaze. The absolute classic, and my personal go-to, is a big mound of fluffy, perfectly steamed white rice. That rice is the best sauce mop you’ll ever find; it soaks up every drop of that sweet and tangy flavor.
But you shouldn’t just stop at rice, right? We need some green on the plate to make it feel like a balanced meal. I usually steam up some broccoli or snap peas really quickly—just a few minutes so they stay bright green and slightly crunchy. The slight bitterness of the greens cuts right through the sweetness of the glaze, making the whole bite taste better. If you are wanting something a little different than regular mashed potatoes, you could try my recipe for Roasted Garlic Cauliflower Mash; it’s really creamy and pairs surprisingly well with Asian flavors!
Sometimes, honestly, I just need a break from white rice. When I do that, I’ll switch to brown rice for a little more nutty texture, or even serve it over some simple lo mein noodles if I’m feeling lazy but want a heartier texture. Seriously, whatever you choose, make sure you have extra on the side because you’re going to want a second helping of that amazing sauce.
Storage and Reheating the Orange Chicken Recipe
Okay, let’s talk about the real challenge with any crispy fried chicken dish: leftovers! As much as I love this orange chicken recipe fresh out of the wok—when it’s piping hot and the glaze is perfectly sticky—sometimes you just can’t finish it all. I won’t lie to you: the moment that sauce touches the crispy coating, the clock starts ticking on that crunch factor. Once it cools down, it’s going to soften up a little bit. But don’t worry, we can bring it back from the brink!
For storage, you need to keep the components separate if you want to maximize the texture. If you try to save everything mixed together, the chicken will definitely get soggy overnight. I usually keep the leftover sauced chicken in an airtight container in the fridge for up to three days. If you managed to have any leftover rice, keep that separate too!
Waking Up Your Leftover Orange Chicken
The microwave? Absolutely not! Microwaving this will turn your beautiful, crispy bites into sad, steamy sponges. If you are in a massive rush, you can use the oven, but for the absolute best revival, you need a hot pan. This simulates that quick cook time we used in the first place.
Here’s the trick: Get a clean skillet heating over medium-high heat. You don’t need extra oil unless the pan is totally dry. Toss the leftover chicken into the hot pan first and let it cook for about 60 seconds, just to drive off any surface moisture the sauce added. Then, if you have any extra sauce left over (or you made a quick tiny batch fresh), just pour a tablespoon over the chicken and toss super fast, maybe 30 seconds more. You want it hot, sticky, and just barely starting to re-crisp on the edges. It won’t be exactly like the first time, but trust me, for a second-day Homemade Orange Chicken, it’s fantastic!
Avoiding a Splotchy Glaze When Reheating
When reheating, the main worry is the sugar in the sauce scorching because it’s highly concentrated. Always use medium heat or slightly below. High heat scorches sugar really fast, and you don’t want that burnt taste anywhere near your delicate Sweet Tangy Orange Sauce. If you notice the sauce seems too thick when you reheat it, just add a tiny splash of water or fresh orange juice—maybe a half teaspoon—to loosen it up while you toss the chicken. Too much liquid, though, and you’re back to being soupy, so go slow!
Frequently Asked Questions About This Orange Chicken Recipe
I know sometimes the recipe sounds perfect but you need that one little tweak for your family or your schedule. That’s totally normal! I’ve gathered up the most common questions I get about keeping this Classic Chicken Noodle Soup-level comforting dish on rotation. Let’s tackle them so you can get cooking!
Can I use chicken thighs instead of breasts in this orange chicken recipe?
Oh, absolutely! I included breasts in the main recipe because they are leaner and hold the coating really well, but chicken thighs are actually my preferred meat for flavor. Thighs are more forgiving—they have more fat, which means they stay incredibly moist even if you cook them a minute or two too long. If you’re using thighs, just trim off any excess fat and go ahead and cut them into cubes just like the breasts. You might need to add an extra minute or two to the cooking time to make sure they are cooked all the way through before you toss them in the glaze, so just check that interior temp!
How can I make this Easy Takeout Orange Chicken spicier?
That is a fantastic question, because sometimes you just need that little kick! If you want to turn this into a sweet and spicy orange chicken situation, you can easily add heat right when you are simmering the sauce base (Step 3). My favorite way is to toss in about a half teaspoon of dried red pepper flakes directly into the orange juice mixture. You’ll see the flakes infuse the sauce as it simmers. If you want bigger, bolder heat that’s mixed right into the meat, a teaspoon of Sriracha or Gochujang mixed right into your dredging slurry will work wonders! It definitely takes this from just being a great family dish to being a seriously exciting Easy Takeout Orange Chicken.
Can I prepare the Sweet Tangy Orange Sauce ahead of time?
Yes, you definitely can, and this is great for those super busy nights! You can absolutely combine all the sauce ingredients—the juice, sugar, vinegar, soy sauce, ginger, garlic, and zest—and keep that mixture sealed up in the fridge for three to four days. It lets those spices really bloom together, which is great for flavor depth!
Here is the absolute key, though: Do NOT add the cornstarch slurry until you are ready to cook. If you mix the slurry into the sauce ahead of time and refrigerate it, the cornstarch might clump up or break down, and you’ll lose that beautiful glossy thickening power. When you’re ready to eat, just heat the sauce base back up until it’s simmering, then whisk that slurry in quickly just like the recipe says. Remember to reheat gently so you don’t scorch that sugar!
Estimated Nutrition for This Quick Chicken Dinner
I always feel a little better knowing what I’m putting on the table, even when I’m whipping up something fast like this orange chicken recipe. Now, I have to give you the standard disclaimer here: these numbers are just my best guess based on the exact ingredients and amounts I listed above, assuming four solid servings. If you use more sugar or scoop a huge pile of rice underneath, the totals will shift, naturally!
But overall, for a dish that tastes this decadent and satisfying—a real Family Favorite Chicken meal—I think these numbers are pretty reasonable, especially since we aren’t deep-frying everything in sight!
- Serving Size: 1 serving
- Calories: 450
- Protein: 35g (That’s a great boost for dinner!)
- Fat: 10g (Mostly unsaturated, thanks to the light pan-fry!)
- Carbohydrates: 50g
- Sugar: 35g (This is where most of the sweetness comes from, of course!)
- Sodium: 550mg
If you are watching sugar or sodium intake, you can easily reduce that by cutting the granulated sugar in the sauce by about 10-15% or using low-sodium soy sauce. It affects the thickness slightly, but it’s a simple modification for your personalized Quick Chicken Dinner!
Share Your Sticky Orange Glaze Success
Listen, I’ve shared all my secrets for getting that crunch and balancing that perfect sweet and tangy flavor in this orange chicken recipe. Now it’s your turn! I genuinely want to know how it turned out in your kitchen. Did the coating stay crispier than you expected? Did the 30-minute timeline hold up for you?
The best part of sharing recipes is seeing your success stories! Please, please hop down below and leave a star rating. Five stars always makes my day, but honest feedback about what you loved (or what you tweaked) helps me keep making stronger recipes for everyone.
And if you took a picture of that beautiful, glossy chicken glistening on a bed of rice, you absolutely have to share it on social media! Tag me so I can see your amazing work. It just warms my heart to see my favorite Sticky Orange Glaze showing up on your dinner table. If you’re still looking for more inspiration for new meals, you can always browse my latest posts over at my main recipe index!
Print30-Minute Crispy Homemade Orange Chicken

Make better-than-takeout orange chicken at home in 30 minutes. This recipe delivers crispy chicken pieces coated in a sticky, sweet, and tangy orange sauce.
- Prep Time: 10 min
- Cook Time: 20 min
- Total Time: 30 min
- Yield: 4 servings
- Category: Dinner
- Method: Pan-Frying
- Cuisine: Chinese American
- Diet: Low Fat
Ingredients
- 1.5 lbs boneless, skinless chicken breasts or thighs, cut into 1-inch pieces
- 1 large egg
- 1/4 cup all-purpose flour
- 1/4 cup cornstarch
- 1/2 teaspoon salt
- 1/4 teaspoon black pepper
- 2 tablespoons vegetable oil (for pan-frying)
- 1 cup fresh orange juice
- 1/2 cup granulated sugar
- 1/4 cup rice vinegar
- 2 tablespoons soy sauce
- 1 tablespoon grated fresh ginger
- 2 cloves garlic, minced
- 1 teaspoon sesame oil
- 1 tablespoon cornstarch mixed with 2 tablespoons cold water (slurry)
- Zest of 1 orange
- Optional: Sliced green onions and sesame seeds for garnish
Instructions
- In a medium bowl, whisk the egg. In a separate shallow dish, mix the flour, 1/4 cup cornstarch, salt, and pepper. Dip each chicken piece first in the egg, then dredge thoroughly in the flour mixture.
- Heat 2 tablespoons of oil in a large skillet or wok over medium-high heat. Add the coated chicken in a single layer, working in batches if necessary, and cook for 3 to 4 minutes per side until golden brown and cooked through. Remove the chicken and set aside on a plate lined with paper towels.
- In the same skillet (drain off excess oil if needed), combine the orange juice, sugar, rice vinegar, soy sauce, ginger, garlic, and orange zest. Bring the mixture to a simmer over medium heat, stirring until the sugar dissolves.
- Whisk the cornstarch slurry once more and pour it slowly into the simmering sauce, stirring constantly until the sauce thickens and becomes glossy, about 1 minute.
- Stir in the sesame oil. Return the crispy chicken pieces to the skillet. Toss gently until every piece is evenly coated with the sticky orange sauce.
- Remove from heat immediately. Serve hot over steamed white rice, garnished with green onions and sesame seeds if desired.
Notes
- For extra crispy chicken without deep frying, you can bake the coated chicken at 400°F (200°C) for 15 minutes, flipping halfway, before tossing in the sauce.
- If you prefer an air fryer method, cook the coated chicken at 380°F (195°C) for 10 to 12 minutes, shaking the basket halfway through.
- Use fresh orange juice for the best flavor in the sauce.
Nutrition
- Serving Size: 1 serving
- Calories: 450
- Sugar: 35
- Sodium: 550
- Fat: 10
- Saturated Fat: 2
- Unsaturated Fat: 8
- Trans Fat: 0
- Carbohydrates: 50
- Fiber: 1
- Protein: 35
- Cholesterol: 105