

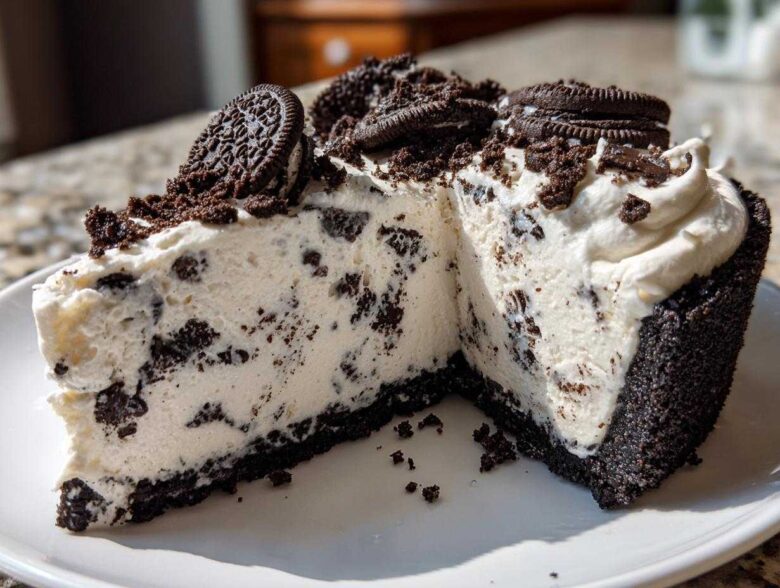
When the summer heat settles in, or frankly, any time I need a magnificent dessert without wrestling with the oven, I turn to something wonderfully cool and fast. Jun (my Spoon) always appreciates a dessert with deep, comforting roots, and while this Easy No Bake Oreo Pie certainly comes from a modern place of speed, it provides that deeply satisfying, rich chocolate flavor that feels timeless. Trust me when I say this cookies and cream treat is probably the easiest, creamiest dessert you will ever assemble. It just comes together—no baking, no fuss, just pure, chilled indulgence that everyone, even the little sprouts, absolutely devours.
If you’re looking for other great no-oven options, you should absolutely check out my recipe for the No Bake Peanut Butter Cup Cheesecake! This is the kind of magic that happens when the foundations of tradition meet the need for speed. If you love chocolate and cream, you have to try making this simple Oreo Pie this week!
Why This No Bake Oreo Pie Recipe is Your New Favorite Quick Dessert
When I look at a recipe, I really need to know what it brings to the table, especially when Mei (my Sprout) is waiting for dessert after a long afternoon in the garden. This No Bake Oreo Pie recipe is fantastic because it checks every single box for a busy cook needing something decadent but fast. You honestly won’t believe how little effort this takes for such a huge payoff in flavor!
What convinced me to add this to our rotation permanently was how it honors that simple, comforting spirit Jun loves, but done in record time. It’s the ultimate crowd-pleaser because who doesn’t love a good Cookies and Cream Pie recipe? Here’s why you need to try this whipped cream pie immediately:
- Zero Heat Required: That’s right, we are keeping the oven off! This makes it perfect for baking during the dog days of summer or when you just don’t want the house to warm up. It’s a true No Oven Desserts champion.
- Speedy Prep: We are talking about 20 minutes of active work. Twenty minutes! That’s less time than it takes to order a pizza, and you get this glorious, rich, creamy Oreo Dessert instead.
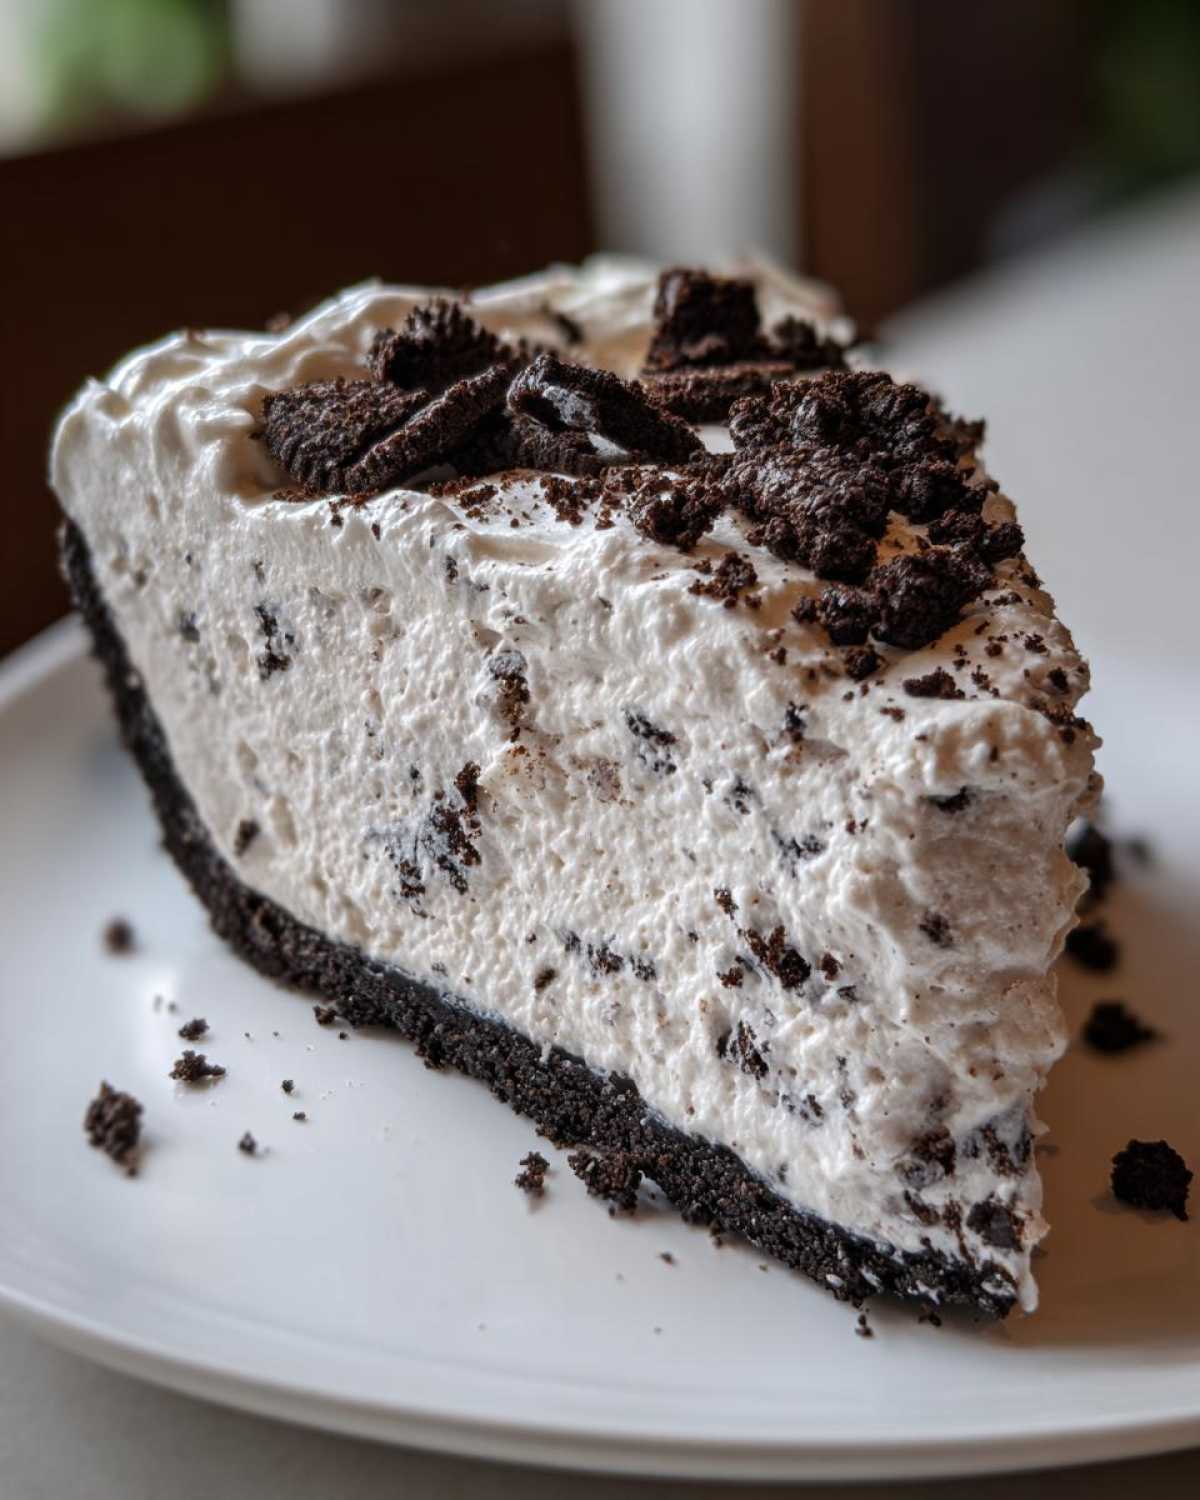
- Amazing Texture: The filling is wonderfully light and fluffy, but the crust offers that essential crunch. It’s smooth, it’s cold, and it’s deeply chocolatey.
- Party Perfection: Because it needs that essential chilling time, it’s the perfect make-ahead Party Desserts solution. You make it the day before, and it’s ready to go!
If you’re trying to fill that craving for something incredibly sweet, you might also want to bookmark my Cookie Dough Truffles—they are also no-bake and ridiculously addictive!
Key Details for Your Easy Oreo Pie
For anyone who needs the facts right upfront—because sometimes a recipe needs to fit into a specific meal plan—here are the vital stats for the pie. This is truly an Easy Oreo Pie setup!
Here’s the basic layout for this particular Oreo Pie:
- Prep Time: 20 minutes (That’s just active time, folks!)
- Cook Time: 0 minutes (I love saying that!)
- Total Time: Around 4 hours 20 minutes (Most of that is chill time, which is hands-off!)
- Yield: 8 generous servings
- Method: No Bake
Gathering Ingredients for the Perfect Oreo Pie
This is where the magic starts, and honestly, I find the list so manageable that it feels like cheating! When I make a dessert for Jun, I lean into the comforting, rich flavor profile, and this Oreo Pie delivers that dark chocolate punch we both love. For the crust, it’s just two things—butters and cookies—and that’s the beauty of a great no-bake foundation. Creamy, crunchy, and ready in minutes!
For the filling, we rely on a mix of cream cheese for body and structure, powdered sugar for sweetness (no gritty sugar here!), vanilla for depth, and the magical ingredient: the frozen whipped topping that gives us that lovely, airy lift. If you’re looking for a similar, slightly different comfort dessert, you might enjoy the filling structure in my Apple Pie Crumb Bars, though this pie is certainly quicker!
Here’s exactly what you need to grab:
- 1 1/2 cups Oreo cookie crumbs (This is about 30 of those beautiful sandwich cookies, whole).
- 6 tablespoons unsalted butter, melted (Use the real stuff here; it makes a difference in the crust).
- 1 (8 ounce) package cream cheese, softened (Please, please make sure it’s truly soft, or you’ll get lumps!).
- 1 cup powdered sugar (Sifted, if you’re feeling fancy, but beat it well regardless!).
- 1 teaspoon vanilla extract (Clear vanilla if you want a pure white look, but brown is fine too).
- 1 (12 ounce) container frozen whipped topping, thawed (Or, if you make your own homemade whipped cream, you’ll need about 2 cups).
- 1 cup crushed Oreo cookies (Reserved just for the beautiful topping at the end).
Ingredient Notes and Simple Substitutions
Getting these ingredients right sets up the whole pie for success. Since this is a frozen/chilled dessert, texture is absolutely everything. Don’t be tempted to skip softening the cream cheese; if it’s cold, your filling will have little white chunks that won’t blend, and we want silky smooth!
For the whipped topping—this is where you get the fluff. If you prefer to use homemade whipped cream, you must make sure it’s beaten to firm peaks before you fold it in. If you fold liquid straight into the cream cheese mix, it will separate, and you won’t get that lovely creamy Oreo Dessert texture we are aiming for.
Now, about that crust: if you are in a super big rush and just need a foundation, you certainly can grab a pre-made Oreo crust. But honestly, crushing 30 cookies takes maybe ten minutes total in a blender or food processor, so I always encourage making your own. It tastes fresher, and the butter really binds everything nicely!
Step-by-Step Instructions for No Bake Oreo Pie
Okay, now we roll up our sleeves, but honestly, this is the fun part! Since this pie needs to set up perfectly—we want that firm, chilled slice, not a gooey mess—timing your chilling is just as important as mixing the ingredients. I always think of this first part as setting the stage for our creamy showstopper. We are building layers of texture here, starting with the foundation of any great Oreo Pie: the crust!
If you are keeping an eye on the clock, remember that the prep time is lightning fast, but you must respect the chill time. Even if you’re making this for a dinner party tonight, plan to start it in the mid-morning so it has time to firm up properly. It truly makes all the difference.
Preparing the Crunchy Oreo Crust
First things first, let’s tackle those crumbs. Get your 1 1/2 cups of finely ground Oreo crumbs into a mixing bowl. Now, pour that 6 tablespoons of melted butter right over the top. You need to mix this together really well. I like to use a fork or my hands for this part—just keep mixing until every little crumb is coated. It should look like damp sand; when you squeeze a bit between your fingers, it should hold its shape easily.
Take your 9-inch pie plate and dump that mixture in evenly. Now, this is important: press it down firmly! Use the bottom of a measuring cup or just your clean fingers to press the crumbs consistently across the bottom and slightly up the sides. Don’t be shy, you want a sturdy little boat for that filling!
Once it’s packed tight, pop that whole pie plate into the freezer. We are heading for a quick chill—about 15 minutes is plenty—while we whip up the filling. This helps lock that buttery crust in place so it doesn’t crumble when we add the good stuff.
Creating the Creamy Oreo Dessert Filling
Alright, oven off, mixer on! Grab your largest bowl. Start by beating that softened cream cheese until it’s completely smooth and creamy. There should be no lumps whatsoever; this is the base that holds everything together. Scrape down the sides of the bowl because we don’t want any stragglers hiding out!
Next, slowly beat in your cup of powdered sugar and the vanilla. Keep mixing until the sugar is totally incorporated and the mixture is lightened up a bit. Now comes the folding part, which is key to keeping this a truly Creamy Oreo Dessert. Gently fold in your thawed whipped topping. Remember, we are folding, not beating! You want to keep all those lovely air bubbles in the topping so your filling stays fluffy. If you whip it too hard, it will deflate, and your pie will be dense instead of dreamy.
Finally, stir in about half a cup of those reserved crushed Oreos. Just a quick fold or two—we just want little pockets of cookie goodness throughout the filling, not a uniform brown color. This filling is so dreamy, you might sneak a taste here, and that’s totally allowed!
Assembling and Chilling the Oreo Pie
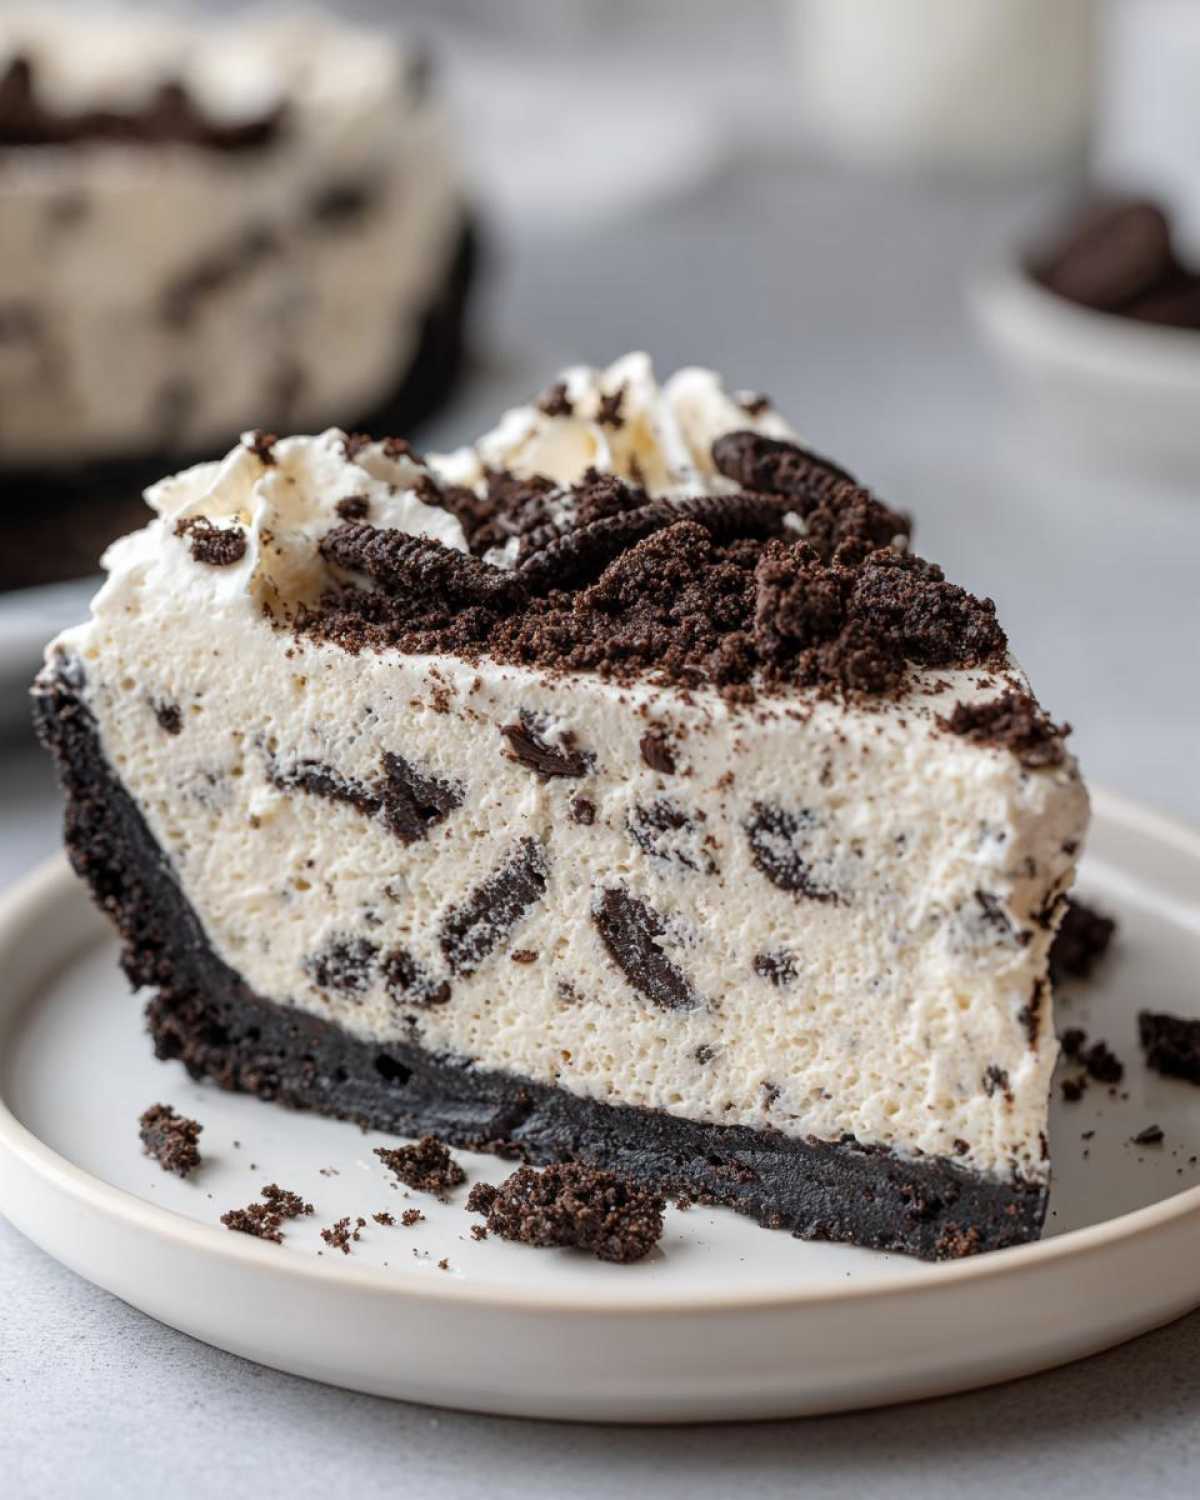
Okay, crust time! Pull that firmly chilled crust out of the freezer. Spoon all that luscious filling right into the crust. Spread it out evenly with an offset spatula or the back of a spoon until the top is smooth and level. This is the perfect moment for a picture, honestly, because it’s so satisfying to see the layers come together!
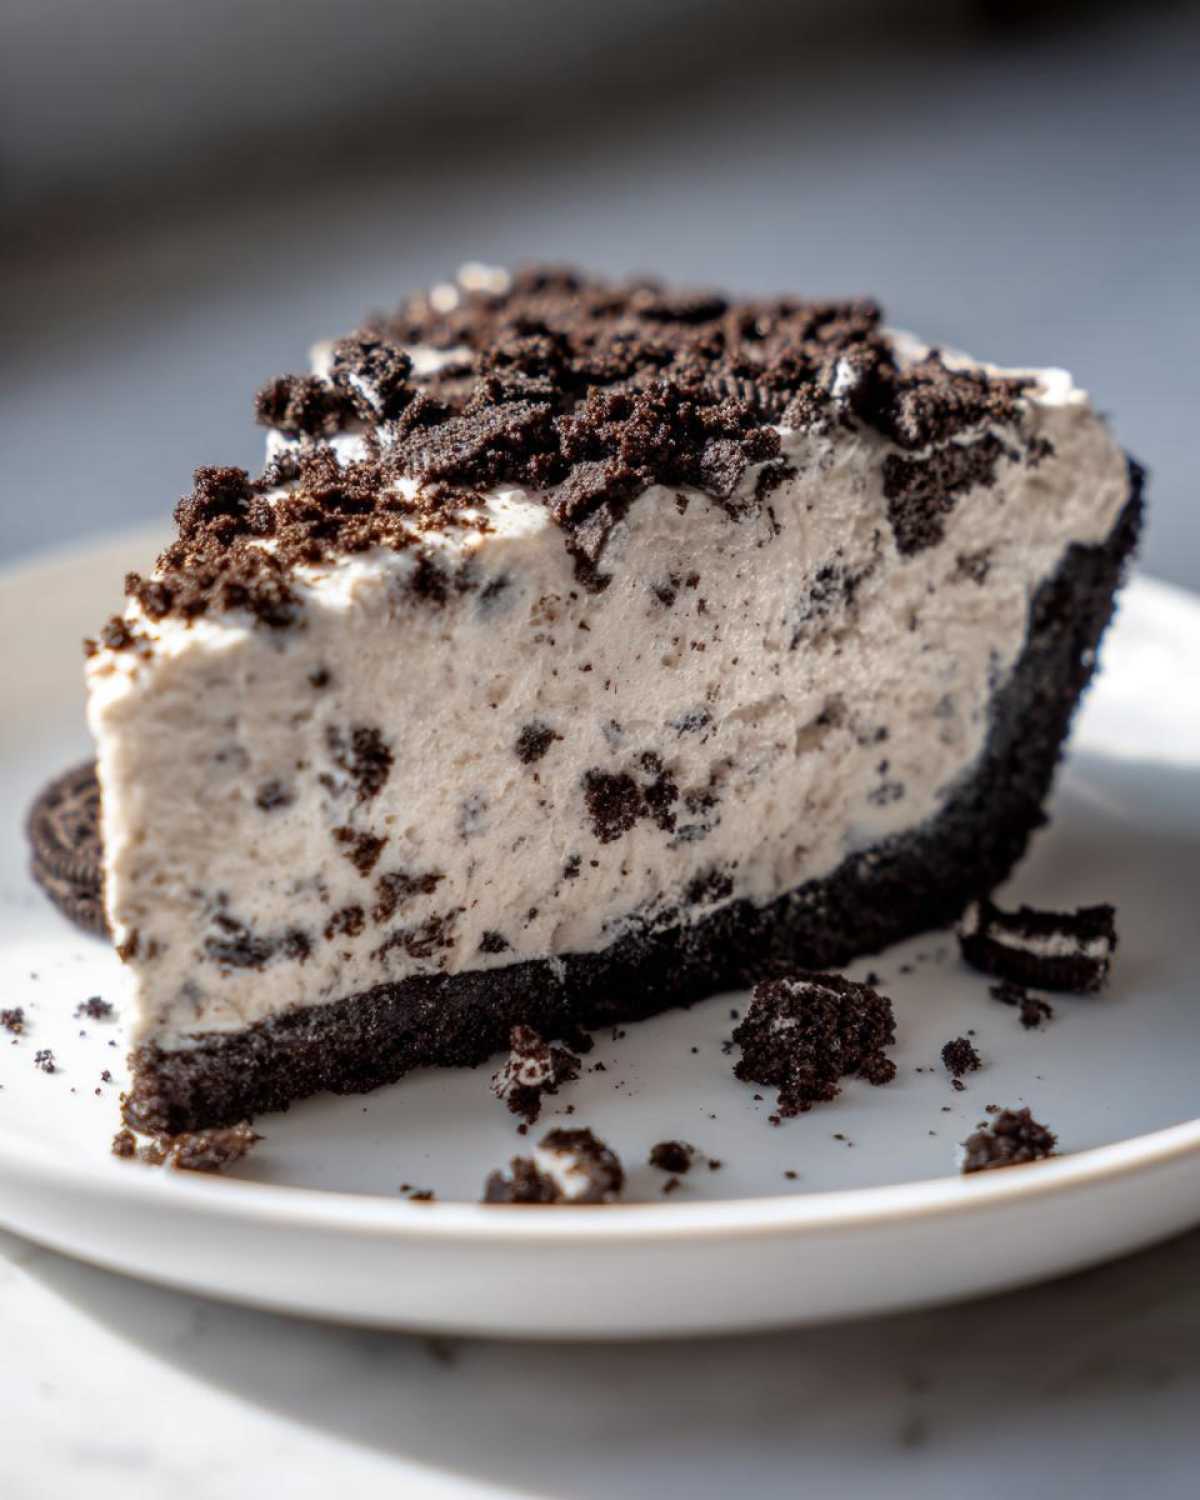
Take the final 1/2 cup of crushed Oreos and sprinkle them right over the top edge-to-edge. This gives us that satisfying crunch when we slice into this glorious Oreo Pie. This little bit of crunch is non-negotiable for me!
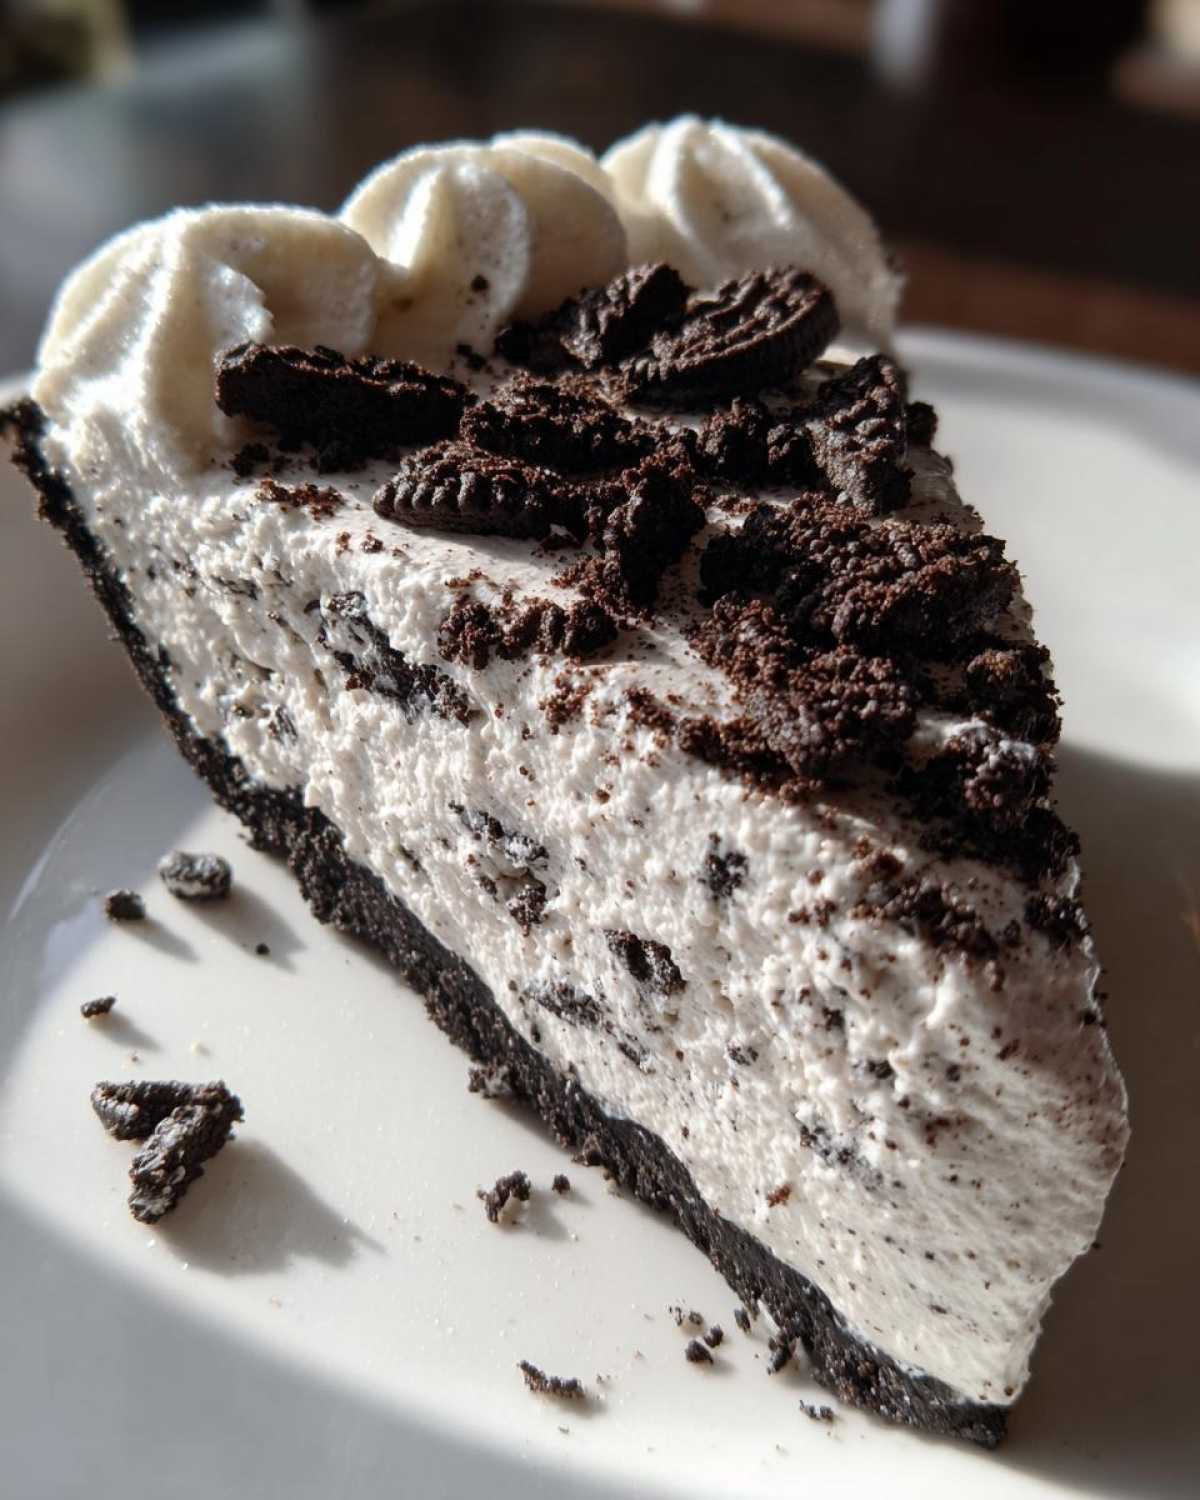
Now for the hardest part: waiting. Cover the pie loosely with plastic wrap and head it straight to the refrigerator. It needs a minimum of 4 hours to set up completely so that that creamy filling firms up beautifully. Honestly, if you can leave it overnight, you’ll get the absolute best texture. Once it’s firm, you can slice it up and serve it cold. If you’ve ever wanted to try making Maple Pecan Sticky Buns, know that this recipe requires patience in chilling that’s just as important as baking them perfectly!
Tips for Making the Best Cookies and Cream Pie Recipe
You’ve gathered the ingredients, you’ve mixed with care, but how do we take this from just a good pie to the absolute best Cookies and Cream Pie recipe ever? It comes down to a few little seasoned tricks that I’ve picked up over the years, mainly learning how to keep moisture where it belongs—in the filling, not the crust!
Jun always reminds me that the difference between a dessert that collapses and one that sings is paying attention to the temperature of the dairy components. If you take these little tips to heart, your pie will be firm, flavorful, and every slice will look magazine-perfect. This is where our kitchen wisdom really shines through to guarantee success.
Here are my secrets for a flawless pie experience:
- Protect the Crust Barrier: The only way moisture travels is through contact. To keep that buttery crust crisp, make sure the cream cheese mixture is spread right to the edges of the crust when you assemble the pie. If you have a few extra crumbs, sprinkle a very thin layer of dry crumbs *directly* onto the bottom of the crust before adding the filling. It acts like a tiny, edible shield!
- Don’t Over-Mix the Whipped Topping: I cannot stress this enough! Whipped topping (or real heavy cream, if you make your own) is full of air. When you fold it into the cream cheese mixture, use a very gentle hand. Cut down the middle and sweep up the sides, turning the bowl as you go. If you beat it vigorously, you deflate that air, and your incredibly creamy Oreo Dessert filling turns into dense, flat cream cheese brick. We want light and fluffy!
- The Chill is Crucial: You are waiting for the fats in the cream cheese and the structure from the stabilizers in the whipped topping to solidify. If you try to serve this pie after just two hours, it will likely slump under its own weight. Give it that full 4 hours, minimum, or better yet, let it sit overnight. The extra wait time makes the slicing so much cleaner.
- Use Fresh Oreos for Topping: For the part you sprinkle on top, try to use cookies that haven’t been sitting in the pantry for months. Fresh cookies crush up nicely, offering better flavor when you take that first bite. This small detail really elevates the finish on this Oreo Pie.
If you’re looking for a soup to warm up with later in the week (because sometimes we need savory!), check out the recipe for Classic Chicken Noodle Soup. You need balance in your menu, after all!
Storage and Make-Ahead for Your Party Desserts
Planning ahead is truly the secret weapon for any good host, and that’s why I love this Oreo Pie so much. If you are preparing for a big gathering, like a summer barbecue or holiday party, knowing how to store your dessert safely and effectively is half the battle won! Because this pie relies on that lovely chilled structure to hold its shape, refrigeration is absolutely mandatory here.
When you’re getting ready for a big spread of Party Desserts, you can easily make this pie a day ahead of time. Seriously, I find that letting it sit in the back of the fridge overnight actually deepens the harmony between the sweet filling and the chocolate crust. It’s wonderful!
How Long Does Leftover Oreo Pie Last?
Because we used cream cheese and real whipped topping (or cream), this isn’t a dessert that should sit out on your counter for ages. Keep it covered tightly! You can store this No Bake Oreo Pie recipe in the refrigerator for up to three to four days. After that, the crust starts to lose its satisfying crunch—it gets a little soft from the moisture, which isn’t terrible, but it’s not the perfect contrast we want anymore.
The biggest thing to watch for is the topping. If you decorated the top with fresh whipped cream the day you plan to serve it, it will look perfect. If you leave the crushed Oreos on, they might start to look a little damp after a couple of days. Everything still tastes delicious, though! Once you slice into it, cover the cut end with plastic wrap to keep the remaining pie fresh.
Can You Freeze This Creamy Oreo Dessert?
This is a question I get a lot, especially around the holidays when my freezer space gets tight. My rule of thumb for any pie that uses stabilized whipped cream or Cool Whip is: be careful with freezing!
If you freeze this Oreo Pie, the texture of the creamy filling can change once it thaws. The fat and water molecules separate a bit when frozen and then thawed unevenly, which can make the filling weep or seem looser than when you first put it in. That perfect fluffy texture we worked so hard for might not come back completely.
If you absolutely must freeze it—maybe you made it for a future event—make sure it’s completely firm. Wrap the *entire, uncut* pie tightly in two layers of plastic wrap, followed by a layer of foil. It should last okay in the freezer for about a month. When you thaw it, you *must* do it slowly in the refrigerator overnight. Don’t ever thaw this kind of pie at room temperature! It needs that slow return to cold. If you’re looking for something that freezes better, check out my recipe for Cranberry Brie Bites—those freeze and reheat like a dream!
Variations: Chocolate Oreo Pie and Oreo Cheesecake Pie Ideas
One of the best things about having a foundational recipe like this simple Oreo Pie is that you can spin it in so many fun, delicious directions! While the classic cookies and cream version we just made is absolutely top-tier, sometimes you need a little something extra—maybe more chocolate, or maybe a tangier, richer cheesecake vibe. I love adapting these easy, no-bake classics to suit whatever mood I’m in.
Don’t feel constrained by what’s written! Every cook needs to play a little, and these adjustments are simple enough that they won’t disrupt the basic structure of the pie. If you are a fan of richer chocolate flavors and want something deep and dark, or if you crave that wonderfully dense tanginess, keep reading. These tweaks turn our already great pie into a spectacular Chocolate Oreo Pie or a marvelous Oreo Cheesecake Pie.
Taking It Deeper: The Chocolate Oreo Pie Idea
If your family leans heavily into the chocolate side of things—and trust me, mine certainly does when Jun gets involved—you might want to boost the cocoa factor significantly. We used plain cream cheese and whipped topping, which keeps the filling light colored, but we can easily pivot this into a true Chocolate Oreo Pie.
The easiest way to deepen that flavor profile is to swap out the powdered sugar and vanilla for instant pudding mix. Instead of the powdered sugar and the vanilla extract in Step 3 of the filling, try beating in one small box (around 3.4 ounces) of *instant chocolate pudding mix* along with your softened cream cheese. You will need to add a bit more liquid, usually about 1/2 cup of cold milk, to the cream cheese mixture before folding in the whipped topping. This gives you a truly rich, silky dark chocolate mousse texture that sets up beautifully and tastes incredibly decadent.
For an even bigger chocolate flavor profile, try using chocolate cream sandwich cookies (like the Double Stuf variety) for the entire crust and replacing the plain vanilla extract with a teaspoon of dark rum flavoring (if you’re making this for adults only!).
Adding Tang: The Oreo Cheesecake Pie Twist
Now, if you prefer that slightly firmer, tangier filling that reminds you of a true cheesecake, but you still don’t want the oven involved, this variation is for you. This takes us right into the realm of Oreo Cheesecake Pie.
Here’s the main switch: you cut the amount of whipped topping by half, and you swap out the texture-giving whipped topping for a full block of cream cheese and use a bit more sugar to balance the tang. For the filling, you’ll use the full 8 ounces of cream cheese (as listed in the main recipe), but you’ll omit the 12 ounces of whipped topping entirely. Instead, beat in 1/2 cup of cold heavy cream until soft peaks form, and then gently fold that into your sweetened cream cheese base.
This results in a denser, richer mouthfeel that tastes exactly like a chilled cheesecake but is still super easy to handle and sets up perfectly in the fridge. It still complements that crunchy crust wonderfully. If you are a fan of creamy desserts, you might also look at my recipe for Mint Pots de Crème; it’s another chilled treat that satisfies those smooth dessert cravings!
Frequently Asked Questions About This Easy Oreo Pie Recipe
It’s always nice when people reach out with questions about how to make sure their Easy Oreo Pie turns out absolutely perfect. These are the dishes that become family favorites, and I want to make sure everyone has a smooth experience! Since this No Bake Oreo Pie recipe is so simple, most questions focus on speed and texture, and I’m happy to clear those up for you. If you’re looking for more quick-fix ideas, you can always check out my general recipe index right here at Spoon & Sprout!
Can I make this a baked dessert instead of a No Bake Oreo Pie recipe?
That’s an interesting thought, but I would strongly advise against it! This pie is specifically designed to be a chilled, no-bake marvel. The structure relies entirely on the cream cheese and the whipped topping chilling and stabilizing in the refrigerator. If you put it in the oven, the fats would melt, the whipped topping would deflate or separate completely, and you wouldn’t end up with a creamy pie—you’d end up with a hot, runny mess. Stick to the chill time; that’s the only “cooking” we do here!
What is the best way to crush Oreos for the crust?
Oh, I have a few methods depending on how much energy I have! If you’re aiming for that speedy 20 Minute Oreo Pie prep time, a food processor is your absolute best friend. Pulse those cookies until they look like fine, dark sand. If you don’t have a processor, don’t worry. Put the cookies in a sturdy zip-top bag, push out most of the air, and then grab a rolling pin or the bottom of a heavy saucepan. Just bash away until they are finely crushed. It’s actually quite therapeutic!
People mention a Three Ingredient Dessert option—is this recipe like that?
That’s a great question! Yes, you can certainly strip this down to its bare bones if you need the absolute quickest option, maybe turning it into a true Three Ingredient Dessert. The core ingredients that hold the structure for the quick version are the cookie crumbs, the melted butter for the crust, and the thawed whipped topping. You would skip the cream cheese and powdered sugar, which means you lose the richness that makes this recipe so decadent. My version has more steps, but trust me, the cream cheese is what makes this filling so spectacularly creamy Oreo Dessert style!
Is the chilling time really important for this simple Oreo Dessert?
Yes, yes, and yes again! I know waiting is the hardest part, especially when you have a beautiful Oreo Pie sitting in the fridge tempting you, but it is non-negotiable. If you are short on time, you can chill it in the freezer for about 90 minutes, but you must let it sit on the counter for 15 minutes before attempting to slice it, or it will crack everywhere. For the best texture, plan for that 4-hour minimum chill time in the refrigerator. That time allows the cream cheese to firm up beautifully against the set butter in the crust.
Nutritional Estimates for a Slice of Oreo Pie
I always tell Mei that when we cook from the heart, we aren’t doing this for the numbers, we are doing it for the joy and the memories! However, I know that for many of you planning meals or managing diets, getting a rough idea of what’s in that glorious slice of Oreo Pie is helpful. Since this is a rich, creamy dessert, it definitely leans towards indulgence, which is perfect for a treat!
Below are the general estimations based on the ingredients listed in the recipe above. Please know that these values are just guides. If you use a different brand of cookie, or if you opt for homemade vs. store-bought whipped topping, these numbers will shift a bit. Think of this as a helpful suggestion, not a strict guarantee!
Here is the breakdown for one slice, assuming you get 8 perfect slices from the whole pie:
- Serving Size: 1 slice
- Calories: Roughly 380 Calories
- Total Fat: About 24g (Be mindful of the saturated fat content, around 13g)
- Carbohydrates: Approximately 38g
- Sugar: Around 28g (It is a dessert, after all!)
- Protein: About 4g
- Sodium: Roughly 250mg
- Cholesterol: Nearly 45mg
This is definitely the kind of Quick Dessert Recipes component that you enjoy with a cup of coffee or as an afternoon indulgence. It’s all about balance in our kitchen, and sometimes balance means enjoying something wonderfully rich and decadent like this Simple Oreo Dessert!
Share Your Experience with This Simple Oreo Dessert
Well, friends, that’s the spoon hitting the counter on this beautiful, easy Oreo Pie! I truly hope you give this a try. There is nothing that makes my day more rewarding than knowing that one of our family’s favorite, simple treats is bringing joy to your table. Mei and I work hard to find that perfect balance between deep comfort and fresh inspiration, and I think this creamy, dreamy pie leans beautifully into the comfort zone.
So, when you manage to whip up this ultimate Quick Dessert Recipes favorite—and I know you will do great—please don’t be shy! Come right back here and tell me all about it in the comments below. Did you make the Chocolate Oreo Pie variation? Did you stick to the classic? Did you try adding a dash of coffee extract to the filling? I absolutely live to read about your kitchen adventures.
Rate us below once you’ve tasted it; those stars really help others find us when they’re looking for the best Simple Oreo Dessert! I thrive on knowing that this recipe worked perfectly for you, delivered that cool, satisfying bite, and perhaps even earned you a satisfied sigh from your own ‘Spoon’. If you have any lingering questions about the chilling time or substitutions, feel free to drop those in as well. You can always reach out directly through our contact page here: Let us know how your Oreo Pie turned out!
We love hearing from you and helping you find that perfect, delicious balance in your own kitchens. Happy baking, or, in this case, happy chilling!
PrintEasy No Bake Oreo Pie: Creamy and Fluffy Dessert

This no-bake Oreo Pie recipe delivers a rich, creamy filling and a crunchy chocolate cookie crust. It is a simple, quick dessert perfect for parties or warm weather when you want something decadent without turning on the oven.
- Prep Time: 20 min
- Cook Time: 0 min
- Total Time: 4 hr 20 min
- Yield: 8 servings
- Category: Dessert
- Method: No Bake
- Cuisine: American
- Diet: Vegetarian
Ingredients
- 1 1/2 cups Oreo cookie crumbs (about 30 cookies)
- 6 tablespoons unsalted butter, melted
- 1 (8 ounce) package cream cheese, softened
- 1 cup powdered sugar
- 1 teaspoon vanilla extract
- 1 (12 ounce) container frozen whipped topping, thawed (or equivalent homemade whipped cream)
- 1 cup crushed Oreo cookies (for topping)
Instructions
- Prepare the crust: Mix the Oreo cookie crumbs and melted butter together in a bowl until the crumbs are evenly moistened.
- Press the crumb mixture firmly into the bottom and up the sides of a 9-inch pie plate. Place the crust in the freezer while you prepare the filling.
- Make the creamy filling: In a large bowl, beat the softened cream cheese until smooth. Gradually beat in the powdered sugar and vanilla extract until fully combined and creamy.
- Gently fold the thawed whipped topping into the cream cheese mixture until no streaks remain. Be careful not to deflate the whipped topping.
- Stir in 1/2 cup of the crushed Oreo cookies into the filling mixture.
- Spoon the creamy filling evenly into the chilled Oreo crust. Smooth the top with a spatula.
- Sprinkle the remaining 1/2 cup of crushed Oreo cookies over the top of the pie for garnish.
- Chill the Oreo Pie in the refrigerator for at least 4 hours, or until firm. For best results, chill overnight.
- Slice and serve this easy Oreo Pie cold.
Notes
- For an even richer chocolate flavor, use chocolate pudding mix in place of the powdered sugar and cream cheese for a variation of this cookies and cream pie.
- If you are short on time, you can use a pre-made graham cracker or Oreo crust.
- This recipe works well as a make-ahead party dessert since it must be chilled before serving.
Nutrition
- Serving Size: 1 slice
- Calories: 380
- Sugar: 28g
- Sodium: 250mg
- Fat: 24g
- Saturated Fat: 13g
- Unsaturated Fat: 11g
- Trans Fat: 0.5g
- Carbohydrates: 38g
- Fiber: 1g
- Protein: 4g
- Cholesterol: 45mg