

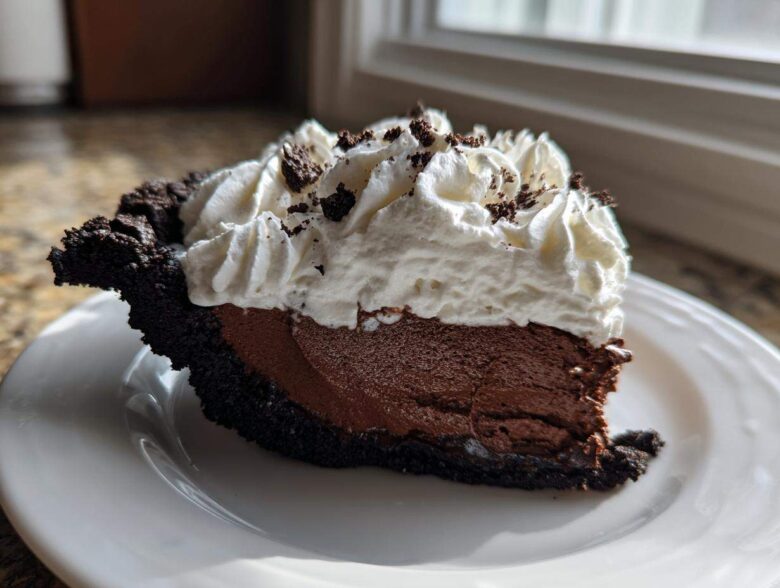
Oh, darling, forget the fussy French patisserie! If you are craving something so rich, so intensely chocolatey, that it makes your eyes roll back, but you absolutely cannot deal with turning on the oven? I have the answer you’ve been looking for. After years of messing around with custards and tempering eggs, I finally landed on my absolute favorite recipe: the chocolate mousse pie that tastes like a million bucks but takes barely any effort. This easy, no-bake version sets up beautifully and gives you that gorgeous, light-as-air texture everyone dreams about. Trust me; this is the ultimate dessert standby for when you need to impress!
Why This Easy No-Bake Chocolate Mousse Pie Recipe Works
Listen, I love my oven, but sometimes the best desserts are the ones that skip the heat entirely. This **chocolate mousse pie** is my go-to when the summer heat is brutal or when I’m just too busy whipping up appetizers!
What makes this recipe shine is how it delivers on texture without needing stabilizers or complicated processes. It hits all the right notes:
- No turning on the oven—hello, cool kitchen!
- It uses simple ingredients you probably have on hand.
- The whole result is unbelievably creamy, not heavy or dense like a ganache.
It’s the perfect compromise when you want a truly decadent mousse but need a quick, elegant finish.
Achieving the Light and Airy Dessert Texture
The secret to that amazing, fluffy texture is all in the folding, my friend. We whip the heavy cream until it holds stiff peaks, and then we incorporate it gently into the cooled, melted chocolate. You have to fold, not stir! Folding carefully traps all those lovely air bubbles from the cream, which is exactly what transforms a thick chocolate paste into a truly light and airy dessert.
Make Ahead Pie Recipes for Stress-Free Hosting
If you’re planning a busy holiday or a dinner party, this falls right into my favorite category of make ahead pie recipes. You finish assembling it, tuck it into the fridge, and forget about it until serving time! The long chill time isn’t just for setting; it lets those rich chocolate flavors really deepen and marry together beautifully.
Ingredients for Your Creamy Chocolate Pie
If you want a truly creamy experience, you can’t skimp on the quality here. This isn’t the time for cheap chocolate chips, trust me! I’ve broken the list down into the three parts we assemble: the crust, the amazing filling, and that fluffy topping. Each piece contributes something essential to our wonderful chocolate mousse pie recipe.
You’ll need 1 1/2 cups of fine chocolate wafer crumbs—that’s usually about 30 small cookies, crushed super fine. We mix that with 1/4 cup of sugar and 6 tablespoons of melted butter. For the mousse, grab 8 ounces of high-quality bittersweet chocolate, chopped, and your heavy cream—make sure that cream is ice cold!
Oreo Crust Pie Component Details
Okay, so I list chocolate wafers because that’s my favorite crunch—it complements the filling perfectly. But if you only have Oreos, go for it! Just make sure you remove the white cream filling first, or your crust will be too sweet and soft. You need that dense, buttery base to hold up our airy filling. Press it in firmly! We want a sturdy foundation for our **oreo crust pie**.
Homemade Chocolate Mousse Filling Essentials
When picking your chocolate, go bittersweet, around 60% to 70% cocoa content. That gives you a rich flavor without making the final pie taste bitter. The heavy cream absolutely must be cold; that’s non-negotiable for whipping up those crucial medium peaks. If you want an extra-firm mousse—maybe you live somewhere super humid—I sometimes dissolve 1 teaspoon of unflavored gelatin in a splash of hot water and stir that into the melted chocolate mixture before folding. It’s my little trick for guaranteeing structural integrity!
Step-by-Step Instructions for the Chocolate Mousse Pie
Okay, this is the fun part where all the measuring pays off! Remember, since this is a no-bake recipe, our main job is careful assembly and chilling time. I’m going to walk you through the layering process so you end up with that perfect, stunning slice of **creamy chocolate pie** you’re picturing.
Building and Chilling the Oreo Crust Pie
First up, let’s get that base ready. In a simple bowl, mix all your crumbs, the 1/4 cup of sugar you’re using for the crust, and the melted butter. You want it to look like wet sand—that means it’ll hold together! Press this mixture down into your 9-inch pie plate. I use the bottom of a measuring cup to really pack it tight along the bottom and up the sides. This step is important so your crust doesn’t crumble when you slice it later. Once it’s packed snugly, slide that beauty into the fridge for at least 30 minutes. It needs that solid chill before the mousse goes in.
Creating the Rich Dark Chocolate Pie Mousse Filling
While the crust is chilling, we tackle the chocolate. I melt my bittersweet chocolate using what I call the ‘hot water bath’ method, but much quicker—just pour that simmering 1/4 cup of water right over the chopped chocolate! Let it sit undisturbed for two full minutes, then stir until it’s glossy smooth. Stir in your vanilla. Now, this is critical: let that chocolate mixture cool down for about 10 minutes. If it’s too hot, it will melt your whipped cream! Meanwhile, beat your main cup of cream with the 1/4 cup of powdered sugar until you get medium peaks. Then, gently fold about a third of that whipped cream into the cooled chocolate to lighten it up. Once that’s mostly blended, gently fold that lighter chocolate mixture back into the rest of the whipped cream. Fold, fold, fold—don’t stir aggressively! We need that air for our **light and airy dessert**!
Finishing with the Whipped Cream Topping Pie
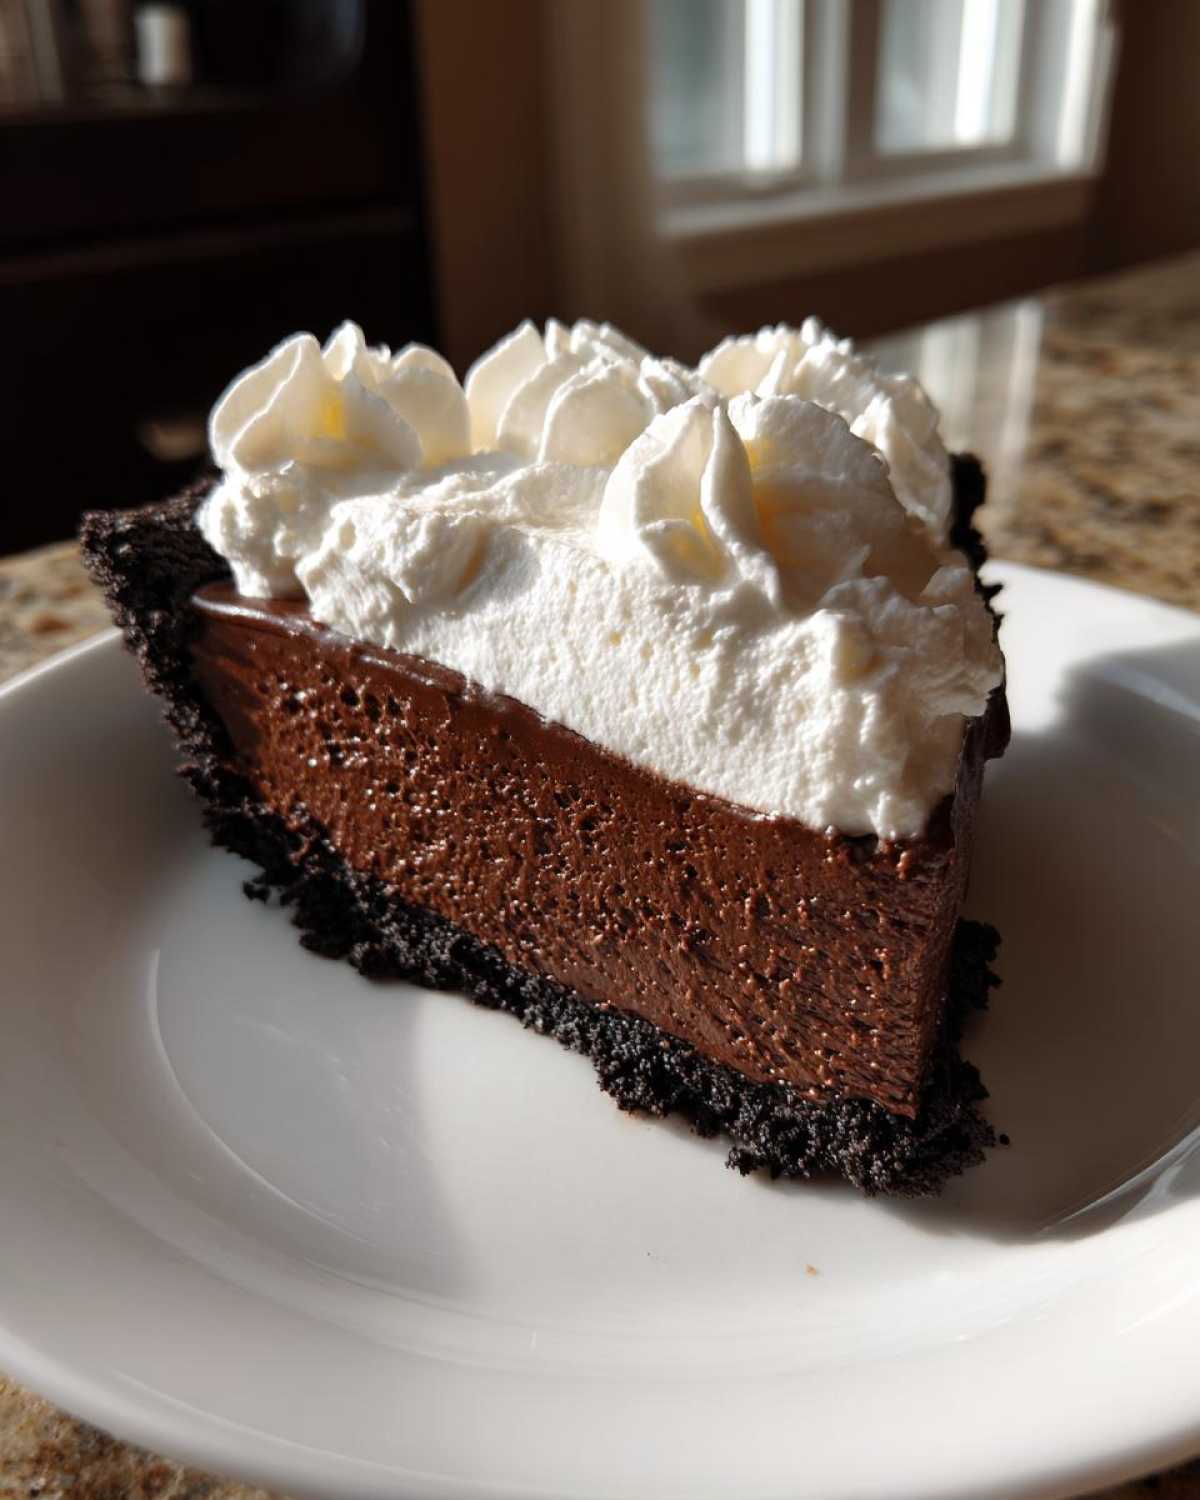
Spoon that glorious mousse into your chilled crust and smooth the top. That goes back into the fridge for at least 4 hours—I usually leave it overnight if I can! The final flourish happens right before you serve it. Take your remaining half cup of cold cream and beat it up fiercely with that last teaspoon of powdered sugar until stiff peaks appear on my classic chocolate pie topping. Spread that perfectly piped or swooped cream right on top. A few chocolate shavings for good measure, and you’re done!
Tips for the Ultimate Chocolate Dessert Success
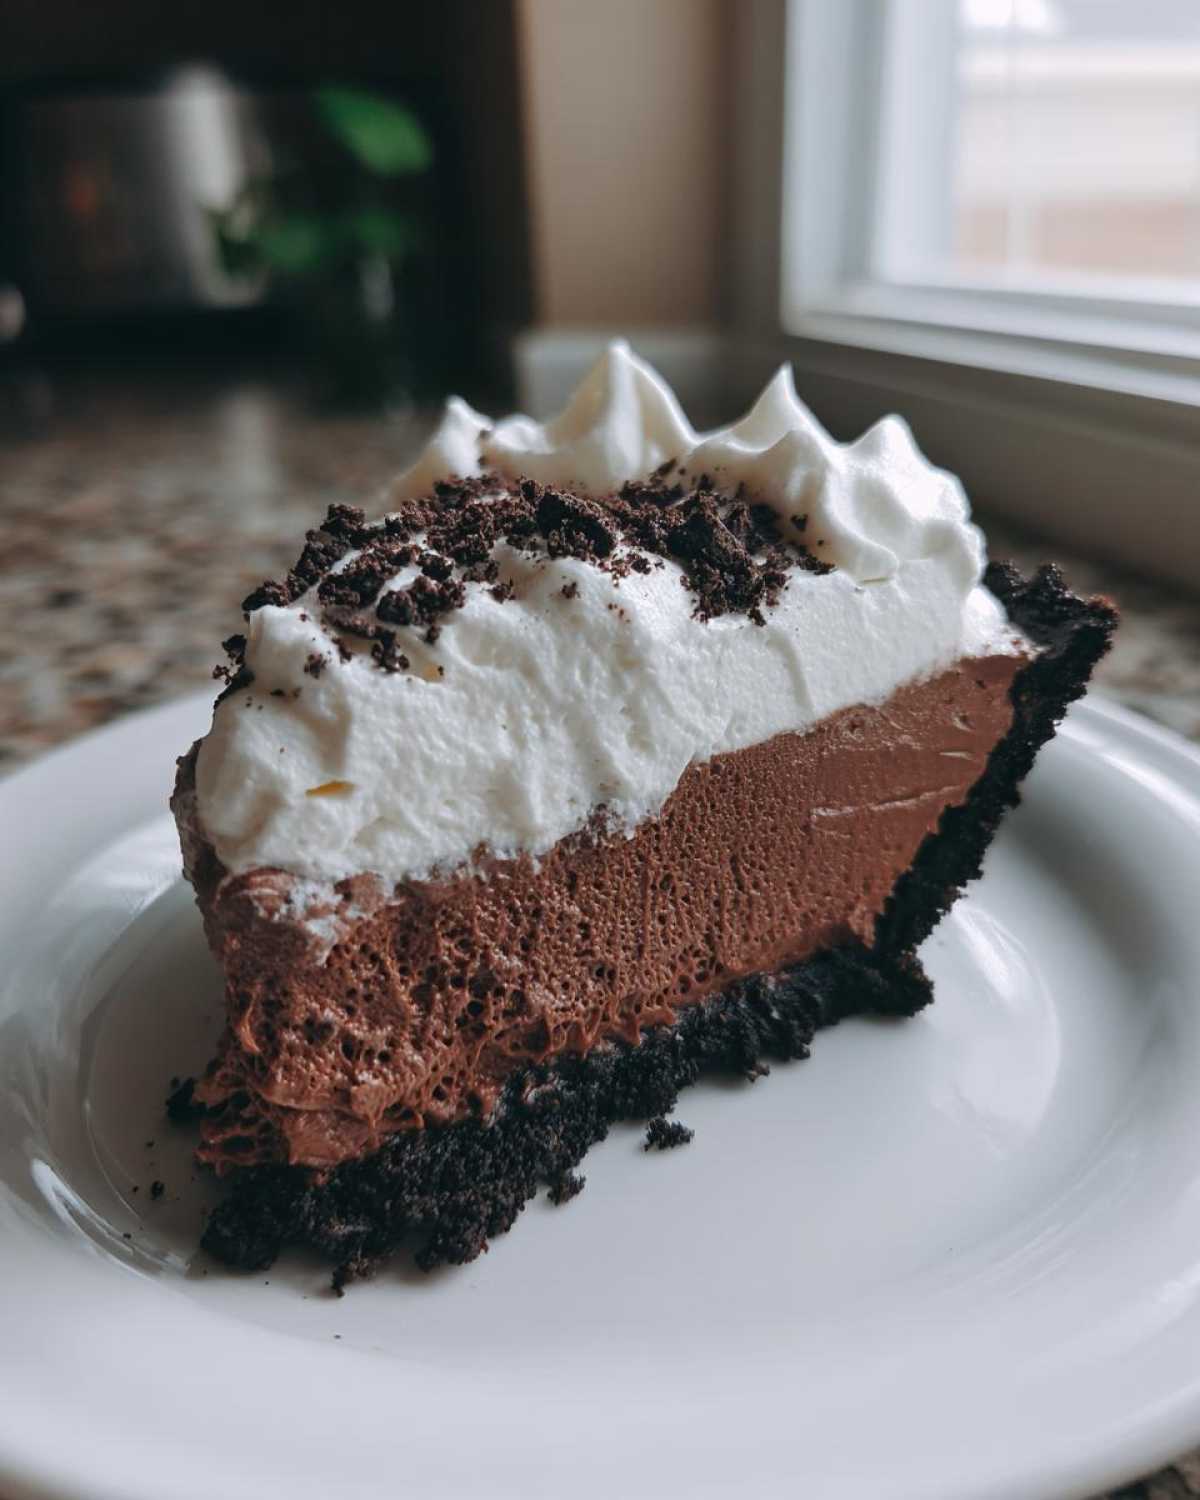
Even though this is a no-bake recipe, there are little secrets to making this the absolute **ultimate chocolate dessert** centerpiece for your table. Don’t stress, though; these tips are easy to follow, and they ensure your mousse sets up perfectly creamy every single time. I learned these the hard way, so you don’t have to!
Ingredient Notes and Chocolate Substitutions
We talked about the bittersweet chocolate already, but let me be clearer: if you use milk chocolate here, the texture will change because it has too much sugar and not enough cocoa solids to balance the cream. It might not set right! Also, remember that if you’re subbing Oreos for the wafers, you need to scrape out that white filling. That filling is mostly fat and sugar that won’t incorporate well into the crust, leaving you with greasy, crumbly edges.
Troubleshooting Common Chocolate Mousse Pie Issues
If your finished pie is too soft that it slumps when you slice it? Chances are the chocolate wasn’t cool enough before you folded in the whipped cream, or you didn’t chill it long enough. The mousse needs that solid 4 hours, minimum! If your heavy cream just won’t whip up to stiff peaks, check the temperature. If the bowl or beaters are even slightly warm, the fat won’t hold the air structure needed for that amazing homemade chocolate mousse filling.
Serving Suggestions for Your Chocolate Mousse Pie
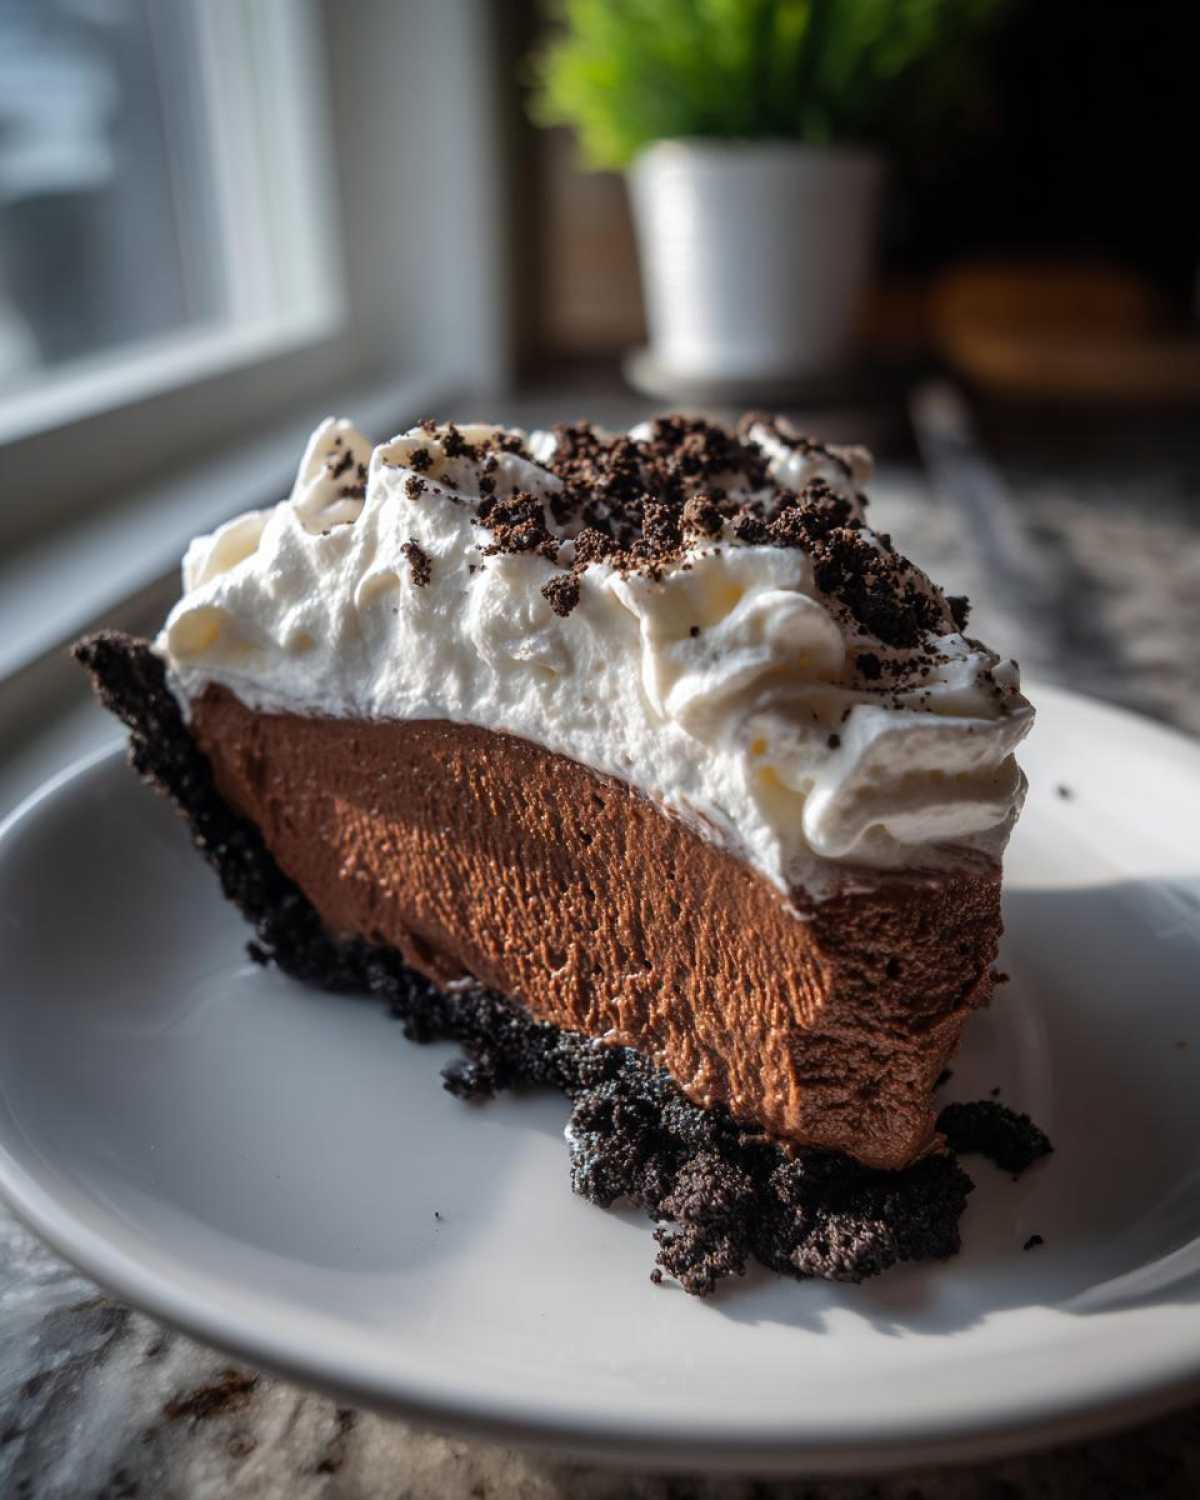
Now that you have this absolutely spectacular, no-bake **chocolate mousse pie** firm and chilled, it’s time to make it look like the showstopper it is! This is one of those special occasion desserts that deserves a little flourish on top. You don’t need to stress over complicated décor, though—a few simple touches make all the difference.
If you’re feeling simple, a light dusting of high-quality unsweetened cocoa powder right before serving gives it a beautiful, matte finish. I love how that bitterness plays against the sweet mousse. For a bit more texture, grab a vegetable peeler and shave off some of the same bittersweet chocolate you used in the filling. Those curls look elegant when scattered across the whipped cream topping!
If you want to bump up the elegance even further, consider serving individual slices alongside something bright. A side of fresh raspberries or perfectly ripe strawberries cuts through the richness of the dark chocolate so well. We have a fantastic recipe for creamy chocolate desserts that uses mint cream, and a tiny dollop of mint-infused whipped cream next to the chocolate slice? Heaven! It just brings a lovely freshness that cleanses the palate after that rich, creamy bite.
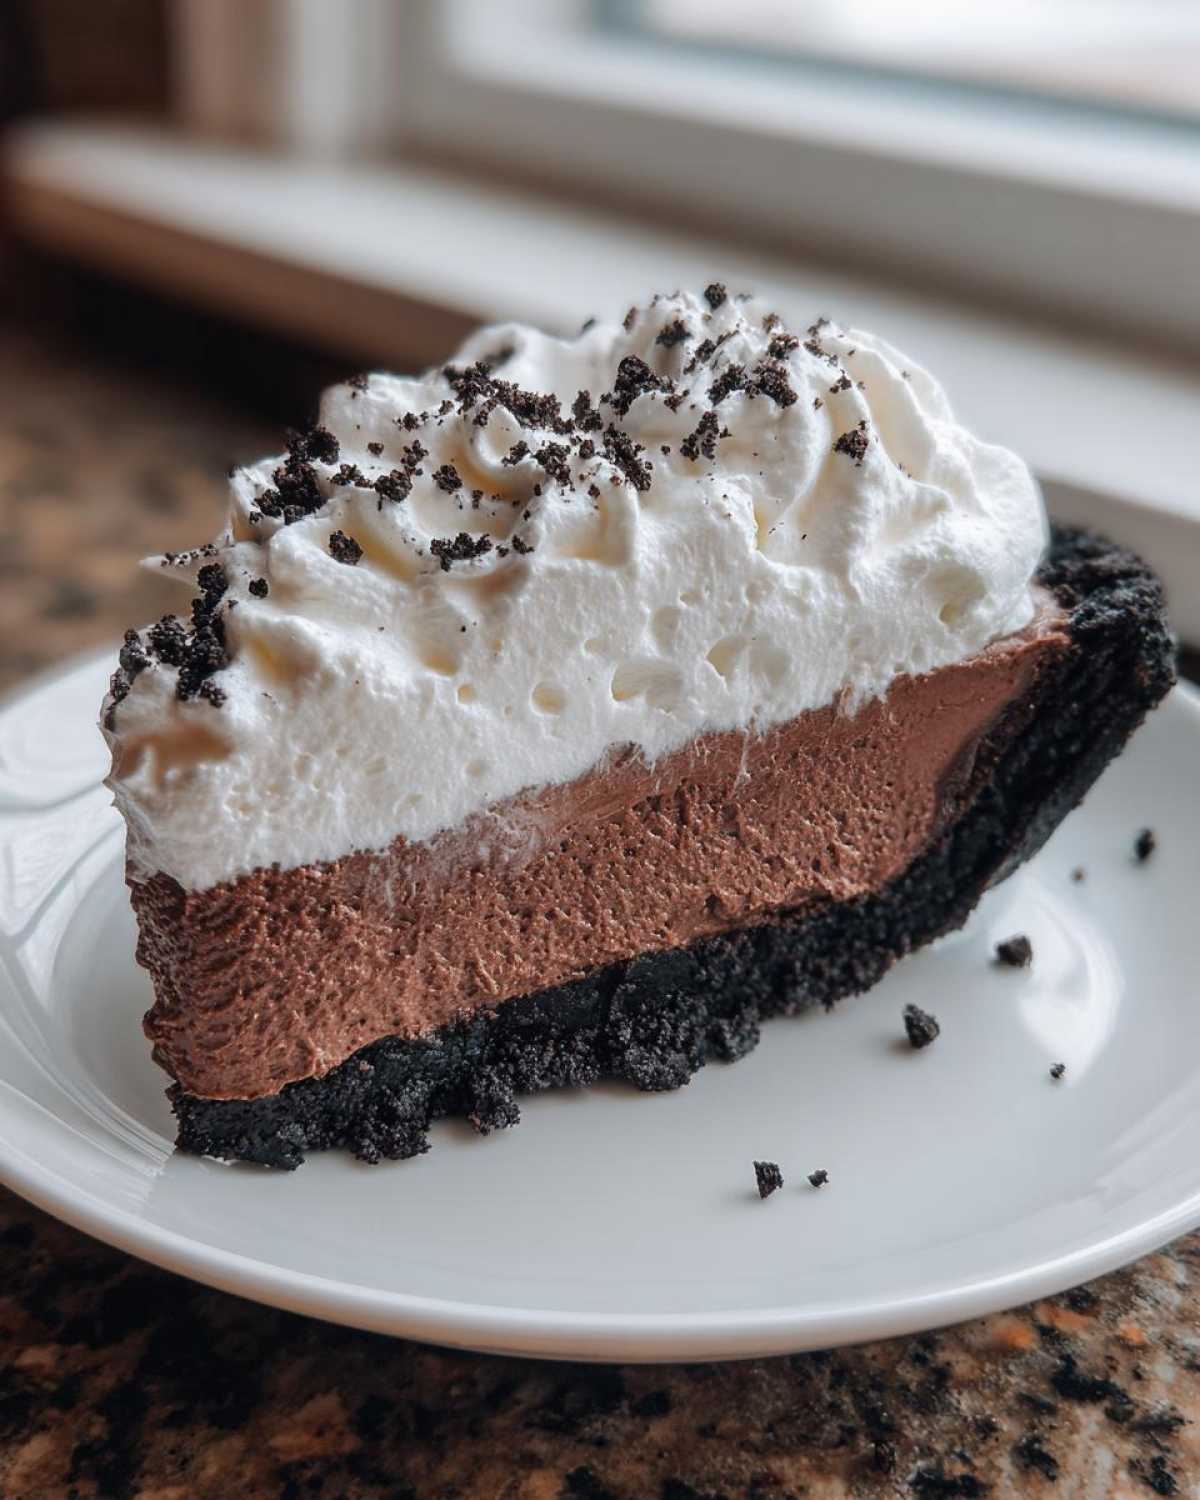
If you’re using a springform pan, let the ring go *just* before serving and place the whole pie on a pretty cake stand. The clean edges of the **oreo crust pie** look so sharp against the soft mousse. Remember, presentation is half the fun when you’ve made something this decadent!
Storing Your No Bake Chocolate Pie
Since this no bake chocolate pie relies on whipped cream and a chilled set, storage is super easy, but you do need to be mindful of time. The structure is delicate! You absolutely cannot try to reheat this—it would turn into a sad puddle of melted cream and chocolate, so we are purely talking refrigeration here.
Once the mousse is fully set (after those mandatory 4+ hours), you want to keep it covered tightly in the fridge. I usually use plastic wrap, but you have to be careful not to let the wrap touch the whipped cream topping unless you want to peel off your beautiful swirls later! If you think the plastic might stick, tent it loosely over the top, or better yet, use a large cake dome if you have one that fits over the plate.
Ideally, this amazing **chocolate mousse pie** is best eaten within 24 hours. Why? Because the texture of the homemade mousse filling starts to change slightly after that mark, and the whipped cream can weep a little moisture. It’s still perfectly safe, but it won’t have that amazing ‘light and airy’ quality you worked so hard to create.
If you need to make it *really* ahead of time—say, for a big event—you have two choices. Assemble the crust and the filling up to 2 days in advance, cover it snugly, and skip the topping. Keep it chilled, and then whip your topping fresh on the day you plan to serve it. That ensures maximum freshness for your [rich dark chocolate pie]. If you try to keep the whipped cream on for more than 12 hours, it just doesn’t look quite as perky.
If you happen to have leftovers (big if, I know!), store the slices in an airtight container. This simple **creamy chocolate pie** holds up decently in the fridge for three days total, but honestly, the magic happens on day one!
Frequently Asked Questions About This Chocolate Mousse Pie Recipe
I knew you’d have questions! When you’re dealing with something this **decadent mousse dessert**, it’s smart to double-check. These are the things I always get asked about after folks see this amazing **chocolate mousse pie**. Hopefully, these quick answers save you a second trip to the fridge!
Can I make this chocolate mousse pie ahead of time?
Absolutely, you can! In fact, I encourage it. This is one of the best easy chocolate dessert options because it frees up your oven and your evening. You should chill the assembled pie for at least 4 hours for any setup, but for the absolute best flavor and texture, I recommend making it two days ahead of time. Just make sure you only add the fresh **whipped cream topping pie** layer right before you serve it, or it might wilt a bit!
What is the best chocolate to use for a rich dark chocolate pie?
For this recipe, you really want the bittersweet stuff. I usually look for chocolate that’s between 65% and 70% cocoa. If you use semi-sweet, it’s still okay, but your final **rich dark chocolate pie** won’t have that deep, complex flavor that really balances the sweetness of the crust and the cream. Milk chocolate? I’d strongly advise against it for this mousse; it usually doesn’t have enough solids to help the chocolate set firmly enough with only the water method.
Can I use graham crackers instead of chocolate wafers for the crust?
You definitely can, but you’re going to lose some of that deep chocolate flavor we’re aiming for! If you do use graham crackers, you must increase the sugar in the crust slightly, and I highly recommend adding about 2 tablespoons of cocoa powder to the crumbs to match the dessert’s profile. Otherwise, you’ll end up with a sweet, salty base under a dark mousse.
How do I make sure the homemade chocolate mousse filling is extra smooth?
The trick here is patience after you melt the chocolate. You *must* let that chocolate mixture cool down until it’s just lukewarm—about skin temperature—before you start folding in any of the whipped cream. If you dump that hot chocolate into the fluffy cream, you’ll deflate all the air, and you won’t get that wonderful **light and airy dessert** texture. Always let it cool slightly!
Estimated Nutritional Information for this Chocolate Mousse Pie
Now, I want to give you a little heads-up about the numbers! I’m not a food scientist, so treat these figures as a **very** good ballpark estimate. If you swap oat milk for heavy cream or use a different type of chocolate, those macros will certainly shift around on you. These estimates are based on my standard recipe using the ingredients listed—especially that buttery crust and the full whipped cream topping.
We need to know what we’re diving into, right? This is a truly **decadent mousse dessert**, so obviously, it’s not low-cal, but wow, is it worth every single bite of that **creamy chocolate pie** experience!
Here’s what you can generally expect per slice (based on 8 servings):
- Serving Size: 1 slice
- Calories: Roughly 450 kcals
- Fat: About 32 grams (mostly from the cream and butter)
- Saturated Fat: Hanging around 18 grams
- Carbohydrates: Around 38 grams
- Sugar: Approximately 35 grams (that’s the fun part!)
- Protein: 6 grams
- Cholesterol: Around 95 mg
See? It’s rich, but that’s what makes it a showstopper **special occasion dessert**! The good news is that since this is a dessert you generally serve only on holidays or big events, enjoying a slice of this incredible **easy chocolate dessert** fits right into celebrating!
Just remember, these figures are estimates for my version of the **chocolate mousse pie recipe**. If you use sugar substitutes or lighter cream, your totals will look different. But for the authentic, rich experience, these numbers reflect that pure chocolate joy!
Share Your Decadent Mousse Dessert Creations
Now that you’ve made your own glorious **chocolate mousse pie**, I desperately want to see it! Don’t keep that beauty a secret. Head down below and leave a rating—was it the creamiest **creamy chocolate pie** you’ve ever tasted? Tell me about your crust success or any swirl techniques you perfected on top!
If you snapped a picture of your finished **decadent mousse dessert**, share it on social media and tag me! I love seeing your creations coming out of your kitchens. Check out the rest of my favorite desserts while you’re here!
PrintEasy No-Bake Chocolate Mousse Pie with Oreo Crust
Make a rich, creamy, and light chocolate mousse pie without turning on your oven. This recipe uses a simple Oreo crust and a stabilized whipped cream topping.
- Prep Time: 25 min
- Cook Time: 0 min
- Total Time: 4 hr 25 min
- Yield: 8 servings
- Category: Dessert
- Method: No-Bake
- Cuisine: American
- Diet: Vegetarian
Ingredients
- 1 1/2 cups chocolate wafer cookie crumbs (about 30 cookies)
- 1/4 cup granulated sugar
- 6 tablespoons unsalted butter, melted
- 1 cup heavy cream, cold
- 8 ounces bittersweet chocolate, chopped
- 1/4 cup water
- 1 teaspoon vanilla extract
- 1/4 cup powdered sugar
- 1/2 cup heavy cream, cold (for topping)
- 1 teaspoon powdered sugar (for topping)
Instructions
- Prepare the crust: Combine cookie crumbs, 1/4 cup granulated sugar, and melted butter in a bowl. Press the mixture firmly into the bottom and up the sides of a 9-inch pie plate. Chill the crust for at least 30 minutes.
- Melt the chocolate: Place the chopped bittersweet chocolate in a heatproof bowl. Heat 1/4 cup water until simmering, then pour it over the chocolate. Let it sit for 2 minutes, then stir until the chocolate is completely smooth. Stir in the vanilla extract. Let the mixture cool slightly, about 10 minutes.
- Make the mousse base: In a separate bowl, beat 1 cup of cold heavy cream with 1/4 cup powdered sugar until medium peaks form.
- Fold the chocolate into the cream: Gently fold about one-third of the whipped cream into the slightly cooled chocolate mixture to lighten it. Then, fold the lightened chocolate mixture back into the remaining whipped cream until just combined and no streaks remain. Do not overmix.
- Fill the pie: Spoon the mousse filling evenly into the chilled Oreo crust. Smooth the top with a spatula.
- Chill the pie: Refrigerate the pie for at least 4 hours, or until the mousse is firm.
- Prepare the topping: Just before serving, beat the remaining 1/2 cup cold heavy cream with 1 teaspoon powdered sugar until stiff peaks form. Spread or pipe the whipped cream over the chilled pie.
- Garnish: Sprinkle the top with extra chocolate shavings, if desired. Slice and serve cold.
Notes
- For a firmer mousse, you can substitute 1 teaspoon of unflavored gelatin dissolved in 2 tablespoons of hot water for 2 tablespoons of the water used to melt the chocolate. Add the dissolved gelatin to the melted chocolate mixture before folding in the whipped cream.
- Use high-quality dark chocolate for the best flavor in the mousse.
- If you do not have chocolate wafers, you can substitute with Oreo cookies (remove the cream filling first).
Nutrition
- Serving Size: 1 slice
- Calories: 450
- Sugar: 35
- Sodium: 250
- Fat: 32
- Saturated Fat: 18
- Unsaturated Fat: 14
- Trans Fat: 0
- Carbohydrates: 38
- Fiber: 3
- Protein: 6
- Cholesterol: 95