

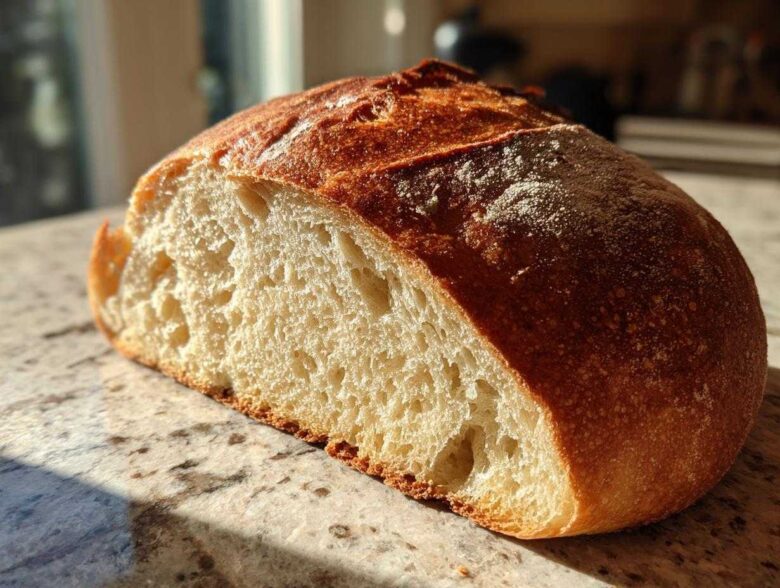
I used to think that truly *amazing* Italian bread—that perfect symphony of a crunchy, golden crust giving way to an airy, chewy center—was something only the professionals at an Italian bakery could manage. I mean, baking bread felt intimidating, right? All that kneading and worrying about yeast!
But wow, am I excited to share this secret with you today. This specific **Easy Crusty Italian Bread Recipe** changed everything for me. It’s unbelievably simple and delivers that bakery-style quality right on your countertop. Seriously, if you’ve ever felt nervous about trying to make homemade bread, this is the recipe that will turn you into a total believer. You get that amazing **crusty exterior** and a wonderfully **soft and chewy interior** every single time. Trust me, you’re going to love it!
Why This Easy Crusty Italian Bread Recipe Works for Everyone
So, why am I so totally sold on this particular method for baking Italian bread? It’s all about ditching the complicated techniques that scare people off while keeping all the good parts that make artisanal bread so magical. This recipe is my go-to because it truly delivers on the promise of **Bakery Style Bread at Home**, even for absolute novices.
It keeps things straightforward, using simple bread ingredients you probably already have. We focus hard on getting those two crucial elements right—the inside and the outside!
- It’s the definition of **Easy Homemade Bread**; no weird equipment needed!
- The short hands-on time means you get that amazing **Aromatic Fresh Baked Bread** scent quicker than you think.
- You get that glorious, loud crunch when you cut into that **Golden Brown Italian Loaf**.
- The inside stays perfectly tender, ready for dipping into your favorite pasta sauce. You can check out more favorite kitchen tips over here if you need them!
Achieving that Perfect Soft and Chewy Italian Loaf Texture
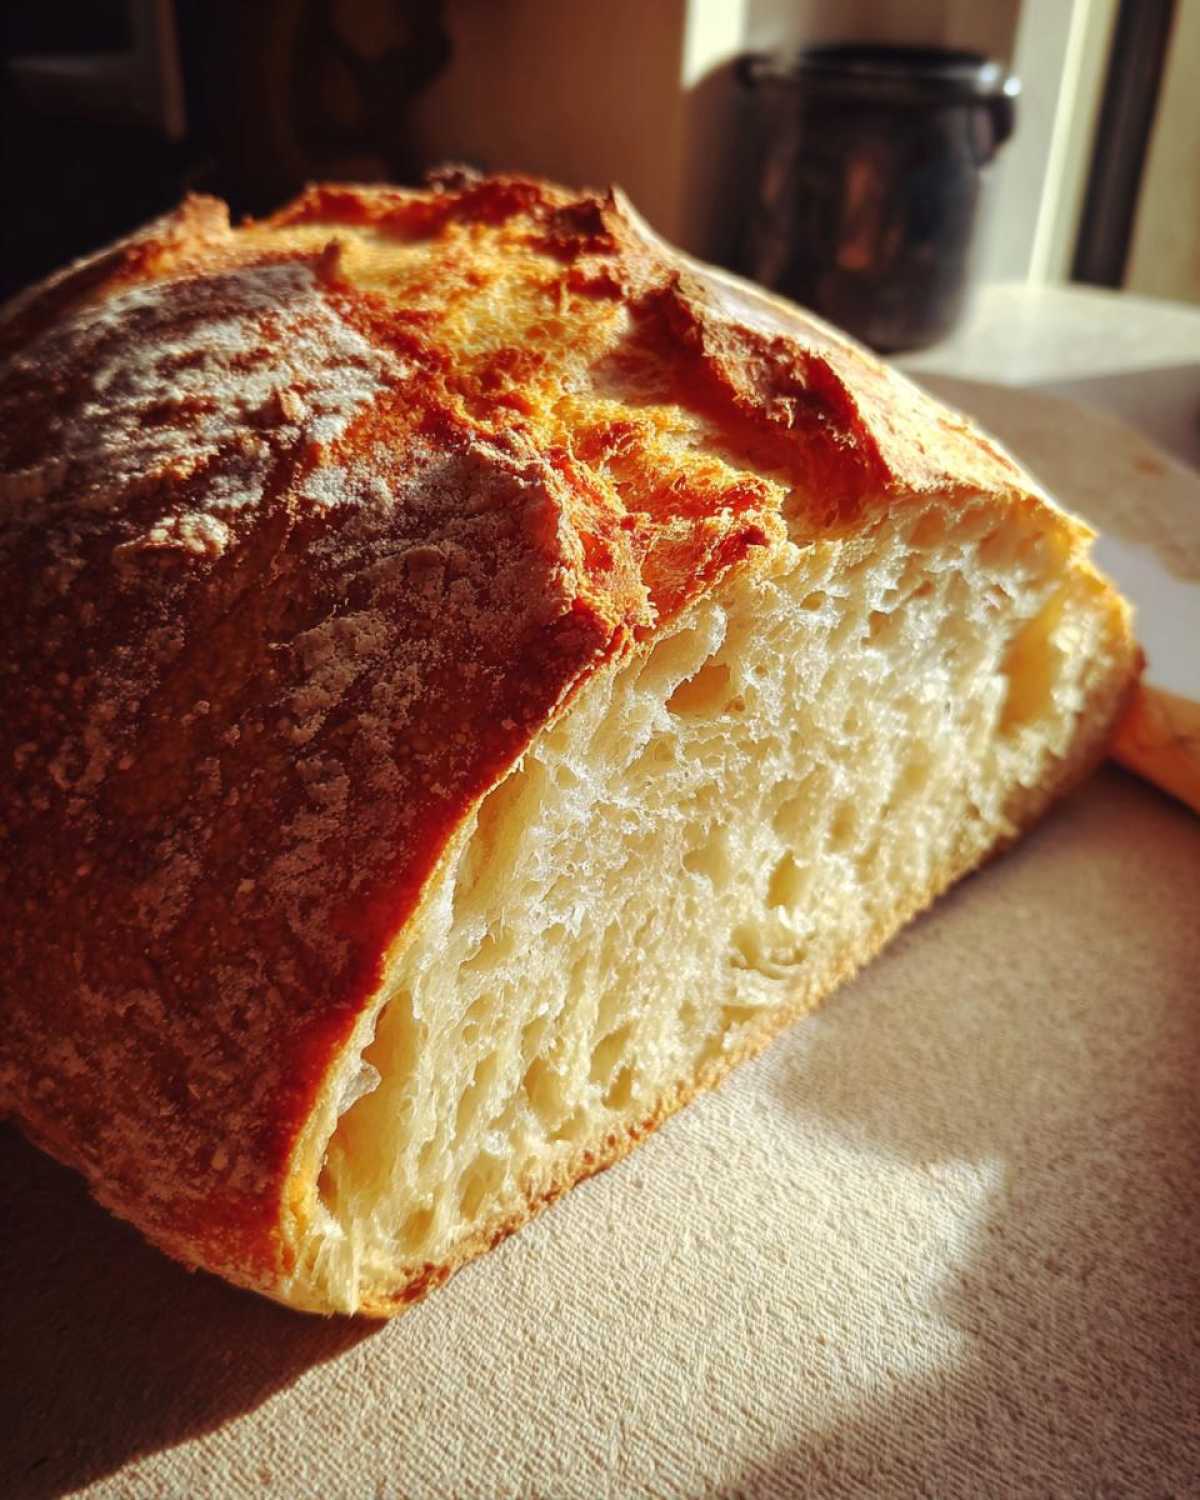
The secret to that **Soft and Chewy Italian Loaf** texture isn’t just the yeast; it’s the hydration level and how long we work the dough. We use just enough warm water to fully hydrate the flour, making that shaggy dough manageable. Kneading for a good five to seven minutes develops the gluten structure. That structure is what traps the gas bubbles, giving you that wonderful, satisfying chewiness rather than a dry, crumbly interior. Don’t rush this part, okay?
Tips for a Truly Crispy Crust Bread Tutorial
If you want that incredible crackle when you slice your bread, you absolutely must pay attention to steam during the first part of the bake. The recipe tells you to put a pan underneath to create steam, which keeps the crust soft initially so the loaf can expand fully—we call that ‘oven spring.’ Once it’s sprung open, the steam evaporates, and the heat dries out the surface to make it crisp!
Here’s my extra tip: after you pour the hot water in the bottom pan, shut the oven door quickly. Then, about five minutes later, quickly open the door and spray the oven walls *twice* with a spray bottle full of water before shutting it tight again. That extra blast locks in the crispiness beautifully!
Simple Bread Ingredients for Your Homemade Italian Bread
You know, the absolute best part about ditching the store-bought stuff is realizing you only need five main ingredients for this bread! I love that simplicity. We aren’t messing around with eggs or fancy milk powders here; this is pure, rustic baking at its finest.
Go ahead and grab these simple bread ingredients before you start the mixing process. Remember, measurement accuracy matters a lot in bread because you want that perfect environment for the yeast to thrive and for us to get that **crusty exterior** we’re aiming for.
- Three lovely cups of all-purpose flour—nothing fancy!
- One teaspoon of instant dry yeast. (If yours is active dry, we’ll talk substitutions later!)
- One and a half teaspoons of good salt.
- One and a quarter cups of warm water. Seriously, get that thermometer out—it needs to be between 105 and 115°F. Too cold, and the yeast snoozes; too hot, and you kill it!
- One tablespoon of olive oil, just for greasing up the bowl later on.
Step-by-Step Instructions for Quick Italian Bread
Okay, deep breaths everyone! This is where the magic really happens on our journey to **Quick Italian Bread**. We’re going to take those simple ingredients and turn them into something loaf-worthy. Follow these steps closely, and this **Artisan Bread Recipe Easy** method will treat you right. Don’t forget to check out my favorite Parker House Roll recipe if you’re having a carb craving later!
First, get your flour, yeast, and salt whisked together in a big bowl. Once combined, pour in that warm water and just mix it until it looks like a messy, shaggy cloud. Seriously, don’t worry about it looking pretty right now! Now, turn that shaggy mess onto a lightly floured surface. It’s time to knead this dough for a solid five to seven minutes until your arms are a little tired and the dough is smooth and elastic. You’re making the gluten happy!
Next, grease your clean bowl slightly with that olive oil. Plop the dough in there, flip it around so it gets a little oily coating, cover it up, and find a warm spot. It needs to hang out for about an hour and a half until it’s doubled in size. When it’s ready, gently punch it down, shape it into your favorite oval loaf, and let it rest for a 30-minute “nap.” While it rests, crank that oven up to 425°F—remember that shallow pan on the bottom rack for steam!
Mixing and Kneading for Beginner Bread Baking Success
The feel of the dough tells you everything when you’re kneading. If you accidentally added too much water and it feels super sloppy, just dust your hands with a tiny pinch of flour and keep working it. If it feels too stiff and won’t come together, wet your fingertips just slightly. Don’t dump in more water; introduce it slowly! That smoothness you’re looking for comes from consistent effort.
The Rise Time and Shaping Your Rustic Italian Loaf
Find a spot away from chilly drafts—a slightly warm oven that’s turned OFF works perfectly! When the dough has doubled, it should look puffy and feel light when you gently poke it. Honestly, the smell changes too; it starts becoming that beautiful, almost sweet, yeasty smell that signals success when we’re making this **Rustic Italian Loaf**. Gently tap down the air, shape it into your loaf, and let it rest like I mentioned. That second rise is key for volume!
Baking Your Golden Brown Italian Loaf with Steam
This is the grand finale, the part where our **Quick Italian Bread** goes from doughy promise to reality! Get your oven up to 425°F (220°C) well before you’re ready to bake. Don’t forget that shallow pan on the bottom rack—that’s where the hot water goes! Steam is so crucial because it keeps the surface of the dough moist for the first few minutes. This prevents the crust from setting too early, allowing the loaf to expand to its maximum height, giving you that light interior!
Right before sliding it in, take a very sharp knife and make a few quick, shallow slits—that’s scoring! It looks professional and helps control where the bread bursts open as it bakes. Once it’s sliding in, pour that cup of hot water into the bottom pan quickly. Bake for 25 to 30 minutes. You’re aiming for a crust that is deeply colored—not pale—a true **Golden Brown Italian Loaf** that sounds hollow when you tap it. That sound is music!
Ingredient Notes and Simple Bread Ingredient Substitutions
I always get questions about substitutions for this recipe, which makes perfect sense! When you’re going for a **crusty exterior**, ingredients really matter. Let’s talk flour first: I listed all-purpose flour because it works brilliantly for this style of soft, chewy crumb, but **Bread Flour** is totally fine too! Bread flour has higher protein, so it might make the dough slightly stiffer, but the results will still be fantastic.
Remember that warm water? It’s got to be between 105 and 115°F, that’s non-negotiable for instant yeast to wake up happily. If you happen to be using Active Dry Yeast instead, just dissolve it in that warm water for about five minutes first until it gets foamy before you mix in the flour. That foaming tells you the yeast is alive and ready to make your **Homemade Italian Bread** rise beautifully!
Serving Suggestions: What to Serve with Italian Bread
Once that beautiful, **Warm Italian Loaf** is out of the oven and cooling—oh man, that’s half the battle won! But what do you do with it? This bread is way too good to just sit there, so let’s put it to work!
Obviously, it’s perfect for soaking up every last drop of sauce left over from dinner. A big bowl of my favorite creamy tomato soup is just screaming for chunks of this bread for ultimate dipping. Honestly, that’s my favorite way to eat it!
But don’t stop there! This recipe makes incredible **Italian Sandwich Bread**. It’s sturdy enough to hold heavy fillings like salami, fresh mozzarella, and roasted peppers without getting totally soggy. You could also serve slices alongside rich dishes like gnocchi in brown butter sauce. It’s phenomenal for **Italian Bread for Dipping** in a little olive oil and balsamic vinegar. It’s versatile perfection!
Storage and Reheating Instructions for Your Italian Bread
You’ve baked the perfect loaf, but now you need to keep it perfect! This is key to maintaining that crunchy crust we worked so hard for. Don’t wrap your beautiful **Homemade Italian Bread** in plastic wrap!
Plastic traps moisture, and moisture is the enemy of crispiness. Instead, just let it cool completely on a wire rack, then store it in a paper bag at room temperature. This lets the loaf breathe while keeping the *soft interior* fresh for a couple of days.
If you want to reheat a slice or half a loaf to bring that crust back to life, don’t even think about the microwave! Pop it directly onto the oven rack at about 350°F for five to seven minutes. You’ll hear that glorious little crackle return instantly. Instant gratification, my friends!
Frequently Asked Questions About Making Italian Bread
Can I use active dry yeast instead of instant yeast for this recipe?
Yes, you absolutely can! This is such a common question when folks are making **Easy Homemade Bread**. If you use active dry yeast, you just need to ‘wake it up’ first. Before mixing the flour, stir the yeast into the warm water (105-115°F) and let it sit for about five minutes until it gets foamy on top. If it doesn’t foam, your water was likely too hot or too cold, so toss it and start over! Once it’s foamy, proceed exactly as written.
How do I make this look more like an artisan bread recipe easy version?
The look comes down to shaping and scoring! To amp up the **artisan bread recipe easy** vibe, try shaping it into a round boule instead of an oval. Also, use a very sharp lame or razor blade to score a deep, long slash down the middle—or even make several parallel cuts. When it bakes, those cuts will open up beautifully, creating that dramatic, crackly edges that scream ‘artisan!’
My bread didn’t rise properly! Why did this happen?
Oh, that’s the worst feeling! Usually, yeast problems are the culprit for a failed rise. The most common mistake is water temperature—if it’s too hot, it kills the yeast. If your kitchen is cold, the yeast gets sluggish. A good tip is to place the covered bowl inside your oven with *only the light on* to create a consistently warm, cozy spot for it to double in size. You can find a few more troubleshooting tips here.
Is this recipe too much work if I want a truly quick Italian bread?
Well, ‘quick’ is relative in bread making! This recipe has about 15 minutes of active work, but the rising takes time. If you need bread even faster, you might need a recipe using commercial dough conditioners, but those lose the true flavor of homemade bread. For this recipe, the 2+ hours total time gives you that fantastic flavor without kneading for an hour. It’s the best compromise I’ve found for great flavor and reasonable time!
Estimated Nutritional Data for This Homemade Bread
It’s important to know what you are eating, even when you are enjoying homemade bread, even if it’s the best batch of **Italian bread** you’ve ever made! Because we use such simple ingredients—flour, water, salt, yeast, and a touch of olive oil—the numbers here are pretty great. We are keeping things lean, which is why this bread works perfectly alongside heavier pasta dishes.
Here is the estimated breakdown based on the recipe yielding one loaf, sliced into 12 servings:
- Serving Size: 1 slice
- Calories: 180
- Sugar: 1g
- Sodium: 350mg
- Fat: 1g
- Saturated Fat: 0g
- Trans Fat: 0g
- Carbohydrates: 38g
- Fiber: 2g
- Protein: 5g
- Cholesterol: 0mg
Please remember, just like I always say: these figures are just estimates! They can shift a tiny bit depending on the brand of flour you use or exactly how much salt you chose to sprinkle on top before baking. For full details on how we calculate these numbers, make sure you check out our full nutritional disclaimer page.
PrintEasy Crusty Italian Bread Recipe
Make bakery-style Italian bread at home with a crispy crust and a soft, chewy interior. This recipe is simple enough for beginners.
- Prep Time: 15 min
- Cook Time: 30 min
- Total Time: 2 hours 15 min
- Yield: 1 loaf
- Category: Bread
- Method: Baking
- Cuisine: Italian
- Diet: Vegetarian
Ingredients
- 3 cups all-purpose flour
- 1 teaspoon instant dry yeast
- 1 1/2 teaspoons salt
- 1 1/4 cups warm water (about 105-115°F)
- 1 tablespoon olive oil (for greasing)
Instructions
- In a large bowl, whisk together the flour, yeast, and salt.
- Pour in the warm water and mix with a wooden spoon until a shaggy dough forms.
- Turn the dough out onto a lightly floured surface. Knead for 5 to 7 minutes until the dough is smooth and elastic.
- Lightly grease a clean bowl with olive oil. Place the dough in the bowl, turning to coat. Cover the bowl with plastic wrap or a clean kitchen towel.
- Let the dough rise in a warm place for 1 to 1.5 hours, or until doubled in size.
- Gently punch down the risen dough. Shape it into a long, oval loaf.
- Place the loaf on a baking sheet lined with parchment paper. Cover loosely and let it rest for 30 minutes.
- Preheat your oven to 425°F (220°C). Place a shallow pan on the bottom rack to create steam later.
- Before baking, lightly score the top of the loaf with a sharp knife. Pour 1 cup of hot water into the shallow pan on the bottom rack to create steam.
- Bake for 25 to 30 minutes, or until the crust is deep golden brown and sounds hollow when tapped.
- Remove from the oven and let the bread cool on a wire rack before slicing.
Notes
- For an extra crispy crust, spray the inside walls of the oven with water twice during the first 10 minutes of baking.
- If you do not have instant yeast, use active dry yeast and let it proof in the warm water for 5 minutes before adding the flour.
- This bread is excellent served warm with pasta sauce or used for hearty sandwiches.
Nutrition
- Serving Size: 1 slice
- Calories: 180
- Sugar: 1
- Sodium: 350
- Fat: 1
- Saturated Fat: 0
- Unsaturated Fat: 1
- Trans Fat: 0
- Carbohydrates: 38
- Fiber: 2
- Protein: 5
- Cholesterol: 0