

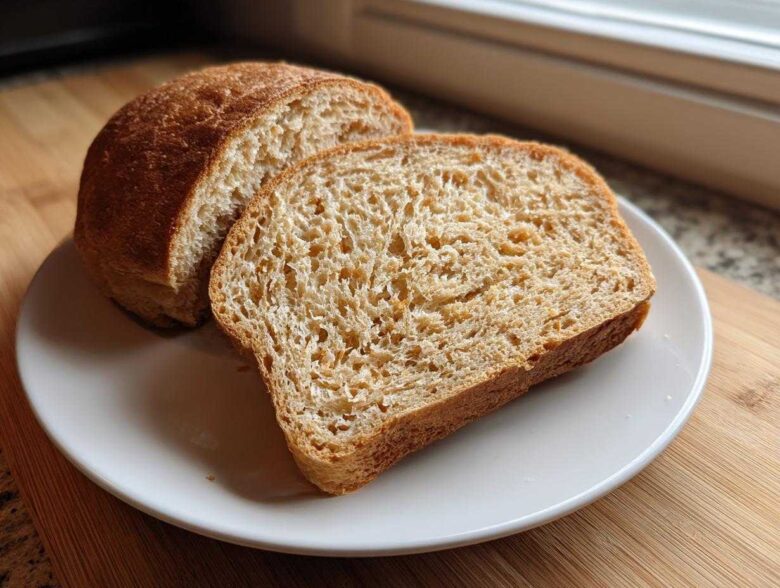
Okay, listen up! If you’ve ever tried making whole wheat bread and ended up with something that feels more like a brick than a cloud, I totally get it. That dry, heavy texture can be so discouraging, especially when you just want a perfect slice for your morning avocado toast or a reliable sandwich loaf. Trust me, I’ve been there! I wasted so many bags of expensive whole wheat flour over the years trying to crack the code.
But I finally nailed it. After what felt like a million dusty loaves, I perfected this recipe: the Soft & Easy Honey Whole Wheat Sandwich Bread. This isn’t just another recipe; this is the one that finally delivers that incredibly soft, fluffy result everyone wants from their homemade grain bread without needing a six-hour, complicated process. You can check out all my other baking adventures over at my main baking hub if you want more ideas. Seriously, this recipe gives you that wholesome flavor with an unbelievable texture. Get ready for the best whole wheat bread you’ve ever baked.
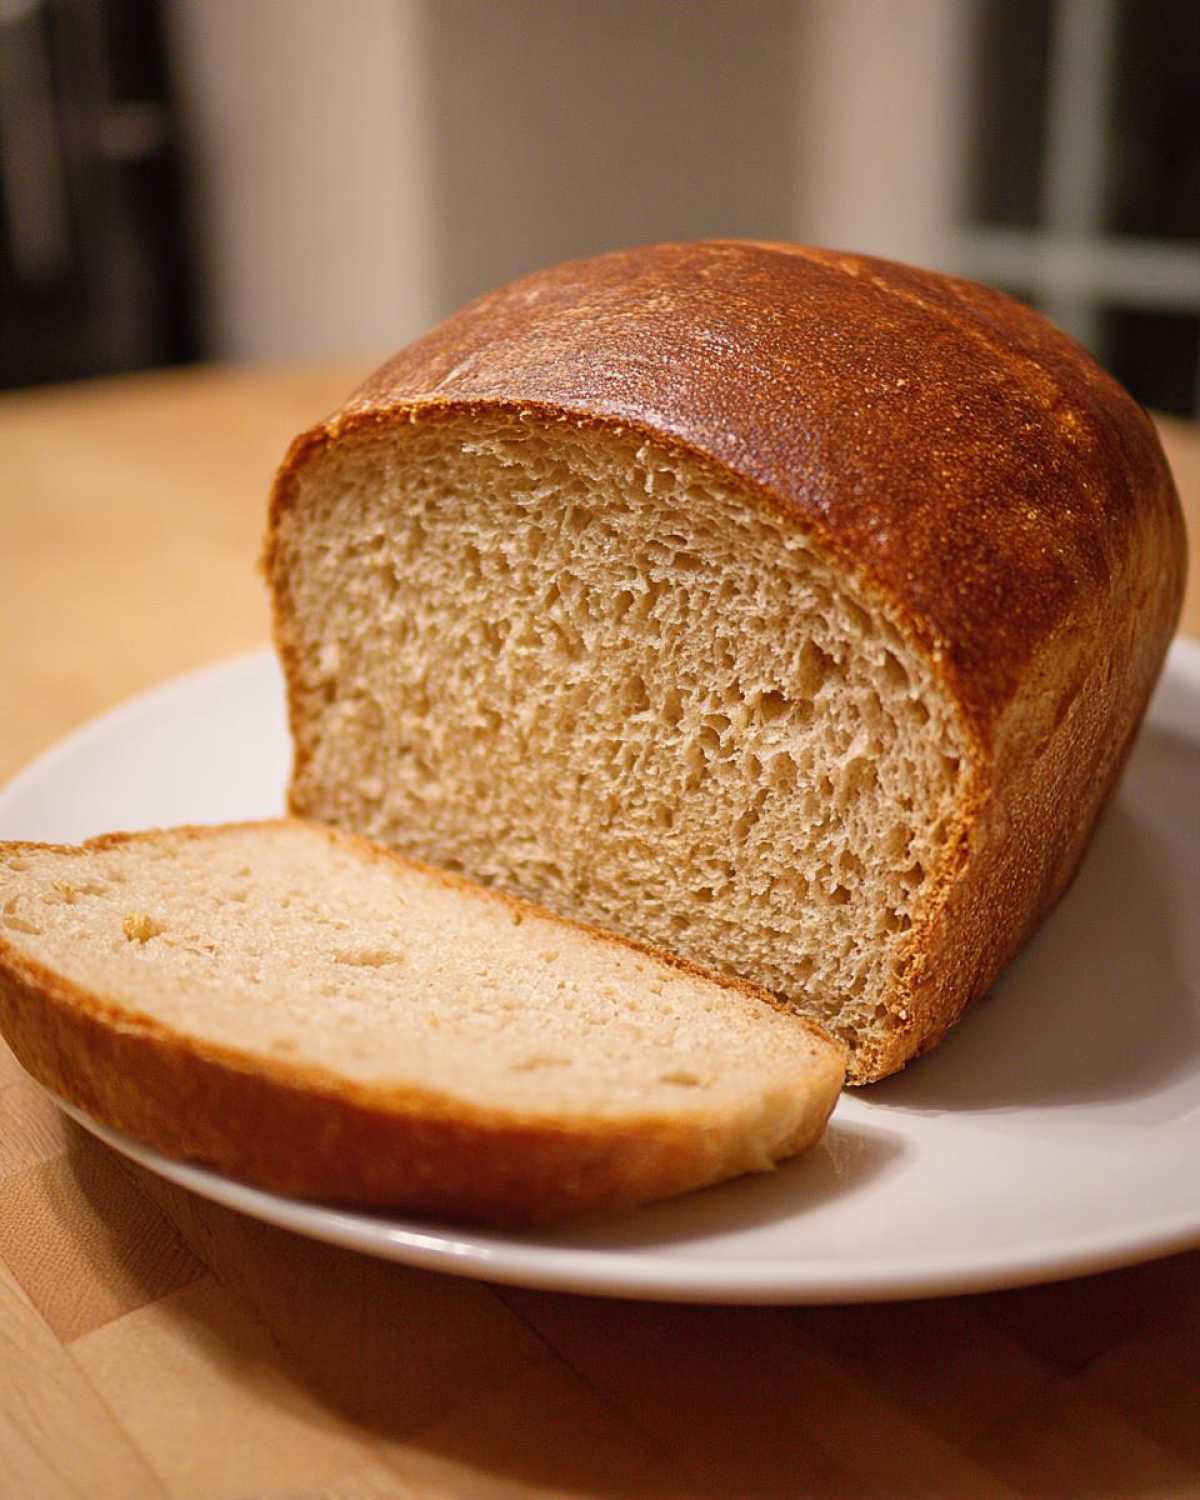
Why This Soft & Easy Honey Whole Wheat Bread Stands Out
Honestly, what makes this loaf so special is that it finally delivers on the promise of a truly soft whole wheat bread that doesn’t taste like cardboard. We want that great, hearty flavor, but we don’t want to fight our way through a slice just to eat a sandwich, right?
- Achieving Fluffy Homemade Bread Texture: We use a little trick—a blend of whole wheat and regular flour—plus natural sweeteners. This keeps the crumb incredibly moist and gives you that desired Fluffy Homemade Bread consistency, even on day two.
- The Simple Whole Wheat Recipe for Beginners: I promise this is straightforward. You don’t need fancy starters or hours of complicated folding. Most of the time is just hands-off rising! It’s truly an Easy Whole Wheat Loaf, clocking in at just 20 minutes of active prep time. It’s perfect for when you need wholesome bread baking without the fuss.
Essential Ingredients for Your Honey Whole Wheat Bread Recipe
Okay, let’s talk fuel! The magic of this whole wheat bread really comes down to using the right building blocks in the right amounts. Don’t just grab whatever is on the shelf; a few key components here make all the difference between a tough loaf and a truly soft one. I always measure my ingredients precisely before I even turn on the oven, which keeps things moving smoothly.
When you look at this list, you’ll see it requires warm water, which seems obvious, but getting that temperature just right is crucial for making sure our yeast wakes up happy. Same thing with the honey—it feeds the yeast but also adds moisture that keeps our finished bread tender.
Flour Combination for the Best Whole Wheat Bread
This is where we get that incredible texture for our whole wheat bread! We aren’t going 100% whole wheat here, and that’s intentional. I use three cups of whole wheat flour, but we pair that with one full cup of all-purpose flour. The all-purpose flour has more gluten potential, which lets us achieve that beautiful stretch and elasticity we want in a bread for sandwiches, ensuring the loaf stays fluffy instead of feeling too hearty or dense.
Activating the Yeast for a Great Rise
You must use water between 105°F and 115°F. If it’s too cold, your yeast sleeps; too hot, and you kill it! Once the yeast is foamy and happy in that warm bath, you stir in the ¼ cup of honey. The yeast devours that sugar, creating all the air pockets we need for that spectacular final rise!
Step-by-Step Instructions for Your Easy Whole Wheat Loaf
Now we get to the fun part—turning that liquid mix into actual whole wheat bread dough! Don’t be intimidated by kneading; this dough is quite forgiving, especially when you remember my little secret about how it should feel. We are aiming for a wonderfully soft texture, so follow these steps precisely from mixing to cooling.
If you’re looking for even more detailed tips on mixing methods, I’ve covered some advanced techniques on my main kitchen blog, but for this easy whole wheat loaf, just follow this flow.
Mixing and Kneading the Whole Wheat Bread Dough
First, we mix things messy! Start by stirring in 2 cups of the whole wheat flour and all of the all-purpose flour into your wet ingredients. It’ll look shaggy—that’s great! Then, add the last cup of whole wheat flour slowly until you have a rough ball. Turn that beauty out onto your counter and get ready to work it. You need to knead for a solid 6 to 8 minutes until it’s smooth and elastic. Here is the key whisper: this whole wheat bread dough will feel noticeably softer and a little less stiff than dough made from 100% white flour. If it sticks too much, add flour just one tablespoon at a time!
The First Rise: Creating Fluffy Homemade Bread
Once kneaded, tuck that dough into an oiled bowl—make sure to turn it once so it gets coated evenly! Cover it up tight. Now, it needs warmth and time to get its air. Let it sit in a nice, draft-free warm spot for 1 to 1.5 hours. You’re waiting for it to completely double in size. This long, slow rise is what builds the incredible structure for your Fluffy Homemade Bread!
Shaping and Second Proofing for Perfect Loaf Structure
Gently punch the air out—yes, it’s sad, but necessary! Shape it carefully into a smooth log and nestle it into your greased 9×5 inch pan. This is the final rest before baking, called the second proof. Cover it loosely and let it hang out for only 30 to 45 minutes this time. We know it’s ready when the dough crests about an inch above the rim of the pan. That perfect lift means success!
Baking Your Soft Whole Wheat Sandwich Bread
Time to turn up the heat! Preheat your oven to 375°F (190°C). Before it goes in, brush the top with that lightly beaten egg—that’s your golden sheen ticket! Bake for about 30 to 35 minutes. I always check the *internal* temperature because that tells the real story: we want it to hit 200°F (93°C). This ensures every part of your Soft Whole Wheat Sandwich Bread is cooked through but still unbelievably moist.
Tips for Baking the Best Whole Wheat Bread Tutorial
Even with the best recipe, sometimes little oopsies happen in the kitchen, right? That’s totally normal, especially when you’re working with whole wheat bread. My goal with this whole guide is to make sure you have the confidence to fix those minor hiccups and achieve what I consider the gold standard: the Best Whole Wheat Bread Tutorial conclusion! Don’t sweat it if your dough is a little unruly initially. We want this process to be relaxing, not stressful.
I’ve learned a few things over the years about what prevents that dense loaf we all fight against. A few simple tweaks at the end can save your bake!
Troubleshooting Common Whole Wheat Bread Issues
If you found the dough way too sticky during the kneading stage (step 5), remember my note: add the extra whole wheat flour *one tablespoon at a time*. Seriously, don’t dump it in! Whole wheat flour absorbs liquid differently than white flour, so go slow. The second critical point is cooling. Once that beautiful loaf comes out of the oven, you must remove it from the metal pan immediately and let it cool *completely* on a wire rack. If you skip that, the steam gets trapped underneath, and you end up with a soggy bottom—we don’t want that!
Enhancing the Crust on Your Whole Wheat Bread
While we’re aiming for soft whole wheat bread, sometimes the crust can still feel a little too firm for certain sandwiches. If that happens, I have a little trick that feels luxurious but is still super easy. As soon as the bread comes out of the oven—like, the second it hits the cooling rack—brush the top surface lightly with some melted, unsalted butter. It melts right into the crust, softens it beautifully, and adds a wonderful richness. It makes the loaf smell amazing while it cools! For more ideas on shaping and proofing breads like this, you might want to check out my post on dinner rolls; the science is similar!
Serving Suggestions for Your Hearty Whole Grain Baking
Now that you have this amazing, soft golden loaf of whole wheat bread, what are you going to do with it? Because it’s sturdy enough yet tender enough, it instantly becomes my go-to bread for sandwiches. Tuna salad just feels better on this bread, you know? It stands up to wet fillings without immediately falling apart.
Don’t forget the toast! Sliced thick and toasted up, the honey notes really come forward. It’s incredible with just a schmear of good quality butter. If you want to build an amazing breakfast around it, I have some great avocado crema recipes that pair perfectly with a thick slice of this savory wheat bread!
Storage and Reheating Instructions for Homemade Whole Wheat Bread
Keeping that soft texture locked in your fresh Homemade Whole Wheat Bread is the final challenge. For daily use, I skip the fridge because that makes bread go stale faster! I wrap it tightly in plastic wrap, then maybe foil, and keep it on the counter for about three days. It stays wonderfully soft that way.
If you know you won’t finish it quickly, slice the whole loaf first, and then freeze the slices in a heavy-duty freezer bag. When morning comes, just pop a slice straight into the toaster. It comes out perfectly fresh—no need to thaw!
Frequently Asked Questions About 100 Percent Whole Wheat Baking
It’s smart to have questions when diving into whole wheat bread baking! People are always asking me how to tweak this recipe for different needs or what makes it taste so much better than the store-bought stuff. I tried to make this your ultimate resource for mastering the Simple Whole Wheat Recipe, but a few things pop up again and again, so let’s clear those up right now.
I’ve learned so much about baking with whole wheat flour over the years, and lots of that knowledge comes from experimentation, so fire away with your concerns!
Can I make this a 100 Percent Whole Wheat Baking recipe?
You absolutely *can* try for a 100 Percent Whole Wheat Baking loaf! However, you’ll lose some of that signature softness we worked so hard for. My recipe relies on that one cup of all-purpose flour to give the gluten enough structure to keep the loaf light. If you swap it completely for whole wheat flour, expect a denser, heavier crumb. It will still be delicious and super healthy, but it won’t be quite as fluffy!
What makes this Honey Wheat Bread Recipe so soft?
It’s a two-part magic show for the Honey Wheat Bread Recipe! First, the flour ratio we discussed gives us the necessary structure without overwhelming the loaf with bran. Second, the combination of melted butter and honey acts as a wonderful moisturizing duo that keeps the crumb soft much longer than a recipe using just sugar or oil. It’s the perfect balance for that healthy homemade bread we want.
How long does this Simple Whole Wheat Recipe take total?
Even though it’s an Easy Whole Wheat Loaf to make, bread takes time because the yeast needs to work! The total time is about 2 hours and 5 minutes. That breaks down into about 20 minutes of active prep time (mixing and kneading), followed by the first rise of 1 to 1.5 hours, the shaping (5 minutes), the second rise of about 30–45 minutes, and finally, 35 minutes in the oven. Most of that is hands-off waiting time, so it’s quicker than you think for such a great result! For more in-depth flour tips, check out my guide on baking with whole wheat flour.
Nutritional Estimate for This Wholesome Bread Baking
Now, I always tell people that baking your own whole wheat bread is miles better for you than anything pre-wrapped, but remember that these numbers are just estimates! We are using real ingredients like honey and butter, so the counts will vary based on the exact brands you choose. This estimate is based on the recipe yielding one standard 9×5 loaf, divided into 16 slices.
This table gives you a general idea of what you’re getting with a slice of this delicious, healthy homemade bread. For more tips on keeping your baking wholesome, I’ve shared some great ideas over on my wholesome baking page!
- Serving Size: 1 slice
- Calories: 135
- Fat: 3g (with 1.5g Saturated Fat)
- Sodium: 180mg
- Carbohydrates: 25g
- Fiber: 3g
- Sugar: 5g
- Protein: 5g
- Cholesterol: 15mg
Share Your Soft Whole Wheat Sandwich Bread Results
I am so excited for you to try this! Truly, I want to see all your gorgeous, golden loaves of Soft Whole Wheat Sandwich Bread. Baking is all about sharing the love, even if it’s just showing off a perfect crumb shot!
When you make your first batch of this whole wheat bread—and I know you will—please come back here and leave me a rating. Five stars if it made your kitchen smell amazing, right? Let me know in the comments how it worked out for you. Did you serve it with butter? Make giant sandwiches? Tell me everything!
If you snapped a picture of your perfect, fluffy homemade loaf, please share it on social media and tag me! I love seeing how you adapt things in your own kitchen. If you’ve got questions or want to send me a more detailed note about your experience, you can always reach me directly through my contact page. Happy baking, friends!
PrintEasy Soft Honey Whole Wheat Sandwich Bread

A simple recipe for baking a soft, fluffy loaf of whole wheat bread perfect for daily sandwiches and toast.
- Prep Time: 20 min
- Cook Time: 35 min
- Total Time: 2 hours 5 minutes
- Yield: 1 loaf
- Category: Baking
- Method: Kneading and Baking
- Cuisine: American
- Diet: Vegetarian
Ingredients
- 1 cup warm water (105-115°F)
- 2 1/4 teaspoons active dry yeast
- 1/4 cup honey
- 1/4 cup unsalted butter, melted
- 1 1/2 teaspoons salt
- 3 cups whole wheat flour, plus more for dusting
- 1 cup all-purpose flour, plus more for dusting
- 1 large egg, lightly beaten
Instructions
- Combine the warm water and yeast in a large bowl. Let stand for 5 minutes until foamy.
- Stir the honey, melted butter, and salt into the yeast mixture.
- Add 2 cups of the whole wheat flour and all of the all-purpose flour. Mix until just combined.
- Add the remaining 1 cup of whole wheat flour gradually, mixing until a shaggy dough forms.
- Turn the dough out onto a lightly floured surface. Knead for 6 to 8 minutes until the dough is smooth and elastic. It will feel softer than standard white bread dough.
- Place the dough in a lightly oiled bowl, turning once to coat. Cover the bowl with plastic wrap or a clean towel and let it rise in a warm place for 1 to 1.5 hours, or until doubled in size.
- Gently punch down the risen dough. Shape it into a loaf and place it in a greased 9×5 inch loaf pan.
- Cover the pan loosely and let the dough rise again for 30 to 45 minutes, or until it crests about 1 inch above the rim of the pan.
- Preheat your oven to 375°F (190°C). Brush the top of the loaf lightly with the beaten egg.
- Bake for 30 to 35 minutes, or until the crust is golden brown and the internal temperature reaches 200°F (93°C).
- Remove the bread from the pan immediately and cool completely on a wire rack before slicing.
Notes
- For a softer crust, lightly brush the top of the loaf with melted butter immediately after removing it from the oven.
- If your dough seems too sticky during kneading, add whole wheat flour one tablespoon at a time.
- Using warm water between 105°F and 115°F activates the yeast best.
Nutrition
- Serving Size: 1 slice
- Calories: 135
- Sugar: 5
- Sodium: 180
- Fat: 3
- Saturated Fat: 1.5
- Unsaturated Fat: 1.5
- Trans Fat: 0
- Carbohydrates: 25
- Fiber: 3
- Protein: 5
- Cholesterol: 15