

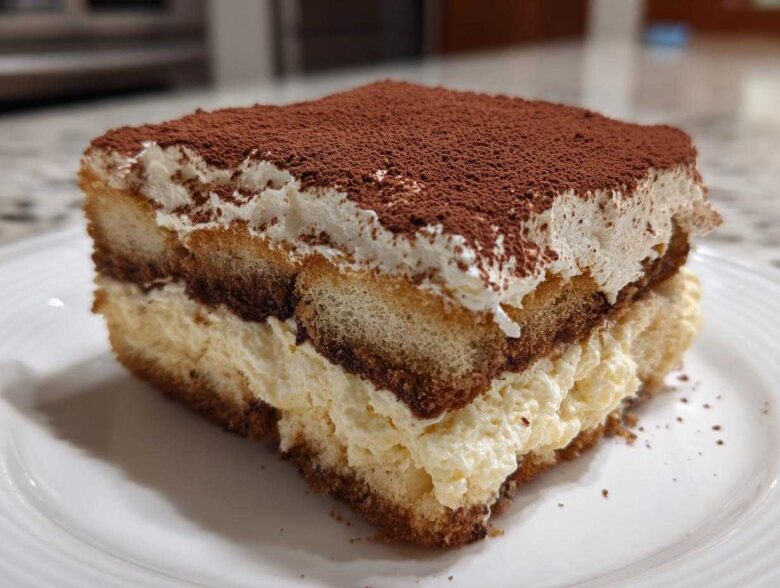
Oh, friend, when you think of elegant Italian desserts, you probably picture tiny pastries or elaborate chocolate work, right? But I have to tell you, nothing beats the simple, moody beauty of Tiramisu. It’s the dessert that always makes a huge impact without stressing me out, especially since this is truly the easiest, no-bake tiramisu recipe you will ever need.
I remember the first time I served this homemade version to my in-laws—I was so nervous! But within minutes, they were all asking for the recipe. It’s so creamy and deeply flavored with espresso, yet the assembly is honestly faster than just setting the table! Trust me, once you try this foolproof method, Tiramisu will become your go-to special occasion treat.
Why This Is The Best Tiramisu Recipe Ever
Look, I know you want something impressive, but I also know you don’t want to stand over a hot stove for an hour before your dinner party starts. That’s why this version just works! It hits every single mark you’re looking for, honestly. And don’t forget to check out my recipe for no-bake peanut butter cup cheesecake if you need another make-ahead treat!
- It’s completely **No-Bake**! Zero oven drama, just pure chilled satisfaction.
- The **Easy Assembly** means anyone can tackle this; you can’t mess up the layers too badly!
- We are achieving that unbelievably **Creamy Mascarpone Dessert** texture—it melts in your mouth.
- It’s one of the best **Make Ahead Dessert Ideas** because it actually tastes *better* the next day!
Essential Ingredients for Your Tiramisu Recipe
Okay, let’s talk about what goes into this gorgeous dessert. For a truly Classic Italian Tiramisu, you can’t substitute the essentials, but quality really matters here, especially with the coffee and the cheese. Make sure your heavy cream and your mascarpone are ice cold when you start whipping—otherwise, you’ll have soup instead of cream!
- 6 large egg yolks (We handle these safely, don’t worry!)
- 3/4 cup granulated sugar
- 1 1/2 cups heavy cream, cold
- 16 ounces mascarpone cheese, cold
- 2 cups strong brewed coffee, cooled completely
- 1/2 cup coffee liqueur or dark rum (optional, but amazing!)
- 2 packages (7 ounces each) ladyfingers (Savoiardi are best)
- Unsweetened cocoa powder, for dusting (Get the dark stuff!)
If you want to see how I make another creamy delight, check out my recipe for mint pots de creme—it uses cream similarly!
Ingredient Notes and Substitutions for the Tiramisu Recipe
Now, let’s address the big question: those egg yolks. While heating them gently over the double boiler cooks them just enough to make them safe and gives you that rich, authentic texture, I know some people just aren’t comfortable. So, here is my trick for a Tiramisu Without Raw Eggs: Ditch the yolks! Just use 1 cup of heavy cream whipped with 1/2 cup of powdered sugar and 1 teaspoon of vanilla extract, and fold that into your mascarpone instead. Works like a charm!
Also, please use the strongest coffee you can manage, ideally espresso. Since the ladyfingers only get a quick dip, that coffee flavor needs to be intense to shine through. Never use basic, weak drip coffee, or your whole beautiful layered coffee dessert will taste watered down. Cold dairy is non-negotiable for stable whipping!
Step-by-Step No Bake Tiramisu Instructions
This is where the magic happens, and honestly, it’s so much easier than it sounds! The key to this amazing tiramisu recipe is having everything ready before you start layering. Remember, speed is your friend when dipping those ladyfingers!
Preparing the Coffee Soaking Liquid
First things first, grab a shallow bowl—something wide enough for the ladyfingers to dip easily. Pour in your cooled, strong coffee. If you are using that optional rum or liqueur, stir it right in now. This mixture needs to be completely cool, like room temperature, before we move on.
Creating the Creamy Mascarpone Dessert Base
This is the step that takes a little patience, but it guarantees a safe, rich cream. Set a heatproof bowl over a saucepan barely simmering with water—this is your double boiler. Whisk those egg yolks and sugar together constantly until the mixture gets pale, thick, and it hits that safe 160°F mark. Don’t stop whisking! Once it’s done, take it off the heat and let it cool down a bit so it doesn’t melt the cheese.
While that cools, whip your cold heavy cream until you get nice stiff peaks. Then, gently fold the slightly cooled yolk mixture into your cold mascarpone cheese until it’s just smooth. Don’t beat it! Finally, gently fold the whipped cream into the mascarpone mix in bowls. Seriously, go light and slow; we want to keep all that glorious air trapped inside!
Assembling Your Layered Coffee Dessert
Grab your 9×13 inch dish! Now, for the famous quick dip: Take one ladyfinger, dunk it into the cold coffee mixture for just a second on each side—we want it moist, not soggy like a sponge left in the sink. Arrange them snugly in a single layer on the bottom of your dish. Spread half of that heavenly mascarpone cream evenly over that first layer.
Repeat everything! Another layer of dipped ladyfingers, and then top it all off with the rest of that fluffy cream. If you peek at my no-bake tiramisu cups instructions, you’ll see this layering technique works every single time for structure!
Chilling and Serving the Perfect Tiramisu Recipe
This is the part where you have to practice the hardest skill in baking: patience! You absolutely cannot rush Tiramisu. If you try to eat this right after layering, it’s honestly just sweet, boozy ladyfingers floating in soup. The chilling time is completely crucial for structure and flavor melding. When the ladyfingers soak up all that lovely coffee and the mascarpone cream firms up, that’s when it transforms into the Classic Italian Tiramisu we want.
You need to cover that dish tightly with plastic wrap—I mean airtight—and stick it in the fridge. My rule is *always* overnight. If you absolutely cannot wait, six hours is the absolute minimum, but trust me, the flavors need that time to marry properly. It becomes this totally decadent, ready-to-slice creation.
Now, for the grand finale! You assemble the whole thing and keep it hidden away, but you do the final presentation step right before you serve it. You are going to dust the top generously with that unsweetened cocoa powder. Get yourself a fine-mesh sieve; that’s the secret to getting that beautiful, velvety, professional-looking top layer.
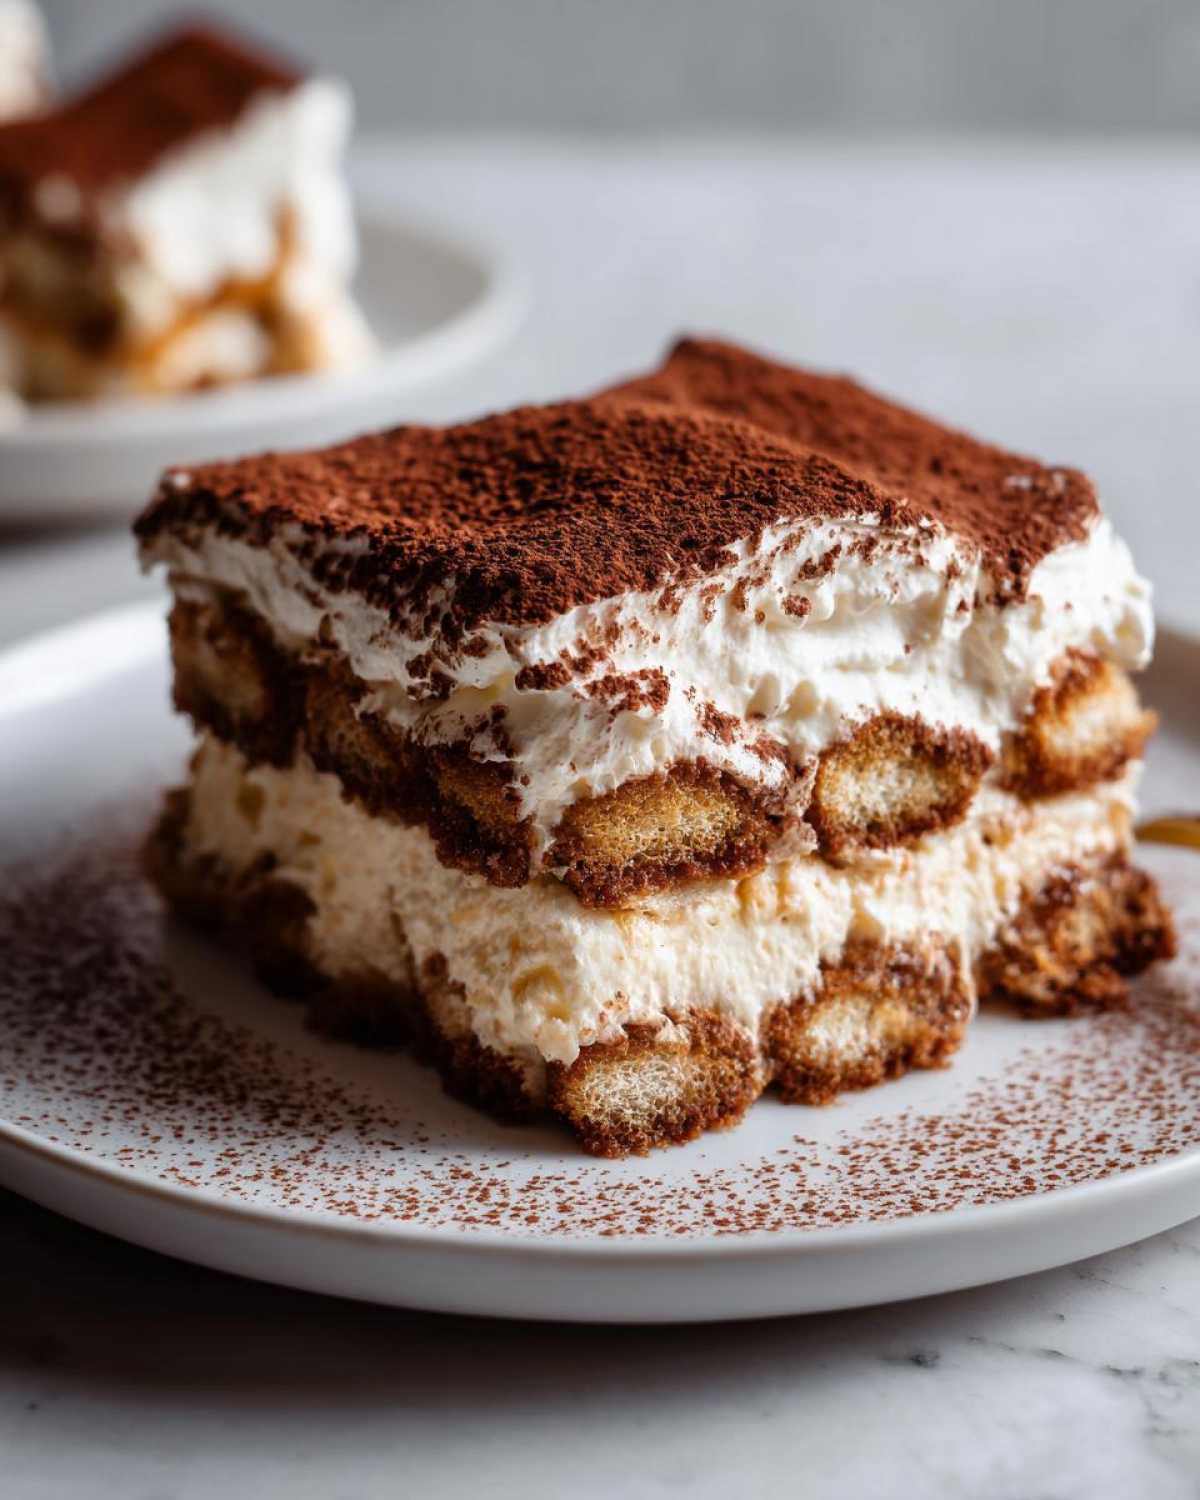
When you dust it, give it a nice, even layer. It creates a gorgeous, dramatic contrast against the pale cream underneath, turning it into a truly Rich Chocolate Dusting Dessert. If you watch my friend’s video over at lemon berry trifle, you see how the topping makes all the difference in presentation. Slice it into clean squares, serve it cold, and get ready for the applause!
Tips for Success with Your Homemade Tiramisu Recipe
Even though this is the easiest tiramisu recipe ever, there are just a few little things that can trip you up if you aren’t used to working with mascarpone. Don’t sweat it; I’ve made all these mistakes so you don’t have to! Getting these tiny details right is what elevates this from good to truly unforgettable.
First up: the dreaded soggy ladyfinger. This is the number one reason people end up with a soupy dessert. Remember what I said earlier? A quick dunk is all you need. If you can dip and pull out immediately, that’s perfect. If you hold it for even three full seconds, it’s going to weep moisture into your cream layers. You want them firm enough to hold their shape when you place them, and they’ll finish softening during that long chill time.
Next, watch how you handle the dairy! When folding the whipped cream into the mascarpone base, you need to use a spatula and a gentle cutting motion. If you stir too aggressively, you will deflate all that air you just worked so hard to whip into the cream. Grainy or loose cream is usually the result of overmixing that final step. It should look like light, fluffy mousse when you’re done folding.
If you want a super tall, dramatic dessert perfect for a big holiday gathering, skip the 9×13 dish! Try using an 8×8 inch baking dish instead. The batter will be much deeper, making the layers thicker, which looks incredibly impressive when you slice into it. You’ll probably need one or two extra ladyfingers to cover the base completely, but it’s worth the extra height!
And finally, the chilling time—it’s not optional! I know it’s hard to leave something this delicious alone in the fridge, but you *have* to let it set. Six hours is the bare minimum, but if you can manage overnight, do it. The entire structure firms up, the flavors deepen from all those coffee notes, and the whole thing holds together beautifully when you cut those squares. If you’re looking for a fantastic holiday recipe that holds up well, try my apple pie crumb bars, too!
Make Ahead Dessert Ideas: Storing This Tiramisu Recipe
This section is why this tiramisu recipe is truly my secret weapon for hosting. Seriously, if you’re planning a dinner party, you can get this dessert done two days before everyone even arrives! That frees up so much brain space on the actual event day, which I really appreciate.
Since this dessert is unbaked, its structure relies almost entirely on that chill time. Once you’ve done the final cocoa dusting, cover the dish tightly with plastic wrap. I always give the plastic wrap a little tent over the top so it doesn’t stick to the chocolate powder—nobody wants cocoa stuck to the film!
You can safely store this incredible make-ahead dessert idea in the refrigerator for up to three, maybe even four days. Any longer, and the ladyfingers might start to get *too* soft, which just isn’t the texture we worked for. I find day two is peak perfection, but day three is still glorious.
The essential serving advice? Always serve it cold. It never needs to be reheated or brought to room temperature—in fact, if it sits out too long, that beautiful mascarpone cream starts to soften up too quickly. If you’ve made my cranberry brie bites for appetizers, just make sure you keep this tiramisu tucked away in the coldest part of your fridge until you are ready to slice and serve!
Variations on the Classic Italian Tiramisu
Now, don’t get me wrong—I absolutely adore serving the Authentic Italian Tiramisu just as Grandma taught me, with that perfect balance of espresso and creamy cheese. But sometimes, you just need to mix things up when you’re making this layered coffee dessert over and over again for different parties!
We don’t mess with the mascarpone cream base too much because that’s where the magic texture lives. But you can absolutely play around with the soaking liquid and the toppings to give the dessert a totally new vibe. It’s a great way to customize this Quick Elegant Dessert without changing the core assembly!
Here are a few little tweaks I love trying out when I get the urge:
- Spice It Up: If you skip the coffee liqueur or rum in the soaking mix, try adding about a teaspoon of high-quality vanilla extract or even a tiny splash of amaretto! It gives the ladyfingers a really warm, sweet note that pairs wonderfully with the cocoa topping. This is a safe bet if you’re serving kids or anyone avoiding alcohol.
- Chocolate Lover’s Dream: This is probably my favorite twist on the Tiramisu Dessert Recipe. After you set down that first layer of cream, melt about 4 ounces of good bittersweet chocolate and spread it thinly right over the cream before you add the second layer of ladyfingers. The chocolate sets up slightly during the chill, giving you an extra layer of indulgent flavor! It’s definitely not traditional, but wow, is it rich!
- Cookie Swap: Sometimes, ladyfingers (Savoiardi) are sold out, or maybe you just want something crunchier! You can swap those out for nice, plain, crisp vanilla wafers or even thin shortbread cookies if you have to. The trick here is that you have to cut the dipping time down even further! These cookies soak up liquid faster than the spongy ladyfingers, so dunk them for barely a second per side. If you’re experimenting with different cookies, check out my recipe for fig walnut baklava—it shows how different textures play off sweet cream!
Remember, no matter what you change in the soak or the toppings, the flavor foundation of this Easy Homemade Tiramisu comes from that perfectly balanced, simple mascarpone cream. Have fun playing around!
Frequently Asked Questions About This Tiramisu Recipe
I know when you’re trying to nail down a show-stopping dessert like this, you might have a few little questions bubbling up. It’s totally normal! Making the best tiramisu recipe ever should feel easy, not stressful. Here are the things I get asked most often when people are getting ready to assemble this Indulgent Coffee Flavored Treat. For more great baking ideas, take a peek at my cookie dough truffles recipe while you’re here—it’s another easy one!
Can I skip the step where I heat the egg yolks?
Oh, my darling, please don’t skip that step if you can help it! I know it adds five minutes of whisking over hot water, but that gentle heating is essentially pasteurizing the yolks. Since this is a no-bake dessert, heating the yolks to 160°F kills any potential bacteria, making the dessert safer for everyone. Plus, that heat causes the yolks to thicken beautifully, which is what gives us that classic, pale, velvety base when you fold in the mascarpone. Skipping it means you risk your texture being a little too loose and you skip out on that important safety measure. Better safe than sorry when it comes to uncooked eggs, right?
What is the best way to get a ‘Simple Coffee Soaked Dessert’ without making it wet?
This is the number one mistake I see people make! We want flavor, not mush! The secret to a perfect Simple Coffee Soaked Dessert is speed and preparation of the coffee itself. First, make sure that coffee is strong—think espresso strength, or it won’t provide enough flavor to cut through the richness of the cream. Second, your dipping rhythm needs to be lightning fast.
Think of your ladyfinger like a dry sponge. You dip it down into the coffee mixture, let it soak for literally one second while you count “one-one-thousand,” and then immediately pull it out. You should still see some white pastry poking through when you remove it, because it will continue to absorb moisture from the cream layers as the whole dessert chills. If your ladyfinger looks completely saturated when you pull it out, set it aside on a plate for a minute to drip off before adding it to your dish!
Can I use milk instead of heavy cream for the mascarpone layer?
Oh goodness, no. I really wouldn’t recommend it! The heavy cream is essential for creating those stiff peaks that give the entire dessert its height and airy structure. If you substitute milk, it just won’t whip up correctly, and you’ll end up with something closer to sweet, thin soup instead of the Creamy Mascarpone Dessert we are aiming for. Stick to the cold heavy cream; it performs perfectly every time!
How long does this Tiramisu recipe actually take to set?
I get it; waiting is hard when dessert is waiting! While you can technically assemble the whole tiramisu recipe in about 30 minutes of active work, the chilling time is non-negotiable. You need a minimum of 6 hours for the cream to firm up enough so you can slice it without the whole thing sliding apart. But honestly, serving it after an overnight chill is when it truly sings—that’s when the flavors have had time to completely meld together, making it the ultimate Make Ahead Dessert Idea.
Is it okay if I don’t use any alcohol in my Tiramisu?
Absolutely! This is your kitchen and your dessert! If you leave out the coffee liqueur or rum, you are perfectly fine. If you want to keep that little bit of extra complexity without the alcohol, I sometimes mix a teaspoon of almond extract into the cooled coffee instead. It gives a lovely, slightly nutty warmth that complements the espresso beautifully. It’s still an amazing Layered Coffee Dessert even without the booze!
I hope that clears up any last-minute worries! If you’ve whipped this Easy Homemade Tiramisu up, I’d love to hear how it went! Don’t forget to leave me a rating below so others can see just how fantastic this recipe is!
Share Your Creamy Mascarpone Dessert Creations
Now that you’ve made what I truly believe is the Best Tiramisu Recipe Ever, I want to see it! Seriously, making this dessert is only half the fun—the other half is seeing the beautiful, rich, chocolate-dusted layers everyone manages to create!
If you followed these Step by Step Tiramisu Guide instructions and found this the most satisfyingly Easy Homemade Tiramisu you’ve ever tackled, please don’t keep that happiness to yourself!
Take a second when you get a chance and head over to the comments right below this! Tell me:
- How many hours did you actually let it chill? (Be honest!)
- Did you use the alcohol or did you skip it?
- Did you choose the simple dusting or did you go for the chocolate drizzle variation?
And if you snap a picture of that stunning final product—especially that beautiful cross-section showing off your Creamy Mascarpone Dessert layers—tag me on social media! Seeing your successes makes my day, and it inspires everyone else trying to make their first or next batch of this fantastic Holiday Italian Dessert.
If you’re already obsessed with easy, elegant desserts, you can find tons of other ideas over on the full recipe index. Happy baking (or, well, happy *assembling*!)
PrintEasy No-Bake Classic Tiramisu Recipe

Follow these simple steps to make an authentic, creamy Italian Tiramisu dessert using mascarpone cheese. This no-bake recipe is perfect for dinner parties and can be made ahead of time.
- Prep Time: 30 min
- Cook Time: 0 min
- Total Time: 30 min
- Yield: 10 servings
- Category: Dessert
- Method: No-Bake Assembly
- Cuisine: Italian
- Diet: Vegetarian
Ingredients
- 6 large egg yolks
- 3/4 cup granulated sugar
- 1 1/2 cups heavy cream, cold
- 16 ounces mascarpone cheese, cold
- 2 cups strong brewed coffee, cooled
- 1/2 cup coffee liqueur or dark rum (optional)
- 2 packages (7 ounces each) ladyfingers (savoiardi)
- Unsweetened cocoa powder, for dusting
Instructions
- Prepare the coffee mixture: In a shallow bowl, combine the cooled coffee and coffee liqueur or rum, if using. Set aside.
- Make the cream base: In a heatproof bowl set over a saucepan of simmering water (double boiler), whisk the egg yolks and sugar constantly until the mixture is pale yellow, thick, and reaches 160°F (about 8-10 minutes). Remove from heat and let cool slightly.
- Whip the cream: In a separate large bowl, beat the cold heavy cream until stiff peaks form.
- Combine mascarpone: Gently fold the cold mascarpone cheese into the cooled egg yolk mixture until just combined and smooth.
- Fold in whipped cream: Gently fold the whipped cream into the mascarpone mixture in two additions until no streaks remain. Do not overmix.
- Assemble the dessert: Quickly dip each ladyfinger into the coffee mixture, ensuring it is coated but not soggy. Arrange a single layer of dipped ladyfingers in the bottom of a 9×13 inch baking dish.
- Layer the cream: Spread half of the mascarpone cream mixture evenly over the layer of ladyfingers.
- Repeat layers: Create a second layer of dipped ladyfingers on top of the cream, followed by the remaining mascarpone cream.
- Chill: Cover the dish tightly with plastic wrap and refrigerate for at least 6 hours, or preferably overnight, to allow the dessert to set.
- Serve: Before serving, dust the top generously with unsweetened cocoa powder using a fine-mesh sieve. Slice and serve cold.
Notes
- For a recipe without raw eggs, you can substitute the egg yolks with 1 cup of heavy cream whipped with 1/2 cup of powdered sugar and 1 teaspoon of vanilla extract, folding this into the mascarpone.
- Use very strong coffee for the best flavor in the soaking liquid.
- You can use an 8×8 inch dish for a thicker, taller tiramisu, but you may need to adjust the number of ladyfingers.
Nutrition
- Serving Size: 1 slice
- Calories: 450
- Sugar: 30
- Sodium: 120
- Fat: 32
- Saturated Fat: 19
- Unsaturated Fat: 13
- Trans Fat: 1
- Carbohydrates: 35
- Fiber: 1
- Protein: 10
- Cholesterol: 250