

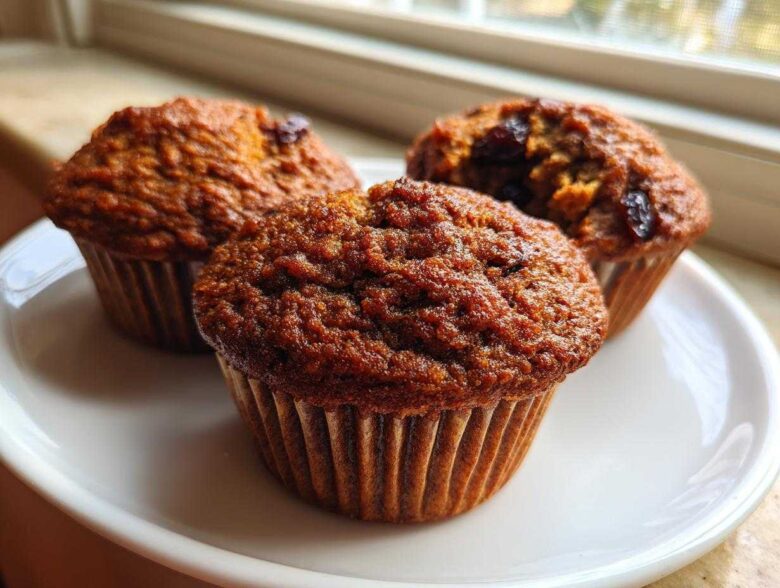
If you think healthy breakfast means dry, crumbly compromises, you are about to have your mind blown! Seriously, I spent *ages* trying to crack the code on truly satisfying food that doesn’t derail my morning plans. That search finally led me to this incredibly simple recipe for **bran muffins** that tastes like something you’d buy at a rustic bakery, but packed with fiber. I swear, these are the most moist bran muffins I have ever managed to pull out of my oven. They stay soft and tender for days, which makes them my go-to for that crucial grab-and-go breakfast situation. Getting that satisfying texture without loading them up with tons of sugar was tough, but I nailed the ratio of buttermilk to oil that keeps them perfectly plump.
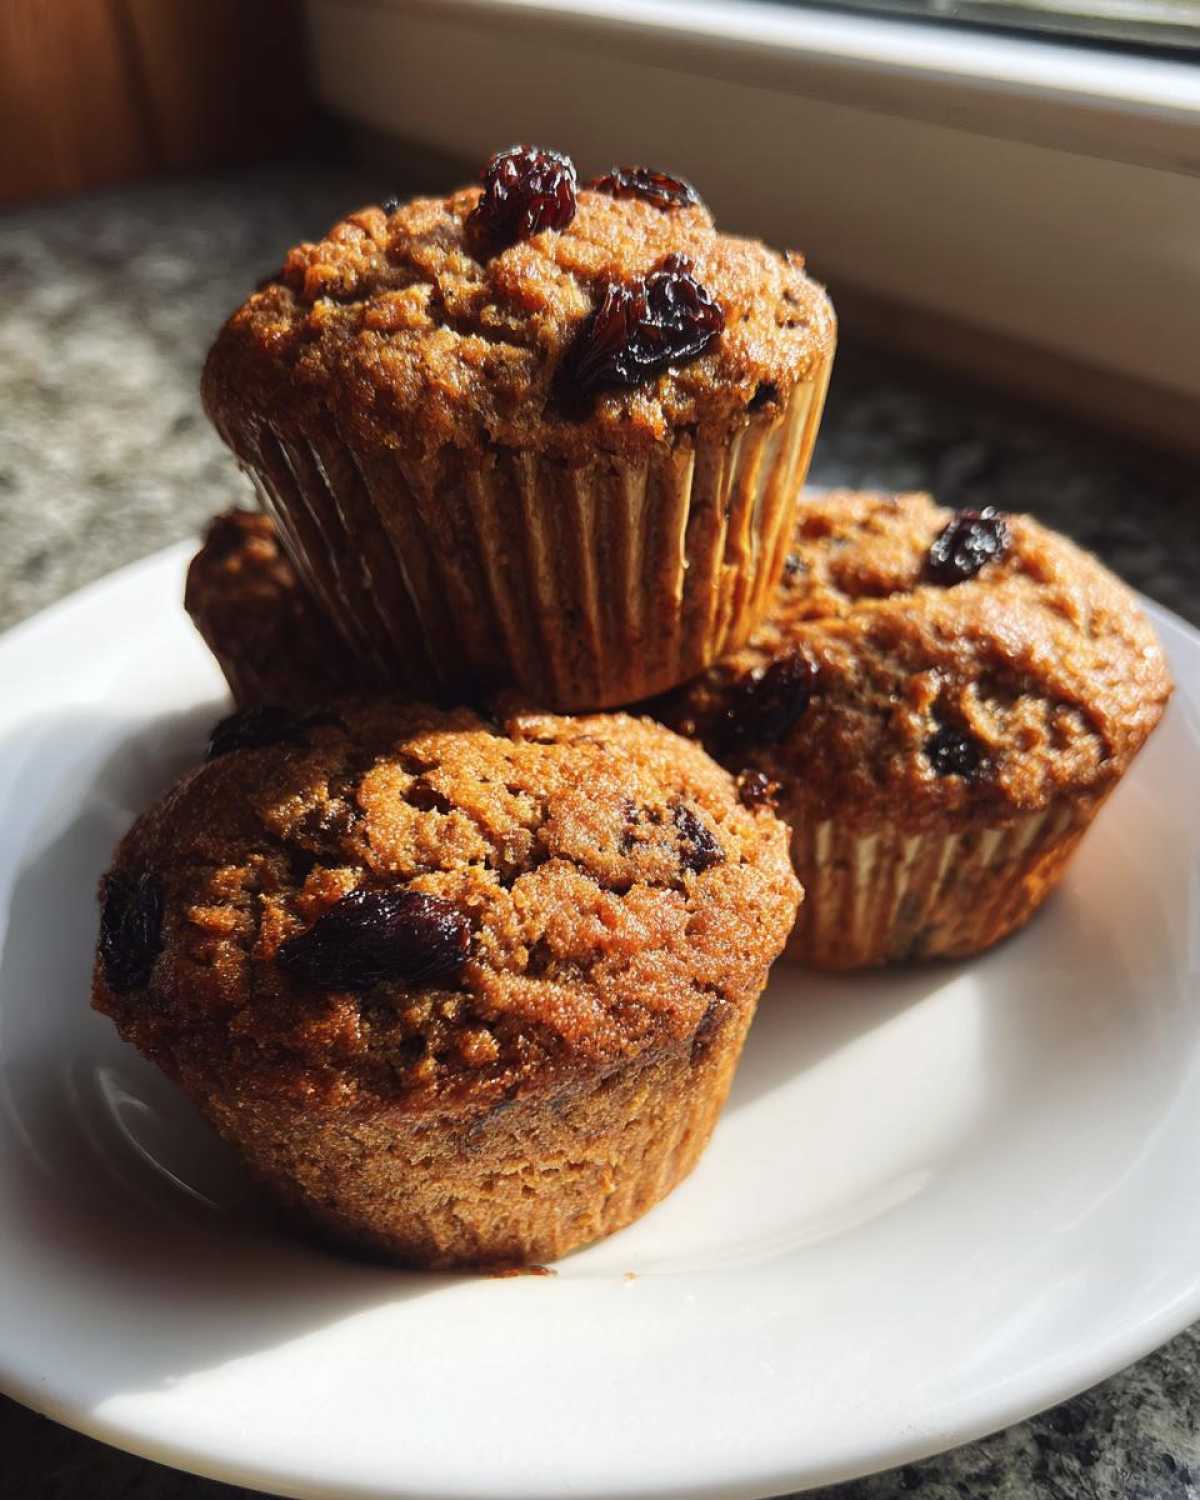
Why This is the Best Bran Muffins Recipe for You
I know, I know, everyone claims their muffins are the “best,” but these **bran muffins** truly deliver on texture. I developed this recipe because I needed something hearty that wouldn’t leave me hungry an hour later. It’s the perfect blend: wholesome, wonderfully moist, and fast enough for a Tuesday morning. You can mix these up nearly as fast as you can boil water for coffee!
- They are incredibly moist—truly no dry crumbs here!
- Packed with fiber to keep you full until lunch.
- They are hearty enough to count as a real, healthy breakfast muffins option.
- The prep is unbelievably simple; it’s basically a dump-and-stir situation.
Achieving Maximum Moisture in Your Bran Muffins
The secret isn’t just the buttermilk, though that helps! It’s about two things: the initial 10-minute soak where the bran softens up, and absolutely resisting the urge to overmix once the flour hits the bowl. Overmixing develops gluten, and gluten makes muffins tough and dry. We want tender, soft carriers for fiber, not little gluten hockey pucks. Trust me on this; mix it just until you don’t see fluffy white flour anymore.
Gathering Ingredients for Moist Bran Muffins
Okay, let’s talk about what you need to pull these together. The ingredient list is wonderfully straightforward, which I love. We’re keeping this recipe simple, focusing on quality components to ensure we hit that perfect texture we talked about. I always use my big ceramic bowls for this—it just feels right for wholesome baking!
- You’ll need 1 1/2 cups of good old wheat bran cereal. Make sure it’s the flake or bran bud type your box says works best!
- 1 cup of buttermilk—this is non-negotiable for the tang and moisture.
- 1/2 cup of packed brown sugar. We need that molasses flavor for richness.
- 1/4 cup of vegetable oil. Don’t try to swap this for butter; the oil keeps these muffins softer for longer.
- 1 large egg, just at room temperature is fine.
- 1 teaspoon of vanilla extract, because vanilla makes everything taste better.
- 1 1/2 cups of whole wheat flour.
- 1 teaspoon of baking soda.
- 1/2 teaspoon of salt to balance everything out.
- And then the fun part: 1/2 cup of raisins OR finely chopped apple if you’re feeling fruity!
Ingredient Notes and Substitutions for Bran Muffins
Every good recipe needs a little wiggle room, right? If you don’t keep buttermilk on hand, don’t panic! You can make your own quick version by taking 1 cup of regular milk and stirring in 1 tablespoon of white vinegar or lemon juice. Let it sit for about five minutes until it looks a little curdled—that does the trick! This is what I usually do when I plan on making these **bran muffins** last minute.
If you’re digging the idea of **Oat Bran Muffins Idea**, you can totally swap out the wheat bran cereal for oat bran. Just be warned: oat bran soaks up liquid slower, so let that mixture sit for a full 15 minutes before you move on. Also, if you want them even more decadent and moist, try swapping half the buttermilk for plain yogurt; it makes the crumb extra creamy.
Simple Muffin Baking: Instructions for Perfect Bran Muffins
Now for the fun part! If you thought gathering the ingredients was easy, wait until you see how fast these come together. Since these **bran muffins** are meant to be a simple solution for busy people, we’re keeping the stirring to an absolute minimum. Remember that golden rule we talked about? Don’t overmix! This recipe is broken down so you can’t possibly miss a step.
Here is the quick rundown on how to bake these up:
- First things first: Crank that oven up to 400 degrees F (that’s 200 degrees C). Muffins like a hot start! Get your 12-cup muffin tin ready—I always grease mine really well, or you can use those cute little paper liners if you prefer.
- Now, let’s get that bran activated. In your biggest bowl, toss in the wheat bran cereal and the buttermilk. This is crucial! Set a timer for 10 minutes and let it just sit there and soak. This is how we guarantee moistness later on.
- Once that bran bath is done, add the brown sugar, the oil, the egg, and the vanilla right into that bowl. Give it a brief stir until everything looks happy and combined.
- In a separate smaller bowl, whisk your dry ingredients together: the whole wheat flour, baking soda, and salt. Whisking them separately ensures the leavening agents are evenly distributed, which means fewer funky clumps in your finished muffins.
- Time to combine! Gently add the dry mixture into the wet mixture. Mix it with a big wooden spoon—just until you can barely see streaks of dry flour. Seriously, stop mixing then! If you’re using the raisins or apple, fold those in now with just one or two final gentle motions.
- Spoon the batter evenly into your prepared cups. Don’t fill them past about two-thirds full, or they might spill over the edges.
- Bake these beauties for about 15 to 18 minutes. I check at the 15-minute mark using the toothpick test—if it comes out clean, they’re done.
- Let them hang out in the hot pan for just five minutes before you transfer them to a cooling rack. If you leave them too long in the metal tin, they’ll keep cooking and might dry out a bit.
Prepping the Pan and Oven for Your Bran Muffins
We are baking these at a higher temperature, 400°F, to give them a nice dome and set the structure quickly. Since this batter is a bit looser than a cake batter, greasing your tin thoroughly is key if you skip the paper liners. For paper liners, I still like to spray the cups inside the liner just lightly—it keeps the paper from sticking to the delicate muffin sides when you peel them off later.
Mixing Wet and Dry Components for Bran Muffins
The two-bowl method is your best friend here! Once the bran has soaked for those essential 10 minutes, it’s time to treat the wet and dry sides separately. Keep them separate until the very last moment. When you combine them, use a light hand and quick motions. I always picture myself trying to gently fold silk in there—no forceful beating allowed! This is the number one way to make sure you get those delightfully easy muffin recipes without the chewiness.
Tips for Success with Homemade Bran Muffins
I’ve made dozens of batches of these **bran muffins** trying to get them just right, and I’ve learned a couple of tricks over the years that really push them over the top from good to absolutely amazing. A few final checks before they go into the oven can make the difference between a standard muffin and one that’s your new favorite thing to bake.
For starters, if you feel like the batter is just a touch too thin after you add the fruit—which can happen if your buttermilk was a little runnier than usual—add about one tablespoon of extra whole wheat flour. Just one! This tiny adjustment helps stabilize the batter so you get that beautiful rise and dome shape in the oven.
Another thing about flavor: even though this recipe is light on sugar, you can layer in spice easily without compromising the health factor. I often add 1/2 teaspoon of cinnamon and just a pinch of ground cloves along with the dry ingredients. It gives them a warm, cozy depth, making them feel less like just a healthy snack and more like a treat.
Finally, don’t be afraid of the high heat! Baking at 400°F for the first few minutes is what gives you that classic bakery-style exterior crust while keeping the inside soft. If you bake them at 350°F the whole time, they tend to cook too slowly and often dry out before the center is truly done. Stick to the starter high heat, and you’ll have success with these **homemade bran muffins** every single time.
Making Your Bran Muffins Freezer Friendly
This is one of my absolute favorite parts about this entire **Bran Muffins Recipe**, and it’s why I always try to double the batch! Who really wants to spend time baking muffins every single morning when you can bake once and have breakfast set for weeks? These are fantastic **Freezer Friendly Muffins**, and they hold up beautifully.
The absolute key here is cooling. You cannot, under any circumstances, try to freeze warm muffins. They need to be completely, 100% cooled down to room temperature on the wire rack. If there is even a tiny bit of residual heat trapped in there when you seal them up, you’ll end up with condensation, and that condensation turns into icy mush when it freezes. Don’t do that to yourself!
Once they are totally cool, I have two favorite methods for packing these away. For quick grab-and-go breakfasts, I wrap each individual bran muffin tightly in plastic wrap first. Then, I place all those individually wrapped babies into a large, sturdy freezer bag. This keeps them sealed against freezer burn and makes it super easy to pull out just one or two at a time. It’s perfect for packing lunches too, kind of like how I prep my salads for quick lunches.
When you need one, just take it out of the freezer bag, unwrap the plastic wrap, and you have options for reheating. If you’re in a massive rush, a quick 20-30 seconds in the microwave works. But honestly, if you can plan ahead even five minutes, pop that wrapped muffin onto a baking sheet and let it warm up in the still-cool oven while it preheats for the day, or just reheat it in a toaster oven for about 5 minutes. It comes out tasting almost freshly baked. They stay good in the deep freeze for up to three months, which is such a lifesaver during busy weeks!
Creative Variations for Your Bran Muffins
While this foundational recipe for **bran muffins** stands strong on its own, sometimes you just need a little twist to keep things interesting, right? That’s the beauty of these simple baking templates. You can adjust the flavor profile easily without messing up that crucial moist texture we worked so hard to achieve. I’ve experimented a lot with mix-ins, sometimes just to use up fruit lingering on my counter!
If you are looking to step away from the classic raisin or apple combo, here are a few swaps that I guarantee will work beautifully. Think about boosting the spice profile first; a teaspoon of ground cinnamon along with a tiny pinch of ground cloves or allspice goes wonderfully with the earthy bran. It gives the muffins a warmer, almost autumnal flavor, which is cozy even in July!
For fruit lovers, ditching the raisins for something softer is a great move. Mashed ripe banana works exceptionally well—it adds natural sweetness and extra moisture, making them feel even more tender. Blueberry is another winner, but remember to toss those blueberries lightly in a tablespoon of flour before folding them in. That stops them from sinking straight to the bottom of the tin during baking.
Speaking of alternatives, we touched briefly on the **Oat Bran Muffins Idea**, but let’s make it a real option for you. If you haven’t tried it, swapping all the wheat bran cereal for oat bran is fantastic! Oat bran tends to make a slightly denser, almost cake-like muffin, and it’s packed with soluble fiber. Just remember what I said earlier: give that oat bran at least 15 minutes to hydrate in the buttermilk before you add the wet ingredients—it takes its time!
I also love seeing how people adapt these for special occasions. If you’re feeling inspired after making these, you might want to check out some of my other healthy twists, like these carrot cake donut recipes for a sweet weekend treat. It’s all about using wholesome bases to create something wonderful!
Serving Suggestions for These Healthy Breakfast Muffins
These **bran muffins** are designed to be functional, but honestly, just eating them plain right out of the basket is incredibly satisfying! Since they are so hearty and fiber-filled, they stand up really well to just about anything you want to pair them with. They’re perfect for that classic grab and go breakfast moment when you are running out the door and need something quick and sustaining.
If you are sitting down for a proper breakfast, my absolute favorite way to enjoy one is still pretty simple: slicing it in half horizontally and spreading a thin layer of salted butter on both cut sides. That little bit of melted butter soaking into the dense crumb is just heavenly. It makes the whole experience feel less like eating fiber and more like dessert!
For something a bit tangier that complements the slight sweetness from the brown sugar, I always reach for a good, quality cream cheese. Try whipping just a little bit of cream cheese with a tiny dash of honey before you spread it on. The contrast between the smooth, cool topping and the warm, spiced bran is just fantastic.
And of course, what’s breakfast without a little liquid companion? These muffins pair perfectly with a strong, piping hot cup of black coffee—the bitterness cuts through the fiber nicely. If coffee isn’t your thing, a warm mug of herbal tea or even a glass of cold milk works just as well. They offer just enough substance to make that morning beverage feel like a complete meal!
Frequently Asked Questions About Bran Muffins
I always get so many questions when I post these because everyone wants to know my secrets for keeping them moist! Baking questions are always the best because once you know the answer, it makes all the difference for your future batches. Here are some of the most common things people ask me when they are tackling these **High Fiber Muffins** for the first time.
Can I make these bran muffins without buttermilk?
Yes, you absolutely can! Buttermilk really helps with the texture and gives a little tang that balances the sugar, but if you’re out, don’t let that stop you. My favorite trick is using regular milk—any kind works—and turning it into a makeshift buttermilk substitute. Just measure out 1 cup of regular milk, stir in 1 tablespoon of white vinegar or fresh lemon juice, and let it sit on the counter for about five minutes. You’ll see it start to curdle slightly. That acidity is what you need to react with the baking soda, so it works just as well to give your **bran muffins** a lift!
How do I ensure my bran muffins are high fiber?
That’s a fantastic question, and really, that’s the whole point of these, isn’t it? The main source of fiber, as you saw in the recipe, comes directly from the 1 1/2 cups of wheat bran cereal. That cereal does most of the heavy lifting for you! We also use whole wheat flour instead of white flour, which adds a decent boost too.
If you want to go the extra mile and make these the **Best Bran Muffins** in terms of pure fiber content, you have a couple of great options. I highly recommend grinding up some flaxseed or chia seeds and adding about 2 tablespoons of those to the dry ingredient bowl when you mix in the flour. They are virtually tasteless in the final product but ramp up the fiber and healthy fats considerably!
How long can I store these homemade bran muffins?
Because we used oil and buttermilk, these stay much softer than recipes that rely on butter. If you keep them airtight on the counter, they stay wonderfully tender for about four days. After that, they might start to firm up a little bit, but honestly, they rarely last that long in my house! If you know you won’t eat the whole batch in four days, definitely pull them aside for freezing before they cool down completely. That freezer storage option is a lifesaver.
Can I reduce the brown sugar even more?
You can certainly try, but be mindful! Sugar does more than just sweeten baked goods; it attracts and holds onto moisture, which is why our muffins are so tender. If you cut the 1/2 cup down to just 1/4 cup, you risk losing some of that desirable softness. If you really want to cut back on sugar, try substituting half the brown sugar with applesauce or mashed banana instead. That way, you keep the moisture locked in while bringing down the refined sugar content.
Nutritional Snapshot of These Bran Muffins
I always feel a little bit better about eating a second muffin when I know exactly what’s going into my body, you know? These **bran muffins** are definitely on the healthier side, especially since we focused on whole wheat flour and didn’t overload them with refined sugar. But listen closely, because this is super important: these numbers are just my best guess!
The exact nutrition facts can change depending on the brand of buttermilk you use, if you added those optional raisins, or if you swapped the oil for something else. I always run my final recipe through a calculator just to check, but think of this as a good guideline rather than a binding contract. For the official fine print, I always direct people to my disclaimer page, but here is the general breakdown for one single muffin based on the core recipe:
- Serving Size: 1 muffin
- Calories: 180
- Sugar: 10g
- Sodium: 180mg
- Fat: 6g
- Saturated Fat: 1g
- Trans Fat: 0g
- Carbohydrates: 30g
- Fiber: 5g (Yes! That’s a great amount for one little muffin!)
- Protein: 5g
- Cholesterol: 25mg
See? Five grams of fiber in one little grab-and-go breakfast package! That’s what I love about keeping these on hand. They feel hearty and satisfying without being heavy, and the fat content is low, which is great for keeping them light. If you’re aiming for even lower sugar, remember what we discussed about swapping some of that brown sugar for applesauce—that would bring the sugar count down even further!
PrintMoist High-Fiber Bran Muffins

A simple recipe for making moist, high-fiber bran muffins perfect for a make-ahead breakfast or snack.
- Prep Time: 10 min
- Cook Time: 18 min
- Total Time: 28 min
- Yield: 12 muffins
- Category: Breakfast
- Method: Baking
- Cuisine: American
- Diet: Vegetarian
Ingredients
- 1 1/2 cups wheat bran cereal
- 1 cup buttermilk
- 1/2 cup packed brown sugar
- 1/4 cup vegetable oil
- 1 large egg
- 1 teaspoon vanilla extract
- 1 1/2 cups whole wheat flour
- 1 teaspoon baking soda
- 1/2 teaspoon salt
- 1/2 cup raisins or chopped apple (optional)
Instructions
- Preheat your oven to 400 degrees F (200 degrees C). Grease a 12-cup muffin tin or line with paper liners.
- In a large bowl, combine the wheat bran cereal and buttermilk. Let this mixture sit for 10 minutes to soften the bran.
- Add the brown sugar, vegetable oil, egg, and vanilla extract to the bran mixture. Stir until just combined.
- In a separate medium bowl, whisk together the whole wheat flour, baking soda, and salt.
- Add the dry ingredients to the wet ingredients. Mix only until the flour disappears; do not overmix. If using, gently fold in the raisins or apple.
- Divide the batter evenly among the prepared muffin cups, filling each about two-thirds full.
- Bake for 15 to 18 minutes, or until a toothpick inserted into the center comes out clean.
- Let the muffins cool in the pan for 5 minutes before transferring them to a wire rack to cool completely.
Notes
- For extra moisture, substitute half the buttermilk with plain yogurt.
- These muffins freeze well. Cool completely, then store in an airtight container or freezer bag for up to three months.
- If you prefer oat bran, substitute the wheat bran cereal with oat bran, but you may need to increase the soaking time to 15 minutes.
Nutrition
- Serving Size: 1 muffin
- Calories: 180
- Sugar: 10
- Sodium: 180
- Fat: 6
- Saturated Fat: 1
- Unsaturated Fat: 5
- Trans Fat: 0
- Carbohydrates: 30
- Fiber: 5
- Protein: 5
- Cholesterol: 25