

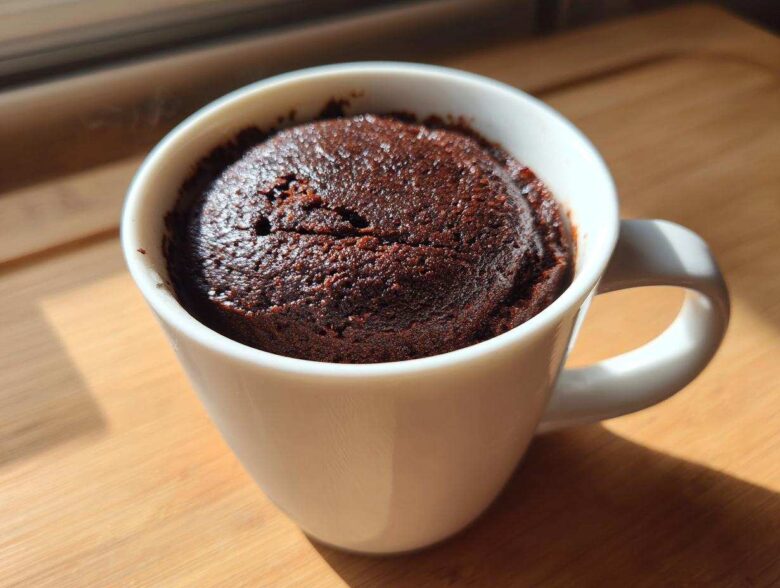
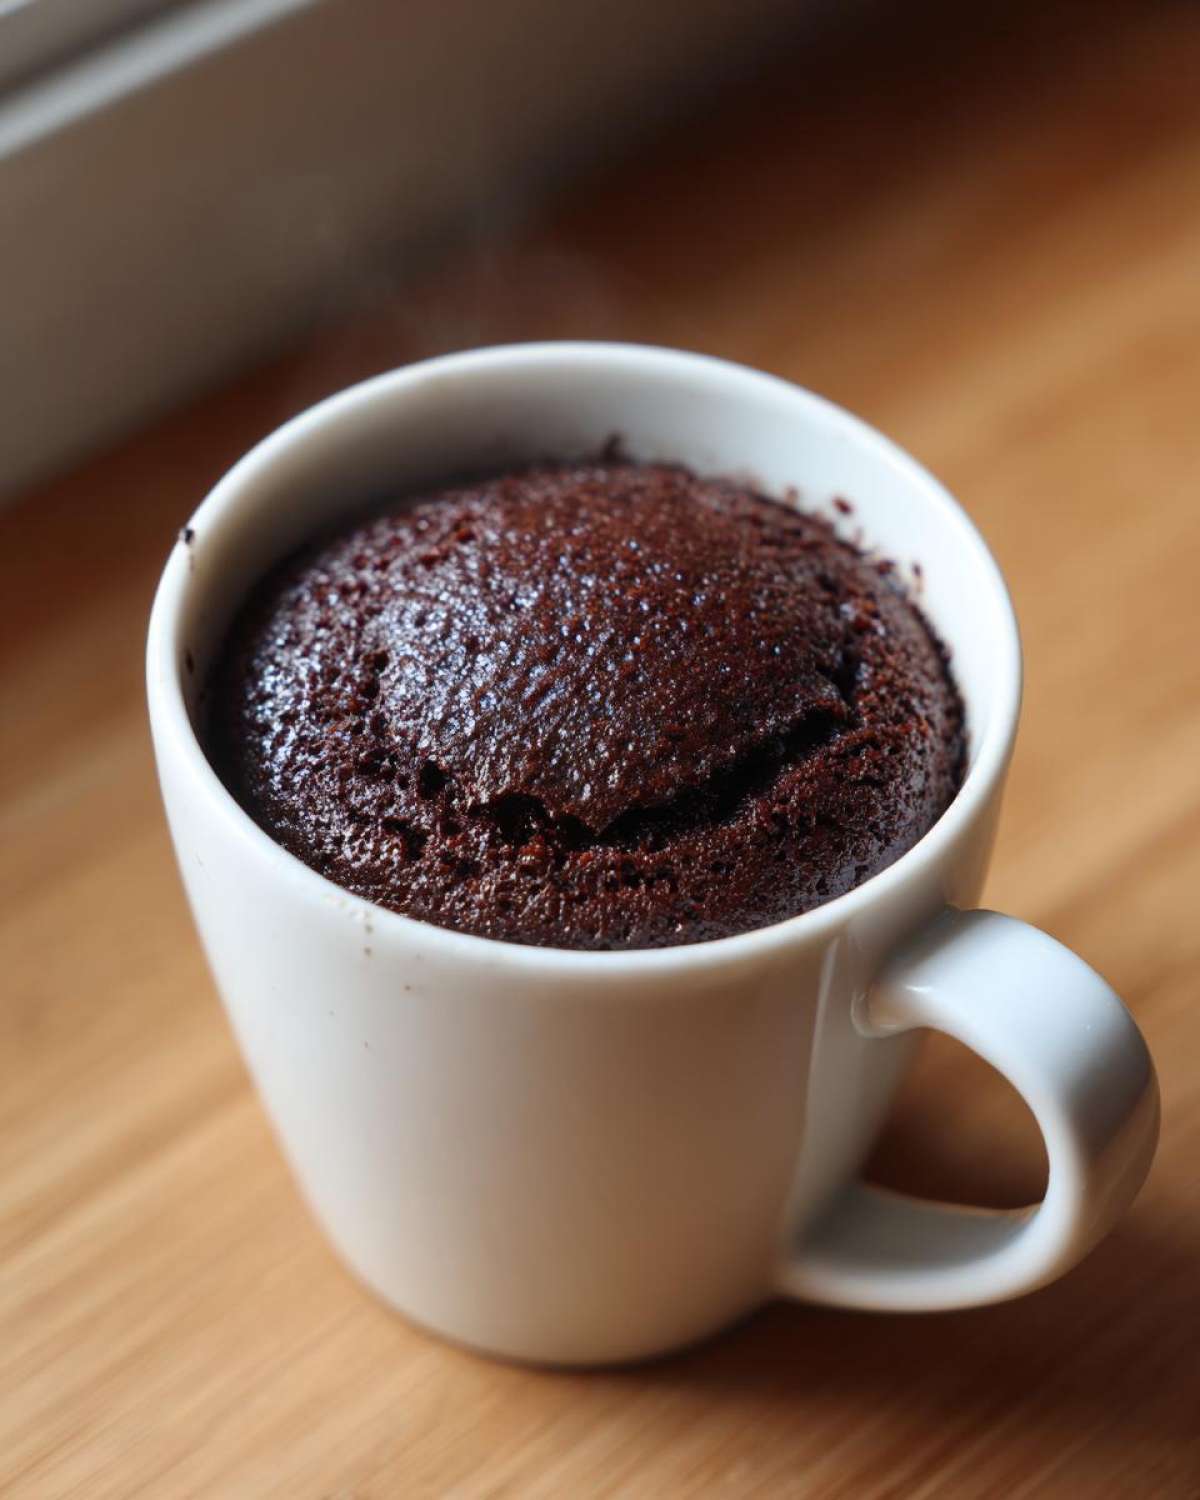
Ugh, I swear, 9 PM hits and suddenly I absolutely *need* cake, but who wants to clean a whole mixer and pan for just one serving? That’s why I’m obsessed with the magic of the **mug cake**! Seriously, this recipe is my go-to for an instant dessert fix. After what felt like a million failed, rubbery microwave attempts, I finally cracked the code for the moistest chocolate **mug cake** you can imagine, all made in under five minutes.
Trust me, finding the right balance of flour to liquid and cocoa is tough in the microwave—it’s easy to end up with something totally dry. I tested ratios forever until I landed on this perfectly gooey, rich chocolate version. It tastes like a tiny, perfect bakery cake, minus the whole hour of waiting!
Why This Chocolate Mug Cake is the Ultimate Quick Microwave Dessert
When that craving hits, you don’t want to wait for preheating or complicated steps. This **mug cake** is different. It’s not just fast; it’s reliably delicious! I’ve made this recipe dozens of times when I needed a simple cake for one, and it never fails to satisfy that dark chocolate urge.
Here’s what sets this recipe apart from those chalky microwave disasters you might have tried before:
- Unbelievable Moisture: We skip the egg and use the right oil/milk ratio, which keeps it soft, almost like a brownie. It’s a genuinely gooey mug dessert.
- Single Serving Perfection: Everything happens right there in the mug—no bowl washing needed if you’re careful! It truly is the easiest dessert for one.
- Speed Demon: We’re talking about getting a warm, bubbling cake in front of you in about three minutes total. That’s faster than making toast!
If you love pairing your dessert with something cool, check out my recommendation for adding ice cream on top—it takes this chocolate lava mug cake with ice cream combo to a whole new level!
Speed and Simplicity of Your New Favorite Mug Cake
Honestly, the best part is how little brainpower this takes. You don’t need an oven, you don’t need fancy ingredients, and you definitely don’t need ten minutes. Think of this as the ultimate two-minute dessert experience once you get the hang of it.
We’re talking about mixing four dry ingredients, adding three wet ones, stirring it up gently, and then zapping it for about 70 seconds. That’s it! You’re done! It’s the definition of an instant dessert recipe. Next up, let’s look at exactly what you need to pull this off.
Ingredients for the Moistest Chocolate Mug Cake
You don’t need a pantry full of specialty items for this, which is another reason I love it so much. Keep these simple components handy, and you can whip up this **mug cake** anytime temptation strikes. Just remember, you need a sturdy, microwave-safe mug—I prefer a standard 12-ounce size to give the cake room to rise without spilling!
Here is exactly what you need:
- 4 Tablespoons all-purpose flour
- 4 Tablespoons granulated sugar
- 2 Tablespoons unsweetened cocoa powder (Use a good quality one; it makes a huge difference!)
- 1/4 teaspoon baking powder
- Pinch of salt
- 3 Tablespoons milk (Whatever you have on hand—whole milk makes it richer, but 2% or even almond milk works totally fine)
- 1 Tablespoon vegetable oil (Or melted butter, seriously, melted butter is my personal favorite swap here!)
- 1/4 teaspoon vanilla extract
- 1 Tablespoon chocolate chips (Optional, but honestly, if you skip these, you’re missing out on the gooey part!)
See? Not scary at all! Once you’ve rounded up these items, we just sweep them into the mug and get ready for some fast microwave baking.
How to Prepare Your Instant Dessert Recipe
Okay, this is the fun part where the magic happens super fast! You’re going to be amazed how quickly we turn pantry staples into a decadent, **single serving cake**. Remember that list of ingredients? Just grab your mug and fork and let’s go.
- First, toss all your dry stuff in—the flour, sugar, cocoa, baking powder, and that tiny pinch of salt. Get your fork in there and really mix those dry ingredients until they look completely uniform. We need to break up any clumps of cocoa now!
- Next, add the wet ingredients: milk, oil, and that hit of vanilla. Stir everything together until it’s *just* combined. Seriously, I cannot stress this enough: stop stirring the second the flour streaks disappear.
- Throw in your chocolate chips if you’re feeling decadent.
- Now for the microwave part. Pop your mug in the microwave and set the timer for 60 seconds. This is where you have to pay attention! Microwave wattages are crazy different. If the top still looks super wet when the timer goes off, add 10 seconds. Then check again and add maybe 10 more if you need it. Don’t go over 90 seconds total unless you like eating dry sponge!
- Crucially, let it sit for a full minute after it stops. That residual heat keeps cooking it just right. Then, enjoy your **dessert for one** straight from the mug!
If you need other super-fast microwave cheats, I use the same low timing adjustments for my microwave mug omelette too. It saves me on rushed mornings!
Mixing Tips for a Perfect Chocolate Mug Cake Batter
The biggest mistake people make when they try to bake this kind of **mug cake** is overmixing the batter. Remember how I said to stop stirring when the flour streaks vanish? Here’s the science behind that: when you mix flour and water too much, you develop gluten. Gluten is great for chewy bread, but for a light, airy, tender cake like this one? Gluten makes it tough and rubbery. We want soft and gooey, right? So, mix until *just* incorporated. A few tiny, dry spots left over are better than a tough, dense cake!
Expert Notes and Substitutions for Your Single Serving Cake
I learned quickly that even the best **mug cake** recipe needs a little tweak depending on what I have in the cupboard that day, or what mood I’m in! Remember those notes I jotted down? They aren’t just suggestions; they’re shortcuts to elevation. The first big upgrade I highly recommend is swapping out the vegetable oil for melted butter if you can. Butter just brings a richness that oil can’t quite match, making this feel less like a quick fix and more like a real dessert.
Also, for anyone who likes a messy, satisfying center, the molten addition is a game-changer. This shows you’ve really mastered the art of **baking in a mug**!
Making a Molten Center in Your Mug Cake
This is my favorite trick! Right after you’ve stirred the batter until it’s happy but not overworked, take about a teaspoon or a small spoonful of something creamy—Nutella, peanut butter, or even a couple of extra chocolate chips clumped together—and gently drop it right into the center of the batter. Don’t mix it in! Just let it sit nestled on top of the batter layer. When the microwave works its magic, that core melts into a wonderfully runny lava. Just be careful when you eat it; it will be piping hot! If you’re looking for other sweet pairings, my chocolate orange mug cake is another flavor combo that handles a molten center beautifully.
Storage & Reheating Instructions for Leftover Mug Cake
Now, let’s be honest. I developed this recipe because I usually want the whole thing right *now*. A proper **mug cake** is designed to be a dessert for one, and honestly, it tastes the absolute best the second it comes out of the microwave—warm, gooey, and perfectly tender.
But sometimes, maybe you got interrupted, or you’re trying to save half for an afternoon snack. If you do have leftovers, storage is pretty simple, though I want to manage expectations!
If you absolutely must save it, let the cake cool completely in the mug first. Once it’s at room temperature, cover the top of the mug tightly with plastic wrap or pop a lid on it if your mug has one. Keep it sealed airtight on the counter or in the fridge for up to two days max. Any longer than that, and that lovely soft texture we worked so hard for turns a little too firm.
Reheating is easy, which is the beauty of **microwave baking**. Just pop the covered mug back in for short bursts—start with 10 seconds. If it needs more, add another 5 seconds. Watch it carefully! You want it warm and steamy, not cooked into a hockey puck. Remember, this **instant dessert recipe** really shines when it’s freshly made, but these little tips will keep your leftovers enjoyable!
Variations: Beyond Chocolate for Your Next Mug Cake
While this chocolate version is definitely my heavyweight champion, half the fun of the single serving **mug cake** concept is how easily you can pivot flavors. You shouldn’t have to settle for one boring flavor just because you’re baking for one! In my testing lab (aka my kitchen counter), I’ve discovered that the base ratios for flour and liquid work beautifully for almost anything.
If you’re not feeling the dark cocoa today, you can whip up a fantastic vanilla cake, or even try a peanut butter treat. For a fun, colorful option, I love tossing in some rainbow sprinkles for a birthday cake feel. If you prefer a hot drink vibe, you can even make a fantastic hot cocoa mug cake with marshmallows!
Quick Vanilla Mug Cake Adaptation
Turning this rich chocolate **mug cake** into a vanilla one is almost too simple. The main thing you must do is leave out the cocoa powder entirely, obviously! Since you’re removing a dry ingredient, you need to replace that volume. I usually add about 1/2 teaspoon extra flour, just to keep the mix stable.
Keep everything else exactly the same—milk, oil, sugar, vanilla, and baking powder. If you want an actual ‘Birthday Cake’ style experience, throw in a big teaspoon of rainbow sprinkles right before you microwave it. It’s a super cheerful dessert!
Serving Suggestions for Your Dessert For One
So, you’ve successfully made the most decadent, moist chocolate **mug cake** known to humankind. Congrats! But where do you go from here? Do you just grab a spoon and dive in straight away? Well, you *could*, and I won’t judge you, but taking 30 extra seconds to dress it up makes it feel like a real, special treat.
Since this is a rich, dark chocolate experience, you want toppings that either cool it down or add a contrasting layer of flavor. My personal weakness is anything cold against warm cake, so ice cream is almost mandatory in my house when I make this.
Here are the things I always keep stocked for decorating my single-serving cakes:
- Vanilla Ice Cream: It melts perfectly into the warm cake, making it even gooier. A scoop right on top after it cools for one minute? Perfection.
- Whipped Cream and Berries: If you want something a little lighter, a dollop of homemade whipped cream makes it feel fancy. A few fresh raspberries or sliced strawberries add a nice, necessary tartness to cut through all that chocolate goodness.
- Dusting: Sometimes I’m too lazy for whipped cream. A simple shaker of powdered sugar or a light dusting of cocoa powder looks elegant, even when you’re eating out of a coffee mug!
If you are looking for a completely different type of creamy dessert (great if you decide you don’t want cake after all!), you should definitely look into making mint pots de creme with whipped cream sometime. But for this **mug cake**, I usually stick to the classics so the chocolate really shines!
Frequently Asked Questions About Making a Mug Cake
I get so many questions about this recipe since it’s so different from traditional baking—it totally makes sense! When you’re trying to manage baking times and ingredient swaps inside a tiny mug, things can get fuzzy. I’m happy to clear up any confusion about making the best **single serving cake** using the microwave!
Here are the three things I get asked about the most when people try this **quick microwave dessert** for the first time:
Can I make this Chocolate Mug Cake without an egg?
Oh, that’s an easy one and a huge strength of this recipe: Yes, you absolutely can! In fact, this recipe is intentionally egg-free. Why? Because eggs tend to seize up and turn rubbery when cooked too fast in the microwave. We skip them entirely!
So, how does it get enough lift and structure for a proper cake texture? We rely on the combination of the baking powder and the fat (the oil or the melted butter). The baking powder gives us the initial puff we need, and the liquid ingredients like milk keep everything hydrated and soft, preventing that dry cake texture. It’s all about balancing those elements when you’re aiming for a **two minute dessert**!
What size microwave-safe mug should I use?
This is super important for avoiding a mess! If your mug is too small, the batter will boil right over the sides, and you’ll spend more time cleaning your microwave than eating your dessert! For this specific batch of batter, I always recommend a standard 12-ounce mug. That gives you plenty of headspace. If you use a huge, oversized novelty mug—say, 16 or 18 ounces—the cake will spread out too thin on the bottom, cook unevenly, and get dense. Stick to the 12-ounce standard for reliable results every time you try this **easy mug recipe**.
Can I bake this recipe in the oven instead?
Yes, you totally can! While this is designed as a true **no oven dessert** cheat, if you just prefer the oven environment, you can absolutely adapt it. If you use the oven, you should pour the batter into a small, greased ramekin instead of a mug.
You’ll need to bake it at about 350°F (175°C), but be warned: the cooking time will be dramatically longer—probably 15 to 20 minutes, depending on your ramekin depth. Honestly, at that point, you might as well just make a full-sized cake! The beauty of this recipe is the speed, which only happens in the microwave. For more tips on that, I’ve got a big guide on baking in a mug if you want to explore other microwave recipes!
Nutritional Estimates for This Recipe
Listen, when you are whipping up an emergency, molten chocolate **mug cake** at 9 PM, you aren’t usually thinking about macros, right? Me neither! But I know some of you are curious, so I pulled the estimates from the basic ingredients I listed.
Keep in mind this is just a rough guideline. If you use extra-large eggs (which you don’t in this recipe, thankfully!) or switch to full-fat coconut milk, those numbers will change. These estimates are based on the standard version listed above—a delicious, quick dessert for one!
Here is the breakdown for one serving of this **instant dessert recipe**:
- Serving Size: 1 mug cake
- Calories: About 280! (Worth every single one, trust me.)
- Sugar: Around 20 grams (Mostly from the granulated sugar and cocoa)
- Fat: 12 grams total (With about 3 grams being saturated fat)
- Carbohydrates: 42 grams
- Protein: 4 grams
- Fiber: 2 grams
- Cholesterol: 5 mg (Not bad for a cake!)
It’s surprisingly reasonable for something this decadent! If you’re watching your sugar, you could easily swap the granulated sugar for an equivalent amount of a powdered zero-calorie sweetener, though I’d recommend you save that experiment for another day. For now, enjoy this **easy mug recipe** as written!
PrintMoistest Chocolate Mug Cake (Microwave)
Make a rich, single-serving chocolate cake in your microwave in under five minutes.
- Prep Time: 2 min
- Cook Time: 1 min 30 sec
- Total Time: 3 min 30 sec
- Yield: 1 serving
- Category: Dessert
- Method: Microwave
- Cuisine: American
- Diet: Vegetarian
Ingredients
- 4 Tablespoons all-purpose flour
- 4 Tablespoons granulated sugar
- 2 Tablespoons unsweetened cocoa powder
- 1/4 teaspoon baking powder
- Pinch of salt
- 3 Tablespoons milk (any kind)
- 1 Tablespoon vegetable oil
- 1/4 teaspoon vanilla extract
- 1 Tablespoon chocolate chips (optional)
Instructions
- Combine the flour, sugar, cocoa powder, baking powder, and salt in a standard 12-ounce microwave-safe mug. Mix dry ingredients well with a fork.
- Add the milk, vegetable oil, and vanilla extract to the mug.
- Stir the wet and dry ingredients together until just combined. Do not overmix; a few small lumps are fine.
- Stir in the chocolate chips, if using.
- Microwave on high power for 60 to 90 seconds. Cooking time varies by microwave wattage. Start with 60 seconds and add 10-second increments if the top still looks wet.
- Let the cake cool for one minute before eating directly from the mug.
Notes
- For a richer flavor, substitute the vegetable oil with melted butter.
- Add a small spoonful of peanut butter or Nutella to the center of the batter before microwaving for a molten center.
- If you prefer a less dense cake, reduce the flour by 1/2 teaspoon.
Nutrition
- Serving Size: 1 mug cake
- Calories: 280
- Sugar: 20
- Sodium: 150
- Fat: 12
- Saturated Fat: 3
- Unsaturated Fat: 9
- Trans Fat: 0
- Carbohydrates: 42
- Fiber: 2
- Protein: 4
- Cholesterol: 5