

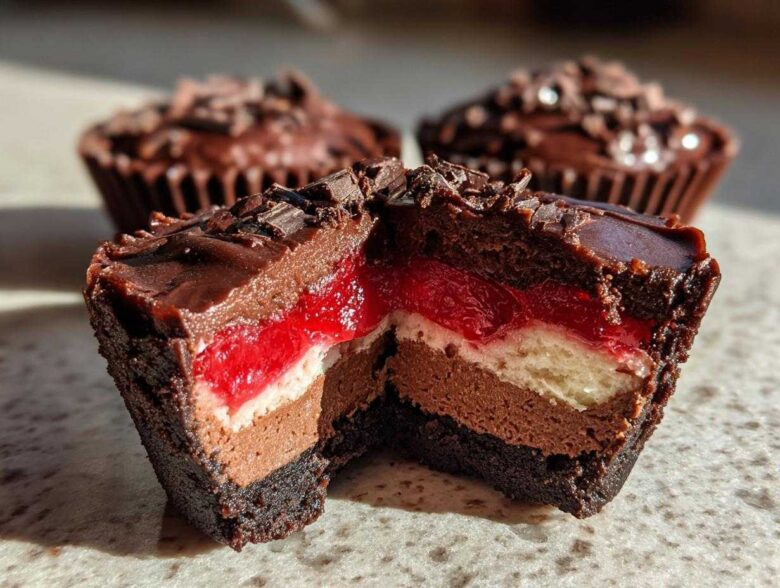
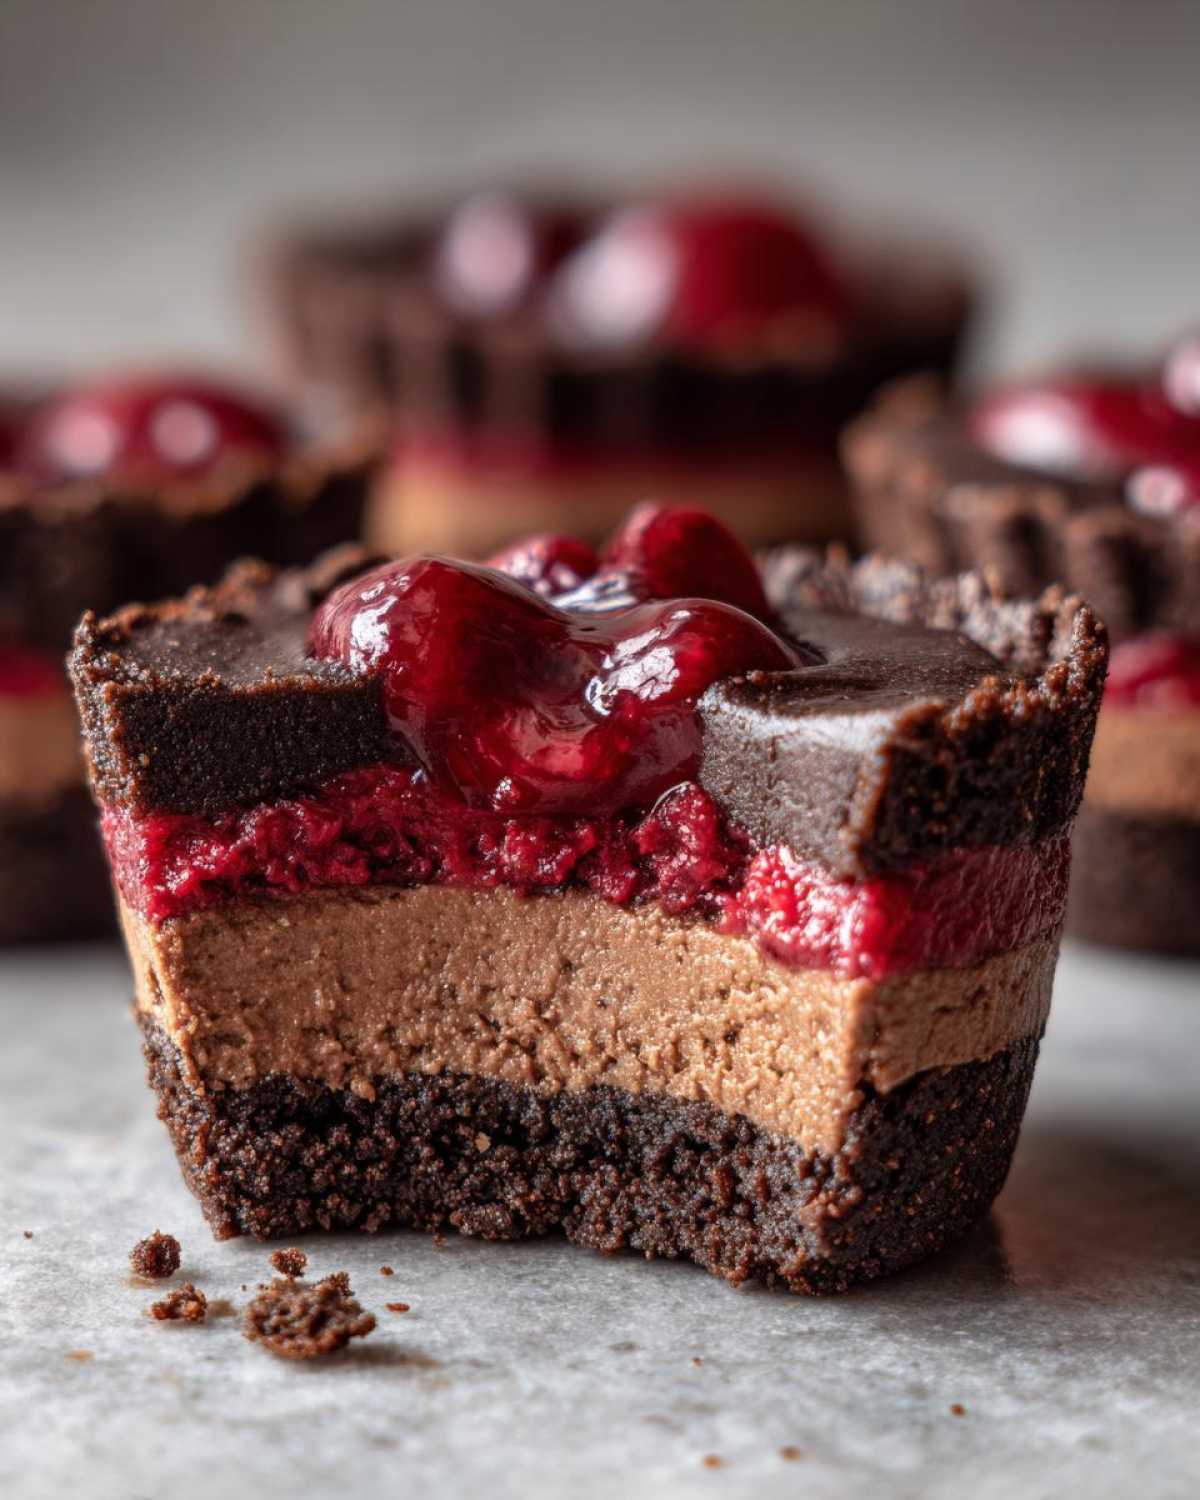
If you’re anything like me, sometimes you just need something incredibly decadent but the thought of turning on the oven in this heat just won’t work. I live for desserts that look like they took hours of fussy work but honestly took about twenty minutes of stirring! That’s where these beauties come in, my absolute favorite treat for when company drops by unexpectedly. We are talking about rich, smooth, unbelievably easy No-Bake Chocolate Cherry Cheesecake Cups.
Forget slicing a whole cake; these are already perfectly portioned! This recipe nails the trifecta: it’s completely no-bake, it delivers that divine, tart cherry swirled through deep chocolate cream cheese, and they set up perfectly in the fridge. Trust me, these little cups are showstoppers, and no one will ever believe how little effort they actually required!
Speaking of effortless baking, if you ever need more inspiration for making treats without firing up the heat, you really must check out my recipe for No-Bake Peanut Butter Cup Cheesecake—it’s another one that flies off the table instantly!
Why You Will Love These No-Bake Chocolate Cherry Cheesecake Cups
Seriously, why wouldn’t you love these? When I need a dessert that looks fancy but keeps my kitchen cool, these are my go-to. They hit all the right notes for busy people who still want something special. These delightful portions fly out of the fridge faster than I can make them!
-
Perfect Individual Dessert Cups
No fussing with slicing or worrying about messy presentation! These make the prettiest Individual Dessert Cups. It’s so nice to just set out six little delights that are perfectly portioned for when you want just a little taste of heaven.
-
Zero Oven Time for Easy Cheesecake Recipe
This is the real magic trick here; we are doing zero actual baking! That means you can whip this up on the hottest day without worrying about heating the house. If you need quick dessert ideas that don’t involve turning on one single burner, this fits the bill beautifully. It’s truly an Easy Cheesecake Recipe.
-
Rich Chocolate Cherry Treats Flavor Profile
Oh my goodness, the flavor! It’s the perfect marriage of tart, juicy cherries and deep, bittersweet chocolate cream cheese filling. If you love pairing chocolate and cherry—like in a Black Forest cake, but easier—these Chocolate Cherry Treats are going to blow your mind. They are some of the best No Bake Desserts I’ve ever made.
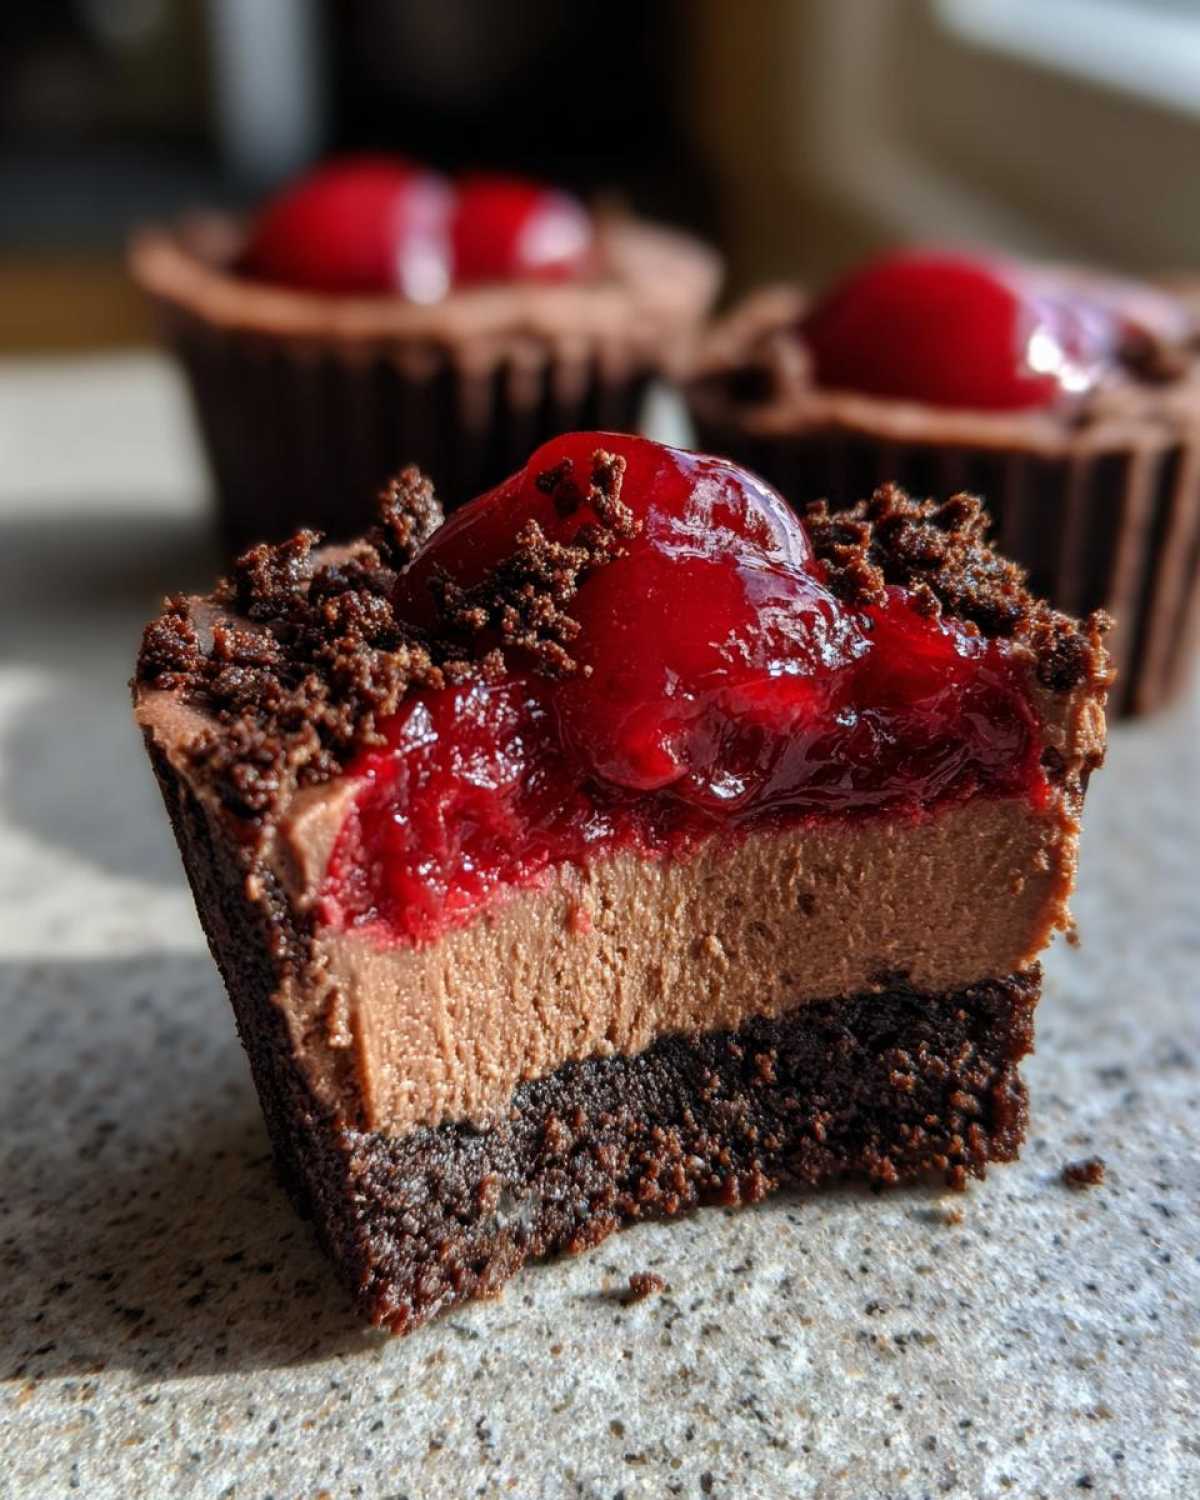
Essential Ingredients for No-Bake Chocolate Cherry Cheesecake Cups
Okay, pulling this together is shockingly simple because we aren’t dealing with gelatin or eggs that need tempering! That’s the beauty of these No Bake Desserts. Everything just mixes and mounds together into something spectacular. Before we start mixing, make sure your ingredients are prepped—especially the cream cheese, which needs to be nice and soft, not straight out of the fridge!
You might want to check out my chocolate cherry smoothie recipe if you’re looking for another quick flavor fix, but trust me, these cups are worth the tiny bit of effort here.
For the Chocolate Crust Base
This base is just as important as the filling, and you only need two things. We want a deep chocolate flavor, so forget plain graham crackers here! You need:
- 1 1/2 cups of chocolate wafer cookie crumbs (Oreos with the cream scraped out work perfectly, or use chocolate graham crumbs if you must!).
- 1/4 cup unsalted butter, melted. Just a quick melt in the microwave is fine.
For the Creamy No Bake Chocolate Cherry Cheesecake Filling
This is where the decadent texture comes from! Remember, your cream cheese has to be softened and your heavy cream needs to be very cold so it whips up into nice stiff peaks. It makes all the difference in creating that structure we need for these Mini Cheesecake Portions.
- 8 ounces cream cheese, completely softened.
- 1/2 cup powdered sugar (sift it if you’re feeling fancy!).
- 1 teaspoon vanilla extract.
- 1/4 cup heavy whipping cream.
- 1/2 cup semi-sweet chocolate chips, melted until smooth.
- 1/2 cup cherry pie filling (yes, the canned stuff is perfect here!).
- A little bit of chocolate shavings for garnish—this is non-negotiable for looks!
Step-by-Step Instructions for No-Bake Chocolate Cherry Cheesecake Cups
Alright, grab your spoons—this is the fun part! Even though this whole recipe is about speed, we still need a few critical steps to make sure these No-Bake Chocolate Cherry Cheesecake Cups are rock solid and deliciously layered. The timing on the chill is everything, so don’t rush that last step!
If you’re looking for another recipe where chocolate and cherry meet for an indulgent (and perhaps boozy) treat, you have to see my notes on chocolate cherry rum balls. But for now, let’s get these cups chilling!
Preparing the Crust and Initial Chill
First things first, we need the base for our Individual Dessert Cups. Take your chocolate wafer crumbs and toss them in a bowl with that melted butter. Mix it up until it looks like wet sand—it should just hold together when you squeeze a little in your palm. Now, press about a tablespoon of that mixture right into the bottom of your six little cups or ramekins. Don’t press them too hard, or they will be impossible to eat later!
Once they are packed down, pop those cups straight into the freezer. We want them firming up while we tackle the glorious filling. Give them about ten minutes in the freezer while you get the next parts ready.
Making the No Bake Chocolate Cheesecake Filling
In a good-sized bowl, start whipping your softened cream cheese until it’s totally smooth and fluffy—no lumps allowed! Mix in the powdered sugar and that vanilla extract until everything is beautifully combined. Now for the cream! Whip your cold heavy cream in a separate bowl until you have stiff peaks. This is crucial for structure!
Here comes the gentle part. You need to gently fold that whipped cream into the cream cheese mixture. Use a rubber spatula and cut down the middle, then scoop up the side. Don’t stir vigorously, or you’ll knock all the air out that we just worked so hard to create! Once combined, gently fold in the melted semi-sweet chocolate chips. Stop mixing the second the swirls disappear—a few faint streaks of chocolate are totally fine, I promise.
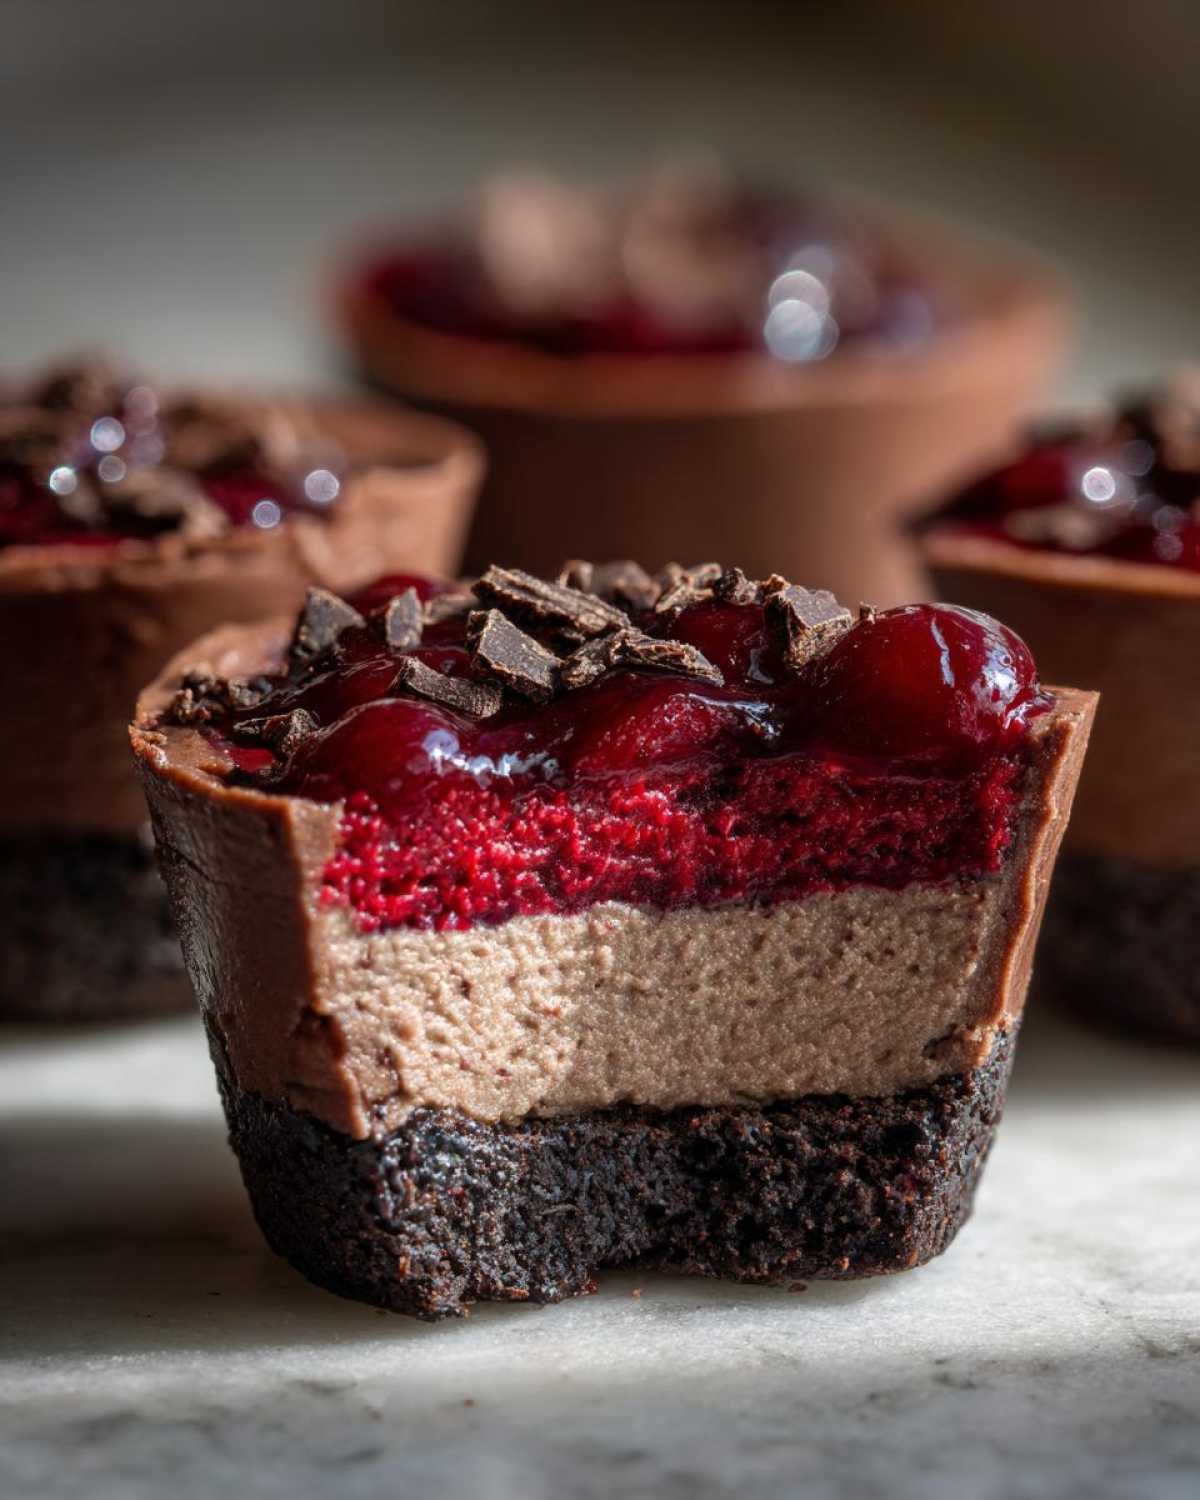
Assembling and Chilling the No-Bake Chocolate Cherry Cheesecake Cups
Time to layer! Take your crusts out of the freezer. Spoon or pipe half of that decadent chocolate cheesecake filling evenly over the crusts in all six cups. Next, take your jar of cherry pie filling and plop about one tablespoon right on top of that first layer in each cup. Make sure the cherry centers up nicely!
Now, finish them off! Spoon the rest of the chocolate cheesecake filling right over the cherry layer, smoothing the top gently. Add just a tiny little dollop of any remaining cherry filling right on the very top—just for color contrast. The absolute final step is placing them back in the refrigerator. You need a minimum of 4 hours for these to set up firm, but honestly, overnight is best for the Best No Bake Cheesecake texture. If you cut them short, you’ll end up with a lovely, slightly softer No Bake Parfait texture instead!
Tips for Perfect No-Bake Chocolate Cherry Cheesecake Cups
We’ve built these amazing No-Bake Chocolate Cherry Cheesecake Cups, but getting that perfect sliceable texture without an oven takes just a couple of little nudges in the right direction. A floppy cheesecake cup is just sad, right? We want these to be beautiful little towers of flavor, perfect for those hot days when you want something truly decadent that qualifies as one of those great No Bake Summer Desserts.
I learned one trick in particular that I always include now, which actually comes from one of the notes in the recipe card: use dark chocolate wafers for the crust base! It sounds small, but that deeper chocolate flavor prevents the crust from tasting way too sweet against that tart cherry topping. If you’ve ever made my chocolate hazelnut truffles, you know I appreciate a good balancing act in texture and flavor!
Achieving a Firm No-Bake Texture
The number one secret—and I can’t stress this enough—is treating that heavy cream right. You need stiff peaks, not soft waves! If your cream is under-whipped, it’ll just melt into the cream cheese mixture, and you’ll end up with soup instead of cheesecake. Make sure your bowl and whisk attachments are cold before you start whipping the heavy cream for the best results!
Also, don’t cheat the chill time! Four hours is the absolute bare minimum, but honestly, the longer they sit—up to 8 hours—the more structured these become. I usually make them the night before I plan to serve them. They taste incredible the next day, and they are structurally perfect for serving!
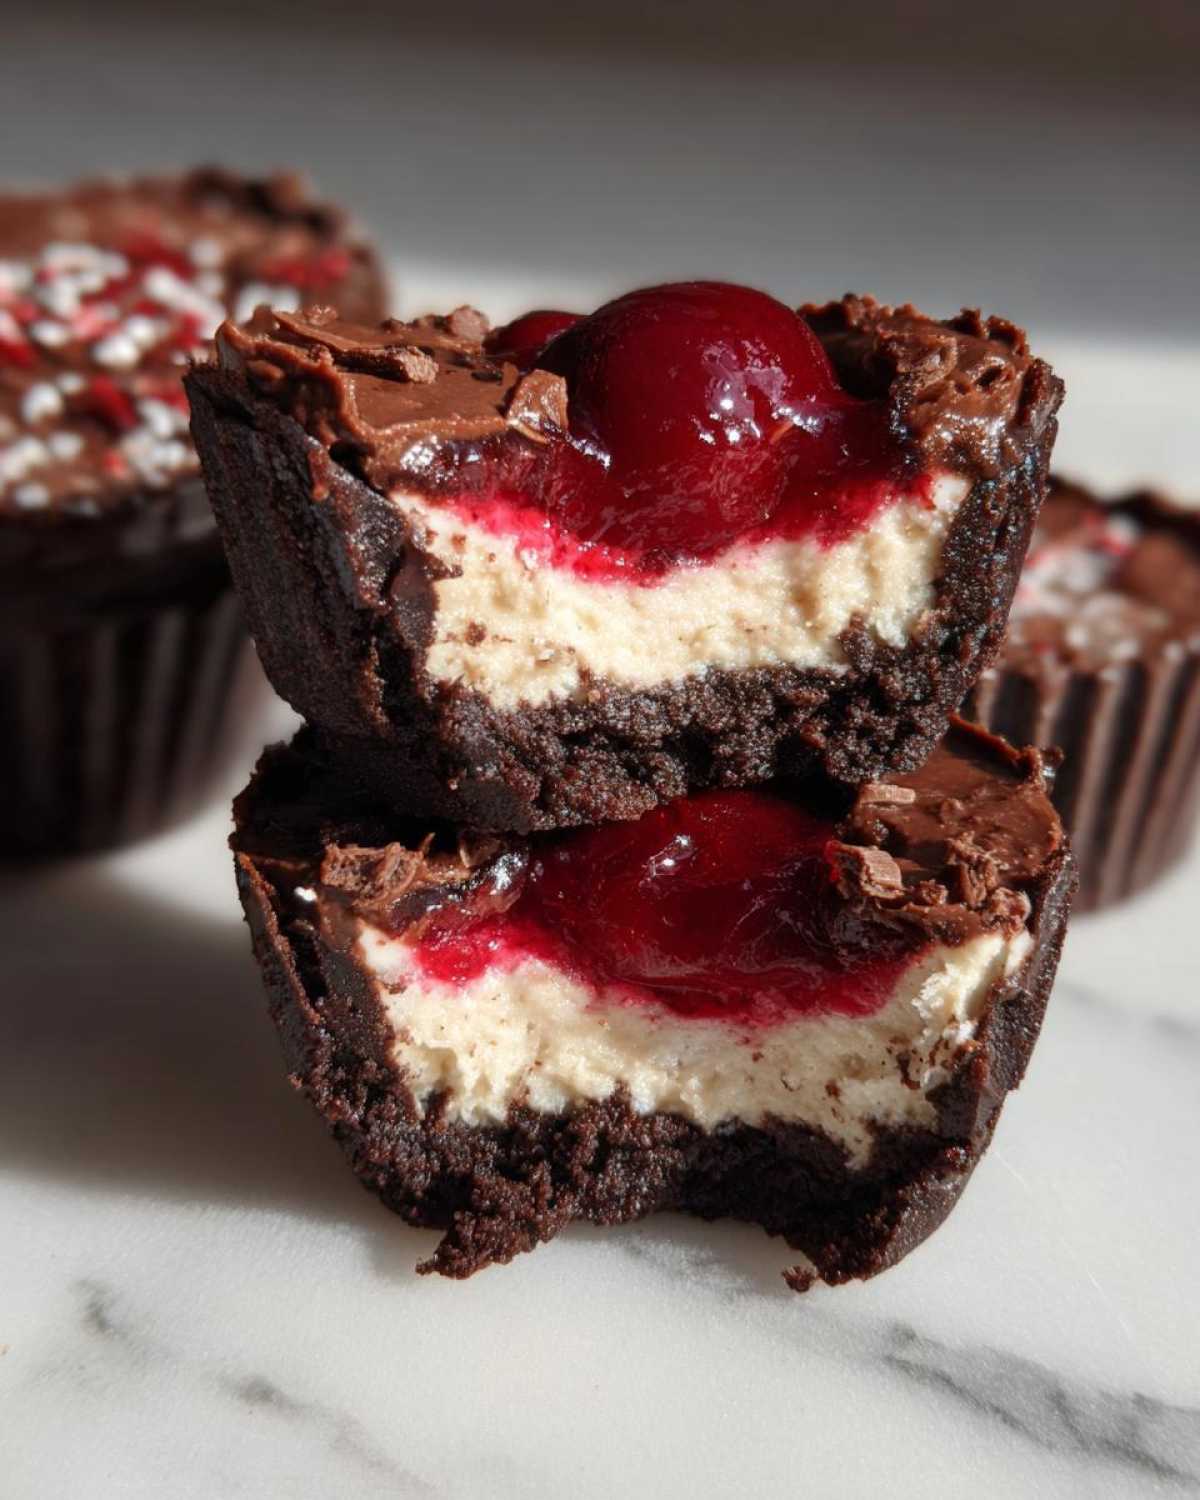
Variations for Chocolate Cherry Treats
Since these Chocolate Cherry Treats are so straightforward, they are fantastic for experimenting! If you’re serving an adult crowd and you want to kick the flavor up a notch, try this: before you layer the cherry filling, gently drizzle just a tiny bit of Kirsch (cherry brandy) over the chocolate filling layer. It really brightens up the cherry flavor!
Also, feel free to swap out the semi-sweet chips for good quality bittersweet chocolate chips if you prefer things less sweet overall. You can also fold in a tablespoon of finely chopped maraschino cherries right after you fold in the melted chocolate if you want cherry flecks all the way through the filling, not just on top!
Storage and Make-Ahead for Your No-Bake Chocolate Cherry Cheesecake Cups
This is one of the best things about making these No-Bake Chocolate Cherry Cheesecake Cups: they are fantastic make-ahead options! Since they have to chill anyway to set up properly, you can honestly make these the day before you plan to serve them, which just screams great Quick Dessert Ideas, right?
I usually whip up a batch of 12 cups on a Saturday afternoon, and they are still spectacularly delicious on Monday afternoon. Just make sure you cover them really well before they go into the fridge. If you just leave them open, the tops can get a little tacky or absorb smells from the fridge, and nobody wants that!
Here’s my trick for keeping them fresh: cover each cup individually with plastic wrap, pressing the plastic gently right onto the surface of the cheesecake itself, especially if you left off the final cherry dollop. Then, once they are individually sealed, pop the whole tray or dish into an airtight container. This double protection works wonders!
If you’re looking for other make-ahead wonders that don’t require the oven, you absolutely have to try my no-bake trail mix energy bars. They are perfect for quick snacks throughout the week!
Because these No Bake Desserts rely on chilling to firm up the cream cheese and stabilized cream, they hold beautifully in the fridge for up to four days. Honestly, they rarely last that long in my house, but I know you can keep them fresh!
Frequently Asked Questions About No Bake Desserts
It’s funny how many questions pop up once you get people thinking about easy desserts! I’ve compiled the ones I get asked most often about these No Bake Desserts. Hopefully, these clear up any last-minute doubts you have before diving in and making these gorgeous Mini Cheesecake Portions for yourself!
Can I use graham crackers instead of chocolate wafers for the crust?
Absolutely, you can! But listen, your flavor profile changes completely, which is why I push for chocolate wafers. Graham crackers lend themselves better to vanilla or lemon cheesecakes. If you use graham crackers, these cups will taste more like a classic cherry cheesecake rather than a decadent, rich chocolate one. Structurally, it holds up just fine—just know you’re trading chocolate intensity for a lighter base flavor!
How long can these *Mini Cheesecake Portions* be stored in the refrigerator?
Because they are so dairy-heavy and they rely on chilling rather than baking to set, I always recommend consuming them within three to four days. After that, the crust can start to get a little too soft, and the cherry filling tends to bleed into the cream cheese layer too much. They are definitely best enjoyed within the first 48 hours, but you have a solid window to enjoy these Individual Dessert Jars!
Is there a way to make these *Cream Cheese Dessert Cups* vegan?
Oh, that’s a great question for those with dietary needs! Yes, you can definitely adapt this! For the cream cheese layer, swap in a high-quality vegan cream cheese substitute—Tofutti or Kite Hill work really well for these applications. For the heavy cream, you’ll want to use a chilled can of full-fat coconut cream instead. Make sure you scoop only the thick cream off the top of the can (leave the watery part behind) and whip that stiff! The chocolate chips will need to be dairy-free, of course. They come out surprisingly similar!
And if you’re looking for more dairy-free delights that require zero oven time, you simply must swing by my guide on using homemade crusts for no-bake peanut butter cup cheesecake. It’s a lifesaver!
Estimated Nutritional Breakdown for No-Bake Chocolate Cherry Cheesecake Cups
Now, I have to start this section with a big, bright disclaimer: I am a cook, not a certified nutritionist! These numbers are my best best guess based on the ingredients I listed, using standard database averages for things like chocolate wafers and standard pie filling. Please do not treat this as medical advice—it’s just a rough guide so you know what you’re diving into when you devour these amazing No-Bake Chocolate Cherry Cheesecake Cups. If you are tracking macros strictly, you might want to weigh your servings!
That said, we are dealing with cream cheese, chocolate, and a cookie crust, so yes, these are definitely rich, decadent Chocolate Cherry Treats! But hey, we didn’t turn on the oven, so that counts for something, right? Here is what my calculator spit out for one single serving cup:
- Serving Size: 1 cup
- Calories: approximately 350
- Fat: about 22g (Watch that saturated fat—that’s the butter and cream cheese talking!)
- Carbohydrates: around 34g
- Sugar: approximately 28g (Most of this is naturally coming from the pie filling and chocolate)
- Protein: about 5g
- Cholesterol: around 65mg
I made sure to use semi-sweet chips, which helps keep the sugar content from skyrocketing compared to using milk chocolate. Enjoy them as the wonderful, rich indulgence they are! These are the perfect Single Serving Desserts when you need that little burst of amazing flavor.
Share Your Decadent Cherry Desserts Experience
That’s it! You’ve made the absolute prettiest, easiest, and most delicious No-Bake Chocolate Cherry Cheesecake Cups, and now it’s your turn to tell me all about it!
Honestly, I live for hearing when one of my recipes totally saves the day for someone. Did you serve them at a big gathering? Did you manage to leave any leftovers to enjoy the next day? Drop everything in the comments below—I want to know how they turned out for you!
Did you stick to the exact recipe, or did you try folding in a little splash of liquor like I mentioned? Don’t be shy! Rating the recipe helps other folks who are looking for fantastic Decadent Cherry Desserts feel confident trying it out. I truly hope these little cups bring as much joy to your table as they do to mine.
And hey, if you snapped a picture of your amazing layered creations, please share it! You can tag me on social media or just let me know where I can see them. I love seeing how everyone sets up their beautiful Mini Cheesecake Portions!
If you’re interested in seeing what else I’m whipping up—especially fun stuff you can make without turning on the heat—be sure to check out my main recipe index! Happy baking (or, well, *mixing*)!
PrintNo-Bake Chocolate Cherry Cheesecake Cups
Make individual, no-bake cheesecake cups featuring rich chocolate and tart cherry flavors. This recipe requires no oven and sets quickly.
- Prep Time: 20 min
- Cook Time: 0 min
- Total Time: 4 hr 20 min
- Yield: 6 servings
- Category: Dessert
- Method: No Bake
- Cuisine: American
- Diet: Vegetarian
Ingredients
- 1 1/2 cups chocolate wafer cookie crumbs
- 1/4 cup unsalted butter, melted
- 8 ounces cream cheese, softened
- 1/2 cup powdered sugar
- 1 teaspoon vanilla extract
- 1/4 cup heavy whipping cream
- 1/2 cup melted semi-sweet chocolate chips
- 1/2 cup cherry pie filling
- Optional: Chocolate shavings for garnish
Instructions
- Combine the chocolate wafer crumbs and melted butter in a small bowl. Press about 1 tablespoon of this mixture into the bottom of six small serving cups or ramekins. Place the cups in the freezer while you prepare the filling.
- In a medium bowl, beat the softened cream cheese, powdered sugar, and vanilla extract until smooth.
- In a separate bowl, whip the heavy cream until stiff peaks form. Gently fold the whipped cream into the cream cheese mixture.
- Fold in the melted semi-sweet chocolate chips until just combined. Do not overmix.
- Spoon or pipe half of the chocolate cheesecake filling evenly over the crusts in the six cups.
- Top the chocolate layer with 1 tablespoon of cherry pie filling in each cup.
- Spoon the remaining chocolate cheesecake filling over the cherry layer.
- Top each cup with a small dollop of the remaining cherry pie filling.
- Refrigerate the cheesecake cups for at least 4 hours, or until firm. Garnish with chocolate shavings before serving.
Notes
- For a firmer crust, chill the crust mixture for 10 minutes before adding the filling.
- Use dark chocolate wafers for a deeper chocolate flavor in the base.
- If you prefer a stronger cherry flavor, you can fold 2 tablespoons of cherry juice into the cheesecake filling before adding the chocolate.
Nutrition
- Serving Size: 1 cup
- Calories: 350
- Sugar: 28
- Sodium: 180
- Fat: 22
- Saturated Fat: 14
- Unsaturated Fat: 8
- Trans Fat: 0
- Carbohydrates: 34
- Fiber: 1
- Protein: 5
- Cholesterol: 65