

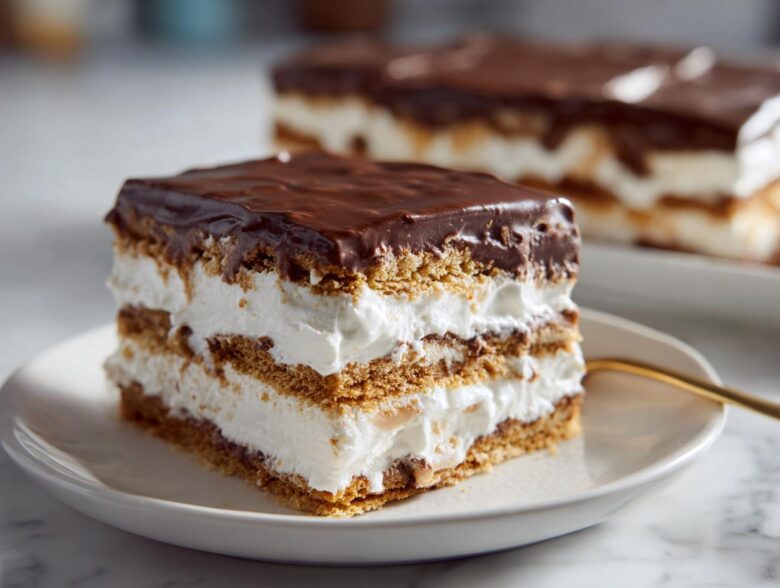
Okay, let’s talk about the desserts that save your life when company shows up unexpectedly. You know the ones—they look fancy, taste like you spent hours in the kitchen, but honestly took maybe twenty minutes of actual work. That’s exactly what this No-Bake Chocolate Eclair Cake Dessert is! Trust me when I say this recipe is pure magic, a total crowd-pleaser, and easily my go-to when I need a stunning focal point for any potluck or family dinner. We’re taking all the amazing layers of a traditional eclair—that creamy center, that crisp-but-soft base, and that gorgeous chocolate top—and we’re doing it without ever even preheating the oven. It’s fast, it’s unbelievably creamy, and I always have to hide a slice for myself before everyone else digs in!
When I first tried mimicking the eclair experience without the fussy pastry cream, I was skeptical. But using a clever filling base makes it completely foolproof. If you need reliable, quick dessert ideas, you absolutely need to bookmark this one. You can check out some other fantastic chilled treats, like my no-bake peanut butter cup cheesecake, if you love this style of dessert, but nothing beats this eclair copycat for that specific nostalgic flavor!
Why You Will Love This No-Bake Chocolate Eclair Cake Dessert
Honestly, this recipe just keeps on giving. It’s the kind of dessert that makes people ask for the recipe before they’ve even finished their first slice! It checks every box imaginable for a busy home cook like me.
- It truly lives up to the name: It is a fantastic Easy No Bake Dessert. Seriously, the only cooking involved is briefly warming the chocolate for the glaze.
- The structure mimics a real eclair! Those graham cracker layers get soft and almost cakey during the chilling process, giving you that amazing Eclair Inspired Dessert effect.
- It’s the ultimate Potluck Dessert Idea. You make it ahead, it travels well in its 9×13 dish, and everyone loves a layered chocolate treat.
- The filling is light but rich. We skip heavy whipping cream and use shortcuts that keep the texture dreamy and airy.
- It’s perfect for making ahead! In fact, you *have* to make it ahead, which takes all the pressure off serving something fresh right out of dinner.
Essential Components for Your No-Bake Chocolate Eclair Cake Dessert
This Eclair Inspired Dessert relies on three distinct layers working together, just like the real thing, but without needing any pastry bags or complicated stovetop stirring—well, almost! We’re building this beauty from the bottom up. I always think of it as three separate missions that come together for one glorious final product.
Because we are using graham crackers instead of piping choux pastry, we get a satisfying, sturdy base that soaks up moisture from the filling, turning into something wonderfully tender during the chill time. If you have explored other graham cracker crust desserts, you know how versatile these cookies are for creating an easy foundation for rich fillings.
Ingredients for the Graham Cracker Layers and Chocolate Glaze
This part covers what we need to make the structural layers and the glossy chocolate blanket that covers everything.
- 1 box (14.4 oz) graham crackers, making sure you have whole sheets—no crumbs needed here!
- 1 cup semi-sweet chocolate chips (the standard size works perfectly).
- 1/2 cup milk (any kind works here for the glaze).
- 1 tablespoon butter (just a little bit to give the glaze shine).
Ingredients for the Simple Cream Filling Recipes
This is the heart of the dessert, transforming simple ingredients into that thick, luxurious layer that makes people think you spent all afternoon whipping cream. The instant pudding is our secret weapon for this Quick Chocolate Treat.
- 1 cup unsalted butter, make sure it’s softened nicely but not melted!
- 1 cup granulated sugar.
- 1/2 cup cold milk (this needs to be cold to work with the pudding mix).
- 1 package (3.9 oz) instant vanilla pudding mix—grab the regular size, not the sugar-free kind!
- 1 container (8 oz) frozen whipped topping, thawed but still cool.
Preparing the Components of the No-Bake Chocolate Eclair Cake Dessert
We have our components ready; now it’s time to get them mixed up before we start layering! The key to making this happen quickly is having everything measured out and ready to go. We have two main tasks here: creating that shiny, smooth chocolate glaze and whipping up that cloud-like cream filling. It’s all about technique, even when you aren’t baking!
If you love simple, creamy recipes like this one, you should definitely have my guide on chocolate pudding desserts handy, because they share so much DNA with this eclair cake filling.
Making the Rich Chocolate Topping
This is fast, so be ready to stir! You simply combine your chocolate chips, the half-cup of milk, and that tablespoon of butter in a small saucepan. Set the heat to medium-low—we don’t want to scorch this, trust me! Keep stirring gently until everything melts down into a beautiful, smooth glaze. Once it’s lump-free, pull it right off the heat. It needs just a few minutes to cool down so it doesn’t melt the filling when we pour it on later, so set that aside for now.
Whipping Up the Cream Filling
This part requires a bit of muscle, or at least a good stand mixer! First, beat that softened butter and the cup of sugar together until it gets super light and fluffy—you want it pale yellow and airy. Then, while the mixer is running, slowly add the cold milk and the entire package of instant vanilla pudding mix. It will thicken up fast, usually in about two minutes. The most important thing next? Gently—and I mean gently—fold in your thawed whipped topping. If you beat it in, you’ll deflate all those nice air bubbles we just created, and we definitely want to avoid that!
Assembling Your No-Bake Chocolate Eclair Cake Dessert
Now that we have our delicious components ready—the chocolate topping cooling patiently and that fantastic cream filling waiting—it’s time for the fun part: layering! This is where we build the structure for our Chocolate Layer Cake Recipe copycat. If you’ve ever made a lasagna, you understand the satisfaction of a perfect stack, and this is no different, just much sweeter!
First things first: get your 9×13 inch baking dish ready. This is my biggest pro tip for this recipe: line the entire dish with plastic wrap, making sure you leave a good overhang on the longer sides. Trust me on this one! When this dessert is completely chilled, it gets wonderfully firm, and that plastic wrap overhang acts like built-in handles, letting you lift the whole perfect rectangle out later for slicing without breaking a single layer. It’s a game-changer for serving!
Once you have your dish lined, we start piecing it together. Line the bottom with a single, flat layer of those whole graham crackers. Don’t overlap them too much, just cover the base. Next, carefully spoon about half of your whipped cream filling over the crackers and spread it out evenly—get right to the edges!
Time for the second layer of crackers! Place those right on top of the filling. Then, spread the remaining half of the cream filling over this second cracker layer. Yes, you’re covering filling with crackers again! For the final structural layer, top it with one last layer of graham crackers.
We are almost done before the long wait. Take that slightly cooled chocolate glaze you made earlier and pour it right over the top cracker layer. Use an offset spatula to gently nudge it so it covers every inch of the surface, making sure those edges are sealed in chocolate. What you’ll have now is a beautiful, flat layered dessert ready for its transformation. Now, cover the whole thing tightly with plastic wrap and get it into the fridge! As I always tell everyone, don’t even think about touching it for at least six hours, but honestly, overnight is where the real magic happens for that perfect texture. You can find some other great layered recipes when you check out my favorite chocolate layer cake recipes!
Crucial Chilling Time for the No-Bake Chocolate Eclair Cake Dessert
This is the step that separates a good dessert from a truly amazing one, and it’s the part where most people get impatient. I get it, I really do! When you see that beautiful chocolate glistening, you just want to grab a fork immediately. But you absolutely have to resist that urge!
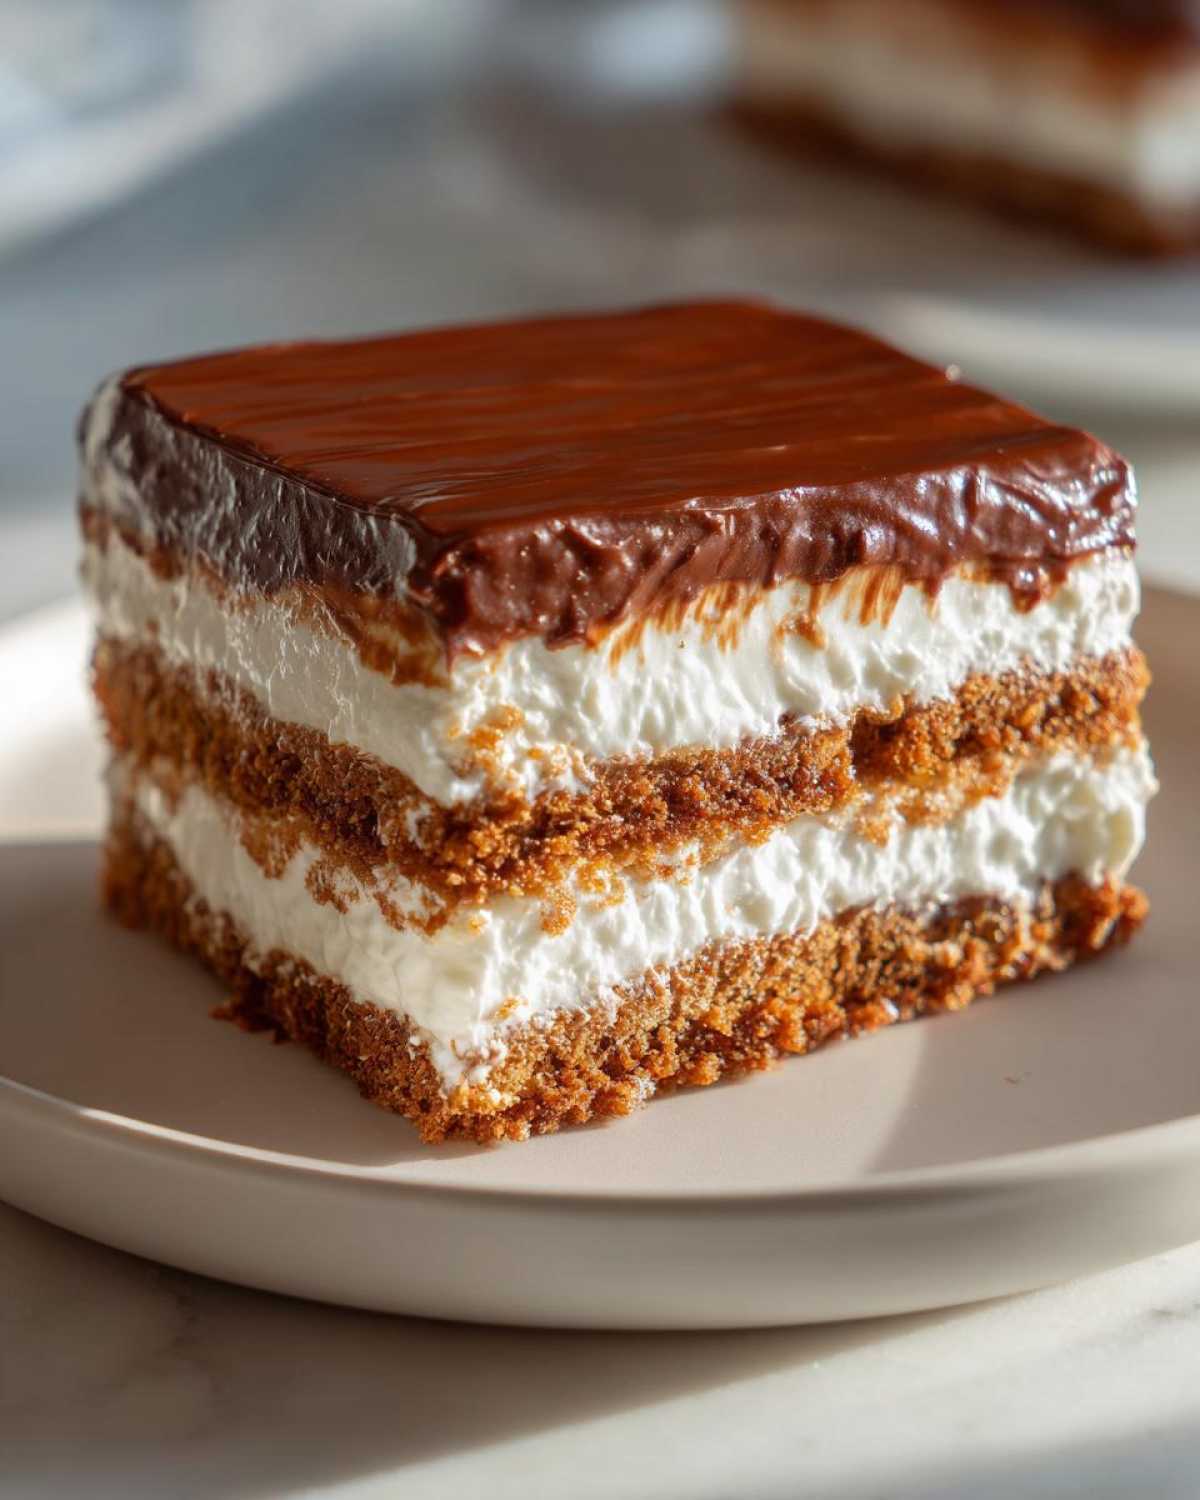
For this No-Bake Chocolate Eclair Cake Dessert to achieve that perfect, slightly chewy, wonderfully soft texture that mimics real eclair pastry, it needs time to work its magic in the cold. Remember, we used whole sheets of graham crackers, not crumbs. Those crackers are designed to be stiff, right? They need hours—and I mean hours—for the moisture from that luscious vanilla cream filling to seep all the way through them.
If you cut it too soon, you’ll end up with thick, clearly defined cracker layers cemented together by filling. That’s not an eclair cake; that’s just a sweet cracker sandwich! But if you follow the minimum six hours, or better yet, chill it overnight, you’ll pull it out and the crackers will have softened just enough. They become tender, slightly cake-like, and perfectly integrated with the filling. This long chill time is non-negotiable for that authentic flavor mimicry!
Because this recipe is designed to be prepped in advance, it makes it wonderful for busy weekends. It’s one of my favorite make ahead desserts because the flavor actually gets deeper and smoother the longer it sits. It means less stress on party day, and more time for you to actually enjoy your guests!
Tips for Success with Your No-Bake Chocolate Eclair Cake Dessert
Even though this is a wonderfully simple, No-Bake Chocolate Eclair Cake Dessert, there are a few little secrets I’ve picked up over the years that make sure you get that perfect texture and flawless presentation every single time. Think of these as the little nudges Grandma would give you if she were looking over your shoulder!
The main goal here is contrast: you want the chocolate topping to set firm, the filling to stay cool and fluffy, and the crackers to absorb just the right amount of moisture. Here are the things I always double-check before that final trip to the fridge.
Keeping Those Cracker Layers Crisp (Until They Soften!)
The recipe calls for whole graham cracker sheets, and I need to stress this point again: don’t go hunting around for the crumbs! We need those full, flat sheets to build our structure. When you’re laying them down, try to keep the gaps minimal, but don’t sweat it if they don’t fit perfectly edge-to-edge. Remember, the filling is going to squeeze into all those little nooks and crannies, and that soaking action is what creates that soft, pastry-like texture we are aiming for. If you use too many broken bits, your cake might end up dense in spots instead of evenly tender.
Ensuring the Cream Filling is Just Right
When you are beating the butter and sugar, make sure you are taking your time! You need that mixture to be visibly pale and fluffy before you even think about adding the instant pudding mix. If the butter isn’t properly aerated, the whole filling ends up feeling heavy or grainy. Once you add the pudding mix and milk, it thickens up shockingly fast. But here’s the key move: after the base is thick, when you fold in the thawed whipped topping, use a rubber spatula and cut through the middle of the bowl gently, turning the bowl as you go. We’re just trying to incorporate the topping; if you mix vigorously, you’ll knock the air right out, and you want this filling to be as light as possible! If you struggle with stabilizing fillings, you might want to look at some other simple cream filling recipes for inspiration, but I promise this one is made for speed.
The Trick to Easy Serving Presentation
We already talked about lining the pan with that crucial plastic wrap overhang—if you skipped that part in the assembly instructions, stop now and go back and add it! This overhang is crucial because after 6 to 8 hours of chilling, this No-Bake Chocolate Eclair Cake Dessert gets absolutely rock solid. Trying to scoop it out with a regular spatula is a recipe for disaster; you’ll end up with crumbling edges and a cracked chocolate top.
When it’s time to serve, just grab those plastic handles on either side, lift the entire block straight up and out of the pan, and place it gently on a cutting board. Then, you can use a sharp knife to slice beautiful, clean squares or rectangles. The glaze stays intact, the layers stay straight, and you look like a total professional! Honestly, it makes this quick treat look like a masterpiece.
Storage and Reheating Instructions for Leftover No-Bake Chocolate Eclair Cake Dessert
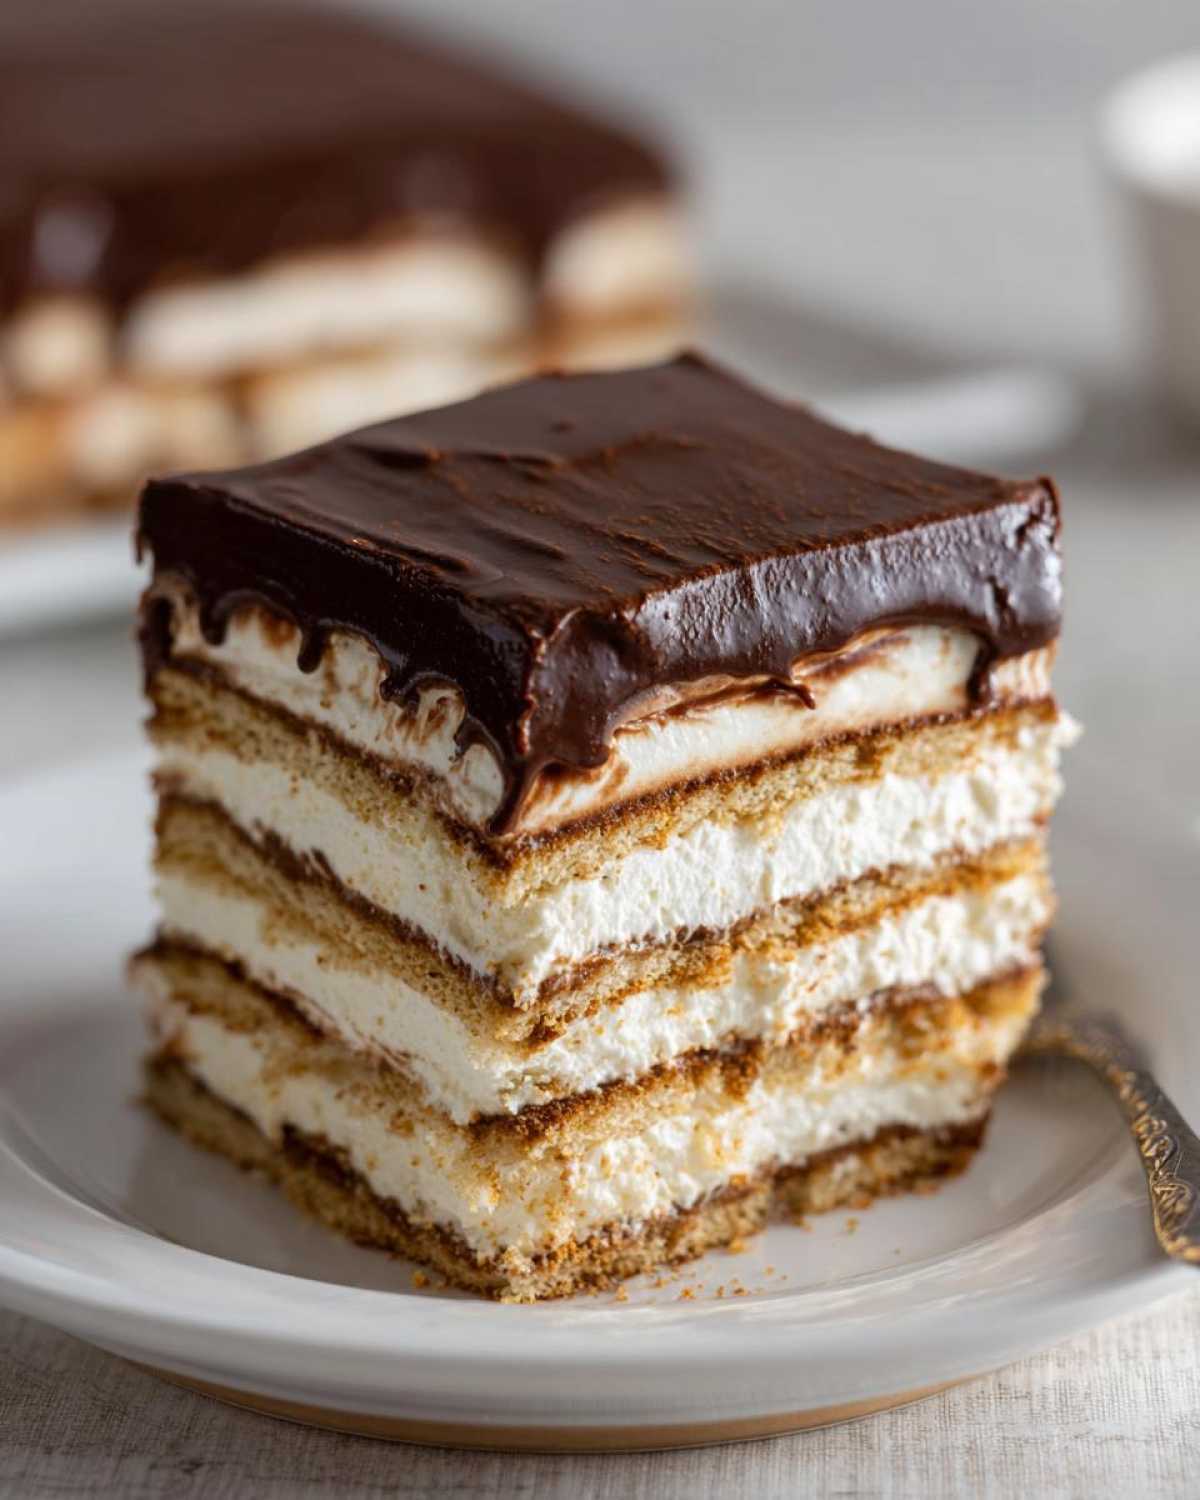
The best part about this dessert, besides how easy it is to make, is that it actually tastes better the next day! Since this magnificent No-Bake Chocolate Eclair Cake Dessert relies on soaking time, it just keeps improving in the fridge. You’ve done all the hard work, so now you need to know how to handle the leftovers—though honestly, there usually aren’t many!
Because we are dealing with pudding and dairy in the filling, proper storage is key to keeping this fresh and safe. But good news: this is the perfect Make Ahead Dessert, so you can fully plan your week around enjoying the leftovers!
Once you lift the cake out of the pan using those plastic wrap handles we insisted on using earlier, you can transfer it to an airtight container or cover the cutting board tightly with plastic wrap again. Keep it in the refrigerator. I find that if you cover it well, it stays perfectly delicious for about three to four days. Any longer than that, and while it might still be safe, the cracker layers might start getting a little too soft for my liking.
Now, let’s talk about serving—this is incredibly important for the ultimate eclair experience! You absolutely must serve this dessert cold. If you let it sit out on the counter for too long, the filling starts to warm up, and you lose that lovely firmness we worked so hard to achieve by chilling it overnight. Warm cream filling just isn’t the same!
What about reheating? Well, since this is designed to be a chilled, set dessert reminiscent of a no-bake pie, you don’t reheat it at all! Think of it like having cold cuts or a trifle—heat would just destroy the texture of the pudding and cause the chocolate topping to melt right off into a puddle. If you pull it out of the fridge, give it about ten minutes on the counter to let the chill come off the very edges, but keep the main body cold. This slight temperature lift prevents the chocolate from being rock-hard when you slice it.
If you have any slices left, don’t try to microwave them! Just pop them straight back into the cold, airtight storage and enjoy them the next day as a perfect cold treat—it’s like finding buried treasure in the fridge!
Frequently Asked Questions About This Eclair Inspired Dessert
I know you’re excited to make this, but sometimes little questions pop up before you even start grabbing ingredients! I’ve put together some of the things people ask me most often about making the perfect No-Bake Chocolate Eclair Cake Dessert. Hopefully, this helps clear up any last-minute confusion!
Is this dessert truly no-bake? I don’t own an oven!
Yes, absolutely! This is one of my favorites when the weather is way too hot to turn on the range, or when my oven is already tied up with something else like a roast. The only heat required is a quick, five-minute gentle warm-up to make the chocolate glaze smooth. Everything else—the layers, the filling—comes together right in the mixing bowl or the refrigerator. It’s the ultimate No Oven Dessert dream come true!
Do I have to use graham crackers, or can I swap them out?
For the authentic experience, yes, you really need those whole graham cracker sheets. The whole point of this Eclair Inspired Dessert is that the crackers absorb the moisture from the filling and soften into a cake-like texture. If you use graham cracker crumbs, you’ll end up with something mushy, closer to a traditional pie crust, rather than the layered “cake” effect we want. For that specific eclair feel, stick to the whole sheets every time!
How long does this Quick Chocolate Treat last in the refrigerator?
This is one of the best things about it being a Make Ahead Dessert! Because the filling is so sturdy (thanks to that pudding mix and butter), it holds up really well. I find it’s best enjoyed within the first 24 to 48 hours for peak texture. However, it remains perfectly good and safe for up to four days in an airtight container in the fridge. Just remember, the longer it sits, the softer those cracker layers get!
Can I substitute the vanilla pudding for chocolate pudding?
You totally can, and it changes the flavor profile slightly! If you swap in chocolate instant pudding, you end up with an even richer, double-chocolate experience. It becomes less of a direct copycat of the classic pastry cream flavor but results in a truly decadent Quick Chocolate Treat. If you do this, you might consider opting for semi-sweet or even dark chocolate chips for your glaze so the layers don’t become overwhelming!
If you are looking for more ideas that skip the oven entirely, I have a whole collection of no oven desserts you might want to save for those busy days!
Nutritional Estimates for the No-Bake Chocolate Eclair Cake Dessert
So, we’ve made this incredible, easy, no-bake treat, and I know the question will eventually come up: “What’s the damage?” Listen, this is rich and delicious because of the butter and sugar, so it’s definitely more of a special occasion dessert than an everyday snack! But I wanted to give you a general idea of what you’re looking at for one generous slice.
Just remember this is all based on my specific measurements using standard, full-fat ingredients. If you decide to swap in light whipped topping or use sugar substitutes, or maybe use low-fat milk in the filling, these numbers are going to change! Always treat this nutritional information as a helpful guide rather than an exact science, especially since this is such a homemade, flexible recipe.
Here are the ballpark figures based on yielding 12 servings:
- Serving Size: 1 slice
- Calories: 350
- Sugar: 35g
- Sodium: 250mg
- Fat: 20g
- Saturated Fat: 10g
- Unsaturated Fat: 10g
- Trans Fat: 0g
- Carbohydrates: 40g
- Fiber: 1g
- Protein: 4g
- Cholesterol: 35mg
See? It’s a treat! We use a full cup of sugar in the filling alone, plus the chocolate glazes adds more, so 35 grams of sugar is exactly what you’d expect from a rich, layered dessert like this. Enjoy every bite of that wonderful No-Bake Chocolate Eclair Cake Dessert, because you earned it!
PrintNo-Bake Chocolate Eclair Cake Dessert
Make this simple, no-bake dessert that tastes like a chocolate eclair. It uses a graham cracker base, a creamy filling, and a chocolate topping.
- Prep Time: 20 min
- Cook Time: 5 min
- Total Time: 6 hr 25 min
- Yield: 12 servings
- Category: Dessert
- Method: Chilling
- Cuisine: American
- Diet: Vegetarian
Ingredients
- 1 cup unsalted butter, softened
- 1 cup granulated sugar
- 1/2 cup cold milk
- 1 package (3.9 oz) instant vanilla pudding mix
- 1 container (8 oz) frozen whipped topping, thawed
- 1 box (14.4 oz) graham crackers, whole sheets
- 1 cup semi-sweet chocolate chips
- 1/2 cup milk
- 1 tablespoon butter
Instructions
- Prepare the chocolate glaze: In a small saucepan, combine the chocolate chips, 1/2 cup milk, and 1 tablespoon butter. Heat over medium-low heat, stirring until smooth. Remove from heat and set aside to cool slightly.
- Prepare the cream filling: In a large bowl, beat the softened butter and sugar until light and fluffy. Gradually add the cold milk and instant vanilla pudding mix. Beat until the mixture thickens, about 2 minutes.
- Gently fold in the thawed whipped topping until just combined. Do not overmix.
- Assemble the cake: Line a 9×13 inch baking dish with plastic wrap, leaving an overhang. Arrange a single layer of graham crackers on the bottom of the dish.
- Spread half of the cream filling evenly over the graham crackers.
- Add a second layer of graham crackers on top of the filling.
- Spread the remaining half of the cream filling over the second cracker layer.
- Top with a final layer of graham crackers.
- Pour the slightly cooled chocolate glaze evenly over the top layer of crackers, spreading it to cover the edges.
- Cover the dish with plastic wrap and refrigerate for at least 6 hours, or preferably overnight, to allow the crackers to soften completely.
- Use the plastic wrap overhang to lift the cake out of the dish before slicing and serving.
Notes
- Use whole graham crackers, not crumbs, for the layers.
- Make sure the pudding mixture is thick before folding in the whipped topping.
- Chill time is essential for the crackers to absorb moisture and soften like eclair pastry.
Nutrition
- Serving Size: 1 slice
- Calories: 350
- Sugar: 35
- Sodium: 250
- Fat: 20
- Saturated Fat: 10
- Unsaturated Fat: 10
- Trans Fat: 0
- Carbohydrates: 40
- Fiber: 1
- Protein: 4
- Cholesterol: 35