

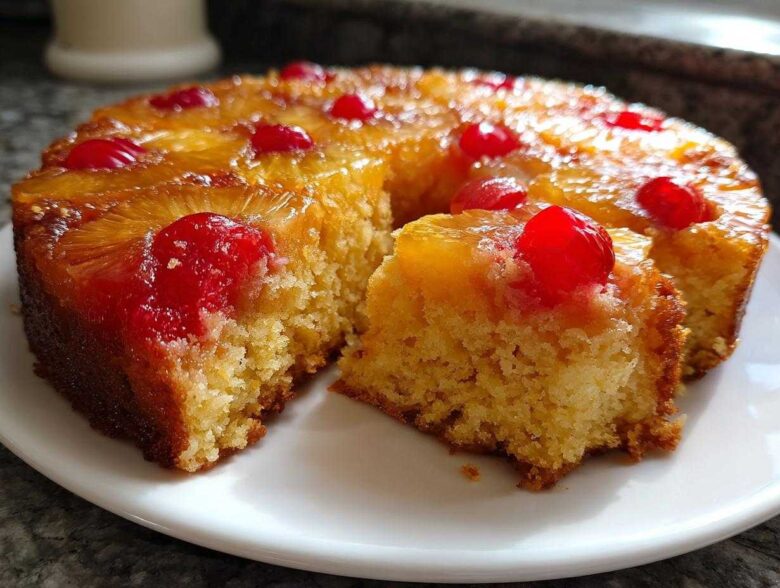
Oh, you know those desserts that just *smell* like childhood? That’s exactly what hits me when I pull this cake out of the oven. There’s nothing quite like that mix of warm, buttery brown sugar and sweet, slightly tangy pineapple. Forget fussy, complicated baking; this is my go-to, super reliable pineapple upside down cake, and honestly, it’s the best you’ll ever make. It’s so easy, you can whip it up on a Tuesday, but it looks and tastes fancy enough for any big family gathering or summer potluck.
I kid you not, the secret here is not just the fresh pineapple, it’s that foolproof method for getting that deep, bubbly caramel layer. We’re talking moist, tender crumb and those gorgeous, vividly caramelized pineapple rings topping the whole thing. If you’re looking for a truly classic, no-fuss recipe that delivers unbelievably moist results every single time, you’ve totally landed in the right spot. Check out my main baking adventures over here at my recipe archive if you want more favorites like this!
Why This is the Best Pineapple Upside Down Cake Recipe You Will Make
I know everyone claims *their* recipe is the best, but trust me on this one. This Classic Pineapple Cake just hits different. It’s the perfect combination of easy effort and amazing payoff. Why settle for dry or soggy when you can have this?
- It’s unbelievably quick to assemble—seriously, the topping comes together before the oven is even fully preheated!
- The most important part, that buttery glaze, caramelizes perfectly without any weird syrup substitutions.
- It creates that rich, moist pineapple cake crumb that stays tender for days, making it ideal for leftovers (if you have any!).
- It travels like a champion, making it my go-to for any summer party or family gathering.
Key Features of Our Classic Pineapple Upside Down Cake
The texture is what sets this baking apart. We get that soft, buttery cake structure because we use both melted butter for the base and creamed butter for the batter—that one-two punch keeps things moist. And that topping? It’s pure, bubbly gold with that slight tang from the pineapple juice mixed right into the flour!
Gather Your Ingredients for the Perfect Pineapple Upside Down Cake
Okay, seeing the ingredients laid out is my favorite part of any baking project. It just makes it feel real! This Pineapple Upside Down Cake Recipe is wonderfully straightforward; we aren’t using complicated things you have to hunt down. We rely on simple pantry staples plus that glorious canned pineapple. Make sure your butter is softened when you get to the batter ingredients; you want that fluffy texture we talked about earlier!
I always lay everything out on the counter before I start mixing. It helps me make sure I didn’t forget anything, especially remembering to keep that pineapple juice separate!
- 1/2 cup unsalted butter (for melting in the bottom)
- 1 cup packed light brown sugar (don’t scoop it hard, pack it lightly!)
- 1 (20 ounce) can pineapple slices in juice, drained (make sure you reserve about 1/4 cup juice for the batter!)
- 10 maraschino cherries, stems removed (these add such a retro pop of color)
- 1 1/2 cups all-purpose flour
- 1 1/2 teaspoons baking powder
- 1/2 teaspoon salt
- 1/2 cup unsalted butter, softened (this is totally separate from the melting butter!)
- 3/4 cup granulated sugar
- 2 large eggs
- 1 teaspoon vanilla extract
- 1/2 cup milk
- 1/4 cup reserved pineapple juice
If you’re looking for more ways to use up those amazing pantry staples, you absolutely must check out my crumb bar recipe next time you need a good buttery treat. These simple ingredients are what make this such a fantastic Easy Pineapple Dessert!
Step-by-Step Instructions for Your Easy Pineapple Upside Down Cake
Alright, now for the fun part! This is where we build that incredible, shiny, caramelized layer. Don’t rush the prep here because having everything ready means the actual mixing goes so fast. I promise, these steps are straightforward, and you won’t need complicated equipment. We are making a beautiful Homemade Pineapple Cake today! If you want to see more of my favorite tried-and-true recipes, check out the baking section on my main site right here: my recipe archive!
- First things first: Preheat your oven to 350 degrees F (175 degrees C) right away. While it heats up, grab a 9-inch round cake pan. You need to grease it thoroughly and then give it a light dusting of flour. This is your first defense against sticking!
- Grab that 1/2 cup of butter that we save just for the topping and melt it down in a small saucepan over medium heat, just until it’s liquid. Carefully pour this melted butter right into the bottom of your prepared cake pan. Swirl it around so it coats everything nicely.
- Next, sprinkle all of that lovely brown sugar evenly over the melted butter—it should mix a little right there, which is perfect. Then, arrange your drained pineapple slices over the brown sugar layer. Pop one maraschino cherry right into the center hole of each pineapple ring. Isn’t that pretty? Just make absolutely sure those pineapple slices are well-drained, or you’ll end up with too much liquid pooling at the bottom, which can lead to a soggy topping!
Preparing the Caramelized Pineapple Topping
This initial layer is the key to that iconic look. We melt the butter in a saucepan—medium heat is essential so it doesn’t brown too quickly—then pour it right into the greased pan. The brown sugar sits on top of that. Remember what I said about draining the pineapple? It’s crucial! If the canned juice ratio is too high, it might prevent the sugar from truly melting into that gorgeous caramel sauce when it bakes. You want a thick, glossy base layer, not soup!
- Now for the batter! In a separate medium bowl, whisk together your flour, baking powder, and salt. Just give those dry ingredients a quick whisk to distribute the leavening agents. Set that bowl aside for just a second.
- In your big mixing bowl—the one you use for creaming—beat that 1/2 cup of softened butter with the granulated sugar until it gets really light and fluffy, pale yellow. Then, beat in your two eggs, one at a time, and stir in that vanilla extract. Don’t skimp on the creaming step; that’s where the air gets trapped!
- In a small bowl, quickly mix together the milk and that 1/4 cup reserved pineapple juice we saved earlier.
Mixing the Moist Pineapple Cake Batter
Here’s the big rule for a Moist Pineapple Cake: We alternate! You are going to gradually add the dry mixture to the wet mixture, alternating with the milk/juice liquid. Always start and finish with the dry ingredients. Mix it just until you *barely* see the streaks of flour disappear. If you overmix cake batter, you wake up the gluten, and suddenly your beautifully tender cake feels like tough bread. We want fluffy, not tough!
- Now, gently spoon that beautiful batter evenly over the pineapple and cherries in the pan. Spread it delicately so you don’t mess up the arrangement you made underneath—that’s why a spoon is better than aggressively beating it in!
- Pop that whole thing into your preheated 350°F oven. You’ll bake this for about 35 to 40 minutes. You know it’s ready when a wooden pick stuck right into the center comes out clean—no wet batter clinging to it. That’s my favorite check!
- This next step takes patience, but it saves your cake! Let the cake cool right there in the pan on a wire rack for exactly 10 minutes. If you try to flip it right out, it might break or leave half the topping stuck to the pan bottom.
- After those 10 minutes, grab your serving plate—make sure it’s bigger than your cake pan—and place it upside down right over the top of the cake pan.
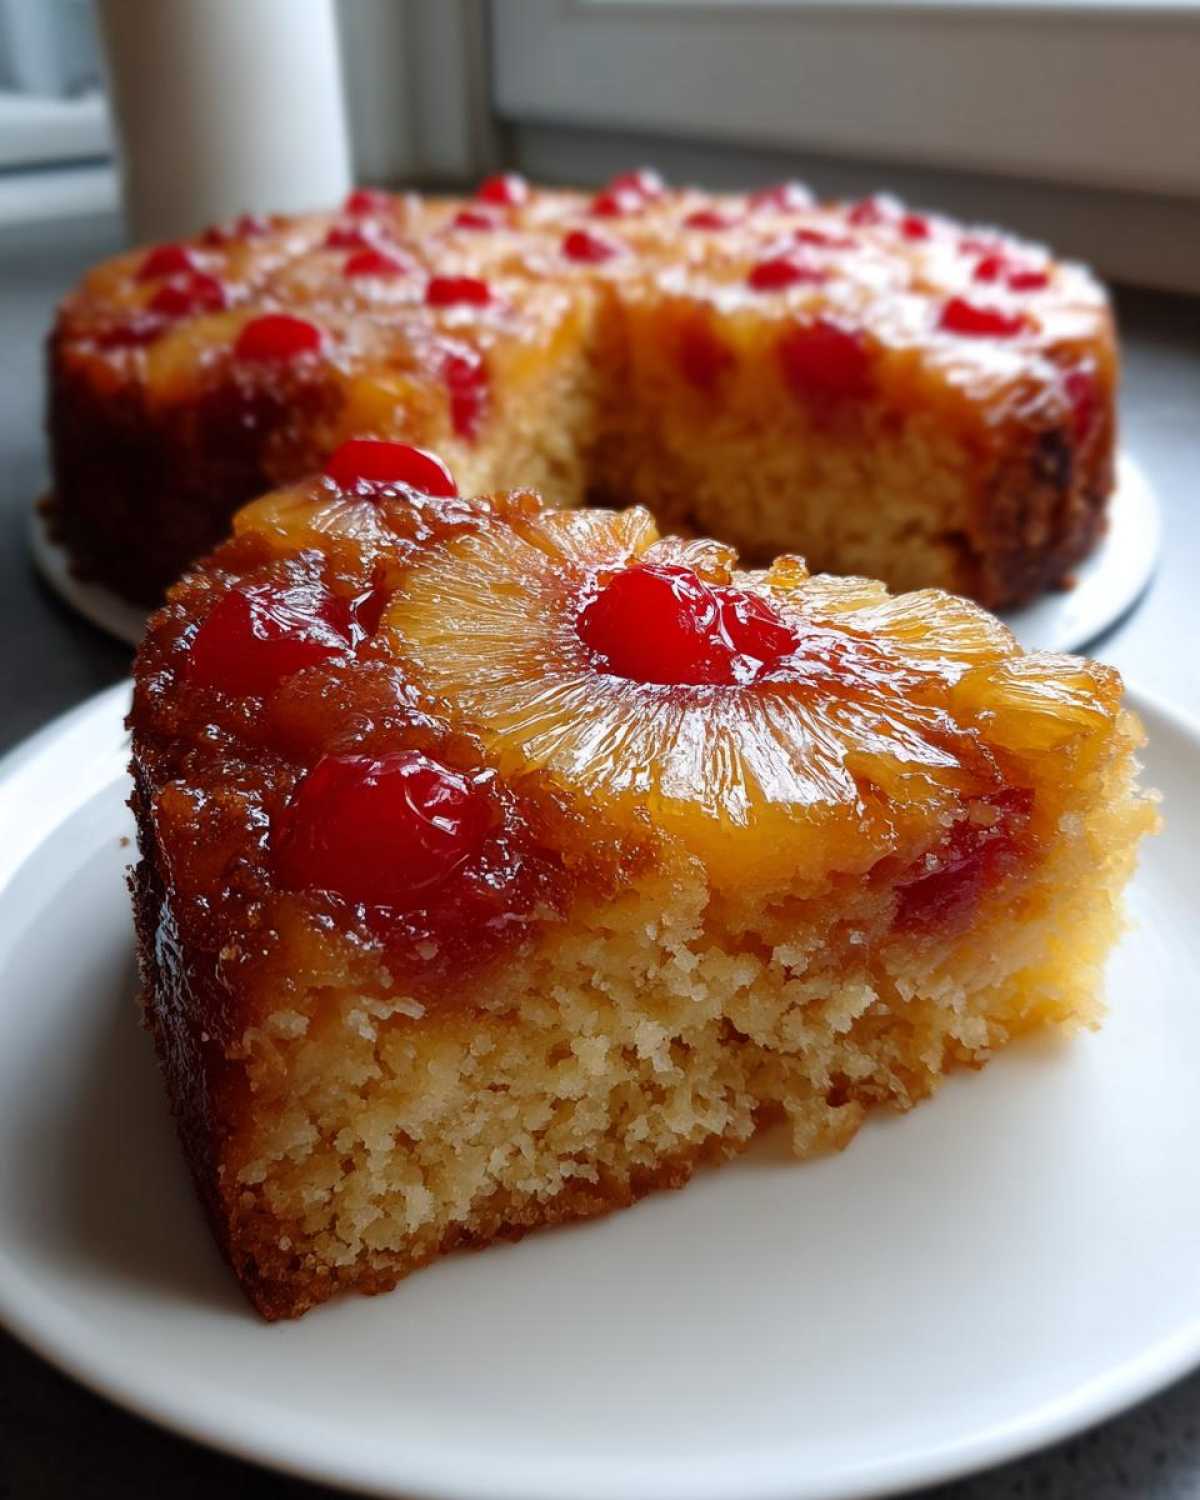
- Take a deep breath, hold the plate and pan together tightly, and with one confident flip, turn the whole thing over! Slowly and gently remove the pan. If you prepped correctly, you’ll have the most gorgeous, dripping Buttery Pineapple Glaze layer staring back at you.
Baking and Inverting the Pineapple Upside Down Cake
The 35 to 40-minute bake time is standard for a 9-inch round, but remember, ovens are little weirdos! Always check it early. The visual cue is key—a clean wooden pick is great, but don’t forget the touch test if you want to be extra sure. After the 10-minute rest period, the inverting process is critical for getting that perfect presentation. That little window allows the caramel to set slightly without bonding permanently to the pan metal. Seriously, don’t skip those 10 minutes, or you might come crying to me later about a sticky mess! We want those beautiful, glossy rings showcasing your hard work.
Tips for the Perfect Caramelized Pineapple Rings on Your Pineapple Upside Down Cake
If you’ve ever flipped one of these gorgeous cakes only to have the caramel stick or crystallize, you know the heartbreak! It all comes down to setting up that base correctly. I always use light brown sugar because it has more moisture than white sugar, which helps keep the caramel sauce runny rather than seizing up later on. Make sure that melted butter completely covers the entire bottom surface of your pan before you sprinkle the sugar on top—no dry spots allowed!
When placing your pineapple slices, don’t overlap them too much. Overlapping can create peaks where the batter bakes unevenly. Also, a little tip: wiggle the pan slightly after you invert the cake. Sometimes a tiny bit of residual caramel is stuck to a single spot, and if you gently coax it with the pan’s handle, it’ll often flow out onto the plate, giving you that beautiful, glossy finish you are after. It’s all about making sure that beautiful, buttery glaze is present everywhere!
Variations and Ways to Customize Your Pineapple Upside Down Cake
Part of the fun with a Retro Dessert Recipe like this is putting your own spin on it! While the classic version with those perfect rings is wonderful, sometimes you want to shake things up a bit, right? This recipe is so sturdy and flavorful that it handles little additions beautifully. Feel free to play around, but remember that the basic caramel layer should always stay put!
You can definitely add a touch of warmth if you like that spiced vibe, almost like a cross between this and a spiced coffee cake. Try sprinkling half a teaspoon of cinnamon or a tiny pinch of ground cloves along with your brown sugar topping. If you love spice as much as I do, check out my recipe for spiced roasted nuts—that flavor profile works great here too!
Also, don’t feel locked into just pineapple! You can make a gorgeous peach upside-down cake using canned peach slices, or even use fresh plums in the fall. Just make sure whatever fruit you use is relatively firm so it holds its shape when you flip it!
Making Mini Pineapple Upside Down Cakes
If you’re serving people individual desserts or just want to control portion sizes (or maybe you just don’t have a big cake pan!), making these in muffin tins is brilliant. It makes for such a cute, simple tropical dessert presentation!
Here’s the trick: use the same topping ratio—melted butter, brown sugar, one pineapple ring, and one cherry per cup. Pour the batter carefully on top, making sure you only fill the muffin cups about two-thirds full since the cake rises nicely. Since the cake layer is thinner, the bake time drops significantly. You’ll probably only need 18 to 22 minutes at that same 350°F. Keep an eye on them! They come out of the tins much easier if you let them cool for just about 5 minutes before gently turning them out onto a cooling rack.
Storing and Reheating Your Homemade Pineapple Cake
One thing I love about this Homemade Pineapple Cake is that it tastes just as good—maybe even better—the next day. All those caramelized juices soak into the cake crumb overnight! If you have any leftovers, storage is super simple, but you have to treat the topping right.
If you plan to eat the entire cake within 24 hours, leaving it covered lightly on the counter at room temperature is totally fine. The high sugar content of that topping acts as a natural preservative. However, if you need it to last longer than a day, or if your kitchen is super warm, cover it tightly with plastic wrap and pop it in the fridge. Just know that refrigeration can sometimes stiffen the cake texture a bit, so we have to wake it back up properly!
For reheating, I always go for warmth because this cake shines when it’s served warm. For a single slice, the microwave is my friend. Just zap it for about 15 to 20 seconds. It’s enough time to make the butter in the caramel soft again without making the cake rubbery. If you’re warming up half the cake, use a low oven setting—say 300°F (150°C)—cover it loosely with foil, and heat for about 10 minutes until it’s just warmed through. You don’t want that glorious topping to melt right off!
If you are looking for great ways to repurpose desserts or leftovers in general, I have some fantastic ideas, including how I handle leftover holiday fixings over at my post on turning leftovers into enchiladas. But for this beauty, just good, slow reheating is the way to go to keep that perfect moisture locked in!
Frequently Asked Questions About Pineapple Upside Down Cake
When you’re baking something as beloved as this, questions always pop up! It’s only natural. I’ve pulled together the most common things people ask me about making sure this Easy Pineapple Dessert turns out absolutely perfect. Don’t worry if you’re new to upside-down cakes; we’ve all been there!
Can I use fresh pineapple instead of canned for this pineapple upside down cake recipe?
You totally can use fresh pineapple, and it tastes amazing, but you need to adjust things a tiny bit! Canned slices come packed in juice which we rely on for moisture and for melting with the brown sugar. If you use fresh rings, they are usually much drier. My advice? If you use fresh, you might need to chop them a little smaller, and definitely toss them gently in about 2 extra tablespoons of brown sugar and maybe a tiny splash of water or pineapple nectar before layering so you don’t end up with a stiff, dry topping instead of that gooey caramel we love.
What is the best way to serve this classic pineapple cake?
For me, the best way is always warm. When it’s warm, that buttery topping is slightly melted and coats your tongue perfectly! This Classic Pineapple Cake is exceptional on its own, of course, but you know what takes it over the top? A big scoop of vanilla bean ice cream that starts melting right into that caramel. Alternatively, a dollop of softly whipped cream works beautifully if you want something a bit lighter. It’s fantastic for any dessert table!
How do I prevent the brown sugar topping from burning?
This is such a good question, and it usually comes down to placement in the oven. Brown sugar burns easily because it has molasses, which caramelizes and then scorches faster than white sugar. If your oven runs hot, or if the top rack is too close to the heating element, move your cake pan down to the center rack—absolutely the center! Also, make sure you are using a glass or metal pan, not a dark non-stick pan, as those dark pans absorb more heat and can speed up the burning process on the bottom before the cake is even done baking through the middle.
Estimated Nutritional Information for This Easy Pineapple Dessert
I always include this section just because it’s good practice, but please take this with a giant grain of salt! These numbers are calculated based on the exact measurements using standard ingredient databases, so they are a great guideline, but they aren’t a guarantee since brands vary and how much you actually eat changes everything!
This information estimates the breakdown for one serving slice of our Easy Pineapple Dessert:
- Serving Size: 1 slice
- Calories: 380
- Sugar: 35g (Mostly from the rich caramel topping, let’s be honest!)
- Sodium: 250mg
- Total Fat: 18g
- Saturated Fat: 11g
- Carbohydrates: 54g
- Protein: 4g
- Cholesterol: 85mg
Remember, if you skip the frosting or use less butter in the topping, those numbers change fast. Enjoying a slice of something this delicious and Nostalgic is what really counts!
Share Your Perfect Pineapple Upside Down Cake
Whew! I hope you’re as excited as I am now. Doesn’t that smell just transport you back to simpler times? This recipe is truly a labor of love, even though it’s so incredibly easy to put together. It’s the kind of dessert that brings everyone together around the table with a smile.
Once you try this, you absolutely have to let me know how it turned out! Did your caramel get super shiny? Did you manage to keep the fruit perfectly arranged? Please leave a rating right below this post—it helps me know which recipes you all want to see more of!
And since this cake is just begging to be shown off, snap a photo! If you share your masterpiece on social media, please tag me so I can see your gorgeous Pineapple Upside Down Cake creations! These visual desserts do so well on sites like Pinterest, so pinning this recipe is a huge help to me if you loved how moist it turned out. If you ever have any burning questions about technique or substitutions for future bakes, you can always reach out to me directly through my contact page. Happy baking, friends!
PrintThe Ultimate Classic & Easy Pineapple Upside Down Cake

Make this moist, buttery Pineapple Upside Down Cake from scratch. It features perfectly caramelized pineapple rings and is simple enough for any baker.
- Prep Time: 15 min
- Cook Time: 40 min
- Total Time: 55 min
- Yield: 8 servings
- Category: Dessert
- Method: Baking
- Cuisine: American
- Diet: Vegetarian
Ingredients
- 1/2 cup unsalted butter
- 1 cup packed light brown sugar
- 1 (20 ounce) can pineapple slices in juice, drained (reserve juice)
- 10 maraschino cherries, stems removed
- 1 1/2 cups all-purpose flour
- 1 1/2 teaspoons baking powder
- 1/2 teaspoon salt
- 1/2 cup unsalted butter, softened
- 3/4 cup granulated sugar
- 2 large eggs
- 1 teaspoon vanilla extract
- 1/2 cup milk
- 1/4 cup reserved pineapple juice
Instructions
- Preheat your oven to 350 degrees F (175 degrees C). Lightly grease and flour a 9-inch round cake pan.
- Melt 1/2 cup butter in a small saucepan over medium heat. Pour the melted butter into the prepared cake pan.
- Sprinkle the brown sugar evenly over the melted butter. Arrange the pineapple slices on top of the sugar mixture. Place one cherry in the center of each pineapple ring.
- In a medium bowl, whisk together the flour, baking powder, and salt. Set aside.
- In a large bowl, cream together the 1/2 cup softened butter and granulated sugar until light and fluffy. Beat in the eggs one at a time, then stir in the vanilla extract.
- In a small bowl, whisk together the milk and reserved pineapple juice.
- Gradually add the dry ingredients to the wet ingredients, alternating with the milk mixture, beginning and ending with the dry ingredients. Mix until just combined. Do not overmix.
- Carefully spoon the batter evenly over the pineapple and cherries in the prepared pan.
- Bake for 35 to 40 minutes, or until a wooden pick inserted into the center comes out clean.
- Let the cake cool in the pan on a wire rack for 10 minutes.
- Place a serving plate upside down over the cake pan. Carefully invert the cake onto the plate. Remove the pan slowly. Serve warm or at room temperature.
Notes
- For a Bundt cake variation, use a 10-cup Bundt pan and increase baking time by 10 to 15 minutes.
- If you prefer a richer caramel, use dark brown sugar instead of light brown sugar.
- You can substitute canned pineapple chunks for slices if you prefer a different topping look.
Nutrition
- Serving Size: 1 slice
- Calories: 380
- Sugar: 35
- Sodium: 250
- Fat: 18
- Saturated Fat: 11
- Unsaturated Fat: 7
- Trans Fat: 0.5
- Carbohydrates: 54
- Fiber: 1
- Protein: 4
- Cholesterol: 85