

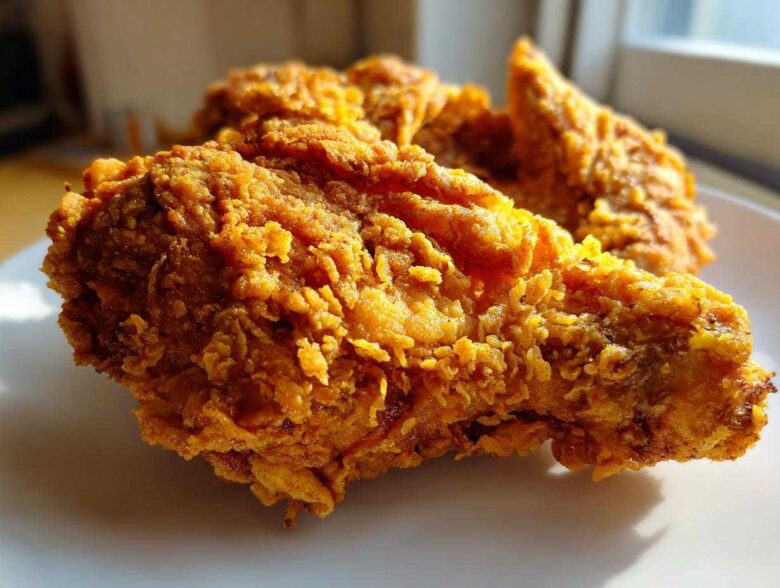
Listen, I used to be a crispy chicken failure. Seriously! I’d spend hours on the brine, but inevitably, my crust would either burn before the middle was cooked, or worse, come out soggy. It was heartbreaking! But I’m here to tell you, we cracked the code. This isn’t just another recipe; this is the ultimate guide to making restaurant-quality fried chicken right in your own kitchen. We’re talking about chicken so golden and crunchy it shatters when you bite it, yet stays unbelievably juicy inside, all thanks to that magic buttermilk soak we use. Trust me, after perfecting this technique, our dinner table suddenly became the hottest reservation in town!
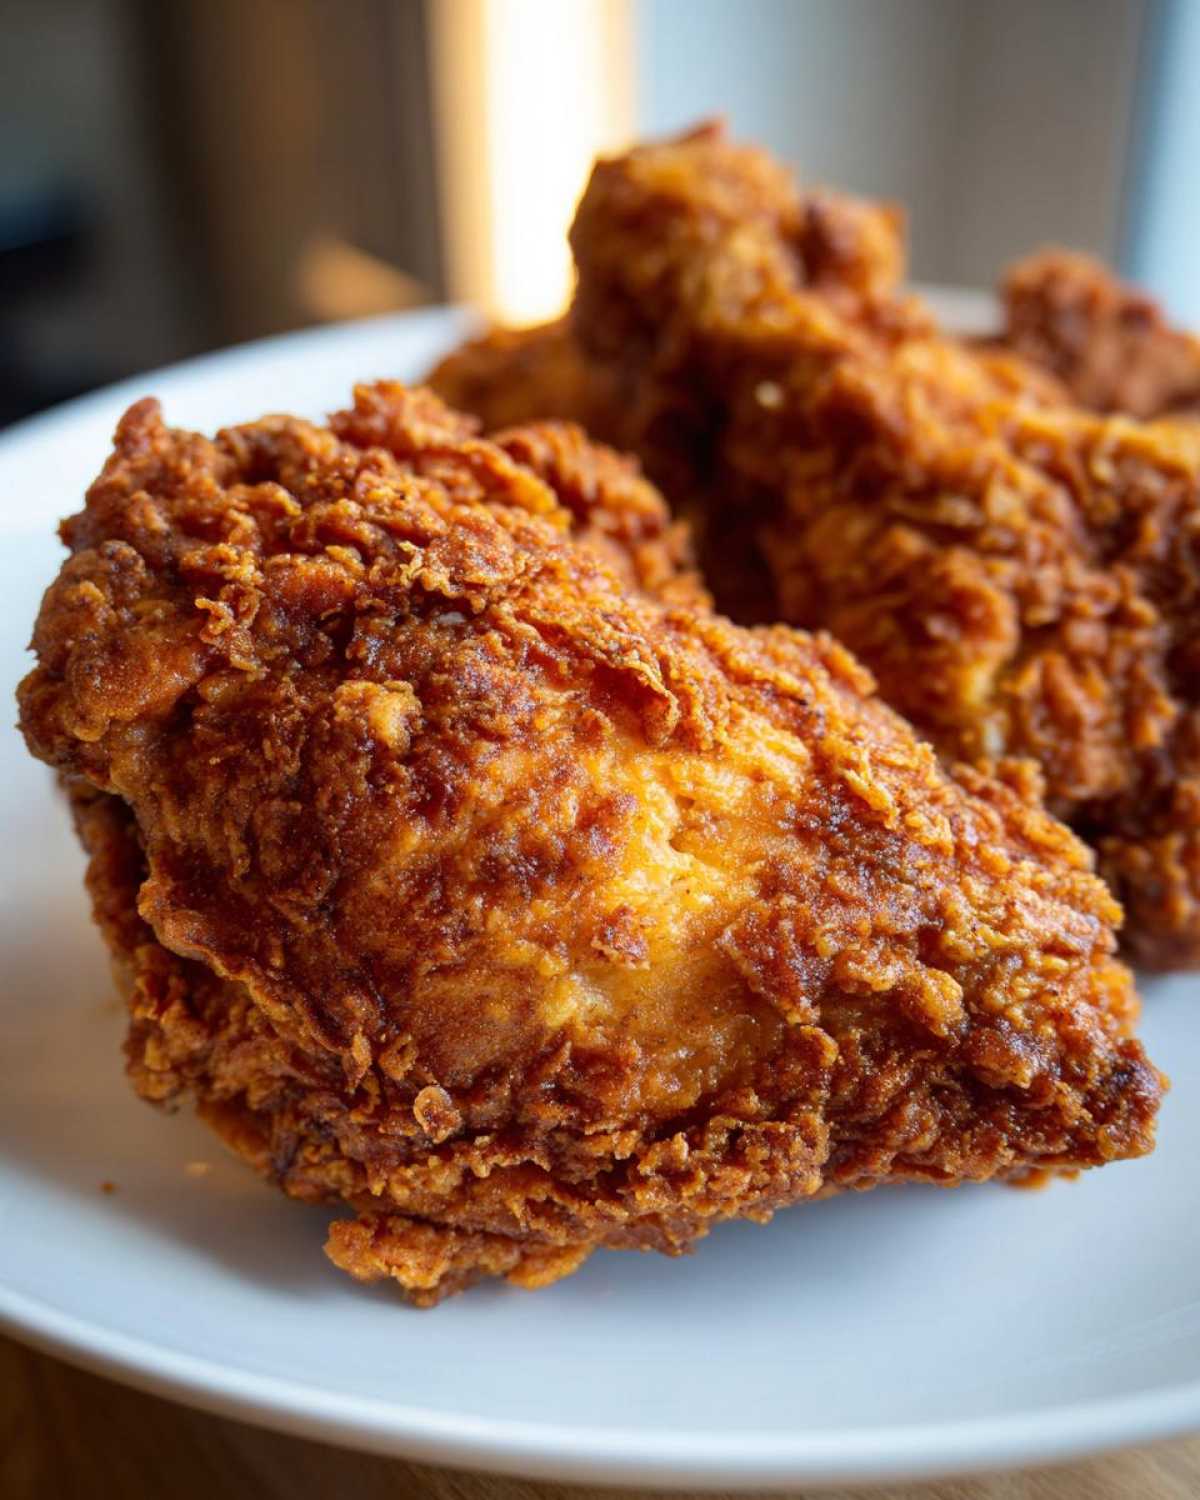
If you’re ready for the crunch of your life, check out all my tricks over on the main blog page!
Why This Buttermilk Southern Fried Chicken Recipe Works (The Secret to Juicy and Crispy Chicken)
People always ask me what makes my fried chicken different from what they make at home. It’s not just luck, honey! It’s knowing *why* the steps matter. We’re aiming for that perfect intersection of tender interior and shatteringly crisp exterior, which is exactly what folks look for in the best homemade fried chicken. The success starts way before the oil even gets hot, right in the fridge with our gorgeous buttermilk bath.
If you need some other cozy ideas, this recipe pairs perfectly with my classic chicken noodle soup, though trust me, the chicken steals the show!
The Power of Buttermilk Brined Chicken
This is non-negotiable for getting that unbelievably juicy and crispy chicken you dream about. Buttermilk isn’t just for moisture; that subtle acidity actually goes into the meat fibers and starts tenderizing everything beautifully before it even sees the heat. That’s why I insist you leave your pieces soaking for a minimum of four hours. Honestly, if you can manage it, let it hang out overnight in the fridge! When you pull that chicken out, it’s ready to absorb flavor and stay moist while the crust crisps up perfectly.
Achieving the Ultimate Crunchy Chicken Coating
The real textural secret to a genuinely crispy fried chicken recipe isn’t just flour; it’s what we add to it! We sneak in cornstarch, and you have to trust me on this one. Cornstarch helps draw out a little moisture from the coating, which turns into that thin, craggy texture when it hits the hot oil. Then, we do that double dip—a quick flick back into the buttermilk and another press into the seasoned dredge. That process builds up those beautiful little flakes you see on professional Southern fried chicken. It’s the key to that crunchy coating!
Gathering Ingredients for Perfect Fried Chicken
Okay, let’s talk supplies! You can’t rush this masterpiece, and having everything measured out beforehand means the actual cooking process is totally smooth. For this ultra-crispy version, you will need all the good stuff for your brine and your dredge. I always recommend using bone-in, skin-on chicken pieces—thighs and drumsticks are my absolute favorite!
Don’t skip those spices in the flour, though; they make all the difference! If you need a good idea for what to serve it with later, these turkey cranberry enchiladas are a fun contrast, but this fried chicken stands alone!
Here’s what you need:
- About 3 pounds of bone-in, skin-on chicken pieces (thighs and drumsticks work best for even cooking).
- 2 cups of good buttermilk mixed with 1 tablespoon of your favorite hot sauce.
- For the dredge: 2 cups of all-purpose flour, 1/2 cup of cornstarch, 2 teaspoons of salt, 1 teaspoon of black pepper, 1 teaspoon of paprika, and 1 teaspoon of garlic powder, plus just a little cayenne kick.
Step-by-Step Instructions: How To Make Fried Chicken
Now for the fun part! Once your chicken has happily marinated overnight, the rest moves pretty quickly, but you have to be attentive. You can’t just walk away while you’re deep frying; it requires your full attention to get that perfect color and texture. Think of this as your fast-paced cooking adventure. This is how we go from soaking, soggy chicken to that amazing fried chicken dinner everyone raves about. I know this can look intimidating, especially dealing with hot oil, but follow these steps, and you’ll be fine—I promise!
If you’re looking for something totally different to serve alongside this, I recently made a batch of gnocchi in brown butter sauce that my family actually ignored, they were so focused on the chicken!
Brining the Chicken (The Flavor Base)
First things first: pull your chicken out of the fridge. You want it coated in that buttermilk and hot sauce mixture. Just give it a quick massage to make sure every nook and cranny is saturated. Cover it back up and let it chill for at least four hours. Honestly, overnight is where the real magic happens; those acids get deep into the meat fibers, ensuring maximum tenderness.
Preparing the Dredge for Crunchy Chicken Coating
While the chicken is resting, get your dry mix ready. You need a wide, shallow dish for this! Whisk together your 2 cups of flour, that crucial 1/2 cup of cornstarch—don’t forget it!—the salt, pepper, paprika, garlic powder, and cayenne. Make sure you whisk it really well so all those seasonings are evenly distributed. You want consistency in every bite you take!
The Double Dip Technique for Extra Crispy Fried Chicken
This is where we build the crust. Take a piece of chicken right from the buttermilk—let the excess drip off, but don’t shake it dry! Press it HARD into the flour mixture, really pushing that coating on there to build up those craggy bits. Then, for the ultimate crunch, dunk it quickly back into any leftover buttermilk you have, and immediately do a second, final dredge in the flour. Press again! Those messy, uneven layers become golden perfection when they fry.
Deep Frying the Chicken to Golden Brown Perfection
Get your oil going—we need about 2 inches deep in a heavy pot and aim for exactly 325 degrees F. Get yourself a thermometer; judging by eye is how you burn the outside! Carefully drop your coated chicken into the oil, but don’t jam them all in at once; keep them separated so the oil temp doesn’t plummet. Fry them for about 6 to 8 minutes per side until they are a deep, gorgeous golden brown. Always check that internal temperature; when it hits 165 degrees F, they are done!
Pro Tips for Foolproof Fried Chicken Success
I’ve messed up a lot of batches trying to get this right, but these tips turned my guesses into guaranteed success. If you want truly foolproof fried chicken, temperature control is your absolute best friend. That advice about keeping the oil between 300 and 335 degrees F while frying? You have to stick to it! My first few times, I just relied on when the oil started smoking lightly, and I ended up with burnt flour crumbs floating everywhere. It wasn’t until I finally bought one of those cheap clip-on thermometers that the game totally changed for me.
Also, remember that note about the bigger pieces, like a full chicken breast? If they look perfectly dark golden but you’re not sure they’re done inside, don’t try to fry them longer! Just pull them out and pop them onto a wire rack in a 350 degree F oven for about five minutes. It finishes cooking gently without burning that beautiful crust. While you’re cooling down, these apple pie crumb bars are my go-to comfort dessert!
Ingredient Notes and Substitutions for Your Fried Chicken
I get so many questions about substitutions, and I totally get it—sometimes you just don’t have everything on hand for a major cooking project like this! This recipe is built around the buttermilk, but don’t panic if you’re staring at an empty carton. If you’re out of buttermilk, you can whip up a perfectly good substitute in five minutes. Just take 1 cup of regular milk and stir in one tablespoon of white vinegar or lemon juice. Let that sit on the counter for about five minutes until it slightly curdles and thickens up. That acidity is what we need for the tenderizing!
When it comes to the oil, you need something that can handle the heat without smoking immediately, which ruins the flavor of your fried chicken crust. Vegetable oil is my old faithful—it’s cheap, it fries evenly, and it doesn’t impart much flavor. Peanut oil is also a fantastic choice if you want a slightly nuttier, richer taste. Just avoid olive oil or anything labeled ‘light’ or ‘extra virgin’ for deep frying; those smoke points are way too low for this method. If you need a sweet treat after all that savory goodness, these no-bake peanut butter cup cheesecakes are unbelievably easy!
Serving Suggestions for Your Savory Chicken Dinner Ideas
Now that you’ve conquered the art of making the best homemade fried chicken—crispy, golden, and totally juicy—you can’t just leave it sitting on the plate by itself, right? This is peak comfort food chicken, and it demands the right company! Forget sad side salads; when you make chicken this good, you have to go all in with classic Southern sides.
My favorite way to serve this is family-style, piled high on a big platter. You absolutely need something creamy to cut through that richness, so I always go for homemade mashed potatoes smothered in country gravy—though the chicken gravy is often better! And you have to have something bright and tangy; nothing beats a crisp, vinegary coleslaw.
If you’re looking for something slightly sweeter that still feels rustic, I love a basket of warm, fluffy buttermilk biscuits on the side. They’re perfect for soaking up any stray seasoned flour bits or rendered chicken fat left on your plate (don’t pretend you don’t do that!). For dessert later, I often whip up a little mint pots de creme. It’s cool, light, and a fantastic contrast after all that savory goodness!
Storage and Reheating Instructions for Leftover Fried Chicken
Oh, the best problem: having leftover fried chicken! It sounds amazing, but honestly, reheating it is where most people mess up that perfect crust we worked so hard to achieve. Listen to me closely: never store your perfectly crispy chicken on paper towels! I mentioned in the steps above that we use a wire rack, right? If you skip that and put that gorgeous, crunchy skin directly onto paper towels in a sealed container, the moisture gets trapped, and you end up with gray, sad, steamed chicken the next day. Don’t do it to yourself.
To keep that satisfying crunch alive, you have to warm it gently, not blast it quickly. The microwave? Forget about it! That’s the enemy of crispiness. The goal is to wake up the crust without drying out the interior. If you have leftovers, toss them onto a wire rack set over a baking sheet.
I swear by using the oven for leftovers. Set it to about 375 degrees F and let the chicken heat through for about 10 to 15 minutes. The dry, ambient heat dries out the crust again, making it crisp up beautifully. Some folks even swear by using an air fryer for 5 minutes! It works like a charm.
If you need a sweet finish after all that savory goodness that’s nearly as good as the leftovers themselves, you absolutely have to make my pear ginger cobbler. It’s heavenly!
Frequently Asked Questions About Making Fried Chicken
I always get asked the same things about getting that perfect crunch, so I figured I’d round up a few FAQs here just to make sure everyone ends up with the most flavorful, savory chicken dinner ideas possible. Don’t worry about making mistakes—we’ve all been there!
If you make this, you have to have something fun for an appetizer, like my amazing cranberry brie bites!
Can I bake this fried chicken instead of deep frying?
Look, you certainly *can* bake it if you’re set on it, but I have to be honest: it won’t be the same. Deep frying is what creates that signature shattering texture we’ve been chasing. Baking dries out the crust too much, and you lose that beautiful, craggy surface. If you absolutely must bake it, I’d suggest spraying the coated chicken heavily with oil and baking it on a wire rack at 400 degrees F until it hits 165 degrees F internally. Just know that you’re getting a baked chicken dinner, not this legendary crunchy chicken!
What is the best oil to use for crispy fried chicken?
This is a great question because the oil matters more than people realize! You need a neutral oil with a high smoke point, meaning it won’t break down and smoke before your chicken is done frying. My top two picks are standard vegetable oil—it’s budget-friendly and does the job perfectly—or peanut oil, which adds the slightest hint of nutty flavor. Both are fantastic for getting that beautiful, even, golden brown chicken color.
How do I keep the crust from falling off my fried chicken?
This has happened to me more times than I care to admit! If your coating is falling off, nine times out of ten, it’s because you didn’t get those dry layers to bond properly with the wet chicken. Remember that crucial step in the dredge? You have to physically press that flour mixture onto the chicken. Don’t be gentle! You need to use your hands, kind of patting and squeezing, to make sure those dry, seasoned flakes are firmly adhered before they even think about hitting the oil. That aggressive pressing creates the best anchor for the crust!
Nutritional Estimate for This Comfort Food Chicken Recipe
Now, let’s talk real talk about what goes into a spectacular piece of fried chicken. Since this is deep-fried, it definitely isn’t going to be low-fat, but remember, we’re making this for a special comfort food chicken dinner, not an everyday meal! These numbers are estimates based on one piece of bone-in chicken thigh cooked using the measurements in the recipe. As always, if you use different cuts or more oil, your totals will change!
For reference, a serving here is roughly one thigh piece. It’s packed with protein, which always satisfies a crowd!
- Calories: About 450 per serving (that’s the fried goodness talking!)
- Fat: Around 28 grams (most of this is the oil absorbed during frying)
- Protein: A whopping 30 grams—it sticks to your ribs!
- Carbohydrates: About 18 grams, mostly coming from that gorgeous flour coating.
If you’re looking for a lighter dessert after indulging in this meal, you have to try my fig and walnut baklava—it feels decadent but is honestly a lighter way to end a meal!
Nutritional Estimate for This Comfort Food Chicken Recipe
Now, let’s talk real talk about what goes into a spectacular piece of fried chicken. Since this is deep-fried, it definitely isn’t going to be low-fat, but remember, we’re making this for a special comfort food chicken dinner, not an everyday meal! These numbers are estimates based on one piece of bone-in chicken thigh cooked using the measurements in the recipe. As always, if you use different cuts or more oil, your totals will change!
For reference, a serving here is roughly one thigh piece. It’s packed with protein, which always satisfies a crowd!
- Calories: About 450 per serving (that’s the fried goodness talking!)
- Fat: Around 28 grams (most of this is the oil absorbed during frying)
- Protein: A whopping 30 grams—it sticks to your ribs!
- Carbohydrates: About 18 grams, mostly coming from that gorgeous flour coating.
If you’re looking for a lighter dessert after indulging in this meal, you have to try my fig and walnut baklava—it feels decadent but is honestly a lighter way to end a meal!
PrintUltra-Crispy Buttermilk Fried Chicken

Make classic Southern fried chicken that stays juicy inside with an extra crunchy, golden crust using a buttermilk soak.
- Prep Time: 20 min
- Cook Time: 35 min
- Total Time: 55 min
- Yield: 4 servings
- Category: Dinner
- Method: Deep Frying
- Cuisine: American Southern
- Diet: Low Fat
Ingredients
- 3 lbs bone-in, skin-on chicken pieces (thighs, drumsticks)
- 2 cups buttermilk
- 1 tablespoon hot sauce
- 2 cups all-purpose flour
- 1/2 cup cornstarch
- 2 teaspoons salt
- 1 teaspoon black pepper
- 1 teaspoon paprika
- 1 teaspoon garlic powder
- 1/2 teaspoon cayenne pepper
- Vegetable oil, for frying
Instructions
- Place chicken pieces in a large bowl. Pour buttermilk and hot sauce over the chicken. Mix to coat completely. Cover and refrigerate for at least 4 hours, or preferably overnight.
- In a shallow dish, whisk together the flour, cornstarch, salt, pepper, paprika, garlic powder, and cayenne pepper. This is your dredge mixture.
- Remove chicken from the buttermilk, letting excess drip off, but do not wipe dry.
- Dredge each piece thoroughly in the flour mixture, pressing the flour onto the chicken to create a thick, craggy coating. For extra crispiness, dip the floured chicken back into the remaining buttermilk for a second, quick dip, and then dredge again in the flour mixture.
- Heat 2 inches of vegetable oil in a deep, heavy-bottomed pot or Dutch oven to 325 degrees F. Use a thermometer to maintain the temperature.
- Carefully place chicken pieces into the hot oil, ensuring you do not overcrowd the pot. Work in batches.
- Fry chicken for about 6 to 8 minutes per side, turning occasionally, until deep golden brown and cooked through (internal temperature should reach 165 degrees F). Adjust heat as needed to prevent burning the crust before the inside cooks.
- Remove chicken from the oil and place it on a wire rack set over a baking sheet to drain excess oil. Do not place on paper towels, as this can steam the crust and make it soft.
- Serve hot.
Notes
- For the crispiest crust, ensure your oil temperature stays steady between 300 and 335 degrees F during frying.
- If you are cooking larger pieces like breasts, you may need to finish them in a 350 degree F oven after frying for 5 minutes to guarantee they are cooked through without burning the exterior.
Nutrition
- Serving Size: 1 piece (thigh)
- Calories: 450
- Sugar: 2
- Sodium: 650
- Fat: 28
- Saturated Fat: 7
- Unsaturated Fat: 21
- Trans Fat: 0
- Carbohydrates: 18
- Fiber: 1
- Protein: 30
- Cholesterol: 110