

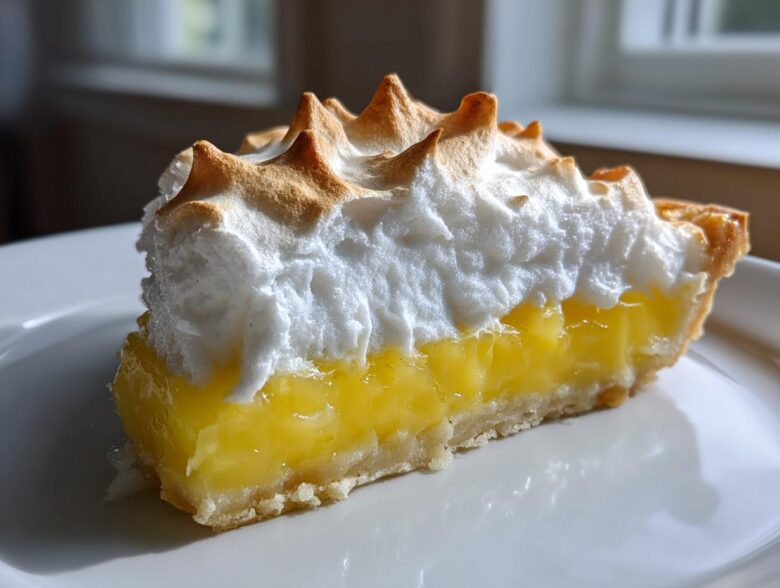
If there’s one dessert that screams perfect balancing act, it’s the lemon meringue pie. You’ve got that sharp, zesty punch of fresh lemon curd fighting just perfectly with the cloud-like, sweet embrace of the meringue topping. I spent years chasing that elusive moment—I couldn’t tell you how many batches ended up weeping on the counter!
But trust me, I’ve finally nailed it. This isn’t just any recipe; this is the definitive, from-scratch lemon meringue pie recipe that guarantees stability. We’re talking an unbelievably tart filling made entirely from scratch and a tall, fluffy meringue that actually stays put. After years of tweaking the acid against the sugar content, I finally found the ratio that works every single time. Get ready for the best lemon meringue you’ve ever made!
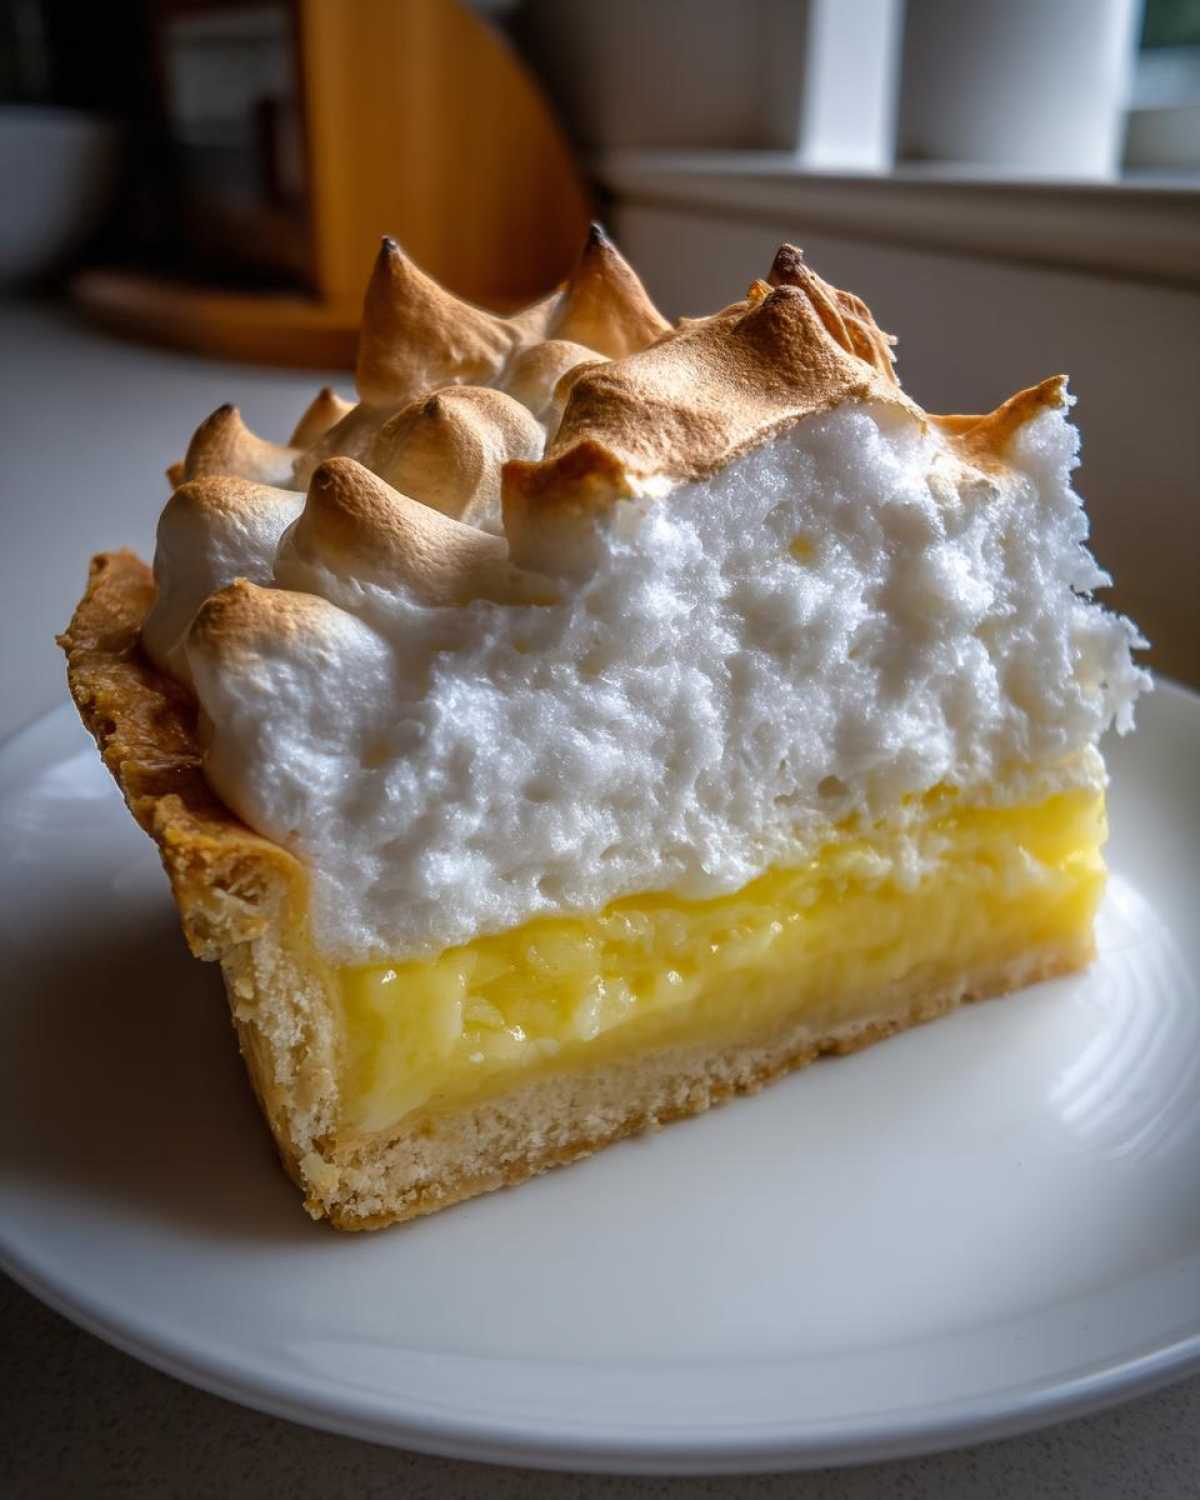
Why This Homemade Lemon Meringue Pie Recipe Stands Out
You want a showstopper, right? Well, this lemon meringue recipe delivers because it solves all the classic trouble spots bakers face. I’m passionate about making sure you succeed on your first try!
- Unmatched Tartness Control: You adjust the fresh lemon juice, so the filling isn’t sickeningly sweet.
- The Perfect Foundation: We start with a rich, prepared crust that’s fully cooled—it’s the backbone of this classic lemon pie.
- The ‘No Weep’ Guarantee: I’ve included the absolute must-do steps to keep that beautiful, fluffy meringue topping standing tall and dry.
If you need more general baking insight and tips from me, pop over to my main blog page—I share everything!
Gathering Ingredients for Your Classic Lemon Meringue
Okay, the first rule of making something this iconic is: use what you know! I always prefer a homemade crust, but if you’re short on time, grab a good quality 9-inch shell and bake it until it’s just lightly golden, then let it cool completely. That cooled crust is essential so it doesn’t steam the lemon meringue filling later. Here’s what you need for the main event:
Remember that crucial tip for the fluffy meringue topping? Your egg whites absolutely must be at room temperature. This helps them whip up into those gorgeous, stiff peaks that give you height!
For the Buttery Pie Crust
- 1 (9-inch) unbaked pie crust (store-bought or homemade)
Make sure this shell is completely cool before you pour in that warm filling. Seriously, let it sit an extra 15 minutes if you aren’t sure!
For the Zesty Lemon Filling
- 1 1/2 cups granulated sugar
- 1/3 cup cornstarch
- 1/4 teaspoon salt
- 1 1/2 cups cold water
- 4 large egg yolks, lightly beaten
- 1/2 cup fresh lemon juice
- 1 tablespoon lemon zest
- 2 tablespoons unsalted butter
See all that fresh zest? That’s where the amazing flavor comes from—you need that bright pop for a true zesty lemon dessert experience!
For the Fluffy Meringue Topping
- 6 large egg whites, room temperature
- 1/4 teaspoon cream of tartar
- 6 tablespoons granulated sugar (for meringue)
The cream of tartar is my secret weapon here. It’s the acid that stabilizes those whites so they don’t collapse into sugary soup later on. Don’t skip it!
Step-by-Step Instructions for Perfect Lemon Meringue
Alright, roll up those sleeves! This is where the magic really happens. We’re building this beautiful lemon meringue layer by layer, and timing is everything to get that rich lemon curd recipe texture without scrambling anything. Make sure your oven is preheated to 350 degrees Fahrenheit before you start with the filling assembly.
Preparing the Crust and Lemon Curd Recipe Base
First thing: make sure that 9-inch pie crust you made is completely cool. If it’s even a little warm, the filling will get soupy! While the crust is cooling, grab a medium saucepan. Whisk together the 1 1/2 cups of sugar, cornstarch, and salt until everything looks like fine sand. Then, you’re going to slowly whisk in that 1 1/2 cups of cold water until it’s completely smooth. No lumps allowed!
Cooking the Tart and Sweet Pie Filling
Place that saucepan over medium heat and stir constantly! Keep going until it thickens up really well and starts to bubble gently. Once it boils, keep stirring for one full minute—this step is vital to cook out that starchy taste. Remove it from the heat, just for a second. Now, the temper: take about a cup of that hot goo and slowly whisk it into your 4 beaten egg yolks in a separate bowl. This gently warms the yolks so they don’t curdle when they hit the heat later. Once they’re happy, pour that warm yolk mix right back into the main saucepan.
Put the pan back on medium heat. Stir constantly until the whole thing boils again—and boil it for one full minute. Take it off the heat for good! Now, stir in your lemon juice, zest, and the two tablespoons of butter until that butter melts right into the mixture. Pour this vibrant, tart and sweet pie filling immediately into your cooled crust.
Making the How to Make Perfect Meringue
While you’re pouring, start on the meringue! In a mixer bowl that is squeaky clean (I mean grease-free, people!), throw in the room temperature egg whites and the cream of tartar. Beat it on medium speed until you get soft, billowy peaks. Then, slowly, slowly, start raining in that remaining 6 tablespoons of sugar, about one tablespoon at a time. Keep mixing until you hit stiff, glossy peaks—this is how you guarantee that fluffy meringue topping!
Assembling and Baking the Lemon Meringue
This is your grand finale before the oven! Spread that gorgeous meringue right over the hot lemon filling. I mean it: make sure the meringue touches the very edge of the crust all the way around. This stops it from shrinking when it bakes. Use the back of a spoon to make dramatic swirls on top. Pop the lemon meringue pie into the 350-degree oven for just 12 to 15 minutes, or until those pretty tips get just slightly golden brown. Don’t walk away! If you want more tips on working with eggs, check out my thoughts on gnocchi in brown butter sauce—it uses yolks and relates to careful cooking!
Expert Tips for No Weep Lemon Meringue Tips Success
If you’ve ever seen drops of moisture forming under your meringue—that’s weeping—and it breaks my heart every single time! We want that cloud to stay proud and dry on top of our tart and sweet pie. So, here are my absolute best hard-won lessons on getting those no weep lemon meringue tips locked in.
First, and I can’t stress this enough: your mixing bowl and the electric mixer beaters must be spotless. I mean zero grease, zero fat, zero lingering oil from last night’s dinner! Even a tiny bit of fat will stop those whites from achieving maximum volume.
Second is timing. You need to spread that meringue over the hot lemon filling right away. The heat from the filling actually sets the bottom layer of the meringue, which helps trap everything in place as it cools. For more kitchen confidence in general, you might enjoy some of my tips over at my favorite soup guide—it’s all about building flavor foundations, just like pie!
Finally, don’t rush the cooling. Resist the urge to pop this beauty into the fridge immediately. Those four hours on the counter are sacred for setting up the structure. Follow those rules, and you’ll have the most stable, beautiful lemon meringue topping!
Cooling and Setting Your Showstopper Dessert
We’ve baked it, the meringue is golden, and it looks absolutely magnificent sitting there cooling on the rack. But stop right there! This cooling period is just as important as the baking itself, especially if you want clean slices of your beautiful lemon meringue pie.
The biggest mistake I see people make—and I’ve certainly done it myself when I was impatient—is taking this hot pie straight from the oven and sticking it in the fridge. Big mistake! That drastic temperature drop is what shocks the filling and causes all that miserable weeping we talked about earlier. Your pie needs a gradual transition.
Let it sit out on the counter, ideally on a wire rack so air can circulate underneath, for a minimum of four hours. Honestly, I prefer letting it cool for closer to six, especially if your kitchen is warm. This allows the cornstarch and egg in the filling to fully gel and firm up without rushing the process.
Once it’s mostly cooled down to room temperature and is firm to the touch, *then* you can cover it loosely and move it to the refrigerator to chill completely. If you’re looking for other great baked goods that need careful cooling, check out my recipe for apple pie crumb bars—they suffer from similar issues if cooled too fast!
When it’s time to slice this towering beauty, grab a long, sharp knife. Wipe the knife clean between every single cut by running it under hot water and wiping it dry. This prevents the sticky filling from dragging down the layers and keeps your slice looking as perfect as the whole pie did when it came out of the oven!
Storage and Reheating Instructions for Lemon Meringue
So, you made it! You managed to resist eating the entire lemon meringue pie in one sitting—impressive! Now, you might have some leftovers, and how you store them is crucial to enjoying that pie tomorrow.
The important thing to remember is that the ingredients in this pie—the egg whites and the lemon acid—don’t love the cold fridge environment long-term. They start to sweat, and that moisture leads right back to our nemesis: weeping. But we can certainly keep it fresh for a couple of days!
The best strategy is refrigeration. Once the pie is completely cooled down (at least four hours on the counter!), cover it gently with plastic wrap or use a cake dome if you have one. Try not to let the plastic wrap actually touch the meringue peaks, or you’ll stick the whole cloud to the plastic. If you can’t avoid touching, use toothpicks poked lightly into the filling around the edge to create a little tent.
This classic lemon pie stays best for two days maximum in the fridge. After that, the texture just starts to break down a little too much. Now for the hard truth: please, please do not reheat this pie!
Reheating a lemon meringue will completely liquefy the filling and turn your beautiful meringue into something resembling soggy, sweetened marshmallow fluff. It’s meant to be eaten cold or slightly chilled. If you really want to ‘refresh’ it, just take a slice out about 15 minutes before you plan to eat it so it loses that hard refrigerator chill. That cold temperature actually helps keep the filling firm, which is why we spent so much time cooling it properly in the first place!
Variations on the Zesty Lemon Dessert
Now that you’ve mastered the full-sized, towering lemon meringue pie, maybe you’re thinking, “What else can I do with this incredible filling?” Because trust me, once you’ve made this zesty lemon dessert filling from scratch, you’ll want excuses to make it all the time! The secret is that wonderful, sharp lemon curd recipe. It’s so adaptable!
I love making smaller versions when I’m having a crowd over—it feels fancier, and then everyone gets their own perfect little portion. It prevents that awkward moment where someone tries to cut the last slice of pie!
Mini Lemon Meringue Tarts
If you have mini tart pans, this is the way to go! You can use pie dough or even shortbread crusts that you blind-bake until crisp. You’ll simply need to scale down the filling, which is actually easier because the small pans cook much faster.
Make the filling just as directed. Instead of pouring it into a 9-inch shell, fill your little tart shells almost to the top. Then, whip up a small batch of the meringue—or use leftover whites from another baking project! Meringue melts beautifully on top of mini lemon meringue tarts. A quick visit to the oven to brown the tops, and you’ve got individual works of art. They look so elegant on a dessert tray!
Lemon Meringue Bars
For a slightly more casual, sturdy treat—or when I just can’t cope with making a perfect crust edge—I turn this into bars. You’ll want to double the crust quantity slightly, press it into a greased 9×13-inch baking dish, and bake it until it’s just lightly browned. That’s your base!
Pour the exact same hot lemon filling right over that warm crust. The cool crust helps keep the base from getting too soggy underneath the filling, which is essential for bars. Bake that filling until it just sets up. Then, you can either spread that gorgeous meringue over the top and quickly brown it, or (and this is a simple swap!) you can cool the whole thing un-meringued and top it with a simple dusting of powdered sugar or a thin layer of melted white chocolate. Either way, lemon meringue bars are fabulous for picnics!
If you are looking for other dessert hacks that save time but still taste incredible—like my way of making no-bake peanut butter cup cheesecake—you know where to look!
Frequently Asked Questions About Lemon Meringue Pie
I know you’re going to have questions because this is a little more involved than just dumping things into a bowl! That’s life when you’re trying to achieve perfection in a classic lemon pie. Don’t worry, I’ve answered the top things people always ask me when they dive into this recipe. It’s worth the little bit of extra attention!
Can I use bottled lemon juice instead of fresh for this lemon meringue recipe?
Oh, please don’t! I really, really advise against it. Bottled juice just doesn’t have the bright, clean acidity that fresh-squeezed lemons give you for this lemon meringue recipe. The fresh juice is critical not just for that wonderful tart flavor, but because the natural acids in fresh juice interact perfectly with the starches and eggs to help the filling properly set up and firm up. If you use bottled, you risk getting a soupier filling and, frankly, a flatter, less exciting flavor profile overall.
What causes the meringue to shrink or weep?
This is the eternal struggle, isn’t it? Weeping usually happens because the filling underneath wasn’t hot enough when you added the meringue, so the bottom layer never cooked and sealed properly. Another big culprit is humidity or letting the pie cool too quickly, which causes condensation. To prevent shrinkage, you have to make sure that fluffy meringue topping touches the crust all the way around the edge—think of it like sealing a lid on the filling so it can’t escape and wrinkle up on itself!
If you’re interested in other recipes where temperature control is crucial for texture—like my mint pots de creme—you’ll see similar rules about setting things gently!
Can I make the lemon filling ahead of time for this classic lemon pie?
Yes, you absolutely can make the lemon filling a day ahead, which saves you a ton of time when company is coming over! Once the filling is cooked and you’ve stirred in the butter, pour it into your cooled crust, cover it tightly with plastic wrap (make sure the wrap doesn’t touch the surface yet!), and stick it in the fridge. The next day, take it out about 30 minutes before you make the meringue. You need to gently warm that filling back up—not boiling, just warm to the touch—so that when you spread that fresh meringue on top, the bottom layer of meringue sets up instantly!
Share Your Best Lemon Meringue Creations
Now that you’ve got the secrets for making the best lemon meringue pie in the neighborhood, I want to see what you’ve made!
Seriously, don’t keep this beauty to yourself. Did you manage those tall, magnificent peaks on your meringue? Did the tartness hit just right? Hearing back from you really makes my day. It lets me know these hard-won tips are working in your kitchen, too.
Please take a moment to leave a rating and let me know how this classic lemon pie turned out for you in the comments below. If you snapped a picture of your glorious slice, tag me on social media! I absolutely love seeing all of your amazing results, especially when you tag me in your triumphs.
If you had a moment of panic but totally nailed the meringue, tell me about it! If you are already planning your next bake, maybe you’ll be excited to try my recipe for pear ginger cobbler next. Happy baking, friend!
PrintClassic Homemade Lemon Meringue Pie

A recipe for a traditional lemon meringue pie featuring a tart, homemade lemon filling and a tall, fluffy meringue topping.
- Prep Time: 30 min
- Cook Time: 45 min
- Total Time: 75 min
- Yield: 8 servings
- Category: Dessert
- Method: Baking
- Cuisine: American
- Diet: Vegetarian
Ingredients
- 1 (9-inch) unbaked pie crust (store-bought or homemade)
- 1 1/2 cups granulated sugar
- 1/3 cup cornstarch
- 1/4 teaspoon salt
- 1 1/2 cups cold water
- 4 large egg yolks, lightly beaten
- 1/2 cup fresh lemon juice
- 1 tablespoon lemon zest
- 2 tablespoons unsalted butter
- 6 large egg whites, room temperature
- 1/4 teaspoon cream of tartar
- 6 tablespoons granulated sugar (for meringue)
Instructions
- Preheat your oven to 350 degrees Fahrenheit. Bake the pie crust according to package directions or your preferred recipe until lightly golden. Cool completely.
- For the filling, whisk together 1 1/2 cups sugar, cornstarch, and salt in a medium saucepan. Gradually whisk in the cold water until smooth.
- Cook the mixture over medium heat, stirring constantly, until it thickens significantly and bubbles. Boil for 1 minute, stirring constantly. Remove from heat.
- In a separate bowl, whisk the egg yolks. Slowly temper the yolks by whisking about 1 cup of the hot sugar mixture into the yolks. Then, pour the tempered yolk mixture back into the saucepan with the remaining hot mixture.
- Return the saucepan to medium heat. Cook, stirring constantly, until the filling comes to a full boil. Boil for 1 minute. Remove from heat.
- Stir in the lemon juice, lemon zest, and butter until the butter melts completely. Pour the hot filling immediately into the cooled pie crust.
- For the meringue, place the room temperature egg whites and cream of tartar in a clean, grease-free mixing bowl. Beat with an electric mixer on medium speed until soft peaks form.
- Gradually add the 6 tablespoons of sugar, 1 tablespoon at a time, beating well after each addition. Increase the speed to high and beat until stiff, glossy peaks form.
- Spread the meringue over the hot lemon filling, making sure the meringue touches the edge of the crust all around to prevent shrinking. Create swirls on top with the back of a spoon.
- Bake at 350 degrees Fahrenheit for 12 to 15 minutes, or until the meringue tips are lightly golden brown.
- Cool the pie completely on a wire rack at room temperature for at least 4 hours before slicing. Do not refrigerate immediately to prevent weeping.
Notes
- To prevent weeping meringue, make sure your mixing bowl and whisk attachments are completely free of any grease or fat residue.
- Bake the meringue topping immediately after spreading it over the hot filling.
- Cool the pie slowly at room temperature for several hours before chilling to help the filling set firmly.
Nutrition
- Serving Size: 1 slice
- Calories: 380
- Sugar: 45g
- Sodium: 180mg
- Fat: 15g
- Saturated Fat: 6g
- Unsaturated Fat: 9g
- Trans Fat: 0g
- Carbohydrates: 60g
- Fiber: 1g
- Protein: 6g
- Cholesterol: 120mg