

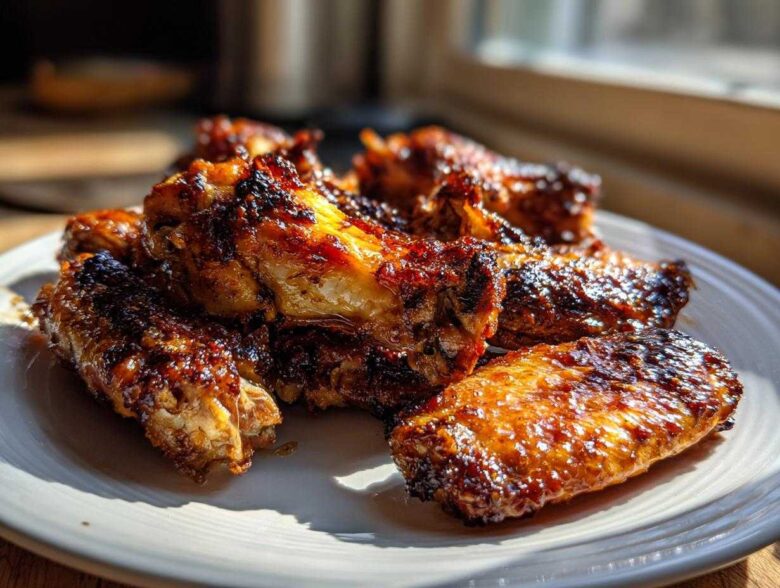
Let’s be honest, oven-baked wings are famous for one thing: being disappointing. You pull them out, excited for that game day crunch, and instead, you get skin that’s chewy, slightly greasy, or just plain sad looking. Ugh, I’ve wasted so many afternoons trying to force perfectly brown wings out of my oven!
But don’t you dare reach for the deep fryer! Over the years, I rigorously tested every flaky salt, every fan placement, and every temperature spike to crack the code. And seriously, I found it. We’re talking about the absolute best crispy baked chicken wings you will ever make without needing a giant pot of oil. The secret isn’t complicated; it involves one pantry staple that does all the heavy lifting for you. Trust me, once you try this method, you’ll never go back.
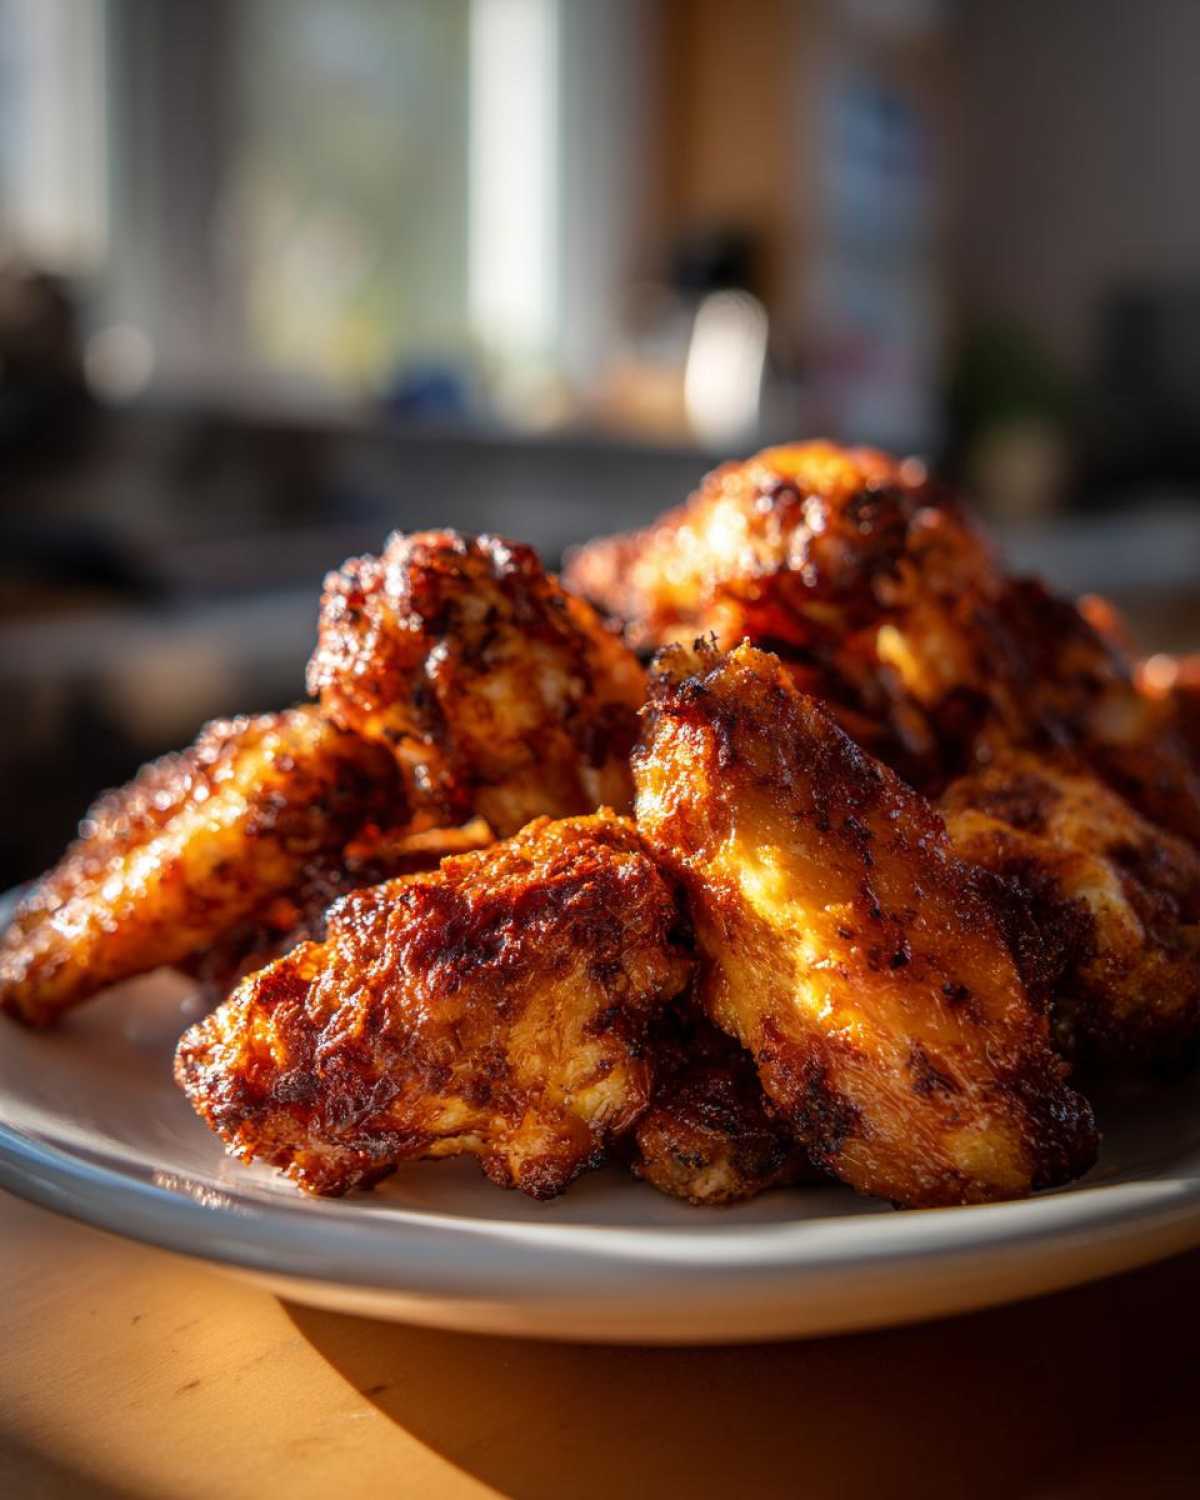
The Secret Weapon: Why Baking Powder Creates Crispy Baked Chicken Wings
Okay, here is where we talk science, but don’t let that scare you! This whole method hinges on one magical powder: baking powder. I know, it sounds too simple, but it’s been my go-to hack for achieving those glorious crispy baked chicken wings that usually only come from a deep fryer. What happens is that baking powder is slightly alkaline, which means it raises the pH level of the chicken skin.
Why do we care about the pH? Because a higher pH helps the proteins in the skin break down quicker and allows moisture to escape way faster than normal. This means the skin dries out beautifully during cooking instead of just steaming itself into a soggy mess. It sounds intense, but really, it just means you get wings that are juicy inside and super crunchy outside, making this the ultimate crispy wings no fry technique!
Baking Powder vs. Baking Soda for Crispy Wings No Fry
This is a crucial distinction, folks! If you grab baking soda, you’re going to end up with metallic-tasting wings—not good. Baking soda is pure base. Baking powder, on the other hand, is a combination of a base (like soda) and an acid (like cream of tartar). Because it already has its own acid, it bubbles away nicely without leaving that weird aftertaste. I always try to snag the aluminum-free kind if I can find it, just because I’m picky, but truthfully, any standard baking powder works wonders here.
Gathering Ingredients for Perfect Crispy Baked Chicken Wings
Alright, now that you know the magic trick, let’s make sure we have our supplies ready. For this recipe, I usually plan for about 3 pounds of wings—that usually feeds four hungry people when they are the star of the show, like for a big game day appetizer. But you can scale this up or down easily. The most important thing is keeping the ratio of baking powder to chicken skin correct, or you won’t get those fantastic crispy baked chicken wings we’re aiming for.
Everything else is pretty standard pantry fare. I like to use fresh cracked pepper, but if you have pre-ground, that’s fine too! The key here is having that baking powder measured out perfectly. Don’t eyeball this part, okay? Precision in the beginning saves you from soggy disappointment later!
Essential Components for the Coating
These simple spices transform the wings from plain baked poultry to something seriously addictive. I’m sticking to the basics here because once the wings come out perfectly crunchy, you can’t mess up the sauce step!
- 3 lbs chicken wings, remember to separate them into flats and drumettes before you start.
- 1 tablespoon baking powder. Remember what I said? If you can find aluminum-free, go for it!
- 1 teaspoon salt—don’t skip this!
- 1/2 teaspoon black pepper.
- 1/2 teaspoon garlic powder—the good stuff, not the powder that’s mostly filler.
- 1/4 teaspoon cayenne pepper (this is optional, but if you like a little sneaky heat, add it in!).
- And just a tiny spritz of cooking spray for the rack.
If you decide to double the wings for a huge party, just double these spice amounts. The coating ratio for the crispy baked chicken wings technique stays the same, no matter how many flats and drumettes you’re tossing in that bowl!
The Best Technique for Crispy Baked Chicken Wings: Step-by-Step
Okay, this is the moment of truth! Everything we’ve talked about—the baking powder, the prep—leads right here. If you skip a step in this technique, you risk ending up with wings that are just *okay*. But if you follow the flow, you are guaranteed to get that amazing texture. This whole process takes about an hour from start to finish, so plan ahead if you need these for a party. First and foremost, we have to deal with moisture. Moisture is the absolute enemy of crispiness, I can’t stress this enough! If you’re curious about other quick methods, I’ve tested air frying too, but for the oven, this is the winner. We cover that recipe here.
Preparation: Drying and Coating the Wings
Grab those separated flats and drumettes and lay them all out on a plate lined with paper towels. Now, pat. Pat them aggressively! Seriously, you need to get them as dry as you possibly can. I often use two paper towels per wing because I want them completely towel-dried. Once they’re dry enough to squeak a little when you handle them, toss them gentle into that bowl with your seasoned baking powder mix we made earlier. Make sure every single little piece gets a nice, even coating. You want that white powdery film completely covering the skin. If you see dry spots, toss it around a bit more until everything looks matte and pale.
Oven Setup: Maximizing Airflow for Crispy Baked Chicken Wings
This next step is just as vital as the baking powder. If you just plop your wings directly onto a flat baking sheet, the bottom side is going to steam in its own juices, and you’ll get soggy skin touching the metal. No thank you! What you need is airflow all the way around. I use a rimmed baking sheet—the one with the edges—and then I place a wire cooling rack right on top of it. Then, lightly spray that rack with cooking spray so the wings don’t stick when they get super crispy.
Arrange your coated wings so that they are all in a single layer and none of them are touching each other. Spacing is key for getting those perfect crispy baked chicken wings. Once everything is set up, preheat your oven to 425 degrees Fahrenheit (220 Celsius). We start a little lower just to heat the internal meat up nicely before we blast the skin into crisp overdrive.
Baking Sequence and Temperature Adjustments
Once the oven hits 425°F, pop that sheet pan in the middle rack. Bake them undisturbed for exactly 25 minutes. Now, this is where the magic gets dialed up! After 25 minutes, carefully pull the pan out—use good oven mitts here!—and flip every single wing over using tongs. Then, crank your oven temperature way up to 450 degrees Fahrenheit (230 Celsius).
Put them back in and bake them for another 15 to 20 minutes. This high heat is what really gets the skin crunchy. If you want wings that look like they came out of a restaurant fryer, watch them closely during those last couple of minutes. If you see them browning nicely, switch the oven setting to broil for just 1 to 2 minutes. Seriously, watch them like a hawk when broiling because they go from perfect to burnt in seconds! Once they look deeply golden and feel super firm to the touch, pull them out immediately.
Achieving Juicy Inside Crispy Outside Chicken Texture
When you see those wings come out of the 450°F blast, you’ll know instantly if you’ve nailed it. The skin should look tight, deeply browned, and wonderfully crackly. That little bit of baking powder action on the outside really works to lock the moisture in while the high heat renders out all the excess fat beneath the skin. That’s how you get that perfect juicy inside crispy outside chicken texture we all crave!
If you’re unsure if they’re done, you can always give one a quick test poke. The juices should run clear, but the interior meat should feel tender, definitely not dry. If you’re serving these plain, right off the rack, they are fantastic. If you plan on saucing them, take them out the second they hit peak crispness because the sauce will soften things up just a tiny bit. You want that exterior crust to grab that sauce, not immediately dissolve into it!
Flavor Variations for Your Crispy Baked Chicken Wings
Now that we’ve mastered the technique to get the crunchiest base possible, we can get creative! Getting those crispy baked chicken wings right means they can handle whatever flavor you throw at them afterwards. You can either tweak that initial dry rub mix or wait until they come out of the oven, which I generally prefer for max crisp factor.
For example, if you’re craving something sweet and sticky, I highly recommend checking out a great honey garlic recipe if you need inspiration for glazes. We have a fantastic one over here if you want to see how to build that sweet coating. But if you want to use the basic seasoning mix we already blended, just keep reading for some fun ways to dress them up for your party!
Tossing Sauces: When and How to Apply
Listen up, this is crucial advice for keeping your hard-earned texture! If you are planning on making Buffalo style wings or dipping them in something saucy—whether it’s a vibrant homemade sauce or store-bought—you have to sauce them right as they come out of the oven. The moment those extra-crispy wings hit the hot metal rack, get them into a large mixing bowl!
Toss them gently but quickly until they are completely coated. The heat retained in the crust is what helps the sauce adhere instantly, kind of sealing the deal on that crisp crust. If you let them sit for even five minutes before saucing, the steam trapped under the sauce starts softening the skin. So, pull, toss, and serve right away!
If you’re doing Garlic Parmesan wings, though, you can skip the saucing step altogether and just toss the hot wings with grated Parmesan cheese, melted butter, and fresh parsley right after they come out. That works beautifully, too!
Tips for Success with Oven Baked Chicken Wings
We’ve covered the main method to get you started on your journey toward oven baked chicken wings perfection, but honestly, sometimes the oven just acts stubborn, right? I’ve learned a few little troubleshooting secrets over the years that ensure you always get that perfect, crackly skin regardless of what your oven is doing. These aren’t in the main recipe because they are little nudges you apply based on what you see happening in the oven. Think of these as the final touches to make the difference between good wings and “wow, are these fried?” wings.
Preventing Crowding on the Baking Sheet
I mentioned spacing earlier, but let me hit this point home again because it’s where most people accidentally sabotage their success! If you pile your wings up, or even if they are just touching slightly, they are going to steam each other. When wings steam, the moisture has nowhere to go, and guess what happens? You end up with soft skin, especially on the sides that are bumping into their neighbors. If you have a ton of wings to make, the best thing you can do is cook in batches. It adds time, I know, but an extra 20 minutes of cooking is always better than a pan full of gummy, disappointing chicken!
If you find yourself with too many wings for one sheet, you need two racks or two baking sheets. When using two sheets, I recommend rotating them halfway through the first baking stage (at 425°F) just to make sure both batches get even heat exposure. We are aiming for maximum air exposure around every single wing for the best results in our healthier chicken wings recipe!
Always Preheat Your Oven Fully
This seems like something Mom told you a million times, but it’s gospel when it comes to crispy skin. If you put your wings into an oven that hasn’t reached that 425°F mark, the skin immediately starts releasing moisture before the heat is high enough to evaporate it. That’s instant sogginess! Make sure you give your oven at least 15 to 20 minutes to fully preheat, especially since we are asking it to hit 450°F later on. Don’t trust the little beep; wait a few extra minutes if you have a notoriously slow oven.
Using a Rack is Non-Negotiable
If you try to skip the wire rack and just use a flat sheet pan because you’re feeling lazy or don’t have a rack, I’m telling you now: don’t do it! The rack lifts the wings off the base of the pan, creating a little air tunnel underneath. This allows that warm, powerful oven air to circulate beneath the wing so the bottom crisps up at the same rate as the top. If you don’t use a rack, the bottom gets saturated with melted chicken fat and moisture, creating a gross sort of wet steam bath for the bottom layer. A rack is how you guarantee that juicy inside crispy outside chicken quality!
The Final Broil Check
Sometimes, your oven temperature runs a little cool, or maybe you had too many wings spaced too closely, and they just aren’t hitting that deep brown color you want. If they look done but still slightly pale after the final 15-20 minute bake at 450°F, this is your last chance! Switch the oven to the broiler setting—usually high—and stand there watching them like a hawk. Seriously, you only want 60 to 120 seconds under the broiler. It’s like a finishing tanning booth for your wings, giving them that final deep color and shatteringly crisp texture.
Serving Suggestions for Game Day Chicken Wings Appetizer
We’ve done the hard work—we baked the absolute best game day chicken wings appetizer known to mankind! Now we can’t ruin the experience by serving them with plain old celery sticks, can we? These wings, whether sauced Buffalo style or seasoned perfectly plain, are rich and savory, so they genuinely shine when paired with something cool, creamy, or slightly tangy to cut through that richness. Don’t go making a huge, complicated meal; wings are meant to be fun finger food!
The traditional carrot and celery sticks are always welcome, of course, but I like to step it up a notch with a few dipping options. A good, homemade ranch or blue cheese dressing is non-negotiable for many people—it’s the perfect creamy coolant for the heat. If you are looking for a dip that steals the show, though, you absolutely have to try a baked dip to serve alongside them. I’m obsessed with a cheesy spinach artichoke dip when I’m hosting a crowd, and you can find my recipe right here. It’s warm, gooey, and everyone dives straight for it!
If you want something that feels a little lighter but still totally satisfying, try these simple pairings. I feel like creamy coleslaw cuts through the spice amazingly well, especially if you are serving something hot like Buffalo wings. Or, make a quick, bright side salad with a sharp vinaigrette that offers a nice acidic contrast. Honestly, whatever you serve them with, these oven baked chicken wings are going to disappear fast. Just make sure you have plenty of napkins nearby!
Storage and Reheating Instructions for Crispy Baked Chicken Wings
Listen, if you’re lucky enough to have any crispy baked chicken wings left over, you should absolutely treat them well! We put in all that work getting them perfectly crunchy, so we don’t want to ruin them by microwaving them the next day. That’s a recipe for mushy disaster, trust me.
The number one rule for storage is to cool them down quickly and store them dry. If you made sauced wings, the sauce is going to soften the skin no matter what, so accept that those ones will be chewier when reheated. For plain, naked wings—or even sauced ones if you’re brave—let them cool completely on the counter first. Then, place them in an airtight container.
You can certainly keep them in the fridge for about three days. Any longer than that, and the texture really starts to suffer. I find they actually taste best the next day if you’re patient and put in the time to reheat them properly. Forget the microwave; that’s just going to create sad, soggy steam pockets!
To bring those glorious wings back to life and get that crunch back, you need high, dry heat again. The oven or a toaster oven is your best friend here. Preheat your regular oven to about 400 degrees Fahrenheit (or 375°F if you’re using a toaster oven, because those heat up faster). Lay the wings out on a clean, wire rack placed over a baking sheet. Again, we are promoting airflow so the bottom doesn’t steam!
Pop them in for about 8 to 10 minutes. You’ll see the skin start to firm up and maybe even sizzle a little bit. That’s the sound of success! They should come out piping hot and almost as crispy as they were fresh out of the fryer. If they were heavily sauced, they might take a tiny bit longer for the exterior to dry out again, maybe 12 minutes. But this quick blast of heat is the ONLY way to resurrect truly crispy baked chicken wings!
Frequently Asked Questions About Healthier Baked Wings Recipe
I love getting questions from all of you because it usually means you’re already in the kitchen trying this yourself, which is the best compliment! Since this recipe is naturally a much healthier chicken wings recipe than deep-fried versions, I get a lot of questions about tweaking the method or troubleshooting the crisp! Here are the most common things I hear.
Can I use this method for frozen wings?
Oh, honey, please don’t even try! This is a firm no. If you try to put chicken wings straight from the freezer into your baking powder dredge, the best you are going to get is a very, very weirdly textured lump that tastes faintly of metal. Moisture is the enemy here, and frozen wings are guaranteed to start weeping moisture the second they hit the dry rub. You absolutely must thaw your wings completely—and then pat them until they feel totally dry—before you coat them. If you need a general guide for making wings a bit healthier overall, I have some great tips in this post on general healthy swaps!
What is the best oven temperature for crispy wings?
This is the heart of the technique, isn’t it? Getting that perfect how to make wings crispy in oven result requires a two-speed approach. We don’t just stick with one temperature! We start lower—at 425°F (220°C)—because we need to gently cook the meat through without burning that flour/baking powder coating instantly. After 25 minutes, that’s when we flip them, and then we crank the heat up high to 450°F (230°C) for the final 15 to 20 minutes. That second blast of heat is what drives out the last bit of surface moisture and creates that shatteringly crisp skin we want. If your oven runs cool, you might even bump that last step to 475°F, but watch them carefully!
Is this recipe better than an air fryer alternative?
That is such a good question! People are always asking if this beats the air fryer, and honestly, it depends on what you prioritize. Air fryers are fantastic for speed and convenience, often giving you great results in about 25 minutes total. However, for genuinely large batches (like 3 lbs or more), the oven method here wins because you can spread everything out on the rack and use a huge surface area. For a huge party, the oven is more efficient, and I find that the baking powder trick in the hot oven gets me a slightly more even, all-around brown crisp than what I sometimes get in my small air fryer basket. Both are great, but this baking method is my personal favorite for texture!
Can I make these wings ahead of time?
You can definitely prep them ahead for maximum efficiency, and I do this when hosting big events! Get your wings dried off and coated in the baking powder mixture the night before. Cover the rack/sheet pan setup loosely with plastic wrap and put them right into the fridge. The cold air will help dry the skin out even more overnight—it’s kind of a secret benefit! The next day, pop them straight into the preheated 425°F oven. You might need to add about 5 minutes to the first baking stage to account for starting cold from the fridge, but they will be gloriously crispy!
Do I have to use the spices you listed?
Nope! I listed those spices because they create a really lovely, subtle savory base that complements almost any sauce you add later, keeping the overall profile leaning toward a healthy baked wings recipe base. But you could easily swap the garlic powder for onion powder, use smoked paprika instead of cayenne, or even use plain salt and pepper. The spices are there for flavor enhancement, but the real magic, the real crispiness factor, comes 100% from the baking powder and the technique. Feel free to experiment with the seasoning—it won’t ruin the crunch!
Estimated Nutritional Data for This Recipe
I always get asked if making crispy baked chicken wings this way adds a ton of fat or calories, and my answer is always a big, happy, “Nope!” Since we aren’t deep frying these beauties, we drastically cut down on the overall oil absorbed. However, I always want to be super honest about what’s in the food we eat, so take this information as a helpful guide, not a hardcore medical analysis!
This nutritional breakdown is an estimate based on the ingredients listed in the recipe—that means it assumes you are serving plain wings with no heavy sauces added after baking. If you toss them in a sugar-heavy BBQ sauce or a creamy ranch dip, those numbers are definitely going up, so keep that in mind when you are enjoying these!
- Serving Size: 4 wings
- Calories: 250
- Total Fat: 15g (This includes the natural fat rendered from the skin during baking)
- Saturated Fat: 4g
- Unsaturated Fat: 11g
- Trans Fat: 0g
- Cholesterol: 90mg
- Protein: 28g (These are power-packed!)
- Carbohydrates: 1g
- Fiber: 0g
- Sugar: 0g (Unless you’re adding a sweet sauce later!)
- Sodium: 350mg (This is mostly from the salt we added to the dry rub)
See? You get nearly 30 grams of protein for just 250 calories, and since there’s virtually no sugar, these wings keep you feeling full and satisfied, which is why they make such a great game day chicken wings appetizer. It’s amazing what removing all that frying oil does for the numbers!
Share Your Crispy Wing Success
Now that you have the ultimate guide to making crispy baked chicken wings that taste like they were fried—without the messy cleanup or the heavy grease—I really want to hear about your results! Seriously, every time someone tells me they finally achieved that perfect, audible crunch using the baking powder trick, I get so excited!
If you made these for a party, or maybe just crushed a plate of them watching a game, please come back and tell me how it went! Leaving a quick star rating for the recipe is super helpful for other cooks wondering if this method really works. And if you happened to snap a picture of those perfectly golden, textured wings, you should absolutely share it with me on social media. Tag me so I can gasp over your crispy creations!
If you’re looking for even more tried-and-true recipes or cooking adventures, feel free to browse around my full blog archives here. But seriously, let me know how your wings turned out. Happy crunching!
PrintThe Ultimate Secret to Truly Crispy Baked Chicken Wings (No Frying Needed)
Follow this method using baking powder to achieve chicken wings that are juicy inside and perfectly crispy outside without deep frying.
- Prep Time: 15 min
- Cook Time: 45 min
- Total Time: 60 min
- Yield: 4 servings
- Category: Appetizer
- Method: Baking
- Cuisine: American
- Diet: Low Fat
Ingredients
- 3 lbs chicken wings, separated into flats and drumettes
- 1 tablespoon baking powder (aluminum-free preferred)
- 1 teaspoon salt
- 1/2 teaspoon black pepper
- 1/2 teaspoon garlic powder
- 1/4 teaspoon cayenne pepper (optional)
- Cooking spray
Instructions
- Pat the chicken wings completely dry using paper towels. Moisture prevents crispiness.
- In a large bowl, mix the baking powder, salt, pepper, garlic powder, and cayenne pepper.
- Add the dried wings to the bowl and toss until every piece is evenly coated with the baking powder mixture.
- Arrange the wings on a wire cooling rack set over a baking sheet. Do not let the wings touch each other.
- Preheat your oven to 425 degrees Fahrenheit (220 degrees Celsius).
- Bake the wings for 25 minutes.
- Flip the wings over. Increase the oven temperature to 450 degrees Fahrenheit (230 degrees Celsius).
- Bake for another 15 to 20 minutes, or until the skin is deeply golden brown and very crisp. For extra crispiness, broil for the last 1 to 2 minutes, watching closely to prevent burning.
- Remove from the oven and serve immediately, tossing with your favorite sauce if desired.
Notes
- Using a wire rack allows air to circulate completely around the wings, which is key to crisping the bottom skin.
- Ensure you use baking powder, not baking soda, as the powder reacts with the chicken skin to raise the pH, helping the skin dry out and brown better.
- For sauced wings, toss them immediately after they come out of the oven so the sauce adheres to the hot, crispy skin.
Nutrition
- Serving Size: 4 wings
- Calories: 250
- Sugar: 0
- Sodium: 350
- Fat: 15
- Saturated Fat: 4
- Unsaturated Fat: 11
- Trans Fat: 0
- Carbohydrates: 1
- Fiber: 0
- Protein: 28
- Cholesterol: 90