

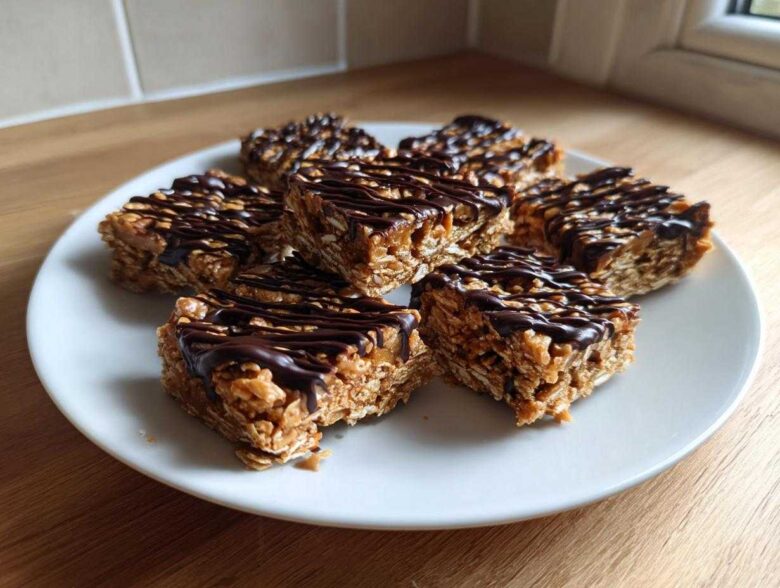
Okay, confession time. I used to spend way too much money staring longingly at those fancy, perfectly wrapped protein bars in the grocery store that promised the world but usually contained a mile-long list of ingredients I couldn’t pronounce. Honestly, they often tasted like sweetened cardboard, too! I was tired of the cost and the weird aftertaste.
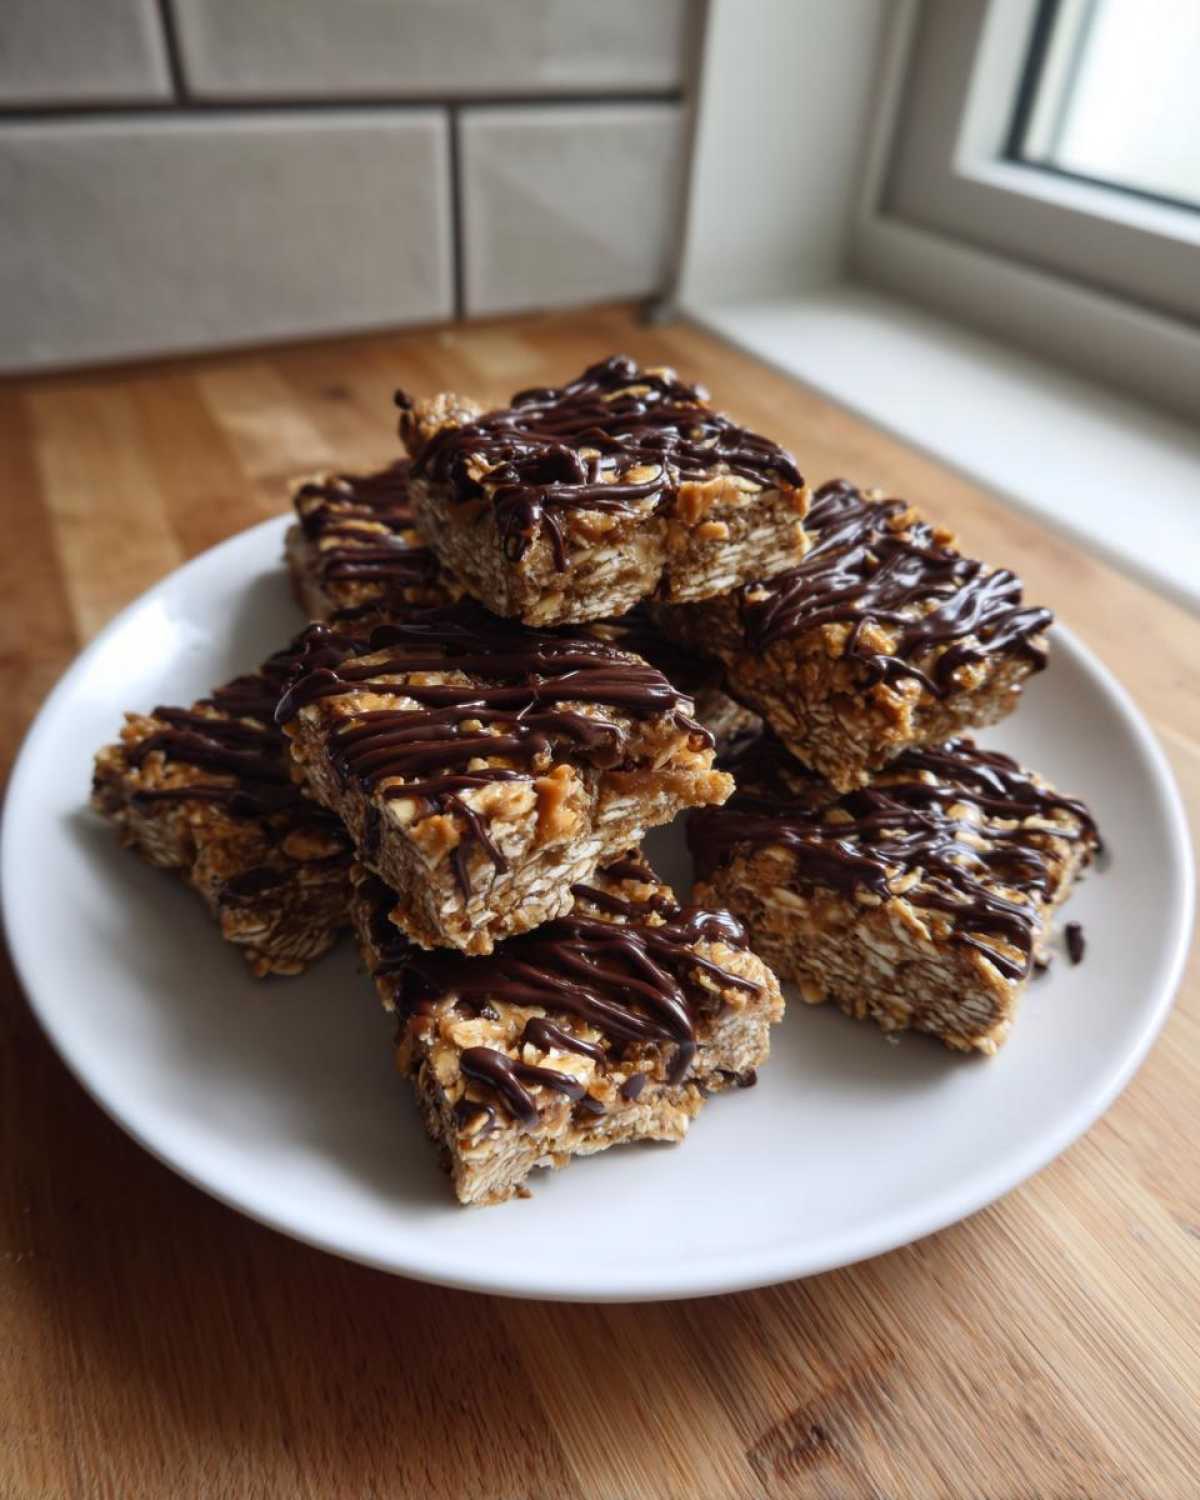
So, I finally figured out the trick to making your own that actually taste decadent, stay chewy, and require zero oven time. Seriously, we are talking about an easy protein bar recipe here. I promise you can ditch the cash register lines because these glorious no bake protein bars only need five basic things from your pantry to come together. That’s fewer ingredients than I use for Tuesday night pancake batter!
I’ve been making batches of these peanut butter protein bars for my weekly snack prep. They are always gone way too fast, which is why I’m sharing my secret now. You simply mix, press, chill, and drizzle. That’s it! We’re going to get that satisfying, high-protein fuel fix without any hassle. You can check out how I prep other high-protein goodies like my overnight oats over here: protein-packed overnight oats.
Why These Easy No-Bake 5-Ingredient Protein Bars Are the Best Homemade Protein Bars
I’m telling you, these are the *best* homemade protein bars you will ever try, and they solve so many problems! First of all, five ingredients—that’s it! We skip the oven entirely, which saves energy and keeps your kitchen cool. Plus, when you make your own easy protein bar recipe, you’re pocketing serious cash compared to the fancy brands.
They taste like a slightly healthier peanut butter candy bar, which is exactly what a good snack needs to be. Forget chalky textures; these are wonderfully chewy and satisfying.
Quick Preparation for Your Protein Bars
You truly can’t beat the prep time here. We’re talking about 10 minutes of actual work. You mix everything in one bowl, press it into the pan, and let the freezer do the heavy lifting. These are the ultimate quick protein treats for when you realize at 8 PM you need fuel for tomorrow morning.
Perfect for Meal Prep Bars and Simple Homemade Snacks
If you’re like me and rely on having snacks ready to go, these are your new best friends. They sit perfectly in the fridge and make fantastic meal prep bars. If you’ve never tried making protein bars for beginners before, start right here. There’s nothing intimidating about mixing things in a bowl!
Gathering Ingredients for Your Peanut Butter Protein Bars
Before we get messy, you need to gather your short list of supplies! Remember, this is where we keep things super simple. We only need five core players to create these amazing peanut butter protein bars. Don’t panic about complicated measurements; this is straightforward stuff.
You’ll need rolled oats, peanut butter (creamy works best for mixing!), your favorite vanilla or unflavored protein powder, a liquid sweetener like maple syrup, and just a splash of water or milk for texture. Oh, and the chocolate chips for the drizzle—that’s hardly cheating, right?
Ingredient Notes and Substitution Ideas for Protein Bars
Let’s talk powder for a second: vanilla or unflavored is best because we want that peanut butter flavor to shine. If you are making these for my vegan friends, swap out the honey for maple syrup—that’s my go-to sweetener anyway!
If your mix seems way too stiff when combining everything, don’t dump in a ton of liquid at once. Just add water or milk one teaspoon at a time until it comes together into a sticky dough. If you add too much, you’ll end up with a soft mess instead of firm protein bars, so go slow!
Step-by-Step Guide to Making No Bake Protein Bars
Alright, let’s get down to business! This part is super satisfying because you watch these ingredients magically transform into something you’d usually spend $4 on at the coffee shop. Remember, we aren’t turning on the stove, but we *are* prepping our pan, which is the first secret to success. Grab an 8×8 inch pan and line it completely with parchment paper. Make sure that paper hangs over the sides—that overhang is your handle later!
These instructions are simple, but following them in order guarantees you get those perfect chewy protein bars rather than a crumbly pile.
Preparing the Base for Chewy Protein Bars
First up, we combine all our dry pals: the oats and the protein powder go into a medium bowl. Then, we add the structure—the peanut butter and the maple syrup. Start mixing! It’s going to look really crumbly at first, and you might think, “Oops, I messed up!” Don’t worry! Keep pushing that spoon around until it finally starts clumping. If it’s resisting and looks totally sandy, add just a teaspoon of water or milk at a time until it starts looking like thick cookie dough that holds its shape when you squeeze it.
Once it’s mixed, dump that dough into your parchment-lined pan. Now, this next part is crucial for sturdy bars: press it down *hard*. Use the flat bottom of a measuring cup or the back of a spoon and compact this mixture until it’s flat and dense. We want zero air pockets at the bottom!
Chilling and Finishing Your No Bake Protein Bars with Drizzle
Now, baby needs a rest. Pop that pan into the freezer for at least 30 minutes. This chilling time is non-negotiable because it helps your amazing mixture set up properly before we add the fanciest part. While that’s chilling, melt your chocolate chips carefully using short bursts in the microwave. Stir it until it’s silky smooth.
Pull the chilled slab out and drizzle that gorgeous chocolate all over the top! Make crazy zigzag patterns—it looks professional! Back into the freezer for just another 10 minutes until that chocolate is hard to the touch. Once it’s firm, you just grab the parchment overhang, lift the whole block out, and slice it into 10 perfect squares. Ta-da! Your kitchen smells incredible and you just made the **best protein bars**.
Tips for Success When Crafting Perfect Protein Bars
Even though these are ridiculously simple, there are a couple of tricks to make sure your post-chilling result is perfectly chewy protein bars and not a bag of crumbs! The biggest rookie mistake I see people make is under-mixing or not compacting the base enough.
When you are pressing that dough into the pan, you have to use some muscle! Really pack it down so there aren’t any weak spots. If you skip this, your bars might break apart when you try to slice them.
Also, remember the liquid adjustment is key. If your peanut butter is super stiff from the fridge, you will need slightly more liquid than I listed. Always add it slowly, teaspoon by teaspoon, until that mixture finally clumps beautifully into a moldable dough. You can find inspiration for adding fun things like dried fruit over here: oatmeal chocolate chip energy bites.
Variations for Your Homemade Protein Bars
Once you master the basic peanut butter version, it’s like opening the floodgates! These protein bars are begging for you to experiment, and thankfully, because they are no-bake, experimentation is super low-risk. You don’t have to worry about baking times throwing off the texture.
The easiest swap is often the nut butter. If you’re feeling almond-y, switch out the peanut butter for creamy almond butter. It gives a slightly different, richer backdrop flavor. You could also boost the texture by stirring in things like chia seeds or hemp hearts along with the oats—these little guys are packed with nutrition! If you want to change up the drizzle, maybe try white chocolate or even a swirl of melted peanut butter mixed with a touch of coconut oil instead of dark chocolate chips.
For tons of ideas on customizing your mix-ins, I compiled a whole list of protein bar ingredient ideas that you might find fun to try next time!
Making Vegan Protein Bars Recipe Variations
These bars are incredibly easy to make fully vegan, which is great if you have friends or family who avoid animal products. The main things you need to watch are the sweetener and the powder itself. For the honey, just substitute it with the same amount of maple syrup—it works perfectly in this formula!
Secondly, make sure the protein powder counts as vegan! Most whey-based powders are out, but plant-based powders like pea or soy work wonderfully. Just check the label. As long as you use those two swaps, you’ve got outstanding, chewy, vegan protein bars recipe variations that everyone can enjoy!
Storage and Make Ahead Protein Snacks
One of the big reasons I love these so much is how easy they are to keep on hand! Since they are no-bake, they don’t have the structure of a baked good, so you must chill them. Store your finished protein bars in an airtight container placed right in the refrigerator.
They stay wonderfully fresh and firm for up to a full week! That means you can make a big batch on Sunday, and you’ve got your fuel sorted for nearly all week long. They are absolutely the definition of reliable make ahead protein snacks. Trust me, having these ready to grab is a game-changer!
Serving Suggestions for These Healthy Snack Bars
So, you’ve got your fresh batch of healthy snack bars chilling out, looking all professional with that chocolate drizzle. Now what? Well, the best part about having these gorgeous, fuel-packed bars around is that they fit into any part of your day! Honestly, they are so good, you might be tempted to eat them for dessert.
My absolute favorite way to enjoy one is right after a tough lifting session at the gym. They have the perfect blend of sweetness and protein to help me refuel without feeling weighed down. If you’re pairing them with a drink, try one alongside a big mug of black coffee in the morning—it’s like a mini, portable breakfast that actually tastes good!
They are also fantastic alongside fresh fruit. Sometimes I slice one in half and serve it next to a handful of bright raspberries or some apple slices. It adds a little vitamin boost to your natural rehydration routine afterward. Honestly, these bars work anytime you need a boost of satisfying energy!
Frequently Asked Questions About Homemade Protein Bars
I totally get it—when you’re making low sugar protein bars or adjusting a simple recipe, you’re going to have questions! Here are a few I hear all the time about ditching the store-bought stuff and sticking to these easy recipes.
Can I make these protein bars low sugar?
That’s a super smart question, especially if you’re watching sugar intake. Since this recipe uses maple syrup, you can swap it out for a zero-calorie liquid sweetener like monk fruit drops or liquid stevia. You’ll need to adjust based on the specific brand, but you can absolutely create delicious, low sugar protein bars this way. Just be aware that the sweetener also acts as a binder, so you might need to add a tiny bit more liquid (like a splash of water just before it forms the dough) to get it to stick together right.
Do I have to use peanut butter for these homemade protein bars?
Nope! While peanut butter is fantastic because it’s naturally sticky and mixes so well, you can try other creamy nut or seed butters. Almond butter, cashew butter, or even sunflower seed butter will work great for these homemade protein bars. Just make sure whatever you use is the smooth, drippy kind, not the super natural kind that separates immediately, or you’ll end up needing way too much liquid.
What if I don’t have protein powder? Can I still make an energy bar?
That’s the one spot where I say you *really* need the powder if you want it to function as a true protein bar. Protein powder is what gives the structure needed for the bar to hold together without baking. If you skip it, you’ll essentially just be making a loose oat-and-syrup snack that won’t firm up properly in the fridge. You’ll end up with something more like a thick granola—still tasty, but not a sliceable bar!
Can I bake this easy protein bar recipe instead of chilling?
You could technically try baking them lightly, but honestly, I wouldn’t recommend it for this specific formula. These easy protein bar recipes are designed to rely on the cold to firm up the binding agents like nut butter and maple syrup. Baking might dry out the oats too much, leaving you with a very crumbly, dusty texture instead of the beautiful chewy protein bars we are aiming for. Stick to the freezer; it’s faster and much more reliable for this style!
Estimated Nutritional Profile of These Protein Bars
Okay, so we know these protein bars taste amazing and they’re packed with protein, but I always like to keep track of what I’m putting into my body, especially when I’m making things for meal prep. I ran the numbers for these 5-ingredient wonders, and I was pretty happy with the result!
Keep in mind, this is just my best estimate, right? Things can change depending on whether you use a whey protein or a plant-based one, or if your peanut butter is natural versus processed. You know how ingredients go!
Here is the breakdown based on making 10 average-sized squares:
- Serving Size: 1 bar
- Calories: About 210 calories
- Protein: A whopping 15 grams of protein! That’s why these are so fantastic for recovery.
- Fat: Around 11 grams (most of that good fat from the peanut butter!)
- Carbohydrates: Roughly 20 grams
- Sugar: Only about 8 grams. See? Way better than those store-bought guys that load up on sweeteners.
I always pair mine with something simple, like a glass of water or maybe whipping up one of my favorite mocha protein smoothies if I need an extra boost after a tough workout. Having these numbers tracked makes fueling smart eating so much easier!
PrintEasy No-Bake 5-Ingredient Peanut Butter Protein Bars
Make simple, chewy peanut butter protein bars at home with only five ingredients. These bars require no baking and are perfect for quick meal prep.
- Prep Time: 10 min
- Cook Time: 0 min
- Total Time: 40 min
- Yield: 10 servings
- Category: Snack
- Method: No-Bake
- Cuisine: American
- Diet: Vegetarian
Ingredients
- 1 cup rolled oats
- 1/2 cup peanut butter
- 1/2 cup vanilla or unflavored protein powder
- 1/4 cup maple syrup or honey
- 2 tablespoons water or milk
- 1/4 cup dark chocolate chips (for drizzle)
Instructions
- Line an 8×8 inch baking pan with parchment paper, leaving an overhang on the sides for easy removal.
- In a medium bowl, combine the rolled oats, protein powder, peanut butter, and maple syrup.
- Mix the ingredients thoroughly until a thick, uniform dough forms. If the mixture is too dry, add water or milk one teaspoon at a time until it holds together when pressed.
- Press the dough evenly into the prepared pan. Use the back of a spoon or your fingers to compact it firmly.
- Place the pan in the freezer for at least 30 minutes to set.
- Melt the chocolate chips in a microwave-safe bowl in 30-second intervals, stirring until smooth.
- Drizzle the melted chocolate over the chilled bar mixture.
- Return the pan to the freezer for another 10 minutes until the chocolate hardens.
- Lift the bars out using the parchment paper overhang and cut into 10 even squares.
Notes
- Store the finished bars in an airtight container in the refrigerator for up to one week.
- For a vegan option, use maple syrup instead of honey and ensure your protein powder is plant-based.
- If you prefer a firmer bar, reduce the liquid slightly in step 2.
Nutrition
- Serving Size: 1 bar
- Calories: 210
- Sugar: 8
- Sodium: 95
- Fat: 11
- Saturated Fat: 3
- Unsaturated Fat: 8
- Trans Fat: 0
- Carbohydrates: 20
- Fiber: 2
- Protein: 15
- Cholesterol: 0