

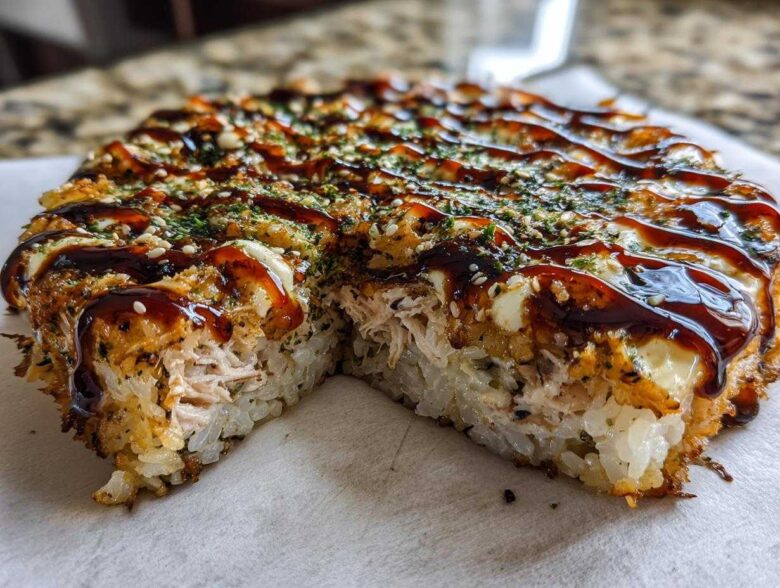
Oh my gosh, you HAVE to stop what you’re doing and try this! If you’ve spent five minutes online in the last year, you’ve seen the glorious, bubbling, scoopable mess that is the sushi bake. Honestly, I thought it was just another passing craze, but let me tell you—it has officially claimed its spot as my go-to weeknight hero. Why? Because I get all the flavor of a perfectly made deconstructed sushi roll without the fussy, sticky mess of rolling forty individual pieces!
This recipe is my secret weapon for busy nights or when I need a dish that screams “I tried!” but only took about 15 minutes of actual hands-on work. It’s pure, simple, Asian comfort food that melts right into your rotation. Trust me, once you scoop that warm, creamy rice and crab mixture, you’ll never look at sushi the same way again. If you’re looking for more easy family meals, you should totally check out my roundup of easy asian comfort food staples!
Why This Easy Sushi Bake Recipe Works for Everyone
I know what you’re thinking: sushi is fancy, right? Nope! Not in casserole form! This particular sushi bake recipe is truly the answer when you need something impressive but have zero energy. It checks every single box for a family favorite or a potluck lifesaver. It’s way better than trying to wrap slippery rice when you’re hungry!
- It’s seriously fast—we’re talking under 40 minutes total, start to finish.
- No rolling skills required! Just mix, spread, and bake. It’s the dream sushi bake for parties.
- The ingredients are super accessible, unlike chasing down specialty fish sometimes.
- The creamy seafood flavor is so comforting—a true winner for picky eaters.
Quick Prep for Your Weeknight Sushi Bake
Seriously, the speed here is unbelievable. We’re looking at only about 15 minutes of active prep time before this beauty goes into the oven. That means you can whip this up right after work and still have time for quality couch lounging before dinner is ready. If you need something reliably fast, this weeknight sushi bake is your new secret weapon. It’s basically dinner on autopilot!
Gathering Ingredients for Your Creamy Seafood Bake
Okay, before we even think about preheating the oven, we need to talk about what exactly goes into this magic casserole. Getting your ingredients prepped right makes the assembly so smooth; it’s like laying down the perfect foundation for a house! I always lay everything out neatly on the counter first—it saves so much running around later. We need that seasoned rice base, then that glorious, thick layer of seafood. If you want a truly rich, savory experience that rivals any restaurant version, you’ll want to check out my recipe for a general creamy seafood bake, but for this sushi version, we keep it focused!
The recipe calls for specific prep methods for a reason. You can’t just toss everything in! The rice needs that sharp tang from the vinegar, sugar, and salt mixture folded in gently while it’s still warm. For the topping, we need the imitation crab—that’s the classic, budget-friendly star here—shredded nicely so it blends perfectly with the cream cheese and mayo base. Remember, everything needs to be softened or dissolved properly so you don’t end up with lumps in your creamy layer.
Ingredient Notes and Substitutions for Sushi Bake
Now for the fun part: making it exactly how *you* like it! The use of imitation crab is what makes this the quintessential imitation crab sushi bake, and it’s fantastic, but I know some folks want real seafood. If you want to try a gorgeous salmon sushi bake, just gently flake some cooked salmon into that creamy mixture instead. It swaps beautifully, though you might need a tiny bit less salt, since salmon is naturally saltier.
If you’re feeling bold, let’s talk heat! That splash of Sriracha mixed into the topping creates a subtle warmth, making it the perfect spicy mayo sushi bake without overwhelming the mild crab. If you hate Sriracha, don’t stress! You can always swap it out for a teaspoon of cayenne pepper or even a drizzle of chili garlic sauce mixed right into your mayonnaise before combining it with the crab. Just taste as you go—that’s the real secret to mastering any recipe!
Step-by-Step Instructions for the Perfect Sushi Casserole
Now that we have our creamy topping ingredients ready, it’s time to put this incredible sushi casserole together! This is where the magic happens, and I need you to picture this: no rolling mats, no sticky fingers, just pure efficiency. We handle this assembly in two simple, straightforward layers. Getting the base right is crucial because that seasoned rice is what gives this dish its signature authentic taste. If you’re prepping for guests, you can even make the rice base ahead of time. For the full, no-fuss method, you can always grab my detailed guide on making the sushi casserole start to finish!
Preparing the Seasoned Sushi Rice Casserole Base
First things first: get that oven hot! You want a nice, medium heat at 375 degrees Fahrenheit. While that climbs, focus on your rice. Your warm, cooked sushi rice needs seasoning ASAP so it can properly soak up all that flavor. In a tiny little bowl, whisk together your rice vinegar, that pinch of sugar, and salt until everything dissolves—it’s quick, just a little stir! Now, pour that magic liquid over the warm rice and gently use a rubber spatula to fold it all together. Don’t smash it! We want to keep the grains intact. Spread this perfectly seasoned rice evenly across the bottom of your prepared 8×8 dish. That’s Layer One, folks. See how easy that was?
Assembling and Baking Your Deconstructed Sushi
Next layer is the creamy dream! Take that bowl with your shredded imitation crab mixture—where you blended the mayo, cream cheese, and Sriracha—and spread it out carefully right over the rice layer. Smooth it gently with the back of a spoon so it covers every grain underneath. If you’re using that optional mozzarella cheese sprinkle, add it on top now. It gives you those beautiful, slightly browned edges when it bakes. Then pop the whole thing into the oven for about 15 to 20 minutes. You’re just looking for it to be piping hot all the way through, maybe a little golden on top. That’s how you confirm your deconstructed sushi dream is baked to perfection!
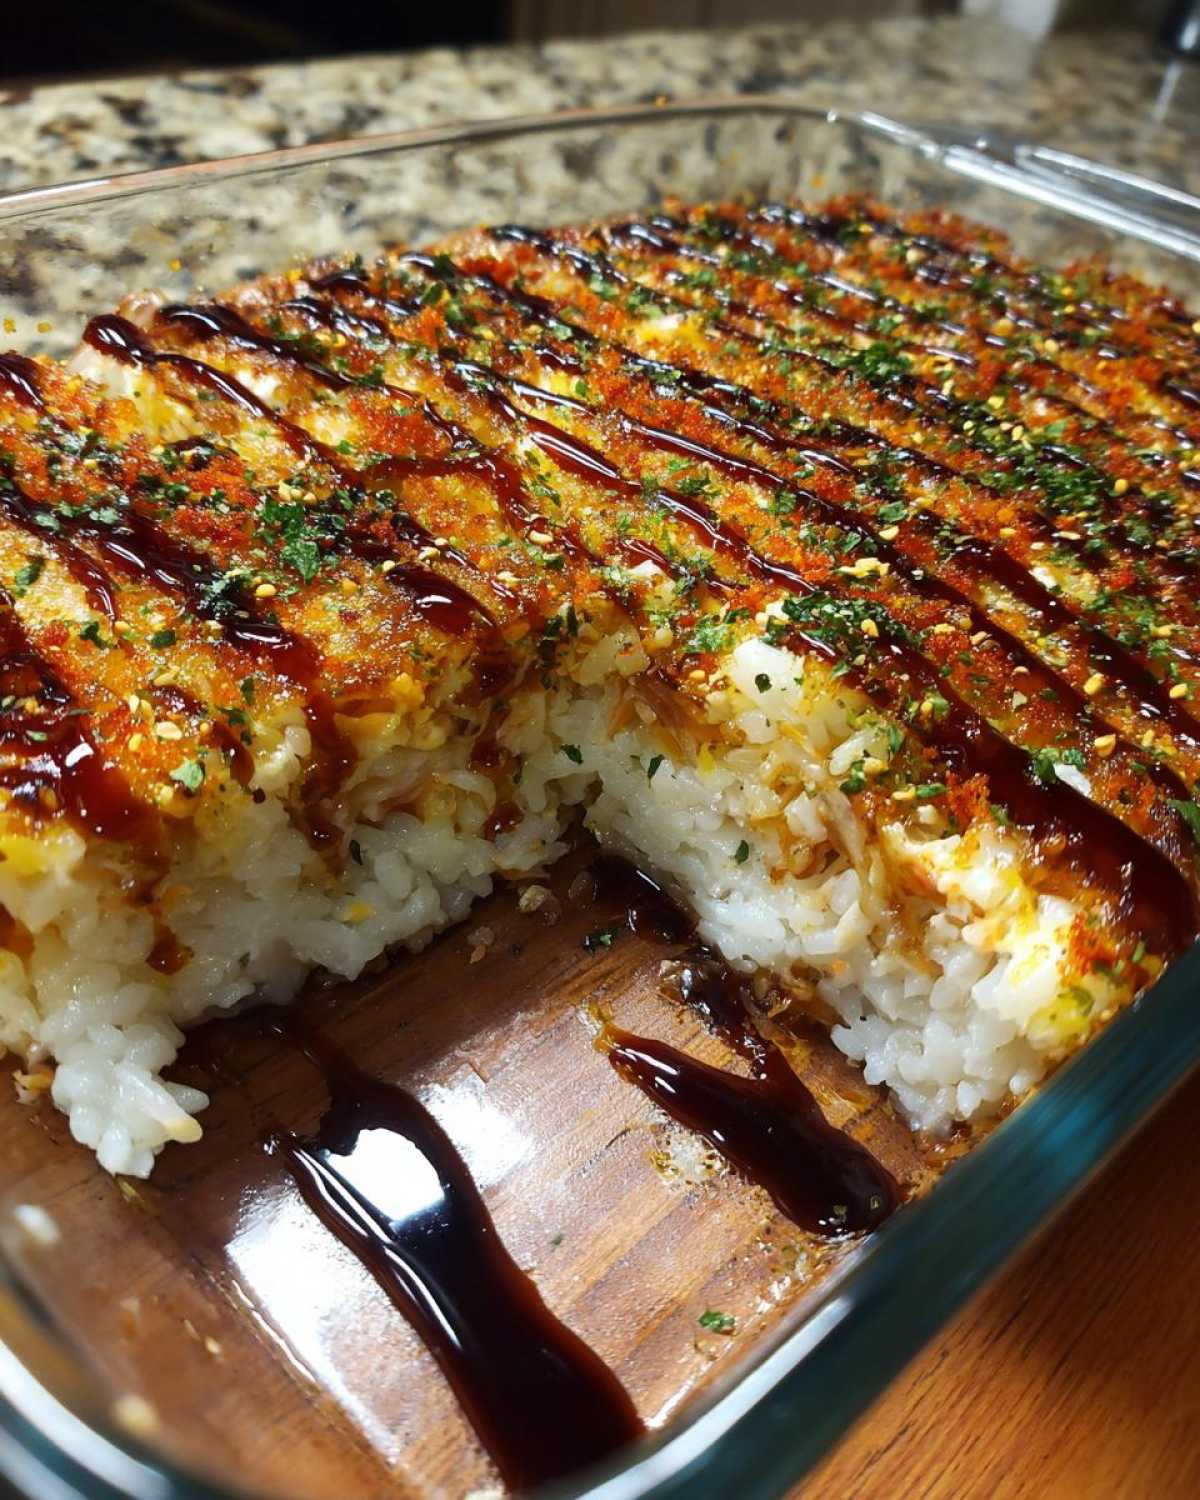
Mastering the Viral TikTok Sushi Bake Toppings
Okay, this is my absolute favorite part, and it’s what truly takes this casserole from a simple baked dish to that glittering masterpiece you see all over your phone! If you’ve been scrolling through videos of the viral tiktok sushi bake, you know the final presentation is just as important as the flavor. We’re talking about those finishing touches that make everyone stop scrolling!
Once that casserole comes out of the oven—and believe me, the smell alone is going to make your family rush to the kitchen—you have to move quickly. We don’t want it cooling down too much before we put on the final layer. I like to do this while the cheese (if you used it) is still bubbly and hot, just to make sure everything marries together perfectly.
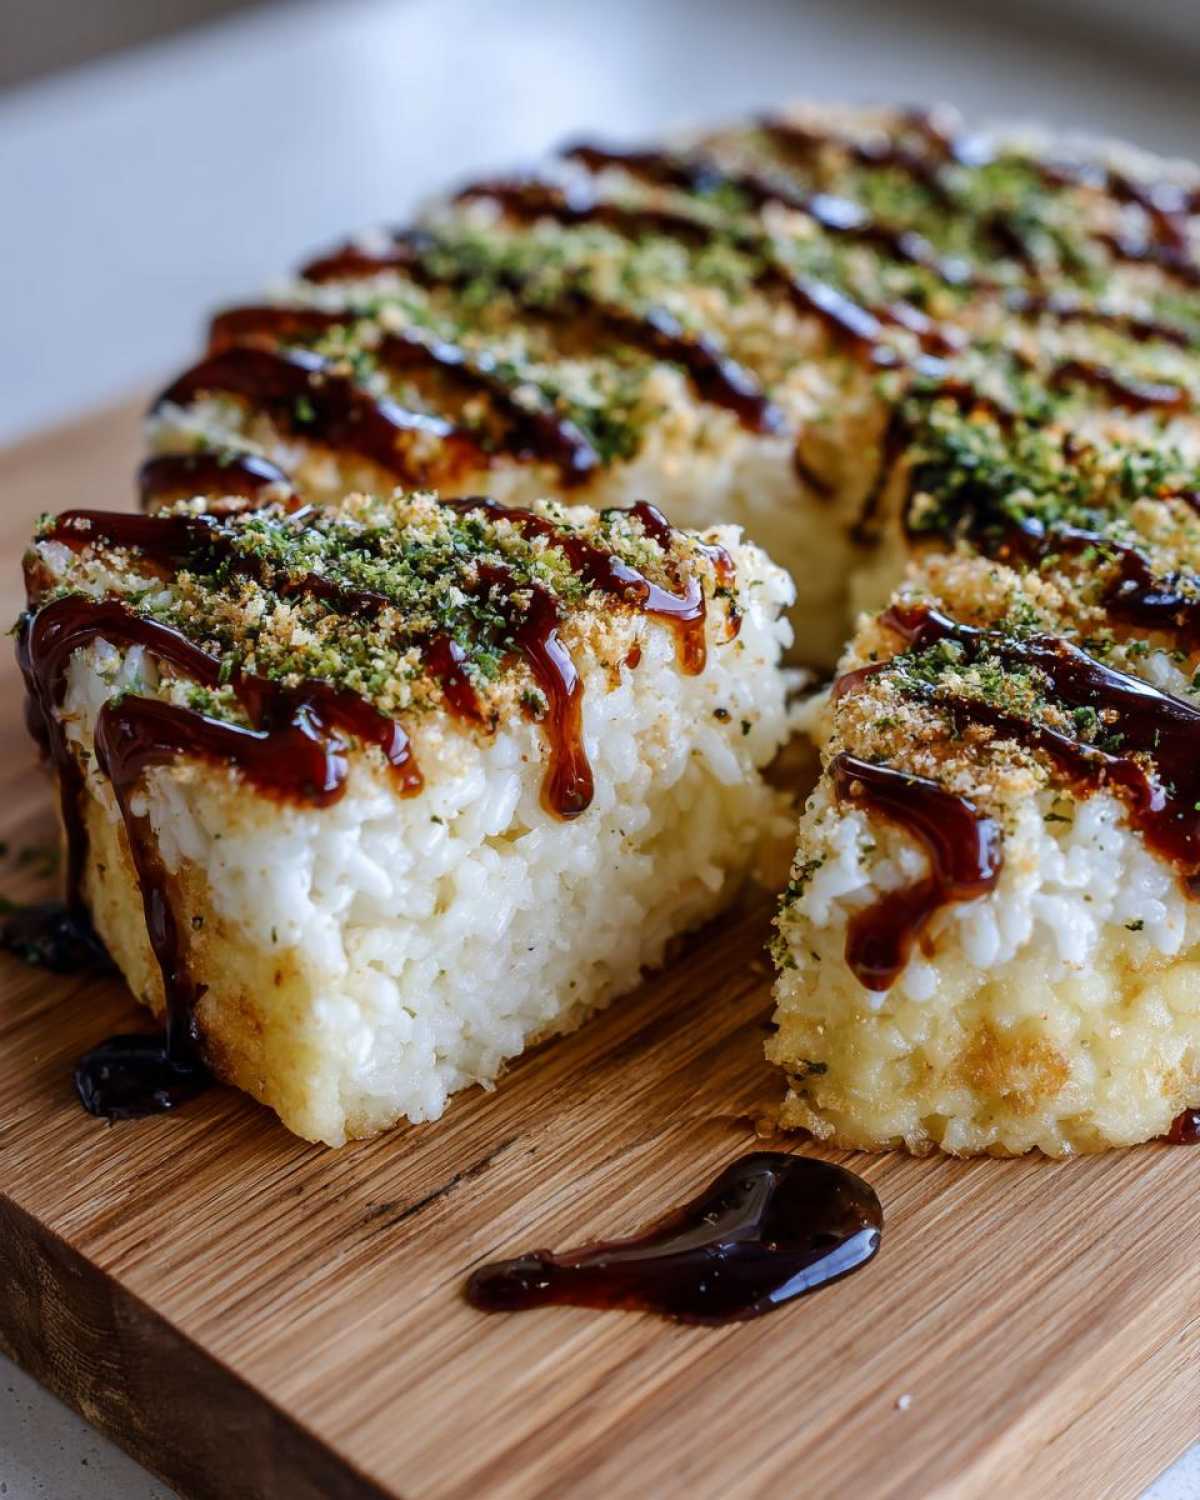
The real star of this show, after the creamy crab topping, is the crunch and savoriness of the finishing herbs and seeds. You need to hit it hard with the furikake topping recipe. If you haven’t used furikake before, grab the kind with the seaweed and sesame seeds—it adds that incredible, slightly salty ocean flavor that just screams ‘sushi.’ Don’t be shy with it! Next, I scatter on some black sesame seeds just for that extra contrast. It makes the whole thing look professionally finished, even though you practically dumped it together!
Finally, you need the sauce drizzle. This is crucial! Grab your unagi sauce—that thick, sweet glaze—or if you reserved some of your spicy mayo, drizzle it in thin, zig-zag lines right across the top. It adds moisture, sweetness, and a professional chef look. Seriously, this final layer is what elevates the entire experience. People think they are complicated when they see photos of the viral tiktok sushi bake, but it’s just this topping mix at the very end. Scoop it up hot with some crisp nori sheets, and enjoy the masterpiece!
Tips for Success with Your Home Baked Sushi
I’ve made this home baked sushi recipe so many times now that I know all the little tricks that keep it perfectly moist and delicious, even on the second day! Building that authority isn’t just about following instructions; it’s about learning what happens when you deviate, even slightly. My biggest concern when baking anything rice-based is always texture—we don’t want dry clumps, and we certainly don’t want the topping to separate under the heat!
The main thing to watch out for is over-baking. Since everything inside is essentially already cooked—the rice is cooked, the crab is pre-cooked—we are really just heating it through and getting that topping warm and slightly melty. If you bake it too long, that wonderful creamy layer will start releasing too much oil, and your rice base can firm up way too much. Keep an eye on that 15 to 20-minute mark I mentioned earlier; it’s usually spot on for an 8×8 dish.
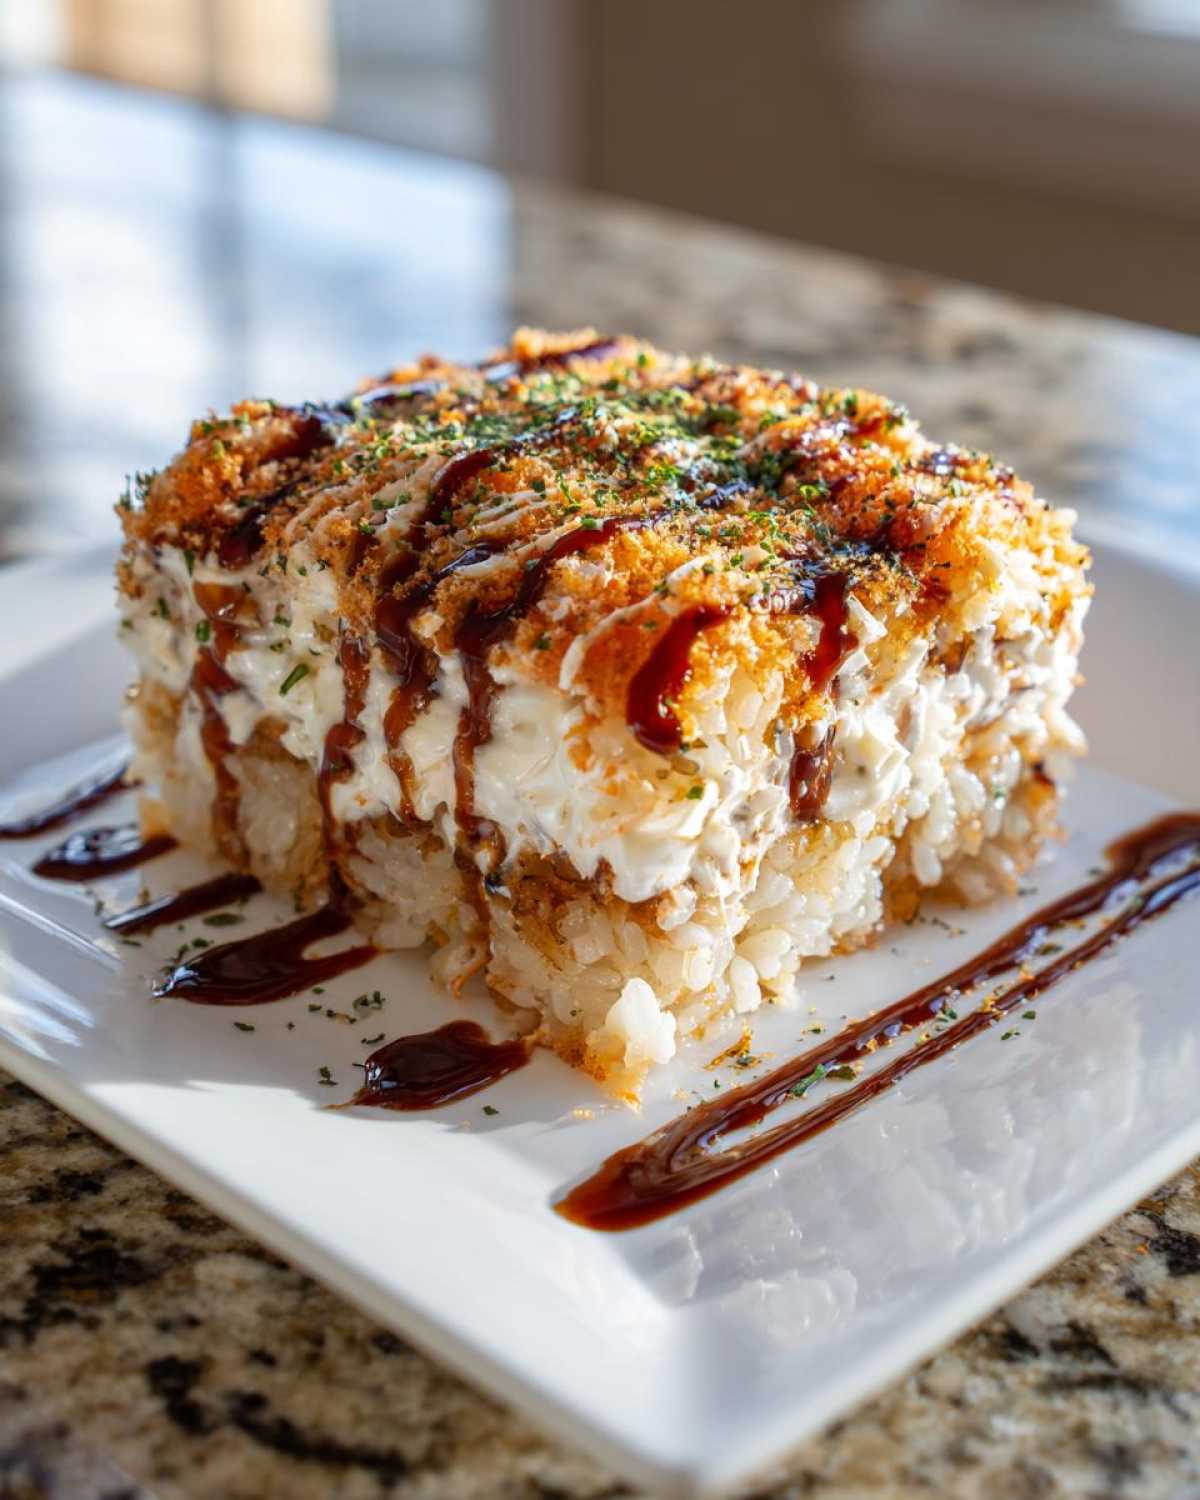
If you are ever worried that your top isn’t golden enough, try this little secret move I learned from a friend who specializes in these kinds of home baked sushi creations: right at the very end, switch your oven to the broiler setting for just 60 to 90 seconds! But I mean it: stand right there and watch it like a hawk. Broilers are intense! You just want to kiss the top with some serious heat to get those little cheese islands bubbling and maybe catch a nice toasted edge on the crab mix. Pull it out the second you see any brown spots forming, because that’s when it goes from perfect to burnt real fast.
Also, let’s talk serving temperature. You absolutely *can* eat this straight out of the oven, but honestly? It’s better if you let it rest for at least five minutes. Giving it that short cool-down period lets the structure set up just a tiny bit. This means when you scoop into it, the topping stays sitting neatly on top of the rice layer instead of immediately running off the sides. It makes for a much cleaner scoop and a better mouthfeel!
Storage and Reheating Instructions for Leftover Sushi Bake
It’s a miracle if you have any left over, because this stuff disappears fast! But say you managed to save a section or two—that’s great news! You’ve got lunch for tomorrow. The most important thing when storing any kind of rice dish is sealing it up tight to keep air out and moisture in. You want to treat this like the precious leftovers they are.
Pop whatever remains into a well-sealed, airtight container. I usually go for glass containers because they reheat more evenly, but just make sure the lid clamps down securely. You can tuck this away in the fridge for about three days before it starts to lose its top-tier texture. Any longer than that, and the rice might start getting a little dry, even under the topping.
When you’re ready to dive back in, you have two options for reheating, and I have strong feelings about which one is better. If you just want a quick bite, the microwave works fine. Zap it for 45 seconds to a minute until it’s hot all the way through. Yes, it will be softer, but it’s fast!
However, if you want to recapture that almost-baked goodness—that slightly firmer rice texture and that warm topping—you absolutely need to use the oven or an air fryer. Cover your portion loosely with foil—this is key! You don’t want the top to burn while the middle heats up. Pop it in a 350-degree oven for about 10 to 12 minutes. It takes longer, but I promise, that little bit of effort brings back that wonderful, fresh-from-the-pan texture. It’s the best way to enjoy your leftovers!
Variations: Moving Beyond the Imitation Crab Sushi Bake
I love that this sushi bake can change based on whatever mood strikes or whatever I have in the fridge! While the imitation crab version is our default because it’s so reliable and easy, you absolutely should feel free to make it your own whenever you whip up this casserole. It’s so adaptable that it practically begs you to experiment with different flavors and mix-ins. Think of the rice layer and the creamy base as your blank canvas for some truly fun quick japanese fusion!
The easiest swap, which I mentioned before, is absolutely the salmon. If you can grab some cooked salmon (even leftover baked salmon works, just flake it up nicely!), it upgrades the dish to feel a bit more luxurious. Just make sure that salmon is seasoned subtly before you fold it into your mayo/cream cheese mixture. That richer flavor pairs really nicely with the sweetness of the rice.
But what if you want to keep the crab but add some textural excitement? Don’t be afraid to fold in some fresh ingredients right before baking! I sometimes chop up about half an avocado—the firm kind, not the super mushy one—into small dice and gently fold those pieces into the crab mixture. It makes the topping even creamier and adds that lovely, fresh green contrast. Just remember not to overmix when you fold them in, or you’ll end up with green mush instead of chunks!
And let’s talk sauces again! While the spicy mayo drizzle is classic, if you want a deeper, slightly sweet, BBQ-esque flavor profile, swap out some of that regular spicy mayo drizzle for unagi (eel) sauce. Unagi sauce is fantastic because it caramelizes just a touch under the heat if you drizzle it on before baking, or it looks gorgeous drizzled on after. You can also mix a teaspoon of sesame oil into the rice layer itself for a nuttier background flavor. Honestly, playing around with toppings and mix-ins is the best part of having a go-to template like this quick japanese fusion recipe!
Frequently Asked Questions About Making Sushi Bake
You know I love hearing your questions! Whenever I post this sushi bake online, everyone wants to know the little details that make the difference between a good casserole and the best one they’ve ever tried. I’ve gathered up the most common things people ask me about to make sure your experience is smooth sailing!
Can I use regular white rice instead of sushi rice for this sushi bake recipe?
This is a big one! The answer is technically yes, you absolutely can use regular, long-grain white rice if that’s what you have on hand, but you have to treat it right or the texture will be totally off. Sushi rice is special because it has a higher starch content, which makes it sticky when cooked. That stickiness is what holds that bottom layer together into a solid base. If you use regular rice, you need to be aggressive with that seasoning mix we talked about—make sure you get the full amount of sugar, vinegar, and salt into it, and really mix it gently but thoroughly while it’s warm. That extra seasoning tries to mimic the flavor profile, but just know the texture won’t be quite as cohesive as it is with proper sushi rice. It’ll still be yummy, but it might crumble a bit more!
Is this considered a healthy sushi casserole option?
Okay, let’s be real! Any dish that has four tablespoons of mayonnaise and a quarter block of cream cheese piled on top of rice isn’t going to win the ‘healthiest meal of the year’ award, and I’m not going to pretend it is! Haha! This is prime sushi casserole territory, which means it’s comfort food, plain and simple. It’s fantastic for a treat or a party, but for a regular Tuesday night? Moderation is key.
Now, if you are trying to lighten it up just a touch without losing that creamy texture, I have a couple of swap ideas! You can substitute regular mayonnaise with a light or avocado oil-based mayo. Or, use Neufchâtel cheese instead of full-fat cream cheese—it has less fat but still gives you the necessary tang and body. The rice base is good, and the imitation crab is lean protein, so it’s all about managing that creamy layer!
How far in advance can I assemble this baked sushi recipe?
This is where I have a strict rule to keep things from getting soggy or separating! While you can certainly prep components ahead of time, I really don’t recommend fully assembling this entire baked sushi recipe more than an hour before you plan to bake it. The moisture from the topping mixture starts to seep down into the rice base if it sits too long, and that’s how you get a gummy bottom layer instead of distinct layers.
Here’s what I do for make-ahead magic: Make your seasoned sushi rice and let it cool completely. Store it in the baking dish, covered tightly. Then, mix up your creamy crab topping and store that in a separate, airtight container in the fridge. When dinner time rolls around, just spread the cold rice out, layer the cold topping right on top, and pop it into the oven. That way, you get the convenience of prepping ahead without sacrificing that perfect layered texture!
Mastering the Viral TikTok Sushi Bake Toppings
Okay, this is my absolute favorite part, and it’s what truly takes this casserole from a simple baked dish to that glittering masterpiece you see all over your phone! If you’ve been scrolling through videos of the viral tiktok sushi bake, you know the final presentation is just as important as the flavor. We’re talking about those finishing touches that make everyone stop scrolling!
Once that casserole comes out of the oven—and believe me, the smell alone is going to make your family rush to the kitchen—you have to move quickly. We don’t want it cooling down too much before we put on the final layer. I like to do this while the cheese (if you used it) is still bubbly and hot, just to make sure everything marries together perfectly.
The real star of this show, after the creamy crab topping, is the crunch and savoriness of the finishing herbs and seeds. You need to hit it hard with the furikake topping recipe. If you haven’t used furikake before, grab the kind with the seaweed and sesame seeds—it adds that incredible, slightly salty ocean flavor that just screams ‘sushi.’ Don’t be shy with it! Next, I scatter on some black sesame seeds just for that extra contrast. It makes the whole thing look professionally finished, even though you practically dumped it together!
Finally, you need the sauce drizzle. This is crucial! Grab your unagi sauce—that thick, sweet glaze—or if you reserved some of your spicy mayo, drizzle it in thin, zig-zag lines right across the top. It adds moisture, sweetness, and a professional chef look. Seriously, this final layer is what elevates the entire experience. People think they are complicated when they see photos of the viral tiktok sushi bake, but it’s just this topping mix at the very end. Scoop it up hot with some crisp nori sheets, and enjoy the masterpiece!
Tips for Success with Your Home Baked Sushi
I’ve made this home baked sushi recipe so many times now that I know all the little tricks that keep it perfectly moist and delicious, even on the second day! Building that authority isn’t just about following instructions; it’s about learning what happens when you deviate, even slightly. My biggest concern when baking anything rice-based is always texture—we don’t want dry clumps, and we certainly don’t want the topping to separate under the heat!
The main thing to watch out for is over-baking. Since everything inside is essentially already cooked—the rice is cooked, the crab is pre-cooked—we are really just heating it through and getting that topping warm and slightly melty. If you bake it too long, that wonderful creamy layer will start releasing too much oil, and your rice base can firm up way too much. Keep an eye on that 15 to 20-minute mark I mentioned earlier; it’s usually spot on for an 8×8 dish.
If you are ever worried that your top isn’t golden enough, try this little secret move I learned from a friend who specializes in these kinds of home baked sushi creations: right at the very end, switch your oven to the broiler setting for just 60 to 90 seconds! But I mean it: stand right there and watch it like a hawk. Broilers are intense! You just want to kiss the top with some serious heat to get those little cheese islands bubbling and maybe catch a nice toasted edge on the crab mix. Pull it out the second you see any brown spots forming, because that’s when it goes from perfect to burnt real fast.
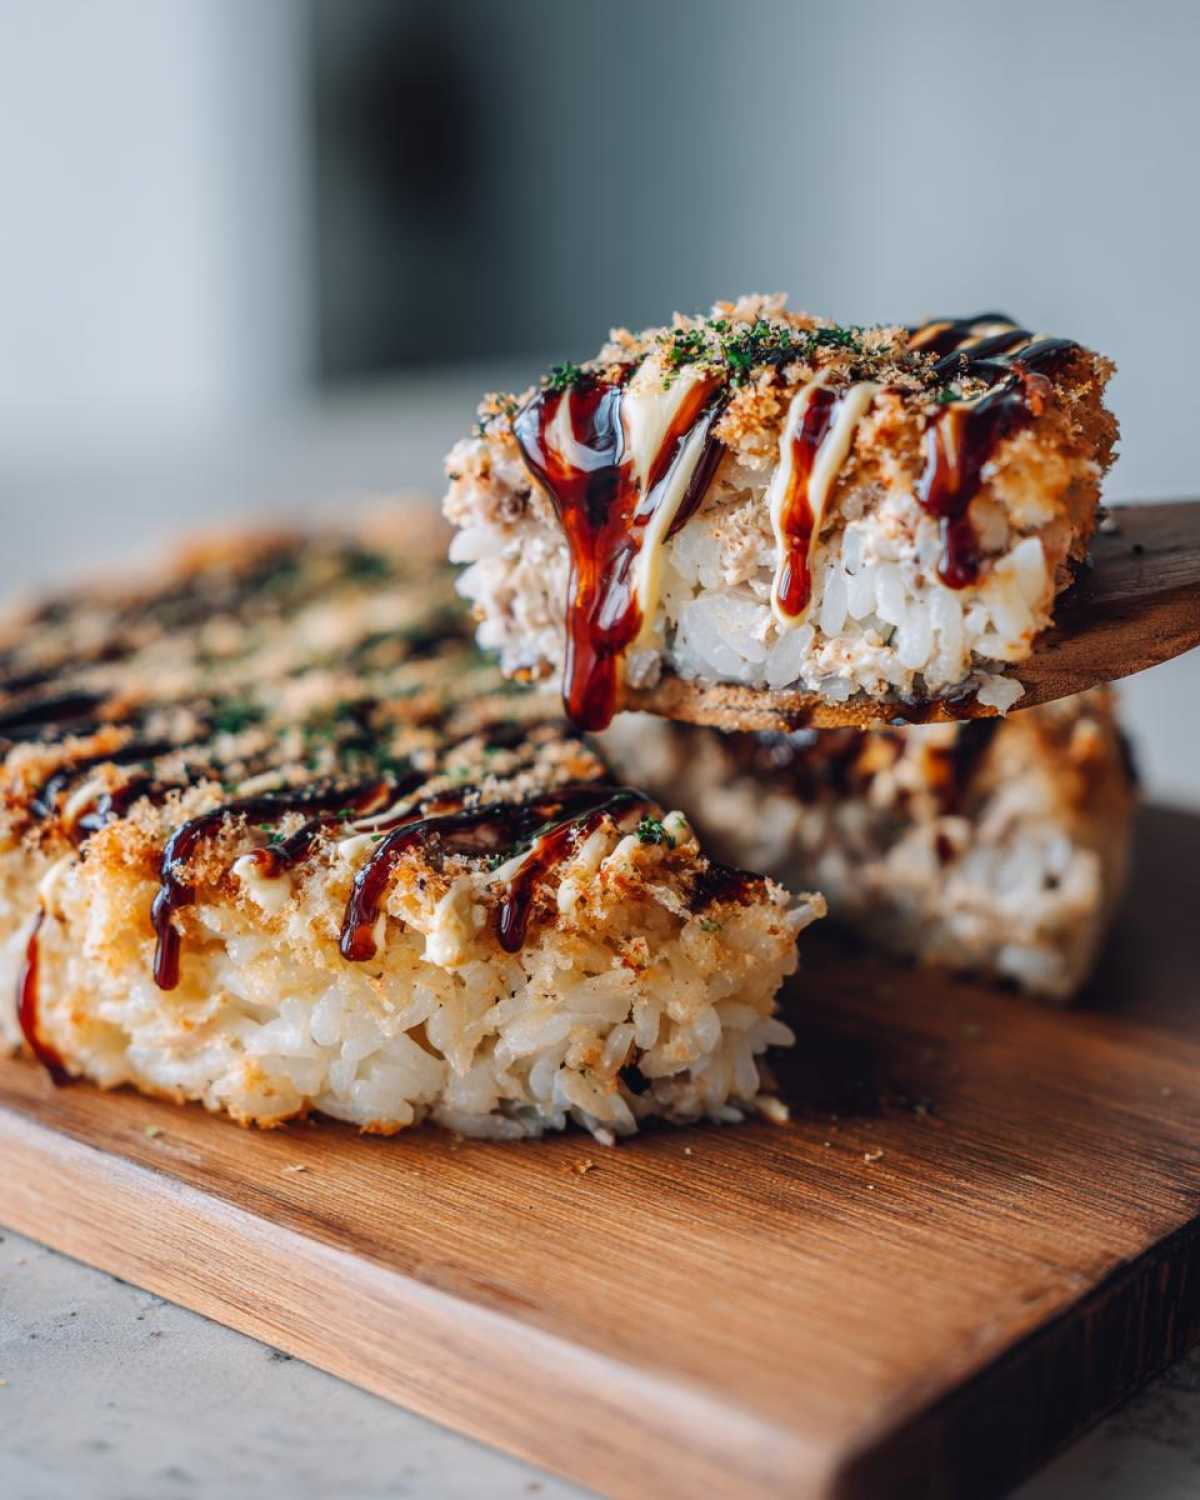
Also, let’s talk serving temperature. You absolutely *can* eat this straight out of the oven, but honestly? It’s better if you let it rest for at least five minutes. Giving it that short cool-down period lets the structure set up just a tiny bit. This means when you scoop into it, the topping stays sitting neatly on top of the rice layer instead of immediately running off the sides. It makes for a much cleaner scoop and a better mouthfeel!
Storage and Reheating Instructions for Leftover Sushi Bake
It’s a miracle if you have any left over, because this stuff disappears fast! But say you managed to save a section or two—that’s great news! You’ve got lunch for tomorrow. The most important thing when storing any kind of rice dish is sealing it up tight to keep air out and moisture in. You want to treat this like the precious leftovers they are.
Pop whatever remains into a well-sealed, airtight container. I usually go for glass containers because they reheat more evenly, but just make sure the lid clamps down securely. You can tuck this away in the fridge for about three days before it starts to lose its top-tier texture. Any longer than that, and the rice might start getting a little dry, even under the topping.
When you’re ready to dive back in, you have two options for reheating, and I have strong feelings about which one is better. If you just want a quick bite, the microwave works fine. Zap it for 45 seconds to a minute until it’s hot all the way through. Yes, it will be softer, but it’s fast!
However, if you want to recapture that almost-baked goodness—that slightly firmer rice texture and that warm topping—you absolutely need to use the oven or an air fryer. Cover your portion loosely with foil—this is key! You don’t want the top to burn while the middle heats up. Pop it in a 350-degree oven for about 10 to 12 minutes. It takes longer, but I promise, that little bit of effort brings back that wonderful, fresh-from-the-pan texture. It’s the best way to enjoy your leftovers!
Variations: Moving Beyond the Imitation Crab Sushi Bake
I love that this sushi bake can change based on whatever mood strikes or whatever I have in the fridge! While the imitation crab version is our default because it’s so reliable and easy, you absolutely should feel free to make it your own whenever you whip up this casserole. It’s so adaptable that it practically begs you to experiment with different flavors and mix-ins. Think of the rice layer and the creamy base as your blank canvas for some truly fun quick japanese fusion!
The easiest swap, which I mentioned before, is absolutely the salmon. If you can grab some cooked salmon (even leftover baked salmon works, just flake it up nicely!), it upgrades the dish to feel a bit more luxurious. Just make sure that salmon is seasoned subtly before you fold it into your mayo/cream cheese mixture. That richer flavor pairs really nicely with the sweetness of the rice.
But what if you want to keep the crab but add some textural excitement? Don’t be afraid to fold in some fresh ingredients right before baking! I sometimes chop up about half an avocado—the firm kind, not the super mushy one—into small dice and gently fold those pieces into the crab mixture. It makes the topping even creamier and adds that lovely, fresh green contrast. Just remember not to overmix when you fold them in, or you’ll end up with green mush instead of chunks!
And let’s talk sauces again! While the spicy mayo drizzle is classic, if you want a deeper, slightly sweet, BBQ-esque flavor profile, swap out some of that regular spicy mayo drizzle for unagi (eel) sauce. Unagi sauce is fantastic because it caramelizes just a touch under the heat if you drizzle it on before baking, or it looks gorgeous drizzled on after. You can also mix a teaspoon of sesame oil into the rice layer itself for a nuttier background flavor. Honestly, playing around with toppings and mix-ins is the best part of having a go-to template like this quick japanese fusion recipe!
Share Your Tasty Sushi Bake Creation
That’s it! You have now mastered the easiest, most delicious, no-roll sushi bake recipe there is. Seriously, I hope you love digging into this warm, savory comfort food as much as my family does. Making this dish is always a little victory in my kitchen on a busy night!
Now, listen, I absolutely live for seeing your creations! It makes my day when you tag me on social media holding up your bubbly, saucy square of perfection. Snap a photo once you’ve piled on those sesame seeds and drizzled that gorgeous unagi sauce and share it with the world! If you try this out, please, please, please come back here and drop a rating for the recipe—five stars if it earned it!
And I really want to hear what you did differently! Did you swap the crab for spicy salmon? Did you load it up with extra cream cheese? Drop a comment below telling me your absolute favorite topping combination for your tasty sushi bake. Hearing your little tweaks and successes is the best part of sharing these recipes, so don’t be shy! Happy baking, and enjoy every single scoop from your tasty sushi bake creation!
PrintEasy Imitation Crab Sushi Bake
A simple, deconstructed sushi roll baked as a casserole, perfect for weeknight meals or gatherings. This recipe uses seasoned sushi rice, a creamy imitation crab mixture, and savory toppings.
- Prep Time: 15 min
- Cook Time: 20 min
- Total Time: 35 min
- Yield: 6 servings
- Category: Dinner
- Method: Baking
- Cuisine: Japanese Fusion
- Diet: Low Lactose
Ingredients
- 4 cups cooked sushi rice
- 1/4 cup rice vinegar
- 2 tablespoons sugar
- 1 teaspoon salt
- 1 pound imitation crab (kani), shredded
- 1/2 cup mayonnaise
- 1/4 cup cream cheese, softened
- 2 tablespoons Sriracha (adjust to taste)
- 1 tablespoon soy sauce
- 1/2 teaspoon sesame oil
- 1/2 cup shredded mozzarella cheese (optional, for topping)
- 2 tablespoons furikake seasoning
- 1 tablespoon black sesame seeds
- Unagi sauce or extra spicy mayo for drizzling
Instructions
- Preheat your oven to 375 degrees Fahrenheit (190 degrees Celsius). Lightly grease an 8×8 inch baking dish.
- Prepare the sushi rice seasoning: In a small bowl, mix the rice vinegar, sugar, and salt until dissolved. Gently fold this mixture into the warm cooked sushi rice until evenly coated. Spread the seasoned rice evenly into the bottom of the prepared baking dish.
- Make the creamy crab mixture: In a medium bowl, combine the shredded imitation crab, mayonnaise, softened cream cheese, Sriracha, soy sauce, and sesame oil. Mix until everything is well combined and creamy.
- Spread the crab mixture evenly over the layer of seasoned rice in the baking dish.
- If using, sprinkle the mozzarella cheese over the crab layer.
- Bake for 15 to 20 minutes, or until the topping is hot and slightly golden brown around the edges.
- Remove the dish from the oven. Sprinkle generously with furikake seasoning and black sesame seeds.
- Drizzle with unagi sauce or extra spicy mayo before serving.
- Let it cool for a few minutes, then scoop and serve directly from the dish.
Notes
- You can substitute the imitation crab with cooked salmon for a salmon sushi bake variation.
- For a richer flavor, mix a small amount of Kewpie mayonnaise into the rice layer before adding the topping.
- If you prefer a crispier top, broil for the last 1-2 minutes, watching carefully to prevent burning.
Nutrition
- Serving Size: 1 serving
- Calories: 450
- Sugar: 10
- Sodium: 950
- Fat: 22
- Saturated Fat: 5
- Unsaturated Fat: 17
- Trans Fat: 0
- Carbohydrates: 48
- Fiber: 1
- Protein: 18
- Cholesterol: 55