

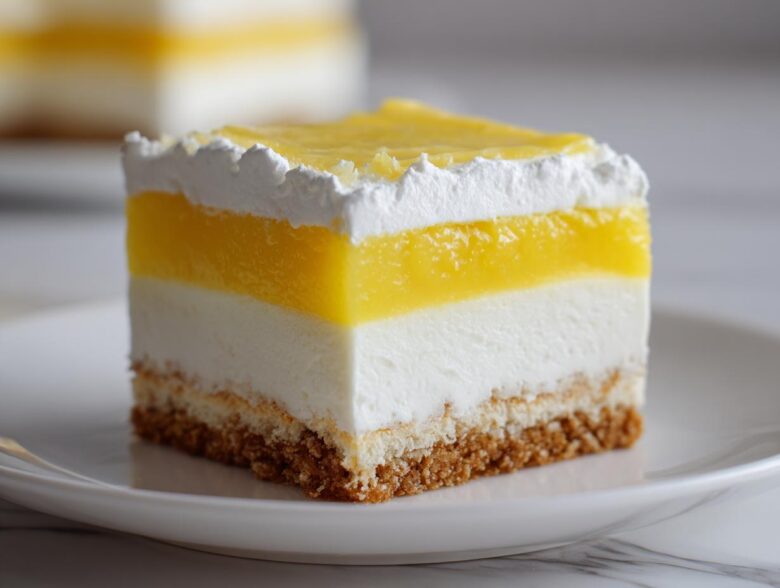
Oh, honey, is it getting hot out, or is it just me? When the weather warms up, the last thing I want to do is turn my oven on for hours. What I crave is something cold, ridiculously creamy, and just bursting with that bright, sunshine flavor only lemon can give you. That’s exactly why I’m sharing my secret weapon: the ultimate **Layered Lemon Lush Dessert (Lemon Dream)**. Trust me when I say this easy, no-bake recipe has been the star of every single potluck and neighborhood barbecue I’ve hosted for years. It looks fancy with all those distinct layers—crust, cheesecake, lemon—but making it is honestly a breeze! For all my best baking adventures and new recipes, make sure you check out my main blog page over at Spoon & Sprout.
Why This Layered Lemon Lush Dessert (Lemon Dream) is a Must-Make
Seriously, this dessert is what pure happiness tastes like in square form. It’s so simple, yet everyone always asks for the recipe. You absolutely need this for your rotation!
- It’s the ultimate refreshing summer lemon dessert—icy cold and totally revitalizing.
- Since it’s a make ahead lemon dessert, you can whip it up the day before the party and forget about it!
- The texture contrast is perfection: crumbly crust meets silky cheesecake and then that unbelievably bright lemon filling.
- Zero oven time means less stress and a cooler kitchen. Check out my Lemon Berry Trifle if you love layers, too!
Gathering Ingredients for Your Layered Lemon Lush Dessert (Lemon Dream)
Okay, ingredients shopping time! Because this is a no-bake dessert, the quality of what you use really shines through. Everything needs to be prepped correctly—butter cold, cream cheese soft—so start pulling things out when you need them, but keep that butter chilling! We need ingredients for four distinct layers to make this a true Layered Lemon Lush Dessert (Lemon Dream) that tastes incredible. For other bright flavors, don’t forget to check out my Green Bean Almondine with Lemon!
For the Buttery Crust
This layer is the foundation, so make sure your butter is icy cold when you start crumbly mixing. It sets up so nicely in the fridge.
- 1 cup all-purpose flour
- 1 cup cold butter, cubed
- 1/2 cup chopped pecans or walnuts (optional, but I love the crunch!)
For the Creamy Cheesecake Layer Lemon Dream
This is where the richness comes in! Make sure your cream cheese is fully softened so you don’t end up with lumps. And remember, we whip the heavy cream separately before folding!
- 8 ounces cream cheese, softened
- 1 cup powdered sugar
- 1 cup heavy whipping cream (you’ll whip this!)
For the Bright Lemon Filling
This is the star of the show! You want that vibrant, tangy punch here, so don’t skimp on the juice or the zest!
- 1 (3.4 ounce) package instant vanilla or lemon pudding mix (I usually stick to vanilla so the lemon shines brighter.)
- 1 1/2 cups cold milk
- 1/2 cup lemon juice (freshly squeezed is always my go-to, but bottled works in a pinch!)
- 1 teaspoon lemon zest
For the Whipped Topping Lemon Lush Dessert
This just finishes off our beautiful layers with something light and airy. Make sure this tub is fully thawed before you go to spread it on top.
- 1 (8 ounce) container frozen whipped topping, thawed
Step-by-Step Instructions for the Layered Lemon Lush Dessert (Lemon Dream)
Don’t let the layers scare you! This is truly assembly work, not complicated baking. We build this beauty one section at a time, making sure each step is set before we move on. Think of it like building a little dessert skyscraper. If you’ve ever tackled my No-Bake Peanut Butter Cup Cheesecake, you already have the skills for this!
Preparing and Chilling the Crust Base
First things first, the base! In a decent-sized bowl, you’ll cut that cold, cubed butter into the flour until it looks like coarse crumbs. If you’re using those optional nuts, toss those in now. Pat this mixture firmly into the bottom of your 9×13 dish. And here’s my expert tip: really press it down! Use the bottom of a flat measuring cup to get a nice, dense foundation. We need that structure, remember? Pop that dish in the fridge to chill for a solid 30 minutes while we tackle the layers above it.
Assembling the Cheesecake Layer Lemon Lush Dessert
For layer number two, grab your mixer and beat that softened cream cheese with the powdered sugar until it’s completely smooth—no lumps allowed! Now, in a separate, clean bowl, whip your cup of heavy cream until it gets soft and fluffy. Gently, using a spatula, fold that whipped cream into the cream cheese mixture. Don’t beat it once they are combined! You want to keep the air in there. Spread this lovely, creamy base right over your chilled crust layer.
Creating the Bright Lemon Filling
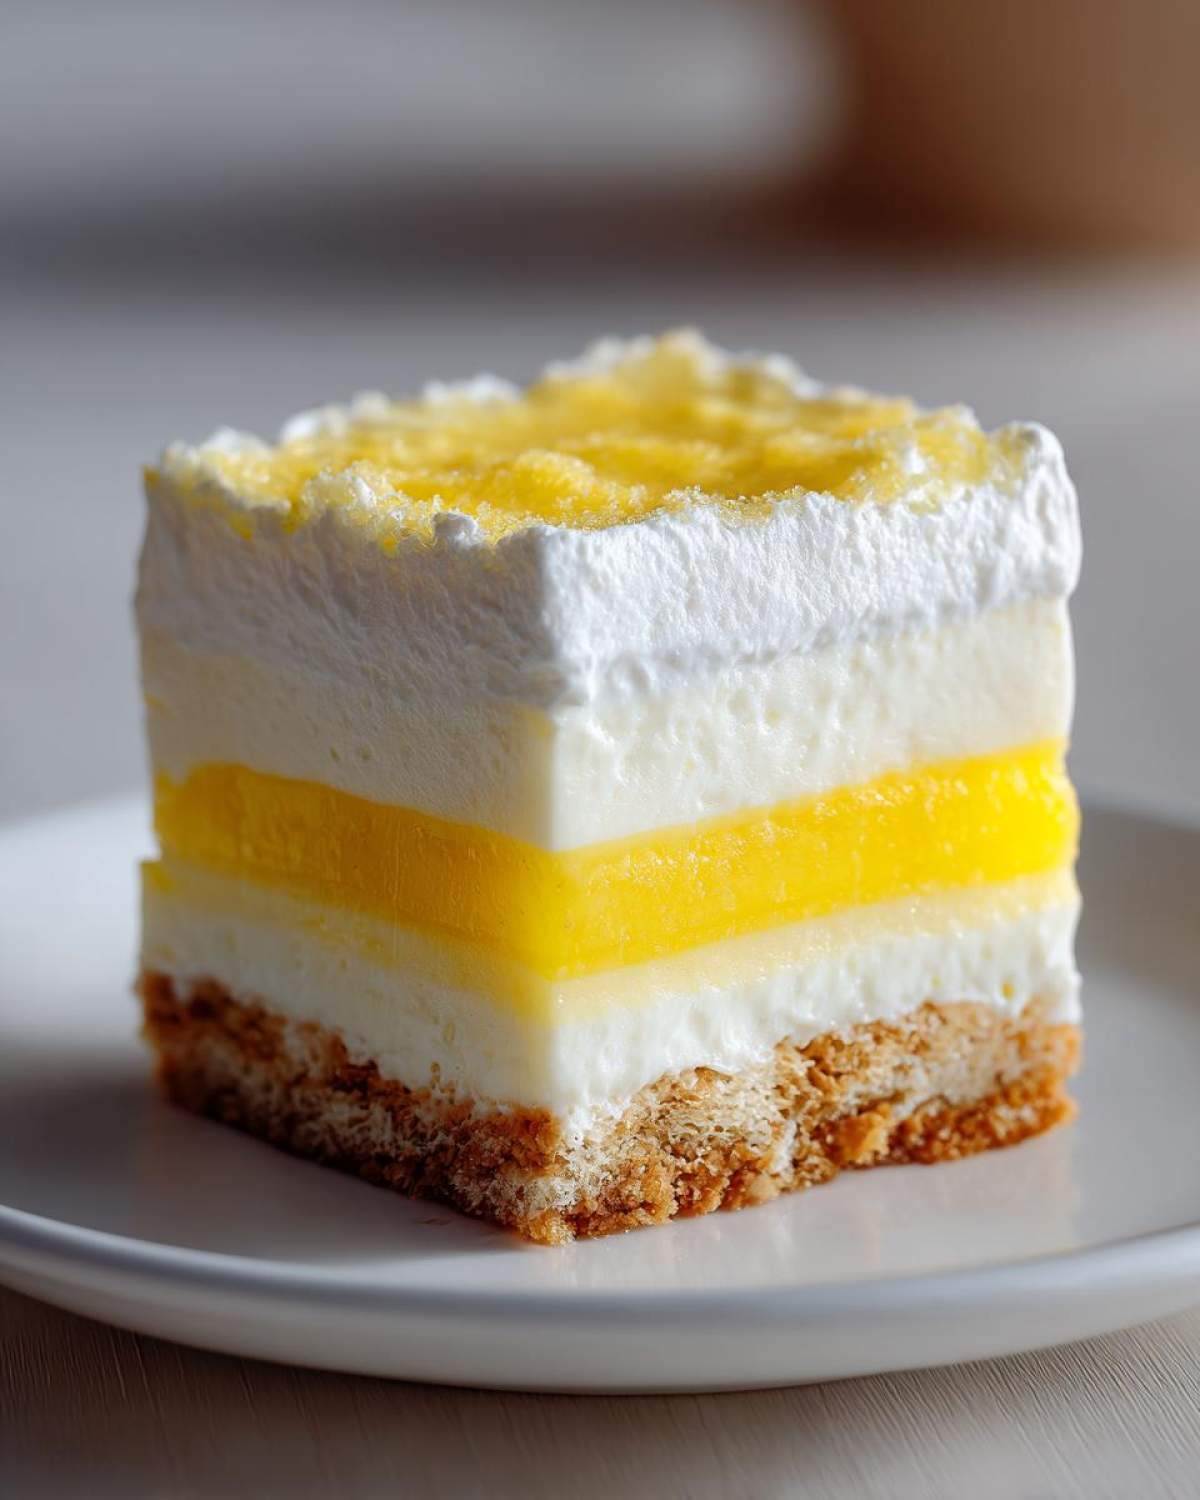
Time for the zing! In another bowl—keep ’em clean!—whisk together your instant pudding mix, the cold milk, your lemon juice, and the zest. You only need to whisk this for about two minutes, tops, and you’ll watch it magically thicken up. It should look thick enough to hold its shape slightly. Gently spoon this bright lemon filling right on top of that creamy cheesecake layer. Smooth it out so it’s even.
Setting the Dessert Layers
This is the hardest part because it requires patience! Once the lemon filling is spread, you must cover the entire dish tightly with plastic wrap (or just use the lid if you have one) and get it into the refrigerator. It needs to chill for a minimum of 4 hours. Honestly, if you can leave it overnight, that lemon layer sets up rock solid, which is perfect for clean cutting later.
Finishing with the Whipped Topping Layered Lemon Lush Dessert
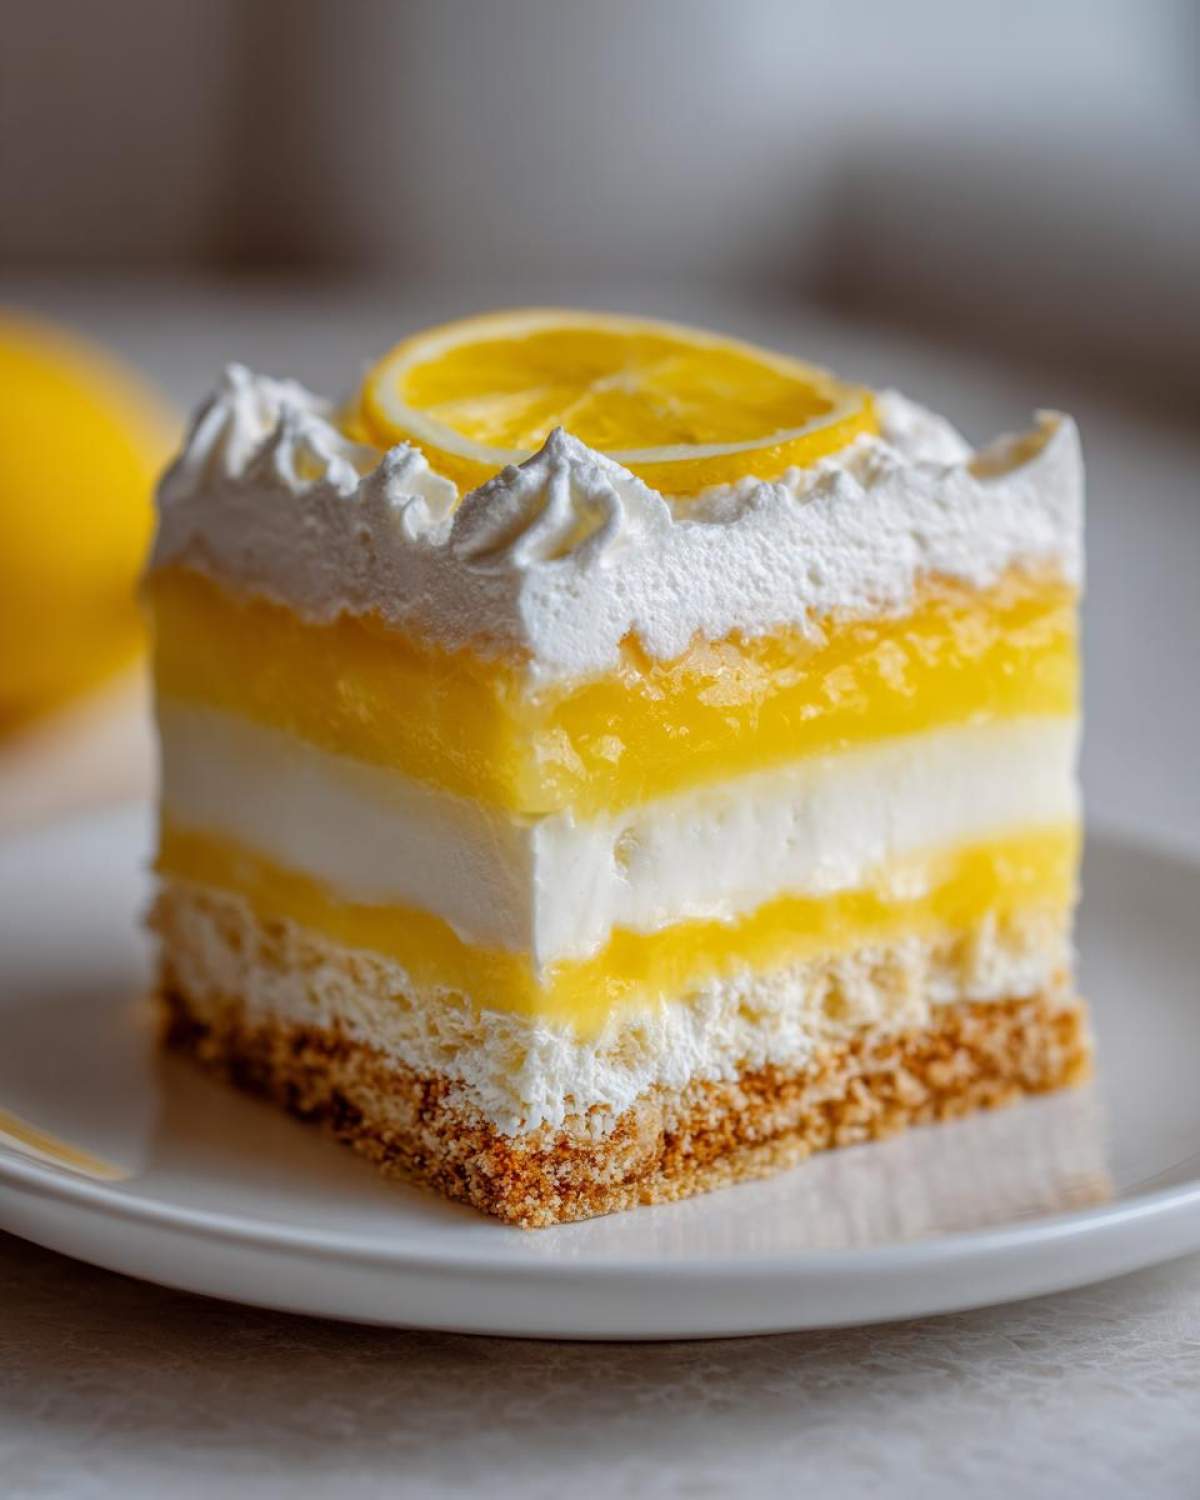
Once that lemon layer is perfectly firm, take your thawed whipped topping and spread it over the top layer like you’re frosting a cake. If you want those gorgeous waves of topping, use the back of a spoon to create swirls! After the topping is on, cover it again loosely and send it back into the fridge for just one more hour before slicing. That final chill helps the topping adhere perfectly.
Tips for the Best Creamy Lemon Dream Dessert
To make this creamy lemon dream dessert truly sing, you need to pay attention to a couple of little details. My biggest tip for the ultimate tanginess? Always, always use fresh lemon juice if you can manage it. Bottled juice just doesn’t have that clean, bright sharpness you want for a truly refreshing summer lemon dessert. It really makes the difference in the filling!
Also, about that crust: although this is a no-bake recipe, sometimes I find the base could use just a tiny bit more structure, especially if I know it’s going to sit in the fridge for two days. If you want extra security, try baking that crust layer at 350°F for about 10 minutes just until it smells nutty. Let it cool completely before you add the cream cheese layer, of course. For other classic bar recipes that bake up beautifully, take a peek at my Classic Buttery Pecan Pie Bars!
Ingredient Notes and Substitutions for Layered Lemon Lush Dessert
I get so many questions about tinkering with recipes, which is totally fine, but remember we’re aiming for that perfect Layered Lemon Lush Dessert structure here! Since this is a no-bake recipe, the ratios are really key, so be mindful when swapping major components. If you’re feeling inspired to try other baked treats, check out the crumb assembly on my Apple Pie Crumb Bars.
For starters, if you have a nut allergy or just don’t stock pecans or walnuts, skip them entirely! The crust will still hold together just fine without them; it just won’t have that extra buttery, toasted flavor. It’s totally acceptable to leave them out.
Now, let’s talk about the lemon filling, because people always ask about making it even more intense. The recipe calls for instant pudding mix because it sets reliably and fast, achieving that perfect texture for this sweet lemon square recipe. If you wanted an extreme burst of flavor, you could try replacing half of the instant pudding mixture with good quality, thick lemon curd. You’d need to adjust the milk slightly, maybe using 1 cup of milk instead of 1 1/2, because curd is much heavier than dry pudding mix.
Remember, substituting that instant pudding changes the structure, so do that substitution gently! You might find the lemon layer doesn’t set quite as firmly as the original no bake lemon dessert recipe, so you might need an extra hour of chill time to get clean cuts for serving.
Serving Suggestions for Your Tangy Lemon Dessert Squares
When you finally pull that perfectly set, glorious Layered Lemon Lush Dessert out of the fridge, you want to serve it right, don’t you? This tangy lemon dessert squares recipe is so bright and happy that it really shines on its own, but a few simple touches can make it feel like a truly gourmet experience. I always like to keep the sides light so the lemon flavor remains the star!
If you are serving this up for a crowd, sometimes a drizzle right before serving looks beautiful. I’m not talking about more whipped topping, though! A light, glistening drizzle of honey or a very thin maple syrup looks stunning against the white top layer. It adds just a hint of earthiness without fighting that bright citrus taste. For ideas on elevating simple flavors, check out my bright Orange Fennel Arugula Salad—it uses the same principle of balancing sharp notes!
For something really special when cutting these sweet lemon square recipe bars, try serving them alongside fresh berries. A few raspberries or blueberries sprinkled on the plate add beautiful color contrast and a different kind of sweetness. They are so juicy, and the tartness of the berry is just a wonderful match for the creamy lemon. Seriously, it elevates your presentation instantly.
Also, don’t forget the drinks! Because this dessert is so rich and tangy, it pairs perfectly with something light and bubbly. Cold iced tea, sparkling water with maybe just a slice of mint, or even a very light Prosecco cut right through that creamy richness. It’s fantastic for a spring gathering!
Storage and Make Ahead Lemon Dessert Tips
Listen, one of the BEST things about this Layered Lemon Lush Dessert (Lemon Dream) is just how fantastic it is as a make ahead lemon dessert. You really can’t mess this one up on timing, which is why I love it for busy weekends. When you’re planning for a party, being able to ditch the dessert stress the day before is a gift!
The key to storing this masterpiece is ensuring every layer stays exactly where it belongs. After that final chill time (that crucial hour after the whipped topping goes on), you need to make sure it stays covered tightly in the fridge. I usually use plastic wrap and press it gently right over the surface of the whipped topping—this stops any weird fridge smells from settling in and keeps the topping from drying out or forming a skin.
How long does it last? Well, I’ve pushed it to four days, but honestly, even my husband claims it tastes the absolute best on Day Two. The crust stays firm, the cheesecake layer remains creamy, and the lemon filling just deepens its flavor. It’s truly sturdy, which is why this kind of Layered Lemon Lush Dessert is so satisfying compared to a fragile cake.
If you are making it completely ahead of time, wait until you are ready to serve to cut it. Chilling keeps the structure perfect, but slicing it while it’s super cold and firm guarantees you get those beautiful, clean lines. If you already know you are making it 12 or 24 hours ahead, just keep it in the pan, covered, ready to scoop!
For more recipes that save you time, check out my dedicated post on Make Ahead Lemon Desserts—it’s all about strategy in the kitchen!
Frequently Asked Questions About the Layered Lemon Lush Dessert
I always get questions when I post this recipe because everyone wants their **Layered Lemon Lush Dessert** to come out perfectly! Dealing with no-bake layers can sometimes feel tricky, but I promise these answers will clear up any little doubts you have before you start assembling your beautiful square.
Can I use fresh lemon pudding instead of instant for this no bake lemon dessert recipe?
That is a super common question! I specify instant pudding in this no bake lemon dessert recipe because it sets up reliably and quickly without the need for cooking, which keeps our kitchen cool and the process easy. Fresh/Cook & Serve pudding requires stovetop cooking and a longer cooling time before you can layer it, and sometimes the cooked version can be a bit gelatinous rather than creamy when chilled.
If you absolutely must use cook & serve, you’ll need to cook it according to package directions, then chill it down completely—like, until it’s cold to the touch—before you spread it. Honestly, though, the texture you get from the instant mix creates that gorgeous, smooth filling that makes this dessert famous!
How do I get clean slices when cutting this creamy lemon dream dessert?
Oh, the eternal struggle of the layered dessert! Nobody wants messy squares, right? Especially when you’ve made something as beautiful as this creamy lemon dream dessert. My best tip, and it’s a game-changer, is using a hot knife. Fill a tall glass with very hot water, dip your sharp, long knife into it (let it warm up for a second!), wipe the blade completely dry, and then make your cut.
Wipe the knife clean and hot again between every single slice! This melts the fat and cream layers just enough to glide through cleanly without dragging the layers down. This trick ensures your finished squares look just as gorgeous as they taste!
Is this Layered Lemon Lush Dessert suitable for a springtime lemon treat?
Absolutely! It’s practically mandatory for spring! Once winter fades, I start craving anything bright and citrusy, and this is the ultimate springtime lemon treat. The coolness is perfect for those warming days, and the flavor just lifts everyone’s mood.
It’s lighter than heavy cakes or pies, which makes it a wonderful final course for Easter dinners or Mother’s Day brunches. Trust me, if you bring this to any gathering where the sun shines, you’ll be the hero!
If you’re looking for other easy recipes for your get-togethers, I have tons of ideas, including my post on Classic Chicken Noodle Soup, which, while not a dessert, is always a crowd-pleaser!
Estimated Nutritional Data for This Layered Lemon Lush Dessert
Now, I have to give you a little disclaimer here because I am a home cook, not a registered dietitian! This nutritional breakdown for the Layered Lemon Lush Dessert is just an estimate based on standard, full-fat ingredients we used. If you use low-fat cream cheese or sugar substitutes, your numbers will definitely change.
But for the sake of full transparency, if you cut this into 12 generous servings, you’re generally looking at something around 350 calories per square, with about 24 grams of fat, most of which comes from the butter and cream necessary for that amazing texture. It’s a treat, for sure, not a health food! For all the details on fats, protein, and carbs, check out the chart, and remember to use this as a guide only. If you’re into recipes with precise component breakdowns, you might enjoy looking at the details for my Gnocchi in Brown Butter Sauce post!
Share Your Layered Lemon Lush Dessert (Lemon Dream) Experience
I truly hope you fall in love with this dessert as much as my family has. It’s simple, it’s cold, and it screams summer happiness! If you whip up this unforgettable Layered Lemon Lush Dessert (Lemon Dream) for your crew, please come back and let me know how it went.
Did the crust stay crunchy? Did you use fresh lemon juice? Drop a comment below and tell me your favorite layer! And if you snap a gorgeous picture of these beautiful squares, tag me over on social media—I love seeing your successes! For other great recipes you can make ahead, don’t miss my Turkey Cranberry Enchiladas!
Estimated Nutritional Data for This Layered Lemon Lush Dessert
Now, I have to give you a little disclaimer here because I am a home cook, not a registered dietitian! This nutritional breakdown for the Layered Lemon Lush Dessert is just an estimate based on standard, full-fat ingredients we used. If you use low-fat cream cheese or sugar substitutes, your numbers will definitely change. Seriously, keep that in mind!
But for the sake of full transparency, based on the ingredients listed for this glorious no bake lemon dessert recipe, if you cut this into 12 generous servings, you’re generally looking at something around 350 calories per square, with about 24 grams of fat, most of which comes from the butter and cream necessary for that amazing texture. It’s a treat, for sure, not a health food! We expect a little richness in a dream dessert like this!
Here’s a quick look at the averages. Remember, this is just a snapshot for planning purposes:
- Serving Size: 1 square
- Calories: 350
- Sugar: 25g
- Fat: 24g (with about 14g being saturated fat)
- Carbohydrates: 32g
- Protein: 4g
It’s a rich dessert because it’s made with real cream cheese and butter, essential for that dreamy texture. For all the details on fats, protein, and carbs, check out the little list above, and remember to use this as a guide only. If you’re into recipes with overly precise component breakdowns, you might enjoy looking at the scientific detail I included for my Gnocchi in Brown Butter Sauce post!
Share Your Layered Lemon Lush Dessert (Lemon Dream) Experience
I truly hope you fall in love with this dessert as much as my family has. It’s simple, it’s cold, and it screams summer happiness! When you make this unforgettable Layered Lemon Lush Dessert (Lemon Dream) for your crew, please, please come back and tell me how it went. I live for hearing your success stories in the comments!
Did the crust stay nice and crisp? Were you able to get those super clean slices we talked about? Let me know which layer was your absolute favorite—mine is always that bright lemon middle layer, hands down. Seriously, those little successes in the kitchen are what keep me going!
And if you snap a gorgeous picture of these beautiful, creamy squares, I would absolutely love to see them! Tag me on social media—I promise I check them all. Seeing your baking adventures is the best reward. For other great recipes you can make ahead for your gatherings, don’t miss my post on Turkey Cranberry Enchiladas! Happy layering!
PrintThe Ultimate No-Bake Layered Lemon Lush Dessert (Lemon Dream)

Make this easy, no-bake layered lemon lush dessert, also known as Lemon Dream. It features a buttery crust, a creamy cheesecake layer, a bright lemon filling, and a light whipped topping.
- Prep Time: 25 min
- Cook Time: 0 min
- Total Time: 5 hours
- Yield: 12 servings
- Category: Dessert
- Method: No-Bake
- Cuisine: American
- Diet: Vegetarian
Ingredients
- 1 cup all-purpose flour
- 1 cup cold butter, cubed
- 1/2 cup chopped pecans or walnuts (optional)
- 8 ounces cream cheese, softened
- 1 cup powdered sugar
- 1 cup heavy whipping cream (for cream cheese layer)
- 1 (3.4 ounce) package instant vanilla or lemon pudding mix
- 1 1/2 cups cold milk
- 1/2 cup lemon juice (fresh or bottled)
- 1 teaspoon lemon zest
- 1 (8 ounce) container frozen whipped topping, thawed
Instructions
- Prepare the crust: In a medium bowl, combine the flour and cold butter until crumbly. Stir in the pecans, if using. Press the mixture firmly into the bottom of a 9×13 inch baking dish. Chill the crust for 30 minutes.
- Make the cream cheese layer: Beat the softened cream cheese and powdered sugar together until smooth. In a separate bowl, whip the heavy cream until soft peaks form. Gently fold the whipped cream into the cream cheese mixture. Spread this mixture evenly over the chilled crust.
- Prepare the lemon filling: In a bowl, whisk together the instant pudding mix, cold milk, lemon juice, and lemon zest until the mixture thickens, about 2 minutes. Spread this bright lemon filling over the cream cheese layer.
- Chill the dessert: Cover the dish and refrigerate for at least 4 hours, or until the lemon layer is set.
- Add the topping: Once the lemon layer is firm, spread the thawed whipped topping evenly over the top.
- Chill again: Return the dessert to the refrigerator for at least 1 hour before slicing and serving.
Notes
- For a tangier flavor, use fresh lemon juice.
- If you prefer a slightly firmer crust, you can bake it at 350°F for 10 minutes before cooling and proceeding.
- This dessert keeps well in the refrigerator for up to three days.
Nutrition
- Serving Size: 1 square
- Calories: 350
- Sugar: 25
- Sodium: 210
- Fat: 24
- Saturated Fat: 14
- Unsaturated Fat: 10
- Trans Fat: 0
- Carbohydrates: 32
- Fiber: 1
- Protein: 4
- Cholesterol: 65