

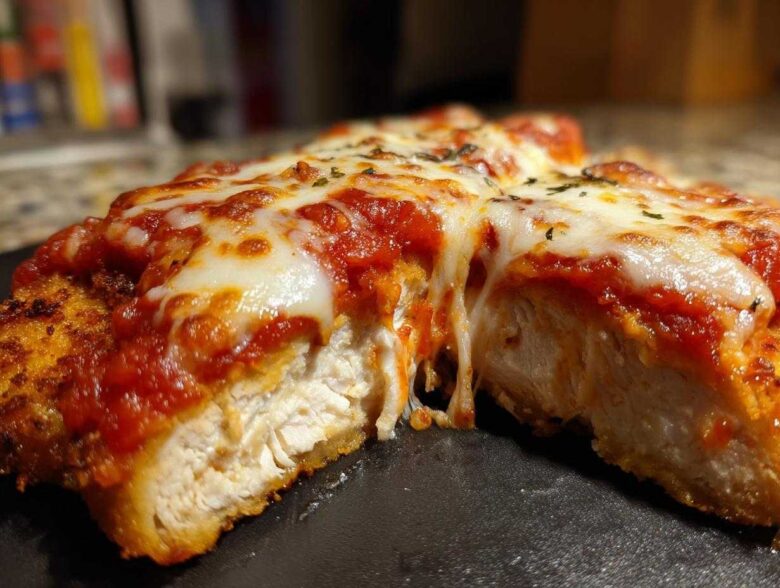
There are nights when only rich, cheesy, Italian comfort food will do, right? You crave that perfect restaurant experience—that shatteringly crispy crust and the gooey, bubbly mozzarella—but honestly, who has time to deep-fry cutlets on a Tuesday? Trust me, I’ve been there way too many times trying to get dinner on the table. That’s exactly why I perfected this Easy chicken Parmesan recipe. We skip the messy skillet oil completely and bake these beauties instead, delivering that golden, crispy breaded chicken breast texture you dream about, all ready to go in under 40 minutes. I make this version constantly for my family because it’s foolproof; it delivers that authentic, amazing flavor every single time without fail.
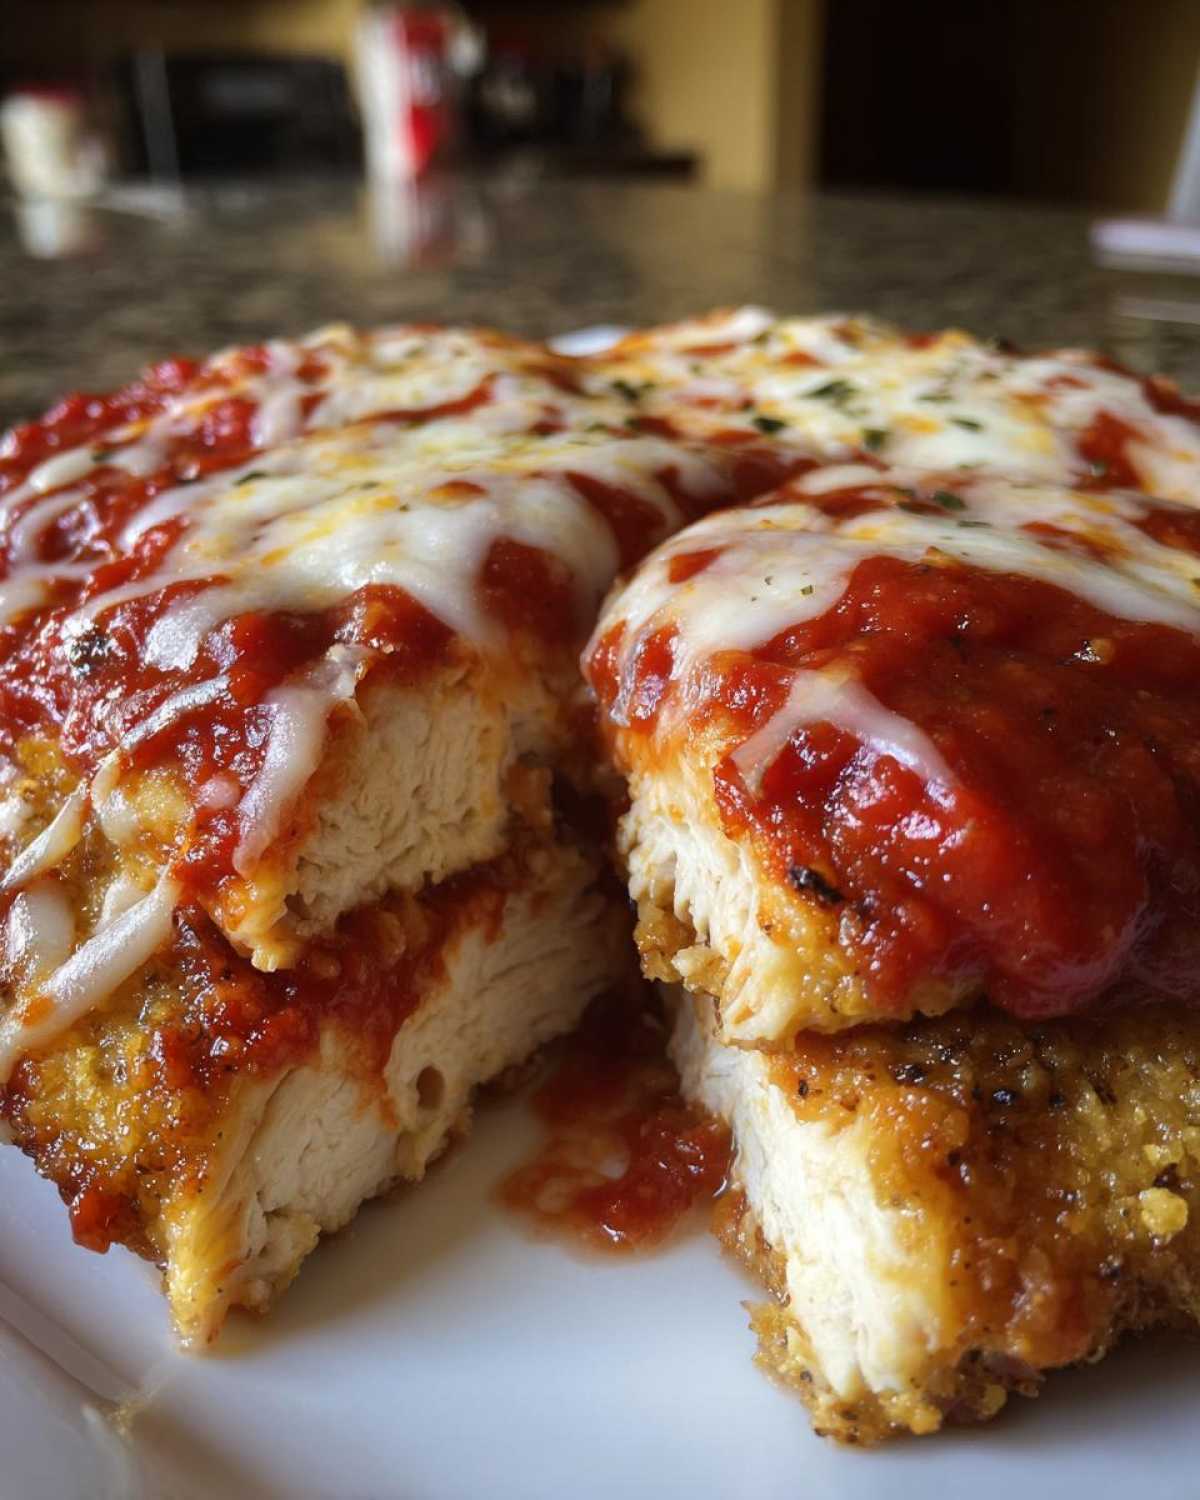
Why This Easy Chicken Parmesan Recipe Works So Well
When you’re aiming for a comforting Italian classic but life is moving at a million miles an hour, this baked method is the absolute game-changer. I used to think you *had* to fry chicken parm to get it right, but that’s just not true! This recipe proves you can get that incredible golden crust and cheesy topping with minimal cleanup.
- Quick Prep for Busy Schedules: Seriously, 15 minutes of hands-on time is all you need before it goes into the oven. That’s less time than it takes to thaw most frozen dinners! This really nails the quick chicken parmesan goal for those hectic evenings.
- Crispy Breaded Chicken Breast Without Deep Frying: We use Panko breadcrumbs—the king of crunch—and a light brushing of olive oil instead of dunking the chicken into a vat of hot oil. The oven does the heavy lifting, and you get that satisfying snap when you bite in. Honestly, I use this exact breading trick for my herbed cutlets too because it’s just superior.
Gathering Ingredients for Easy Chicken Parmesan
Okay, step one is always getting your players lined up—the ingredients! For this easy chicken Parmesan, we aren’t using some fancy, massive list. We’re keeping it simple so you can grab these items most weeks. The quality of your sauce really makes the difference here, so if you have a favorite jarred marinara, use it! If you don’t, I have a great casserole bake that uses some of my favorite pantry staples for sauce bases, but for this, just find a good rich one.
Here is what you absolutely need laid out before you start, especially prepping the chicken right away:
- That’s right, make sure you have 4 boneless, skinless chicken breasts. And listen closely: you need to pound them down to about half an inch thickness. Nobody likes a giant, thick chunk of chicken that stays raw in the middle while the outside burns!
- For the coating—get your standard 1 cup of all-purpose flour ready.
- Two large eggs, just whisked lightly.
- The crunch factor here is key: 1 1/2 cups of Panko breadcrumbs. Don’t skimp on these, they are not the same as regular crumbs!
- You need 1/2 cup of grated Parmesan cheese mixed *into* your Panko, and then you’ll want extra grated Parmesan ready for topping later—don’t forget that second batch!
- For seasoning the crumbs: 1 teaspoon of dried oregano, 1/2 teaspoon of garlic powder, 1/2 teaspoon of salt, and just 1/4 teaspoon of black pepper. Keep that pepper light.
- Just 2 tablespoons of olive oil for brushing—that’s all we need!
- Two cups of your favorite marinara sauce.
- And finally, 8 ounces of fresh mozzarella cheese, which you’ll want to slice up nice and even before you start breading. Trust me on slicing it first, it saves time later.
Step-by-Step Instructions for Perfect Easy Chicken Parmesan
Alright, this is where the magic happens! I like to think of this process like an assembly line—it goes fast once you get the rhythm, but setting up your station correctly is the biggest pro tip I can give you. Before you even touch the chicken, get your oven cranked up to 400 degrees Fahrenheit. I always lightly grease my baking sheet, but honestly, parchment paper saves my life and makes cleanup practically non-existent. If you have some parchment, use it! My secret for getting that amazing coating is making sure everything is organized before I start breading.
The recipe instructions lay out the steps perfectly, but let’s talk execution so you get that restaurant quality when you’re making this Tuscan Chicken-adjacent dinner!
Setting Up the Breading Station
You need three shallow dishes lined up in order: Flour first, then your whisked egg, and finally the Panko mix. The seasoned Panko here is crucial—remember that’s your flour, your 1/2 cup of Parmesan, oregano, garlic powder, salt, and pepper all mixed up. Now, take your pounded chicken cutlet:
- Dredge it in the flour, shake off the super fluffy excess—you just want a light coat.
- Dip it in the egg, let the extra drip back into the bowl.
- Then, this is key for that crispy layer: Press that wet cutlet firmly into your Panko mixture! Really press down until both sides are totally covered. Don’t just lightly place it in there; you want contact!
Once coated, lightly brush both sides with olive oil—that little bit of fat helps it bronze beautifully in the heat. Lay those beauties on your prepared sheet.
Baking and Melting Cheese for Cheesy Chicken Cutlets
We bake this in two stages—that’s how we keep the chicken juicy while making the crust golden. First, pop them into the preheated oven for exactly 15 minutes. You want them cooked through most of the way.
When that 15 minutes is up (set a timer, seriously!), pull them out carefully. Now, spoon about 1/4 cup of that gorgeous marinara sauce right on top of each cutlet. Go easy; you don’t want to drown the crust! Then, lay your slices of mozzarella cheese on top, and hit it with a final, generous shower of that extra grated Parmesan. Yes, more cheese is always the right answer for a perfect batch of cheesy chicken cutlets!
Back into the oven they go for another 5 to 8 minutes. Watch closely! You aren’t looking for a long bake time here, just until that cheese is bubbly, slightly browned, and the internal temperature of the chicken hits a safe 165 degrees Fahrenheit. Use a meat thermometer if you have one; safety first, always!
Tips for the Crispiest Easy Chicken Parmesan
Okay, you followed the baking steps, but maybe you want that *extra* ‘wow’ factor? I totally get it. If you have an extra four minutes and want the crunch levels to reach astronomical heights, try my little secret trick! While this recipe is designed to be easy, sometimes you just need a little extra reassurance on the crust.
My top tip? Before you assemble the Parmigiana, give those breaded cutlets a quick sear. Just heat a thin layer of oil in a skillet (medium-high heat) and pan-fry them for about 2 minutes per side. It won’t make them greasy because the time is so short, but it locks in that incredible crispiness before they ever hit the marinara. You can see how I get a great crust on my baked wings—it’s the same principle!
The Marinara Sauce Quality Matters
Remember how I said use good sauce? Don’t underestimate that! If you use a watery, bland sauce, it steams the crust and tastes meh. If you’re using store-bought, try simmering it for 10 minutes on the stovetop beforehand, maybe adding a pinch of sugar or fresh basil if you have it. It concentrates the flavor beautifully and prevents excess moisture from soaking into your perfectly crispy chicken breast downstairs once the cheese goes on.
Serving Suggestions for Your Easy Chicken Dinner Idea
So, you’ve got this absolutely perfect, cheesy chicken cutlet—what are you going to serve with it? Honestly, this dish is so hearty and satisfying; it really doesn’t need a lot of fuss on the side, which keeps it a fantastic easy chicken dinner idea.
The absolute classic pairing, and my go-to for a family friendly pasta night, is just a big bowl of spaghetti or fettuccine tossed lightly in a little extra marinara sauce to catch all those cheesy drips. You want the pasta to be a vehicle for soaking up the sauce, not a competing star, if you know what I mean!
But you don’t always have to do the spaghetti thing! Here are a few other ways my family loves to enjoy this:
- I sometimes swap the pasta entirely because I am slightly addicted to carbs. Try serving your Parm right on top of a bed of creamy, dreamy garlic mashed potatoes. The potatoes soak up the sauce beautifully, and it feels super decadent for a weeknight meal!
- For something slightly lighter, a bright, crisp Caesar salad is wonderful for cutting through all that richness. Don’t forget garlic bread on the side for dipping, though!
- And since we are keeping things cozy and Italian, this is amazing served alongside a small cup of rich, warm soup. I often make a quick creamy tomato basil soup in the fall—it just screams Italian comfort food at home.
No matter what you choose, make sure you have enough leftovers, because while it’s amazing fresh out of the oven, it’s honestly just as good the next day!
Storing and Reheating Your Easy Chicken Parmesan
We all know that sometimes the best part of cooking a great meal is having leftovers for lunch the next day! This easy chicken Parmesan holds up really well, but you have to treat the leftovers with respect if you want that breading to stay crunchy. Don’t just toss the whole saucy mess into one container!
If you’re planning ahead, try to store your components separately. After the chicken has cooled completely, I hate to say it, but separate the sauced and cheesed cutlets from any extra pasta or salad. If you can manage it without wrecking the top, store any extra marinara sauce in its own little container too. This is the key to keeping things fresh, similar to how I store my holiday enchilada leftovers!
When it comes time to reheat, ditch the microwave if you can. Microwaves are the enemy of crispy breading; they just steam everything into oblivion, turning your beautifully crispy chicken into a soggy sponge. Sadness!
Here are my preferred methods for bringing that cheesy chicken back to life:
- The Oven Reheat (My Top Pick): Place the chicken (sauce and cheese on top is fine here) on a wire rack set over a baking sheet. Pop it into a 350-degree oven for about 10 to 15 minutes. The wire rack lets air circulate underneath, which helps dry out any residual moisture and revives that crumbly texture!
- The Air Fryer Miracle: If you have an air fryer, this is your best friend for this reheat! Set it to about 375 degrees for 5 to 7 minutes. It blasts the hot air around and gets the crust beautifully crisp again in a flash while melting the cheese perfectly.
If you *absolutely* have to use the microwave, go quick! Just zap it for 45 seconds to warm the center, and then finish it in a hot toaster oven for a minute or two just to crisp up the top layer. Happy leftovers!
Frequently Asked Questions About Quick Chicken Parmesan
Whew! We covered a lot of ground getting our perfect baked chicken parm recipe ready. But when I first started making this, I definitely had a few silly questions swirling around. Dealing with chicken cutlets can be tricky, especially when you are aiming for a fast but reliable meal. Here are the things I hear most often from people trying out this ultimate Italian comfort food at home for the first time!
Can I use regular breadcrumbs instead of Panko?
You certainly can, but here is my honest take: it just won’t be the same! Regular breadcrumbs are finer and tend to absorb more moisture from the sauce and the cheese once it hits the oven. That’s how you end up with pizza-like soggy chicken instead of that wonderfully brittle crust. Panko crumbs are dryer and flakier; they stand up way better to the heat and the sauce. If Panko is your only option, I’d strongly recommend giving those cutlets that quick 2-minute pan-fry first, like I mentioned in the tips section, to pre-crisp them up!
Can I prep the breading station ahead of time?
This is a great question if you’re trying to make this a true quick chicken parmesan for a busy night! Yes, you can totally set up your three dishes an hour or two before dinner time, which is a huge help. Cover them tightly with plastic wrap and keep them in the fridge. The eggs will be cold, which is fine—just let them sit out for 10 minutes while you pound your chicken. The one thing you *cannot* do ahead of time is actually bread the chicken. The moisture transfers almost immediately, and the crumbs will get soggy long before they hit the oven. Always bread right before baking!
What is the best way to cook the chicken for the best cheesy chicken cutlets?
The recipe calls for baking at 400°F, and that’s fantastic for an easy weeknight. However, if you prefer the stovetop method but still want the oven finish for the cheese, remember the combination trick! Sear the breaded chicken in about 1/4 inch of oil for 2 minutes per side to get that deep golden color and set the crust. Then move it to the sheet pan for the sauce and cheese step. That method guarantees you get the absolute crispiest results short of full deep-frying. You can find more of my favorite stovetop secrets over on my main recipe page!
Can I use chicken thighs instead of breasts?
Chicken thighs are amazing! They are much more forgiving than breasts because they have more fat, meaning they rarely dry out. If you use boneless, skinless thighs, you might need to trim them slightly to get a somewhat even thickness, but you don’t have to pound them quite as aggressively as the breast meat. You might need to add just a couple of minutes to the initial bake time, maybe 17 minutes instead of 15, just to ensure they are cooked perfectly through.
Can I make this Easy Chicken Parmesan ahead of time for meal prep?
You absolutely can make the chicken cutlets and the sauce ahead of time! Cook the chicken through (Step 5), but stop before adding the sauce and cheese. Once they are cool, wrap them tightly and store them in the fridge for up to three days. When you go to eat them, top with sauce, cheese, and bake until melted. Reheating the *fully assembled* chicken parm is tricky because the sauce makes the crust soft, so prepping the components separately is always the best bet for keeping things fresh!
Can I use thin-cut chicken breasts instead of pounding them for this easy chicken dinner idea?
That’s a smart shortcut! If you buy those pre-cut, thin-sliced chicken breasts, you can certainly skip the pounding step. The most important thing for baking evenly—especially when we are aiming for a quick cook time—is thickness consistency. If your store-bought breasts are already around 1/2 inch thick all the way across, you’re golden! If they are thicker on one end than the other, just quickly use the flat side of a meat mallet or even a heavy rolling pin on the thicker spots until they feel uniform. Even cooking is the secret to all good easy chicken dinner ideas!
Nutritional Snapshot of Baked Chicken Parm
Now, I know what you’re thinking: all that cheese and breading can’t be healthy, right? Well, because we baked this instead of deep-frying it, this Easy Chicken Parmesan is actually pretty fantastic from a nutritional standpoint! It’s satisfying without being overly heavy, which makes it a winner for weeknights.
I pulled the numbers based on the ingredient list above, but keep in mind these are estimates, as always when cooking from scratch. If you use super rich, oily marinara, or maybe skip the final sprinkle of Parmesan, those numbers will shift a bit. But generally speaking, for a hearty, cheesy Italian comfort food at home, this is a great balance!
- Serving Size: 1 cutlet
- Calories: 480
- Protein: 55g (See? All that lean chicken!)
- Fat: 18g (Much lower because we didn’t fry it)
- Carbohydrates: 25g
- Sugar: 7g (Mostly from the marinara sauce)
- Sodium: 650mg
- Cholesterol: 140mg
The best part is the protein punch! Getting 55 grams of protein in one serving really helps keep you full and satisfied until breakfast the next day. It’s proof that a family friendly pasta night can also be reasonably nutritious if you bake your cutlets!
Share Your Experience Making This Easy Chicken Parmesan
That’s it! We’ve officially covered every little trick I have for making this the most unbelievably easy and delicious baked chicken parm recipe you’ll ever try. From pounding the chicken thin to getting that light brush of oil for maximum crispiness, this recipe is designed for you to succeed on your busiest nights.
Now comes the fun part—I absolutely need to know how it turned out for you! Did you stick to the 15-minute bake, or did you give those cutlets the quick pan-fry preview for an extra crunch? Did you add any fresh herbs that you loved into the Panko mix?
Please, please leave a rating below—even if it’s just three stars because you forgot the oregano! Knowing how you handled the breading station helps everyone else who tries this recipe later. Don’t forget to snap a picture of your beautiful, cheesy creation if you share it online; tag me so I can see your amazing Italian comfort food at home!
If you had any major questions or thoughts you want to chat about, you can always reach out directly through my contact page. Happy cooking, and enjoy that amazing smell filling your kitchen!
PrintEasy Baked Chicken Parmesan
A simple recipe for crispy, cheesy chicken parmesan baked in the oven for a weeknight friendly Italian classic.
- Prep Time: 15 min
- Cook Time: 23 min
- Total Time: 38 min
- Yield: 4 servings
- Category: Dinner
- Method: Baking
- Cuisine: Italian
- Diet: Low Fat
Ingredients
- 4 boneless, skinless chicken breasts, pounded to 1/2 inch thickness
- 1 cup all-purpose flour
- 2 large eggs, lightly beaten
- 1 1/2 cups panko breadcrumbs
- 1/2 cup grated Parmesan cheese, plus more for topping
- 1 teaspoon dried oregano
- 1/2 teaspoon garlic powder
- 1/2 teaspoon salt
- 1/4 teaspoon black pepper
- 2 tablespoons olive oil
- 2 cups marinara sauce
- 8 ounces fresh mozzarella cheese, sliced
Instructions
- Preheat your oven to 400 degrees Fahrenheit. Lightly grease a baking sheet or line it with parchment paper.
- Set up a standard breading station with three shallow dishes. Place flour in the first dish. Whisk eggs in the second dish. In the third dish, combine panko breadcrumbs, 1/2 cup Parmesan cheese, oregano, garlic powder, salt, and pepper.
- Dredge each chicken cutlet first in the flour, shaking off excess. Dip it into the egg mixture, letting excess drip off. Finally, press the cutlet firmly into the breadcrumb mixture to coat both sides completely.
- Brush both sides of the coated cutlets lightly with olive oil. Place them on the prepared baking sheet.
- Bake for 15 minutes.
- Remove the chicken from the oven. Spoon about 1/4 cup of marinara sauce over each cutlet. Top each with slices of mozzarella cheese and a sprinkle of extra Parmesan cheese.
- Return the chicken to the oven and bake for another 5 to 8 minutes, or until the cheese is melted and bubbly and the chicken is cooked through (internal temperature reaches 165 degrees Fahrenheit).
- Serve immediately over pasta or with a side salad.
Notes
- For extra crispiness, you can briefly pan-fry the breaded cutlets in a skillet with a thin layer of oil for 2 minutes per side before topping with sauce and cheese and baking.
- Use high-quality marinara sauce for the best flavor.
Nutrition
- Serving Size: 1 cutlet
- Calories: 480
- Sugar: 7
- Sodium: 650
- Fat: 18
- Saturated Fat: 8
- Unsaturated Fat: 10
- Trans Fat: 0
- Carbohydrates: 25
- Fiber: 2
- Protein: 55
- Cholesterol: 140