

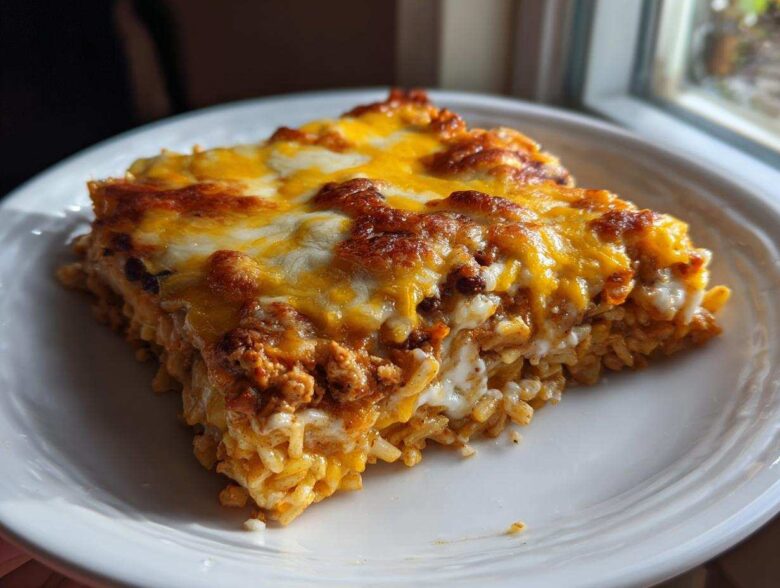
Oh, friends, some nights you just need a dinner that wraps you up like a warm blanket, right? That’s what Spoon (Jun) always chases—those deeply rooted, soulful flavors that feel like they’ve been simmering forever. But let’s be honest, after a long day, nobody wants to spend an hour rolling individual burritos! That’s where our Easy Chicken Burrito Bake saves the day. Seriously, this layered dish hands you all the cheesy, savory, bean-and-rice goodness you crave, perfectly baked into one fantastic, family-friendly casserole. It’s the shortcut to comfort that still tastes like it was made with intention. You’re going to love shaking up your routine with this simple bake. For more deep-rooted comfort food explorations, check out our general recipes on the blog.
Why This Chicken Burrito Bake is Your New Weeknight Dinner Bake Hero
When I look at this recipe, I see pure efficiency married to incredible satisfaction. We took the labor out of the burrito experience, but we kept every single wonderful flavor profile. This isn’t just dinner; it’s the answer to those hectic evenings.
This really shines as an easy baked casserole because it checks all the boxes a busy family needs:
- It’s fast! The prep time is only about 15 minutes, which is lightning speed compared to stuffing tiny tortillas.
- It’s a guaranteed win. Who turns down melted cheese layered with savory chicken and beans?
- It ensures minimal cleanup, making it the perfect anchor for any weeknight dinner bake rotation. For more casserole inspiration, see our chicken enchilada bake idea.
Quick Assembly for Busy Schedules
If you remember the days of laying out tortillas, spooning filling, rolling, and then placing them seam-down in the pan? Forget it! With this approach, we mix the entire filling together in one large skillet, and then it’s just stacking and topping time. It means you can have this bubbling in the oven in under 15 minutes of actual work. Isn’t that the best kind of magic for a Tuesday night?
Ultimate Comfort Food Casserole Flavor
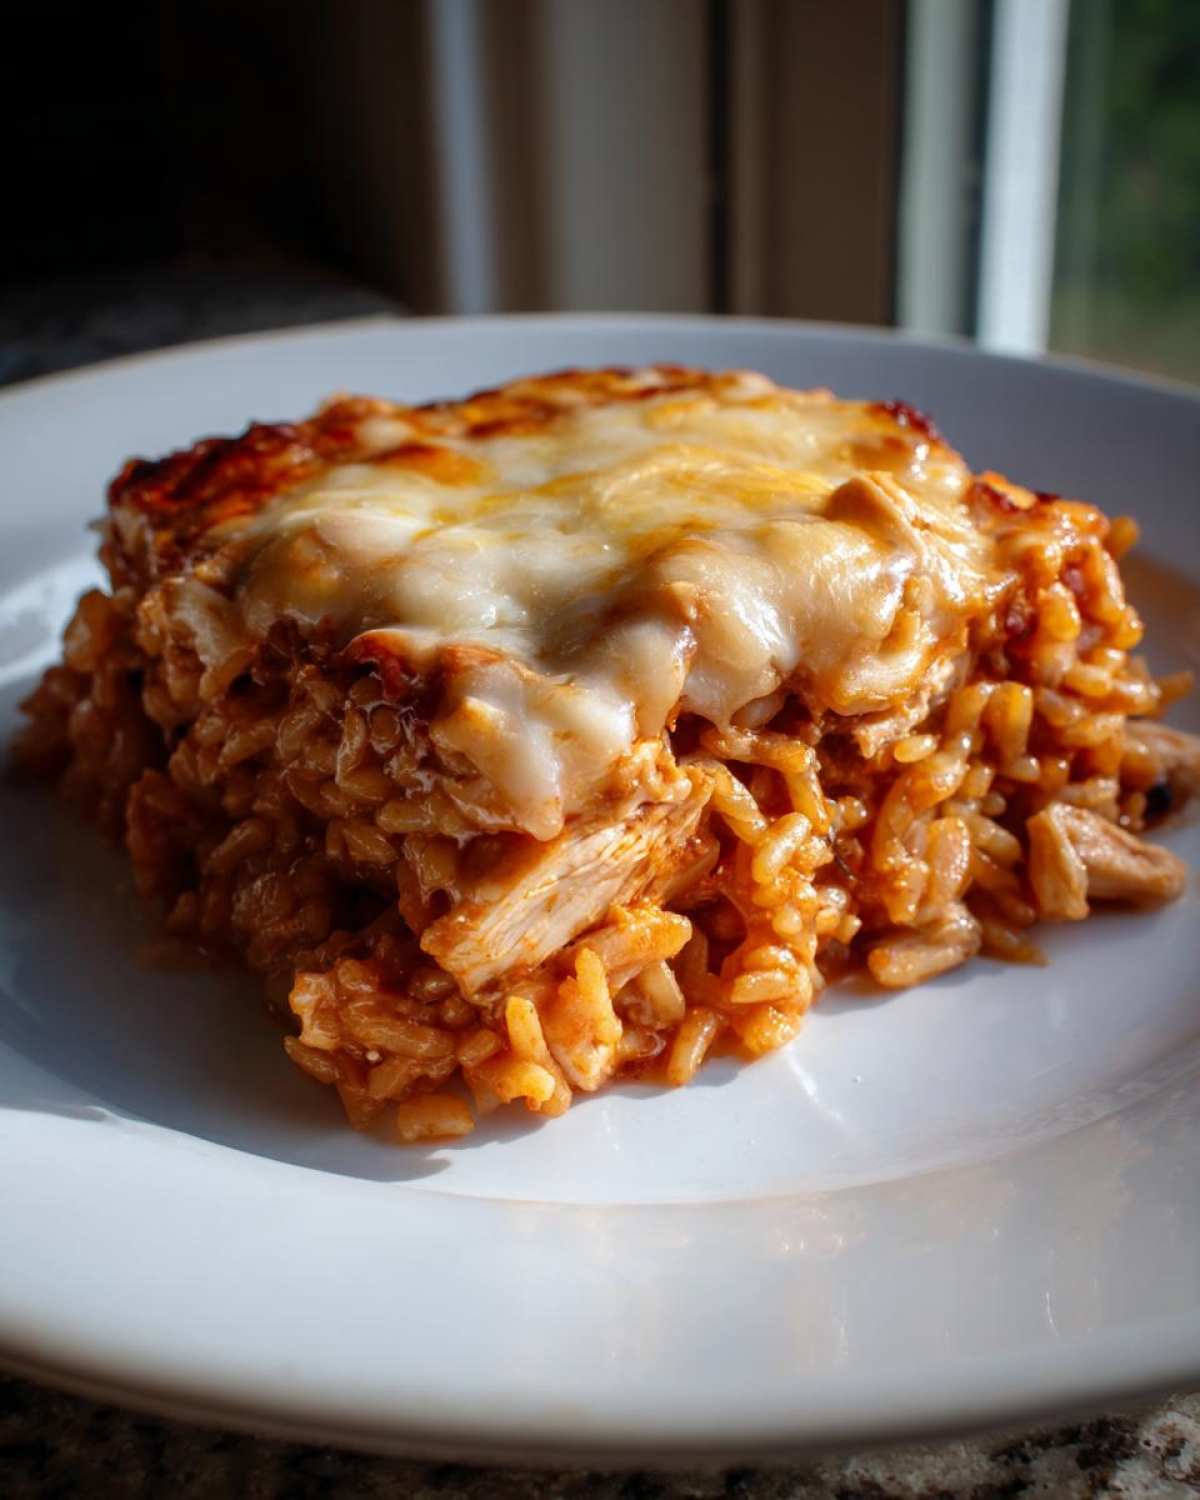
What you get on the plate is pure textural bliss. You have those soft pockets of tortilla steeped in the spicy sauce, soaking up the chicken broth, all glued together with creamy, melty goodness. The layers separate perfectly when you scoop it out, giving you that satisfying bite that tastes exactly like your favorite burrito, just served in a much cozier format.
Gathering Ingredients for the Perfect Burrito Bake
Okay, Spoon insists that measuring correctly is the cornerstone of any good traditional dish, and while this is a modern spin, precision still matters for that perfect layering! We need to set ourselves up for success with our ingredients prepped exactly right. Take your time here, because what you gather now dictates how beautifully this bakes later. We are aiming for vibrant flavor, and that starts before we even turn on the stove.
Ingredient Notes and Substitution Guidance
Let’s talk quick hacks for your flavor base! If you’re really pressed for time, skip cooking the chicken breast yourself and grab about two cups of good quality, pre-shredded rotisserie chicken. It works beautifully in this cheesy burrito bake. Also, don’t skimp on the cheese blend; the Jack gives you the melt, and the sharp cheddar gives you the flavor pop.
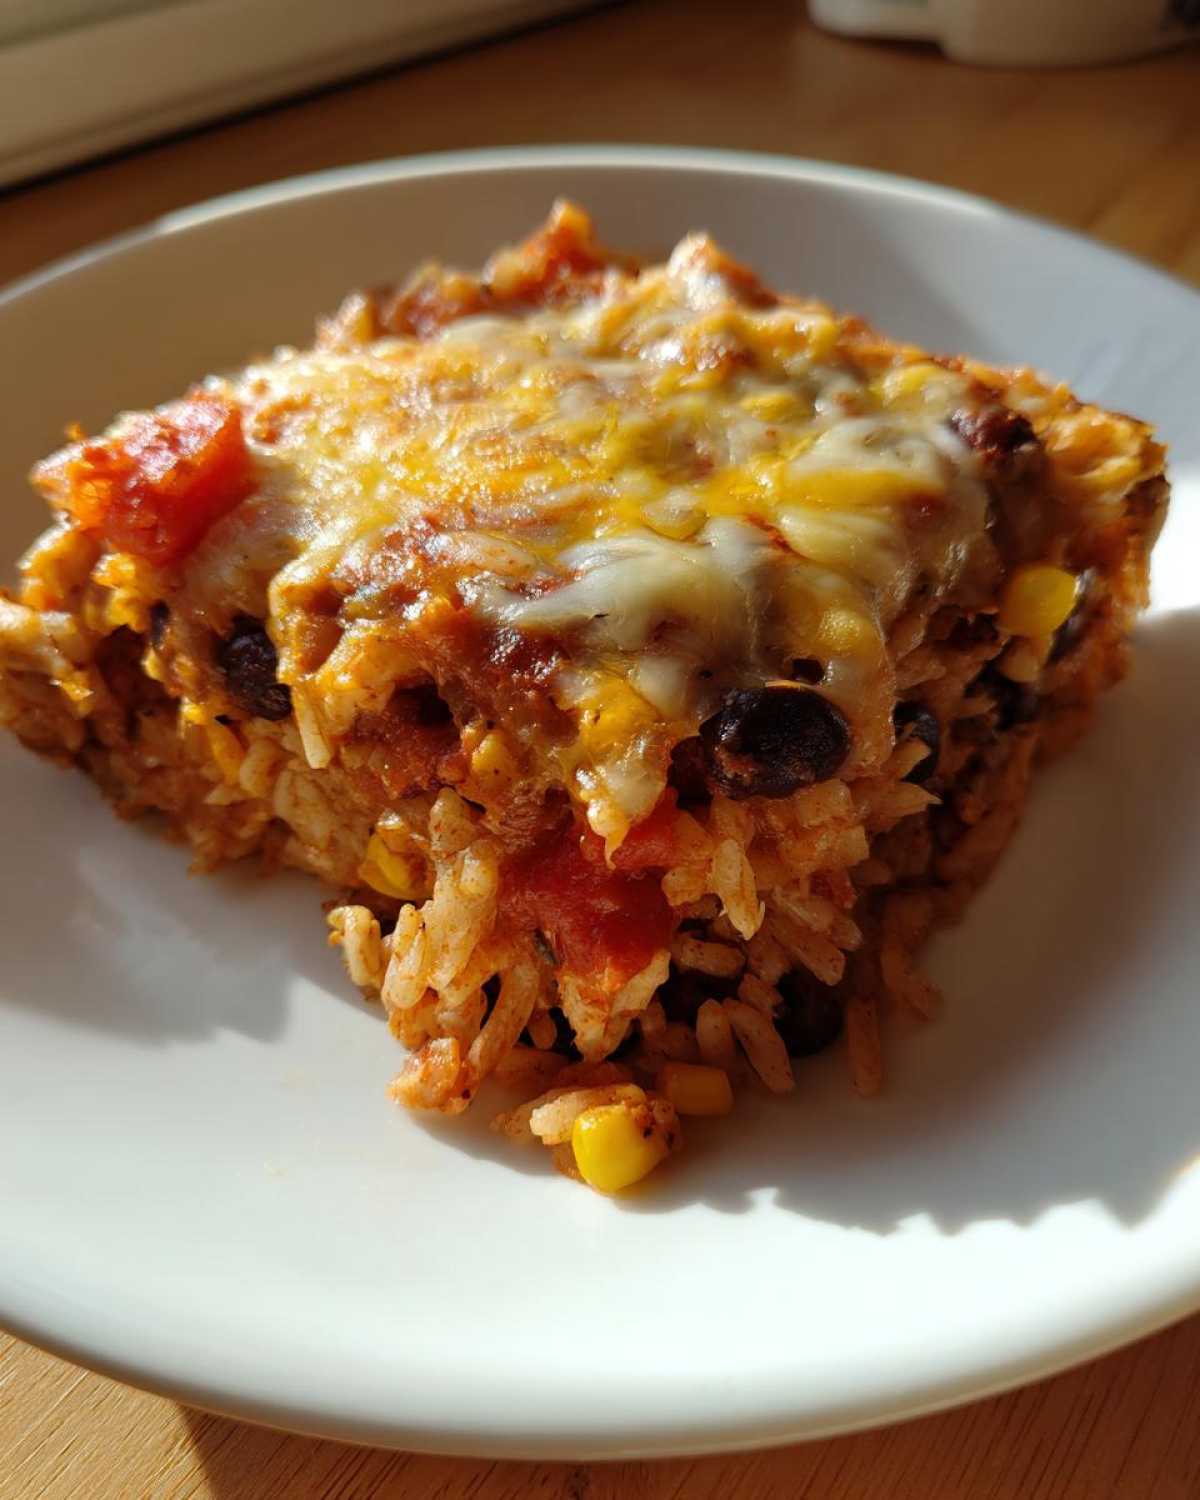
Now, if chicken isn’t what you have on hand, ground beef is a fantastic swap for this Mexican casserole recipe. If you go that route, just make sure you brown it up first in the pan before you add the onions, and drain every speck of fat. We want flavor, not grease pooling in the bottom of our dish!
Step-by-Step Instructions for Your Layered Burrito Dish
Now that we have all our beautiful components ready, let’s get this thing stacked! Remember, precision here means you get every flavor in every single bite when you serve up that glorious burrito bake later. The key is to build those layers so that everything steams together perfectly in the oven. Before we even touch a spoon, make sure your oven is ready—we are preheating to 375 degrees Fahrenheit and your 9×13 baking dish is lightly greased. If you’re looking for more layered magic, check out my thoughts on Cajun chicken Alfredo bake for a different flavor profile!
Preparing the Filling Base
Grab your large skillet and warm up that olive oil over medium heat. We start by softening that chopped onion—give it about five minutes until it starts looking translucent. Toss in the garlic for just a minute until you can really smell it; careful not to burn it! Now, this is where the flavor concentrates: add your shredded chicken, the red enchilada sauce, those rinsed black beans, the cooked rice, and all those lovely spices—cumin, chili powder, oregano, salt, and pepper. Stir it all together until everything is smelling incredibly fragrant and incorporated. That’s your heart for the casserole!
Layering the Cheesy Burrito Bake
Time to build our skyscraper of flavor, folks! Start by spreading just a thin coat of that savory chicken mixture onto the bottom of your prepared dish—this keeps the first layer of tortillas from sticking. Next, lay down half of those quartered tortillas evenly. Sprinkle on about half of your reserved cheese mixture. Then, dollop half of your remaining chicken mix right over that cheese layer, and drizzle half of the chicken broth over everything. Repeat! Top with the final tortillas, the last bit of filling, and finish with the remaining cheese. It’s layered perfection, ready for the oven!
Tips for Success Making This Simple Baked Dinner
Even the most straightforward recipes can throw a curveball if you miss one tiny detail! Since this dish has so many wonderful components—the soft tortillas, the saucy filling, all that cheese—we want to make sure everything comes out tender and bubbling, not dry or unevenly heated. Spoon always stresses the importance of texture, even when we’re making something quick like this easy baked casserole.
If you’re worried about things drying out while waiting for that cheese layer, I have a little trick that always works for me. Also, for more quick, delicious takes on baked dishes, you can peek at this burrito bake inspiration.
Achieving the Best Melt on Your Burrito Casserole
The secret to making this look gorgeous when it comes out of the oven involves reserving about a third of your total shredded cheese. You’ll use some in the middle layers, of course, but make certain that very last, top layer of cheese is generous. That top layer is what we want to get golden brown and bubbly for that perfect appearance. My guideline is to bake it until the interior is completely hot and everything is bubbling fiercely around the edges (that usually hits around the 20-minute mark for me), and then—this is important!—I let it bake for another 5 minutes uncovered until that top cheese starts developing those lovely light brown spots. It turns a great family friendly casserole into a showstopper!
Make-Ahead and Freezer Friendly Burrito Recipe Options
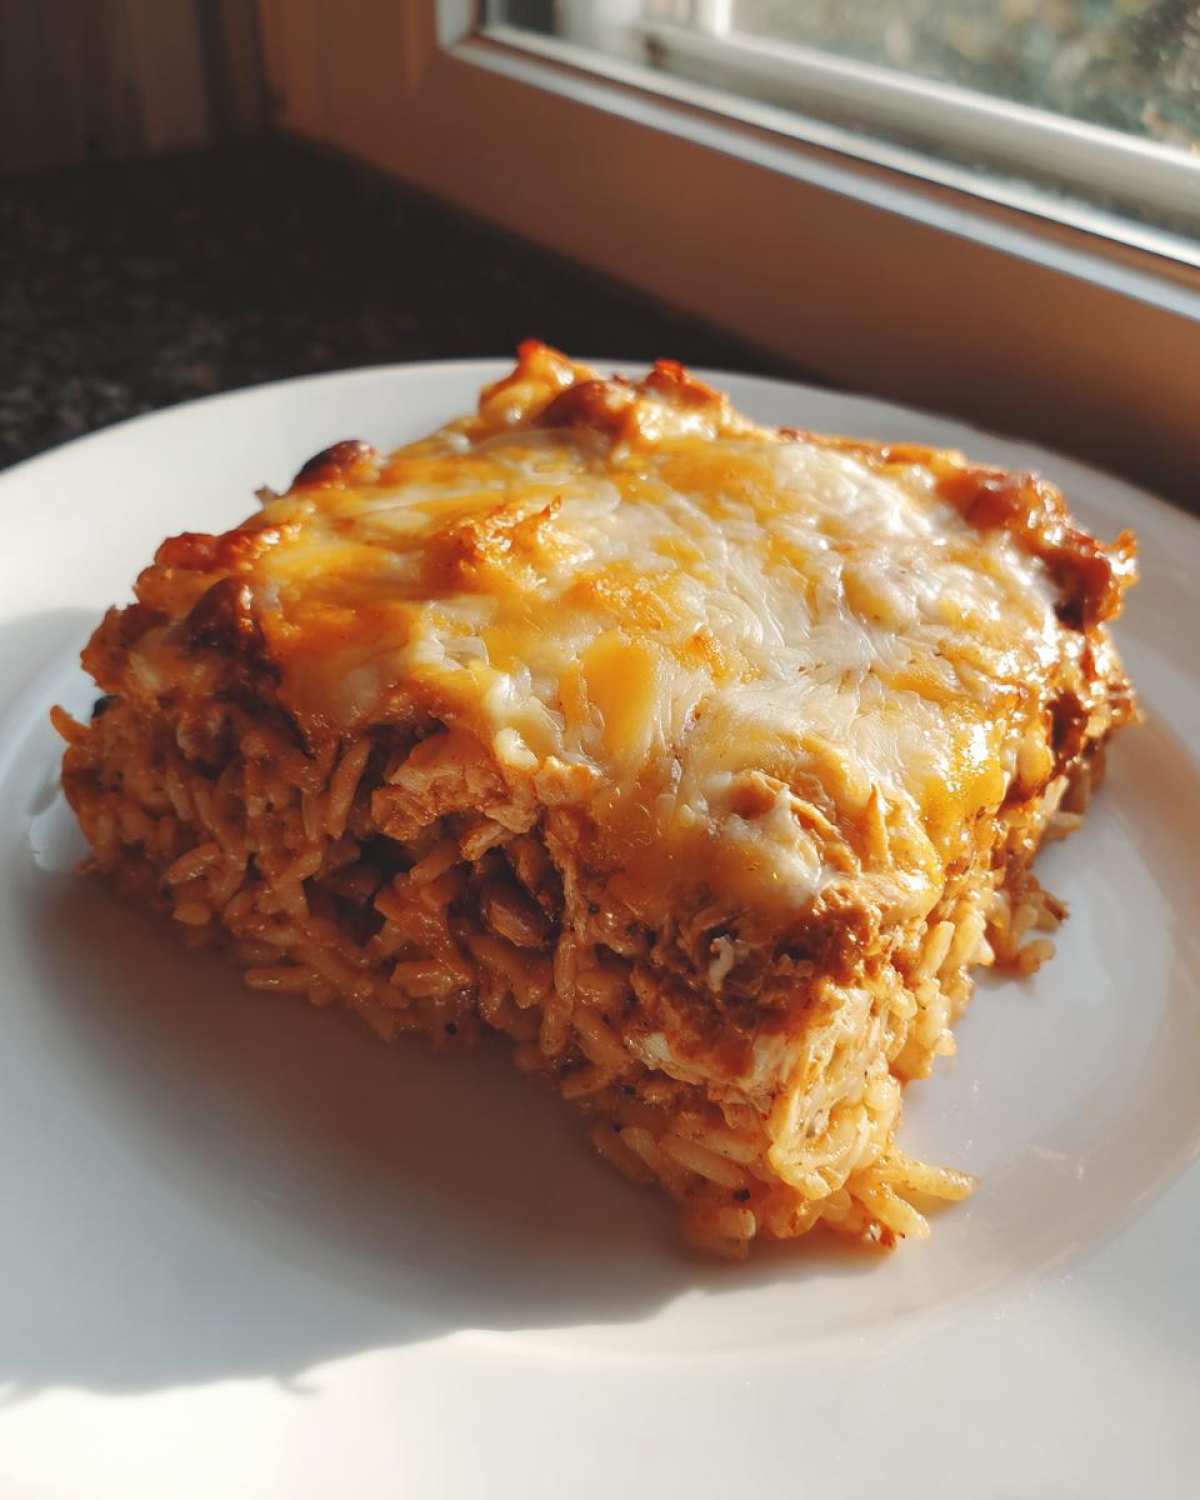
This is where I tell you how this dish truly earns its spot as a busy person’s best friend! We all love comfort food, but sometimes we need that comfort *ready* when we are, right? This Mexican casserole recipe handles batch cooking beautifully, whether you need it tomorrow or next month. Spoon is always preaching about having good food roots, and preparing ahead is definitely one of the wisest growing tips I can share!
If you are planning for leftovers or just want zero work on a hectic Wednesday, you can absolutely treat this like a lasagna. Assemble the whole thing—all the layers, all the cheese—in your baking dish, but stop right before it goes into the oven. Cover that dish tightly with plastic wrap first, then maybe a layer of foil to keep out any freezer smells. When you’re ready to bake it straight from the fridge, you just need to add about 10 extra minutes to that baking time. For more brilliant ways to use up dinner leftovers, take a peek at our turkey cranberry enchiladas recipe!
To make this a true freezer friendly burrito recipe, make sure you use an aluminum or oven-safe dish. Once assembled and wrapped very securely, it can hang out in the deep freeze for up to three months. I always write the date and ‘Bake Covered’ instructions right on the foil—don’t skip that step! When you pull it out, let it thaw in the fridge overnight if you can, and then add those extra 10 to 15 minutes to the baking time. It comes out just as bubbly and delicious, trust me. You can see a fantastic example of a make-ahead beef version over at Evelyn’s Cooking for inspiration, too!
Serving Suggestions for Your Tex Mex Bake
You’ve pulled this gorgeous, bubbly Tex Mex bake out of the oven, and now comes the best part: dressing it up! This casserole is hearty enough to stand on its own, but adding a few fresh textures and cool dips really elevates it from weeknight staple to a full-on fiesta. Spoon always says that the supporting cast makes the main performance shine, and that’s certainly true here!
You need that contrast between the hot, savory casserole and something cool and bright on top. Think about adding just a dollop of thick sour cream or plain Greek yogurt right in the center of your scoop. Then, you absolutely need something tangy!
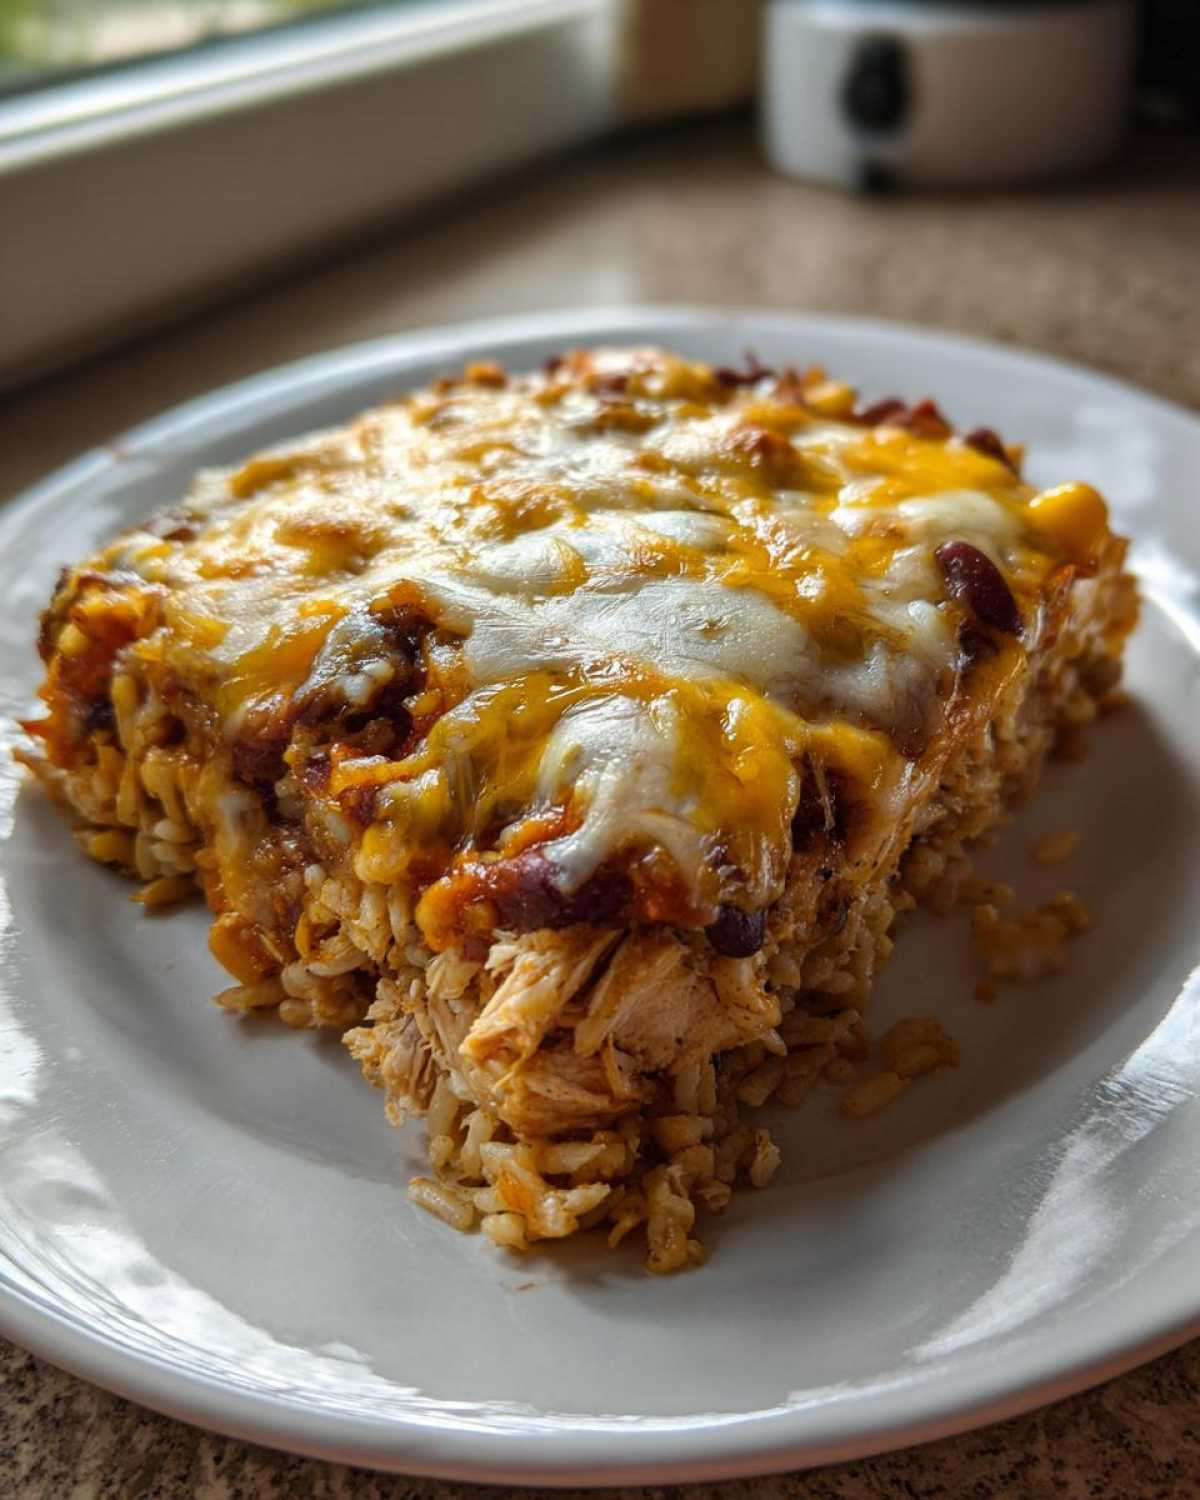
Here are my go-to finishers for every slice:
- Salsa: Use your favorite! Whether you prefer mild pico de gallo or a fiery jarred red salsa, the fresh acidity cuts right through that richness.
- Guacamole or Sliced Avocado: The healthy fats and creamy texture of avocado are just non-negotiable with this kind of dish. It’s heavenly.
- Fresh Herbs: A sprinkle of chopped cilantro on top just wakes the whole dish up. It brings in those green, vibrant notes that Sprout loves so much.
- Black Olives: If you’re adding these to the topping, make sure they are sliced. A few little rings scattered over the cheese offer a salty little surprise.
If you want to pair this with a vibrant side dish instead of just toppings, I highly recommend whipping up a quick side salad or perhaps trying my Mexican Street Corn Pasta if you’re feeling adventurous! It’s a perfect flavor companion to this cheesy casserole.
Storage and Reheating the Burrito Bake
Okay, we’ve all been there—you made this amazing, comforting casserole, and now you’re hoping the leftovers taste just as good the next day. Since we didn’t use the main keyword here, let’s just call this our leftover cheesy goodness for now! Spoon always says that food tastes even better the next day because the flavors have time to settle and mingle a bit more deeply, and that’s certainly true for a rich Mexican casserole recipe like this one.
The goal when storing any baked dish is keeping that moisture locked in, especially with those soft tortillas soaking up all that sauce. Once the casserole has cooled down—and I mean mostly cooled, don’t stick a piping hot dish directly into the fridge, please!—cover it really well. I swear by two layers here: first, a layer of plastic wrap pressed lightly onto the surface of the cheese, and then covering the whole dish tightly with aluminum foil. This acts as a protective shield against drying out.
You can keep your airtight, well-wrapped casserole in the refrigerator for about three to four days. Honestly, even after day four, it’s usually fine, but the texture starts shifting a bit, which is why I aim to finish it inside that window.
Warming Up Leftovers Like a Pro
Microwaving leftovers is fast, but sometimes it makes the tortillas a little chewy on the edges, right? If you have time, the oven is always the better choice for texture rehabilitation. Pop a serving or the whole dish back into a 350-degree oven, covered loosely with foil for the first bit to steam it back to life, then remove the foil for the last five minutes so the cheese crisps up a tiny bit again.
If you’re grabbing just a small slice for a quick lunch, the microwave is totally fine! Just place a small dollop of water inside the microwave near the plate before running it for about 60 to 90 seconds. That steam helps keep the tortilla from drying out while the center heats through. It’s usually the path I take when I’m starving and can’t wait for that oven preheat!
Frequently Asked Questions About the Burrito Bake Casserole
We’ve covered the layering and the baking, but I know when you’re looking for a reliable staple, you want all the details ironed out before you even start chopping! These are the questions I always get when I bring this dish to a potluck—it’s just that good! We want to make sure this fits perfectly into your rotation as the ultimate family friendly casserole.
Can I make this a beef burrito casserole instead of chicken?
You absolutely can! That’s the great thing about these deeply flavorful dishes; they adapt so well. If you want to make this a hearty beef version, just swap out the shredded chicken for about a pound of ground beef. You’ll brown that beef in the skillet first, just like I mentioned when talking about substitutions, and you must drain off all that rendered fat before you mix in the enchilada sauce and the rest of your fillings. It turns into a wonderful hearty beef burrito casserole that Spoon absolutely loves!
What makes this a good one pan burrito dinner?
That’s a fair question because, technically, we use two pieces of cookware: a skillet for the filling base and the baking dish for the final assembly, right? But here’s why everyone still calls things like this a one pan burrito dinner: the cleanup is minimal! You’re not dealing with sauté pans, separate pots for rice, or individual foil wrapping every single portion. Everything cooks together in that 9×13 dish once the filling is made. It truly simplifies your evening because all the work happens in just those two vessels. For more comfort food ideas that keep things simple, check out my cheesy dip recipe when you need an appetizer!
If you’re searching specifically for a true single-vessel approach, some folks skip sautéing the onions first and just dump everything into the baking dish wet; however, I really don’t recommend cutting corners on that flavor base! For a different take on easy layering that might interest you, have you seen this great chicken version over at Yay Recipe?
Sharing Your Cheesy Burrito Bake Creations
My favorite part of sharing these recipes is seeing how you bring our conversation into your own kitchens! When you make this comforting Mexican casserole recipe, I truly want to hear all about it. Did you stick perfectly to the layers? Did you sneak in some corn or use the ground beef variation? These little notes you share back with us help our whole Spoon & Sprout family grow stronger in the kitchen!
Please, take a moment after you’ve enjoyed your meal—after you’ve scraped the last bit of cheesy goodness out of the casserole dish—to leave us a rating and a comment below. Spoon gets so excited seeing those stars light up! It helps other home cooks know that this is a recipe worth trusting, one with deep, reliable flavor roots.
If you tried this recipe and made wonderful tweaks, or if you struggled anywhere along the way and want us to troubleshoot, don’t hesitate to reach out! We read every single message. You can connect with us directly through our Contact Page anytime. We appreciate you letting our story into your home, and we look forward to hearing how much your family loved this hearty bake!
PrintEasy Chicken Burrito Bake Casserole
Make this easy chicken burrito bake for a comforting, family-friendly dinner. This layered casserole combines seasoned chicken, rice, beans, and cheese, delivering all the flavors of a burrito in one simple, oven-baked dish perfect for weeknights.
- Prep Time: 15 min
- Cook Time: 25 min
- Total Time: 40 min
- Yield: 6 servings
- Category: Dinner
- Method: Baking
- Cuisine: Tex-Mex
- Diet: Vegetarian
Ingredients
- 1 tablespoon olive oil
- 1 medium onion, chopped
- 2 cloves garlic, minced
- 1 pound cooked, shredded chicken breast
- 1 (10 ounce) can red enchilada sauce
- 1 (15 ounce) can black beans, rinsed and drained
- 1 cup cooked white rice
- 1 teaspoon ground cumin
- 1 teaspoon chili powder
- 1/2 teaspoon dried oregano
- 1/4 teaspoon salt
- 1/4 teaspoon black pepper
- 8 small (8-inch) flour tortillas, cut into quarters
- 2 cups shredded Monterey Jack cheese, divided
- 1 cup shredded cheddar cheese, divided
- 1/2 cup chicken broth
Instructions
- Preheat your oven to 375 degrees Fahrenheit. Lightly grease a 9×13 inch baking dish.
- Heat the olive oil in a large skillet over medium heat. Add the onion and cook until softened, about 5 minutes. Add the garlic and cook for 1 minute more until fragrant.
- Stir in the shredded chicken, enchilada sauce, black beans, cooked rice, cumin, chili powder, oregano, salt, and pepper into the skillet. Mix well to combine all the ingredients.
- In a small bowl, mix 1 cup of the Monterey Jack cheese and 1/2 cup of the cheddar cheese. Set aside.
- Spread a thin layer of the chicken mixture on the bottom of the prepared baking dish.
- Arrange half of the cut tortilla pieces over the chicken mixture in a single layer. Sprinkle with half of the reserved cheese mixture.
- Spoon half of the remaining chicken mixture evenly over the tortillas and cheese layer.
- Pour the chicken broth evenly over the filling.
- Top with the remaining tortilla pieces, followed by the remaining chicken mixture.
- Sprinkle the remaining 1 cup Monterey Jack cheese and 1/2 cup cheddar cheese over the top layer.
- Bake for 20 to 25 minutes, or until the casserole is bubbly and the cheese is melted and lightly golden brown.
- Let the burrito bake rest for 5 minutes before cutting and serving.
Notes
- Serve this cheesy burrito bake with your favorite toppings like salsa, sour cream, or guacamole for extra flavor.
- For meal prep, assemble the casserole completely, cover tightly, and refrigerate for up to 2 days before baking. Add 10 minutes to the baking time if baking from cold.
- You can substitute ground beef for the chicken; brown the beef first and drain off any excess fat before mixing with the other ingredients.
Nutrition
- Serving Size: 1 serving
- Calories: 550
- Sugar: 5
- Sodium: 750
- Fat: 25
- Saturated Fat: 12
- Unsaturated Fat: 13
- Trans Fat: 0.5
- Carbohydrates: 45
- Fiber: 5
- Protein: 38
- Cholesterol: 95