

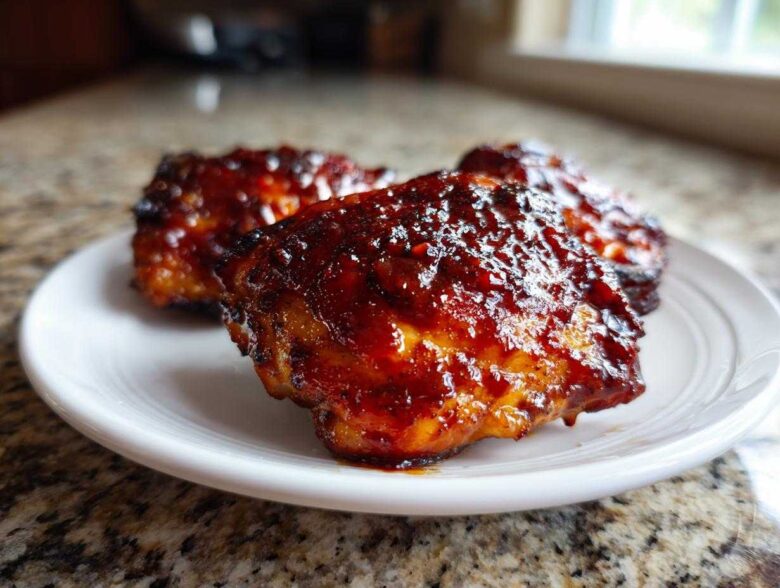
Listen, I know the struggle. You want that sticky, smoky flavor of genuine bbq chicken on a Tuesday night when you barely have the will to boil water. Forget fiddling with charcoal or waiting hours for pulled chicken! I’ve dedicated years—seriously, years—to perfecting the texture of chicken done indoors, and I cracked the code for weeknight dinners. This isn’t some dry breast situation, trust me on this one. We are talking outrageously juicy, fall-off-the-bone BBQ chicken thighs made right in your standard oven. It’s unbelievably simple, uses a homemade rub that tastes like a summer cookout, and guarantees tender results every single time. If you want the absolute easiest path to incredible flavor without firing up the grill, get ready, because this is it. You can check out more of my home cooking adventures over at the Spoon & Sprout kitchen blog!
Why This Oven Baked BBQ Chicken Recipe is Your New Family Favorite BBQ Chicken (Quick Chicken Dinner)
Why mess around when you can have perfect BBQ chicken in under an hour? This recipe hits all the sweet spots for a busy family. It’s truly the easiest route when you need a delicious, satisfying meal fast. We aren’t messing around with complicated marinades or waiting all day for the smoker to heat up.
- It delivers unbelievably Juicy BBQ Chicken results, even on chicken breasts!
- Prep time is just 10 minutes, making it a genuine Quick Chicken Dinner solution.
- The combination of the pre-sear rub and the final glaze creates that sticky, caramelized crust everyone loves.
If you need another foolproof baked chicken meal, check out my Chicken Enchilada Casserole Bake—it’s just as simple!
Achieving Tender Chicken Recipe Results Every Time
The secret weapon here is the consistent, dry heat of the oven at 400 degrees Fahrenheit. Grilling is fantastic, but it’s easy to inadvertently dry out the outside before the inside is done. Baking allows the skin to crisp up beautifully while the meat steams gently in its own juices under that layer of sauce. We bake it slightly longer before the glaze goes on, which is the key to locking in moisture. You get that sought-after tender chicken recipe payoff without standing over a hot grill waiting for the perfect moment!
Essential Ingredients for the Best BBQ Chicken Recipe
I always keep these staples on hand because you never know when a BBQ craving is going to hit! For this recipe, we’re focusing on bone-in, skin-on chicken thighs because they’re nearly impossible to mess up—they retain so much flavor and fat, which guarantees juicy results. You’ll need about six of those beauties. Then, you need your favorite thick BBQ sauce—don’t skimp here, the brand you love is the one that belongs on your chicken!
We ditch the store-bought seasoning packets for a quick homemade mix that makes all the difference. If you want to level up your next meal, check out my recipe for Chicken Broccoli Alfredo Pasta Bake for another easy win!
Crafting the Homemade BBQ Rub for Smoky BBQ Chicken
This spice blend is what separates an okay dinner from a real backyard barbecue experience. The star here is smoked paprika. It brings that deep, woodsy, smoky BBQ flavor right into your oven without needing actual smoke! We balance that out with the usual suspects—garlic powder and onion powder for base savory notes, plus salt and pepper.
And listen, if you like a little kick, toss in a tiny pinch of cayenne. It doesn’t make it hot, but it really wakes up the sweetness of the eventual glaze. Don’t skip pressing that rub right into the skin; that’s where all the flavor starts building!
Equipment Needed for Perfect Oven Baked BBQ Chicken
Okay, so you don’t need a complicated arsenal for this! Since we’re using the oven, most of what you already have in your drawers will work perfectly. Preparation right here saves you a mountain of cleanup later, which, let’s be honest, is half the battle when cooking.
First up, you absolutely need a sturdy baking sheet. I line mine with heavy-duty foil every single time—I’m telling you, sticky sauce baked onto metal is my least favorite thing to scrub! Grab a small bowl for mixing up your homemade rub; you’ll want something just big enough to whisk those spices together comfortably.
The only piece of equipment that might require a quick look in the drawer is a reliable meat thermometer. This isn’t just suggested; it’s crucial for hitting that perfect interior temperature of 165 degrees Fahrenheit without overcooking the meat. Trust me, eyeballing chicken these days just isn’t worth the risk!
Step-by-Step Instructions for Easy BBQ Chicken
Okay, let’s turn that gorgeous pile of seasoned chicken into dinner! We start slow and low, which is the key to getting that amazing texture we talked about. First things first: crank that oven up to 400 degrees Fahrenheit! While it’s heating up, make sure you’ve lined that baking sheet—you do not want to scrape burnt sugar off metal later. Get those chicken thighs completely dry with paper towels; I know it feels tedious, but this is how you get any crispiness at all!
If you need another simple, hands-off meal idea after this one, you absolutely have to try my One-Pot Alfredo with Broccoli. It’s nearly as quick!
Seasoning and Initial Bake for Juicy BBQ Chicken Thighs
Now, take that homemade rub we mixed up—all those paprika, onion, and garlic powders—and sprinkle it everywhere! Don’t just gently dust it on; use your fingers to press that spice blend right into the skin and even under the edges a little bit. This creates a fantastic flavor crust while the chicken cooks down. Lay the thighs skin-side up on your prepared sheet and slide them into that hot oven for a solid 25 minutes. This initial bake renders some of the fat and starts firming up the meat before we introduce the sticky sauce.
Glazing and Caramelizing the Sweet BBQ Sauce Chicken
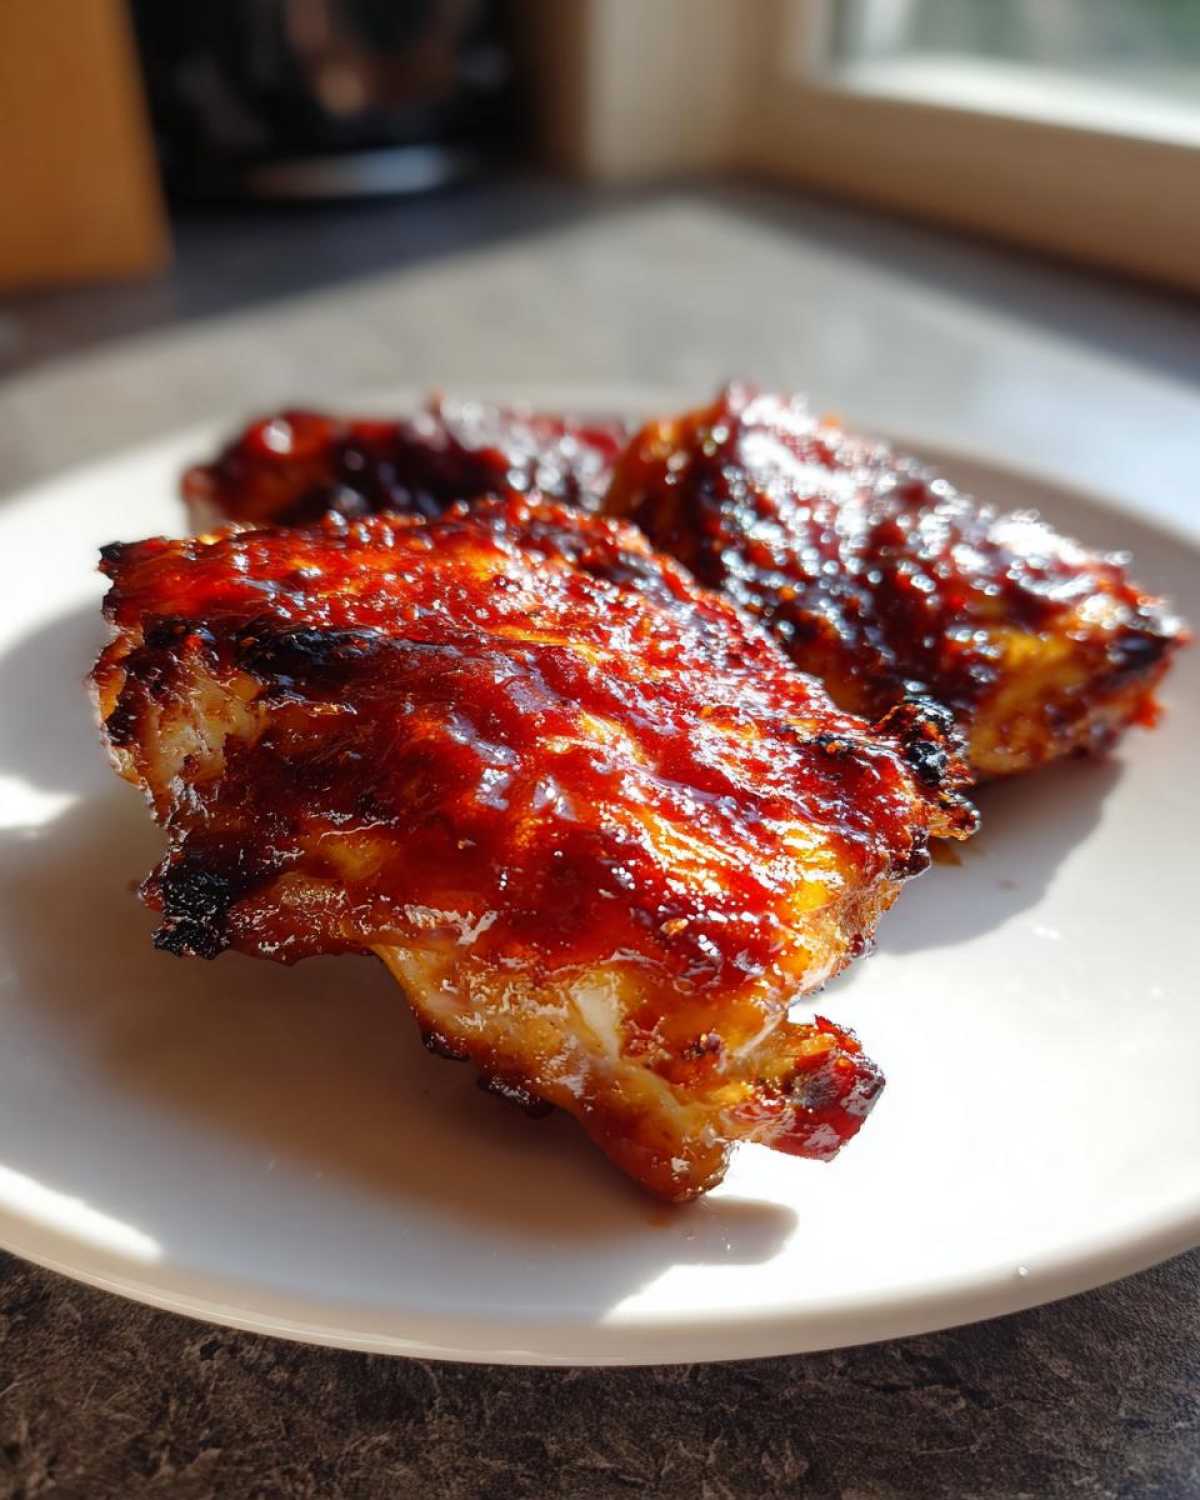
When that timer goes off, pull the tray out—careful, it’s hot! Now, brush on about half of your favorite BBQ sauce pretty liberally over the tops. Pop them back in for another 10 to 15 minutes. This is where the magic happens, but you must watch closely so the sugar doesn’t burn. Use a meat thermometer to confirm they hit 165 degrees Fahrenheit in the thickest part. This ensures perfect doneness and safety! Once they’re out, let them rest for five minutes—seriously, don’t skip the rest! Then, brush on the final bit of sauce right before serving. They’ll be spectacular!
Tips for Success with Your BBQ Glazed Chicken
I’ve got a few little tricks up my sleeve that I learned through trial and delicious error to make sure this BBQ glazed chicken always comes out fantastic. The first tip is borrowed straight from the professional kitchens I’ve peeked into: if you really, truly want crispy skin, don’t just lay the chicken on the pan. Set them onto a wire rack that’s sitting inside your foil-lined baking sheet. That lifts the skin out of any rendered fat, letting the air circulate underneath, which is a game-changer!
Also, remember those boneless, skinless thighs? They cook up way faster, so you need to shave about 10 minutes off that initial bake time, or you’ll have shoe leather! My biggest piece of advice, though, is about the glaze stage. Only use half the sauce during the bake, like I noted in the instructions. If you try to load all that sugar on during the initial 25 minutes, it’s going to burn to a crisp before the chicken is even close to done. We want caramelized, not charcoal!
If you’re looking for another great weeknight bake that’s creamy and quick, you have to try my Creamy Tuscan Garlic Pasta—it’s the perfect comforting follow-up to a smoky chicken dinner!
Variations: Making BBQ Chicken Breasts or BBQ Chicken Wings
Now, I know thighs are my go-to for guaranteed tenderness, but I hear you! Sometimes you have boneless chicken breasts in the fridge, or maybe you’re feeding a crowd that prefers wings. The beauty of using that awesome homemade rub is that it works perfectly across all cuts, you just need to adjust the heat and time slightly. It keeps this general BBQ chicken recipe incredibly versatile for any weeknight dinner situation!
If you’re dealing with boneless, skinless chicken breasts, they are much leaner, so they behave a little differently. Remember, we said thighs take about 35-40 minutes total? Breasts usually get done about 8 to 10 minutes sooner. Keep a close eye on them with that thermometer, aiming for that 165°F mark, and pull them as soon as they hit it. You want to sauce them up right near the end too, just like the thighs, or that lean meat will dry out under the sauce during those last few minutes.
If you’re making chicken wings, which are truly fantastic for a summer cookout, you might want a crispier outcome than the oven alone guarantees. For wings, I actually bump the initial temperature up to 425 degrees Fahrenheit, skipping the first 25 minutes of baking time and going straight to a high-heat crisp. You can still do the two-stage saucing, but you’ll need to move fast!
Better yet, if you have an air fryer, wings absolutely sing in there! The rub goes on exactly the same way, but you’ll air fry at about 380 degrees for 20 minutes, toss with the sauce, and then give them 5 more minutes. If you love wings baked up crispy, you have to see my Oven Baked Honey Garlic Chicken Wings recipe for another easy approach using that crispy oven method!
Serving Suggestions for Your Weeknight BBQ Meal
So, you’ve got this unbelievably tender, sticky, sweet BBQ chicken sitting on the counter resting—that’s the hard part done! But what do you serve alongside it? When I’m planning a quick weeknight BBQ meal, I don’t want sides that take an hour either. We need balance! That deep, smoky sweetness of the chicken begs for something cool, creamy, or maybe something bright and acidic to cut through the richness.
My absolute first go-to, the thing that takes me five minutes, is a vibrant, crunchy coleslaw. It doesn’t have to be mayonnaise-heavy; I often just do a simple vinegar-and-sugar dressing with tons of fresh shredded cabbage and carrots. The cooling crunch against that warm, sticky sauce? Perfection. It balances the entire plate beautifully, keeping the meal feeling fresh instead of heavy.
If you’re looking for something warm that still feels lighter than standard mashed potatoes, you have to try my Roasted Garlic Cauliflower Mash with Butter. It has all the creamy comfort you want, but it sneaks in those vegetables, and the roasted garlic plays so nicely with the smoke in the chicken rub. It turns a simple Tuesday night dinner into something that genuinely feels like a weekend celebration without adding any extra fuss to your kitchen routine!
Storage & Reheating Instructions for Leftover BBQ Chicken
One of the great things about using chicken thighs instead of breasts is that they actually reheat *better*! They hold onto moisture like champions. If you actually manage to have any of this amazing sticky chicken left—which, let’s be honest, is a feat in itself—you’ll want to store it properly so it tastes just as good the next day.
For storage, you need an airtight container. I usually let the chicken cool down for about 30 minutes on the counter before I seal the container, just to prevent excess condensation, and then it goes straight into the fridge. It will keep beautifully safe in there for about three to four days max. Don’t worry about the sticky sauce making a mess; just wipe down the container lid before storing it with the rest of your fridge goods.
Reheating is where you really need to pay attention if you want to restore that juicy texture. Don’t just blast it under the broiler or in the microwave hoping for the best, or you’ll end up with sauce that burns to a carbon husk! For the stovetop, add a tiny splash—maybe a tablespoon—of chicken broth or water to a skillet, place the chicken in, cover it, and heat on medium-low until it’s warmed through. The steam trapped by the lid keeps everything tender.
If you’re heating a larger batch, the oven is surprisingly good for leftovers. Just preheat it low, say 300 degrees Fahrenheit, put the chicken in a baking dish, add that same tiny splash of liquid—liquid is your friend here—cover the dish tightly with foil, and let it warm up for about 15 minutes. It keeps the meat moist while the sauce gently warms without scorching.
If you ever find yourself with leftovers from another amazing dinner, like my Turkey Cranberry Enchiladas, the same rule applies: a little bit of moisture added during reheating makes all the difference in the world!
Frequently Asked Questions About Making BBQ Chicken
I always get so many great questions after sharing this Oven Baked BBQ Chicken recipe because people want to adapt it for every situation! It’s built around the oven, but I totally get wanting to know how to tweak it for different needs. Don’t worry, I’ve got the quick answers for you right here so you can keep using that amazing homemade rub however you want!
If you need a change of pace after this smoky feast, my Classic Chicken Noodle Soup is a fantastic, comforting alternative for a different night!
Can I use this recipe for Crockpot BBQ Pulled Chicken?
Yes, you absolutely can use my homemade BBQ rub on chicken breasts or thighs if you’re aiming for Crockpot BBQ Pulled Chicken! The spice blend is perfect for slow cooking. The main adjustment is the timing and the sauce. When slow cooking, you’ll want to put a little bit of broth or water in with the chicken, and you definitely hold off on adding *any* BBQ sauce until the very end so it doesn’t burn during the long cook. Once the meat is tender and shreddable, stir in most of the sauce. If you need exact timings for shredding, you might want to search specifically for a dedicated Crockpot BBQ Pulled Chicken recipe, as that method relies on getting the meat completely saturated and falling apart!
What if I don’t have smoked paprika?
Oh, that’s a bummer! Smoked paprika is what gives us that pure, deep, Smoky BBQ Chicken flavor without the grill. If you realize you’re out, don’t panic! You can substitute it with regular sweet paprika—it will still taste good because of the other spices—but you’ll lose that essential smoke note. To compensate, try adding just 1/4 teaspoon of liquid smoke to your rub. A little goes a long, long way, but it really mimics that campfire depth we are aiming for!
How do I make this less sticky and more savory?
That sticky glaze is usually the result of the sugar in the BBQ sauce caramelizing deeply. If you prefer a less sweet profile or a more savory bark, you need to adjust when you apply the sauce. Follow the initial 25-minute bake time exactly, but instead of brushing on half the sauce, just toss the chicken lightly in a very thin layer of oil and a touch of vinegar or Worcestershire sauce. Then, cook for another 10 minutes. For the last 5 minutes, *then* brush on a light coat of sauce. This technique gives you seasoned, tender chicken with just a hint of sweet glaze rather than a heavy coating!
Conclusion
I really hope you give this simple, unbelievably effective oven method a try for your next BBQ chicken night. It truly delivers on the promise of juicy, flavorful chicken every single time we make it, cutting down on cleanup and cook time. Happy cooking!
PrintEasy Oven-Baked BBQ Chicken Thighs
Make juicy, tender BBQ chicken thighs quickly in the oven using a simple homemade rub and your favorite sticky sauce.
- Prep Time: 10 min
- Cook Time: 40 min
- Total Time: 50 min
- Yield: 6 servings
- Category: Dinner
- Method: Baking
- Cuisine: American
- Diet: Low Lactose
Ingredients
- 6 bone-in, skin-on chicken thighs
- 1 tablespoon smoked paprika
- 1 teaspoon garlic powder
- 1 teaspoon onion powder
- 1 teaspoon salt
- 1/2 teaspoon black pepper
- 1/4 teaspoon cayenne pepper (optional)
- 1 cup your favorite thick BBQ sauce
Instructions
- Preheat your oven to 400 degrees Fahrenheit (200 degrees Celsius). Line a baking sheet with foil for easy cleanup.
- Pat the chicken thighs completely dry using paper towels. This helps the skin crisp.
- In a small bowl, mix the smoked paprika, garlic powder, onion powder, salt, black pepper, and cayenne pepper to create the rub.
- Sprinkle the rub evenly over all sides of the chicken thighs, pressing it gently into the skin.
- Place the seasoned thighs skin-side up on the prepared baking sheet.
- Bake for 25 minutes.
- Remove the pan from the oven. Brush the tops of the chicken thighs generously with about half of the BBQ sauce.
- Return the chicken to the oven and bake for another 10 to 15 minutes, or until the internal temperature reaches 165 degrees Fahrenheit (74 degrees Celsius) and the sauce is slightly caramelized.
- Remove from the oven and let the chicken rest for 5 minutes before serving. Brush with the remaining BBQ sauce just before serving for extra glaze.
Notes
- For crispier skin, place the chicken on a wire rack set inside the baking sheet before baking.
- If you prefer boneless, skinless thighs, reduce the total cooking time by about 10 minutes.
- You can substitute the homemade rub with 2 tablespoons of your favorite store-bought BBQ rub.
Nutrition
- Serving Size: 1 thigh
- Calories: 380
- Sugar: 22
- Sodium: 550
- Fat: 22
- Saturated Fat: 7
- Unsaturated Fat: 15
- Trans Fat: 0
- Carbohydrates: 15
- Fiber: 1
- Protein: 30
- Cholesterol: 110