

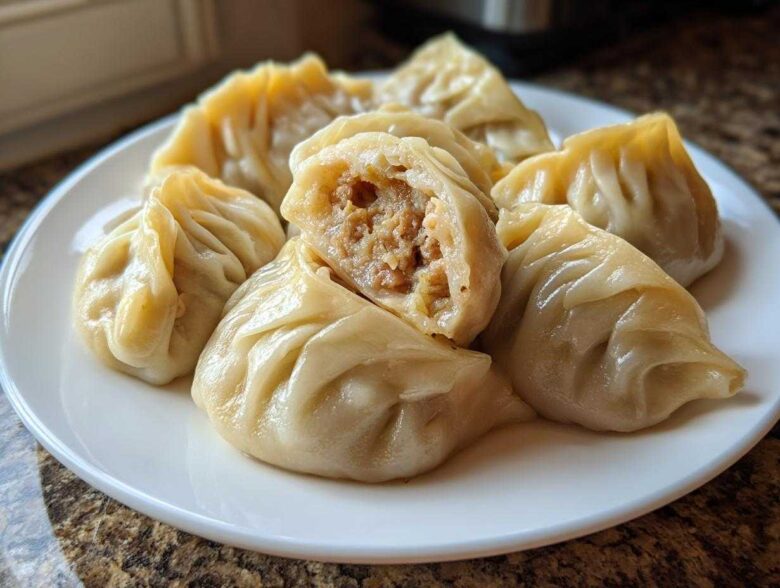
There’s honestly nothing that says comfort like a bowl of steaming hot dumplings, fresh off the boil. Forget the takeout boxes, because when you make these Traditional Chinese Dumplings from scratch, you totally change the game. I remember the first few times I tried to master the fold—it was a disaster! My wrappers tore, the filling escaped, and I ended up with little dough puddles. But trust me, after about three batches, something clicks, and you get this satisfying, tight pleat that just holds everything together.
This recipe is the real deal: we’re using our own homemade dumpling wrappers with the perfect texture, stuffed tight with savory ground pork and crisp Napa cabbage. Once you nail this technique, you’ll want to make dozens, especially if you’re getting ready for Lunar New Year fêtes. They are absolutely worth the tiny bit of effort!
Why You Will Love These Traditional Chinese Dumplings
I know what you’re thinking: making wrappers from scratch sounds like too much work for a weeknight meal. But honestly, I promise you, these are different. Once you taste the chewy, tender wrapper and that perfectly balanced filling, you won’t ever want to go back to the store-bought stuff!
- The Texture Difference is Huge: Seriously, the minute you bite into a dumpling with a *homemade dumpling wrapper* that took you five minutes to roll, you realize why. They are tender yet firm enough to hold up to a good dunk in the sauce.
- Authentic Flavor Profile: This combination of pork, ginger, sesame oil, and cabbage is what I grew up eating. It’s the classic taste of authentic jiaozi, and you just can’t replicate that depth of flavor with generic fillings.
- They Are Super Freezer Friendly: Don’t feel like folding 40 at once? No problem! These are fantastic for batch cooking. Make a huge batch on the weekend, pop them in the freezer, and you have an instant meal ready for any busy night.
- You’ll Feel Like a Master: Okay, maybe this is just me, but every time I successfully seal a bunch of Traditional Chinese Dumplings without tearing them, I feel like I deserve a medal. It’s genuinely rewarding!
Ingredients for Authentic Jiaozi: Homemade Dumpling Wrappers and Pork Cabbage Dumplings
Okay, let’s talk ingredients. This is where we separate the *okay* dumplings from the truly incredible ones. Since we are rolling our own wrappers, we need just a few simple things for that perfect pliable dough. Don’t go trying to substitute the water temperature, though—that’s our secret handshake for elasticity!
For the filling, we keep it classic, relying on the freshness of the pork and the slight sweetness of the cabbage. I always make sure to prep the cabbage the night before or early in the morning, because honestly, squeezing out all that liquid is the difference between a juicy dumpling and one that just bursts open in the pot. I always check out other ways to give pork flavor for inspiration, but for jiaozi, simplicity is key!
Gather these up, and you’ll be ready to roll!
For the Homemade Dumpling Wrappers
- 2 cups all-purpose flour
- 3/4 cup warm water
See? That’s all you need for gorgeous, stretchy homemade dumpling wrappers! That warm water is non-negotiable; it makes the gluten relax just enough.
For the Pork Cabbage Dumplings Filling
- 1 pound ground pork
- 3 cups finely chopped Napa cabbage
- 1/4 cup chopped scallions
- 2 tablespoons soy sauce
- 1 tablespoon sesame oil
- 1 teaspoon grated fresh ginger
- 1/2 teaspoon salt
- 1/4 teaspoon white pepper
Seriously, squeeze that cabbage until your hands hurt! If you don’t get rid of the excess moisture, you’ll end up with sad, watery pork cabbage dumplings. We want sticky and tight, not sloppy!
Mastering the Dough: Making Homemade Dumpling Wrappers
Alright, let’s get our hands dirty with the dough first! This is where we lay the foundation for perfect Traditional Chinese Dumplings. You take your flour and that warm water, and just start pulling it together. Don’t worry if it looks weird and shaggy at first—that’s exactly what you want. You aren’t trying to make silk yet; you’re just trying to drown the flour!
Now, the real work starts: kneading. You need to put some elbow grease into this for about 8 to 10 minutes on your counter until it smooths out. I learned early on that if you stop too soon, the wrappers are tough and tear when you roll them. You are looking for a dough that feels supple and barely sticks to your clean hands. Once it’s that beautiful, smooth ball, wrap it tight and let it chill out for at least 30 minutes. That rest time is crucial, my friends; it lets the gluten relax so you can roll paper-thin wrappers without fighting it the whole time!
Preparing the Flavorful Pork Cabbage Dumplings Filling
Now that our dough is resting happily, we turn our attention to the star of the show: the filling! This step, as I mentioned before, is where we build the flavor profile for our pork cabbage dumplings. Remember that soupy cabbage we had to squeeze dry? Make sure you’ve gotten every last drop out—seriously, wring that thing out like a dishrag!
In your biggest mixing bowl, toss in that ground pork, the happy, dry cabbage, all your scallions, the ginger, salt, white pepper, sesame oil, and soy sauce. Now comes the fun part, but you have to be patient! You need to mix this vigorously. I mean, churn it around with your hands or a sturdy spoon until the entire mixture starts to change texture. You’re waiting for it to get tacky and sticky.
Why sticky? That stickiness is the protein in the pork binding itself together, and that’s what keeps your dumplings from falling apart when they hit the boiling water. It creates a cohesive little meatball inside the wrapper! My one personal tip here is this: once it starts feeling really sticky, stop mixing right away. If you keep churning after that point, you risk over-mixing, and the pork gets tough, almost like a bouncy ball. We want tender flavor, not bouncy texture, okay?
Rolling and Folding Your Traditional Chinese Dumplings
Okay, deep breaths now. This is the part everyone gets nervous about—the rolling and the folding. We’ve done the hard (but messy) work with the filling and the dough, so let’s finish strong so we can eat! Remember how we divided the dough? Take one of those little ropes and chop it up into about 1-inch pieces. These are going to turn into your individual wrappers.
When you roll them out, I want you to remember this secret: always make the edges slightly thinner than the middle! You can see my technique here if you get stuck, but generally, you roll with a little pressure on the outside edges and less pressure right in the center. The center needs to stay a little thicker to hold the filling, but those thinner edges create that perfect soft-chew when they cook.
Now for the folding on your Traditional Chinese Dumplings. Take your wrapper, put about one teaspoon of that amazing filling right in the center—don’t overfill, or sealing becomes impossible! Dab a tiny bit of water along half the edge, then fold it over into a half-moon shape. This is where you channel your inner pleater. Pinch the center edge together first, then start making small, tight folds along one side of the edge, press-press-pressing each fold against the flat edge of the other side. It should look like a ruffled skirt when you’re done!
If you can’t manage the traditional pleats, don’t panic! Just pinch the edges together really, really tightly all the way around. Make sure they are totally sealed, or that delicious pork mixture will escape during the boil. Honestly, even if your folds look funny, if they are sealed well, they are 100% delicious!
Cooking Your Boiled Chinese Dumplings Perfectly
We made the dough, we made the filling, we folded them all up beautifully—it’s time for the bath! Look, boiling dumplings sounds deceptively easy, but there are a couple of crucial things you have to get right so your beautiful creations don’t turn into a soggy mess or stick to the bottom of the pot. This entire process focuses on giving you ideal boiled Chinese dumplings.
First, you need a LOT of water. Don’t skimp! Use your biggest stockpot and fill it about three-quarters full. Bring that water to a serious, rolling boil—not just simmering. If the water isn’t hot enough when you drop them in, they’ll get gummy right away and just deflate.
When the water is raging, gently lower your dumplings into the pot. Don’t just dump a whole plateful in at once, or you’ll shock the water temperature too much and they’ll freeze up. Drop them in near the edge of the pot so they don’t hit the bottom immediately.
This next part is non-negotiable! As soon as the first batch is in, grab a big ladle or a wooden spoon and very, very gently stir the water around the bottom of the pot. You’re just trying to make sure no dumplings are hugging the metal. If they stick to the bottom at the beginning, they will rip when you try to pull them free later. After that initial stir, back off!
You’ll know they are cooking because they’ll all start bobbing their little heads up to the surface. Once they float, that’s the sign they are mostly done, but we need to make sure that pork is cooked through. Keep them boiling gently for about 5 to 7 minutes in total, or until they look plump and have that slightly translucent sheen to the wrapper. Scoop them out immediately with a slotted spoon, drain them well, and get them onto a plate! Serve them right away—maybe with a quick drizzle of sesame oil to keep them from sticking to each other, and dive in!
Tips for Making Freezer Friendly Dumplings
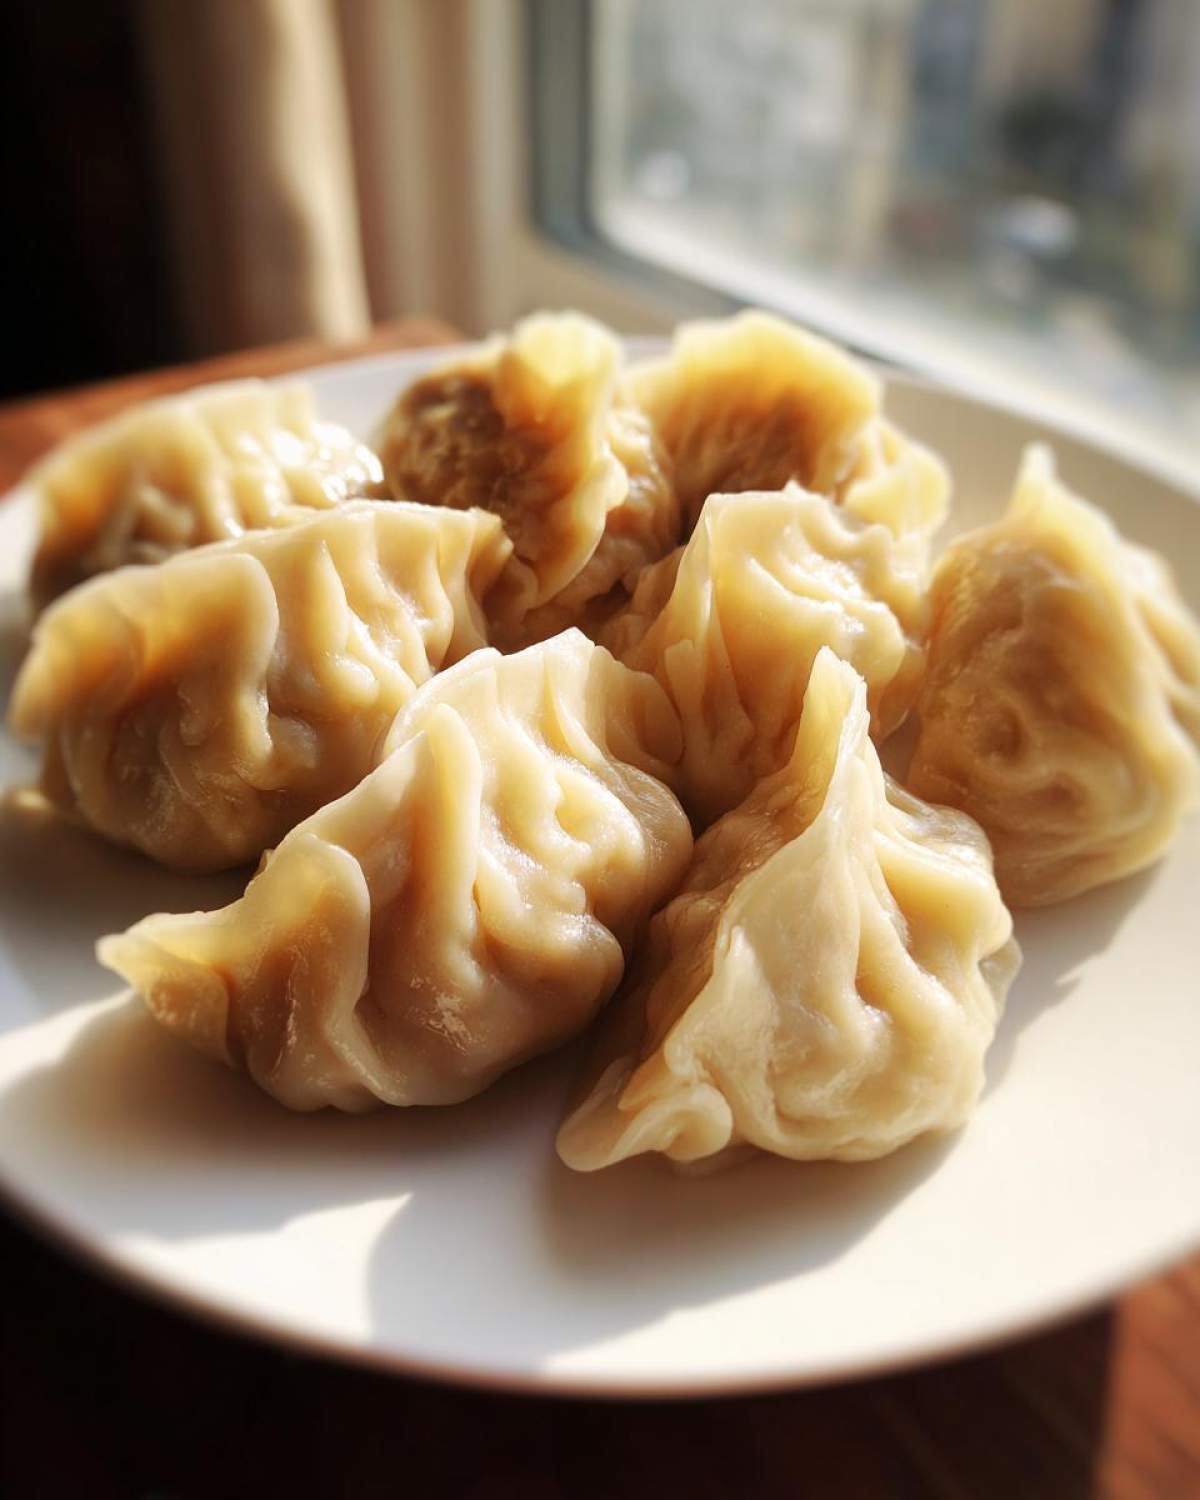
I want to let you in on my absolute favorite hack for these Traditional Chinese Dumplings: making a double batch for the freezer! Honestly, if you take the time to roll out all those wrappers, you might as well make enough for a rainy day. Having a stash of homemade jiaozi ready to go is a weekend win I rely on all the time. Plus, they freeze like a dream, which is huge because store-bought wrappers just don’t have the texture we worked so hard for.
The key here is avoiding what I call the “Clump Monster.” If you just toss all your raw dumplings together into a plastic bag, they wake up cooked together in one giant, solid mass. No thank you! We need organization for these *freezer friendly dumplings*.
When you finish folding your batch, lay them out on a baking sheet that you’ve lined with parchment paper. Make sure there is a little bit of space between each one—they shouldn’t be touching yet. Then, you slide that entire tray into the coldest part of your freezer. This is the “flash freeze” step, and it takes about an hour or two, depending on how cold your freezer is. They need to freeze completely solid, like little dough rocks!
Once they are rock hard, you can grab them off the parchment paper—they will slide right off!—and transfer them all into a heavy-duty, airtight freezer bag or container. You can pile them in now because they aren’t soft anymore; they won’t stick to each other. They’ll stay perfect for months. When you’re ready to eat them later, you don’t even need to thaw them! Just drop them straight from the freezer into the boiling water, but remember you’ll need to add an extra two or three minutes to your usual cooking time since they start out frozen solid. Easy peasy make-ahead magic!
If you want more tips on planning ahead or handling ingredients in large quantities, feel free to check out my general advice over at this post. Batch cooking always saves the day!
Ingredient Swaps and Variations for Traditional Chinese Dumplings
So, while I stand by this classic pork and cabbage combo as the gold standard, I totally get that sometimes you need to mix things up or you’re short on one ingredient. Don’t stress if you’re missing pork! You can absolutely make fantastic dumplings swapping out the protein. Ground chicken works wonderfully, though you might need to dial back the water slightly since chicken is leaner.
My favorite healthier swap, especially when I want something lighter, is using shrimp. If you go the shrimp route, make sure you chop the shrimp finely instead of grinding it, and maybe toss in a little extra sesame oil for necessary richness. You could even do half pork and half shrimp for an incredible flavor boost!
Now, let’s talk about jazzing up the veggies a bit. If you want more earthiness, finely minced shiitake mushrooms are an amazing addition to the filling. Just make sure you sauté them quickly beforehand to cook out a lot of the moisture before you mix them in with the pork. Otherwise, you’re back to soggy trouble!
Another little trick I love for when I’m feeling adventurous is swapping out some of the scallions for finely minced garlic chives—they provide a sharper, almost oniony bite that is incredible with the ginger. Or, if you want to lean into that savory profile, a tiny dash of Chinese black vinegar right into the filling mix before you seal them adds a lovely, complex depth that really shines through once they’re boiled. It really shows how flexible this recipe is once you understand the base!
Frequently Asked Questions About Authentic Jiaozi
I know you’ve got questions simmering after all that folding! Making *authentic jiaozi* mostly comes down to technique, but sometimes substitutions or cooking methods make people nervous. Let’s clear up the last few things so you can get these amazing Traditional Chinese Dumplings on the table!
What is the best dipping sauce for these Chinese dumplings recipe?
Oh, goodness, you absolutely cannot eat jiaozi without a good sauce! The beauty of this savory filling is that it needs a bright, tangy sauce to cut through the richness. Honestly, my go-to for this *Chinese dumplings recipe* is the simplest combination, and it’s perfect every time.
You just mix equal parts soy sauce and black rice vinegar—I use about two tablespoons of each. Then, you stir in a teaspoon of chili oil for heat, if you like it spicy. If you have some fresh sliced ginger on hand, sliver some really tiny pieces right into the sauce bowl. That combination is everything and lets the flavor of your *pork cabbage dumplings* truly shine.
Can I steam or pan-fry these Traditional Chinese Dumplings instead of boiling?
Yes, you totally can! While the recipe focuses on *boiled Chinese dumplings*, these wrappers and this filling are versatile little soldiers. If you want to steam them, just line your steamer basket with cabbage leaves or parchment paper so they don’t stick. Steam them over medium-high heat for about 8 to 10 minutes, until the filling is cooked through.
For my crispy favorite—the potsticker method—you can easily turn them into *freezer friendly dumplings* you cook slightly differently. Heat a little neutral oil in a non-stick pan over medium-high heat. Place the dumplings pleated-side-up in the oil and let them brown for about 2 minutes until the bottoms are golden and crisp. Then, pour in just enough water to cover the bottom inch of the pan, quickly cover it with a lid, and let them steam-fry for about 5 minutes until the water evaporates. You get the best of both worlds: a crispy bottom and a soft, steamed top!
Can I use store-bought wrappers for convenience?
Look, I won’t stop you, life is busy! If you’re in a pinch, yes, you can absolutely buy round dumpling wrappers. But beware: store-bought ones are often thicker or drier than our *homemade dumpling wrappers*. If you use them, make sure you buy the thin ones meant for boiling or steaming!
If you use commercial wrappers, you might find they need a little more water on the edges to seal properly, and you absolutely need to make sure you don’t overfill them. A pre-packaged wrapper is usually smaller than the ones we rolled, so cut back just a tiny bit on the filling, maybe 3/4 teaspoon instead of a full teaspoon, to ensure a tight seal. Check out this link for my general batch cooking thoughts if you’re worried about rushing the process!
Why were my dumpling wrappers tearing when I rolled them?
This almost always comes down to one of two things, and it usually happens when the dough isn’t happy. Most often, it means your dough wasn’t rested long enough after kneading. If you skip that 30-minute rest, the gluten is too tight, and it fights you, causing tears. You need that rest period so the dough stays supple!
The other common culprit? Your water wasn’t warm enough when you mixed the dough! The warm water is what activates everything to become that beautiful, pliable texture needed for thin rolling. If you were using cold water, the dough will be stiff, leading to rips or cracks, especially around the edges of your *authentic jiaozi*.
PrintTraditional Chinese Pork and Cabbage Dumplings (Jiaozi)
Recipe for making authentic Chinese dumplings with a savory pork and cabbage filling and scratch-made wrappers. Includes instructions for boiling and freezing.
- Prep Time: 45 min
- Cook Time: 10 min
- Total Time: 55 min
- Yield: About 40 dumplings
- Category: Main Course
- Method: Boiling
- Cuisine: Chinese
- Diet: Low Lactose
Ingredients
- 2 cups all-purpose flour
- 3/4 cup warm water
- 1 pound ground pork
- 3 cups finely chopped Napa cabbage
- 1/4 cup chopped scallions
- 2 tablespoons soy sauce
- 1 tablespoon sesame oil
- 1 teaspoon grated fresh ginger
- 1/2 teaspoon salt
- 1/4 teaspoon white pepper
Instructions
- Make the dough: Mix flour and warm water until a shaggy mass forms. Knead on a lightly floured surface for 8-10 minutes until smooth. Cover and let rest for 30 minutes.
- Prepare the filling: Squeeze excess water from the chopped cabbage. In a bowl, combine ground pork, cabbage, scallions, soy sauce, sesame oil, ginger, salt, and pepper. Mix well until the mixture is sticky.
- Roll the wrappers: Divide the dough into four equal pieces. Roll each piece into a long rope and cut into 1-inch pieces. Roll each piece into a thin, round wrapper about 3 inches in diameter.
- Fill and fold: Place about 1 teaspoon of filling in the center of a wrapper. Moisten the edges with water. Fold the wrapper in half to form a half-moon, pinching and pleating the edges to seal tightly.
- Cook the dumplings: Bring a large pot of water to a rolling boil. Gently drop the dumplings into the water, stirring gently to prevent sticking. Cook until they float and the filling is cooked through, about 5-7 minutes.
- Drain and serve immediately.
Notes
- For freezing: Place uncooked dumplings on a parchment-lined baking sheet and freeze until solid. Transfer frozen dumplings to an airtight bag. Cook directly from frozen, adding 2-3 minutes to the cooking time.
- You can substitute ground chicken or shrimp for the pork.
- To make the wrappers tender, use warm water when mixing the dough.
Nutrition
- Serving Size: 5 dumplings
- Calories: 250
- Sugar: 1
- Sodium: 350
- Fat: 12
- Saturated Fat: 4
- Unsaturated Fat: 8
- Trans Fat: 0
- Carbohydrates: 22
- Fiber: 1
- Protein: 15
- Cholesterol: 50